INTRODUCTION
In this lab you’ll get familiar with the graph editor and set up your Maya work space. At the end you’ll have all the tools you need to do your homework: a bouncing ball.
SETTING UP MAYA
-
Click the running guy at the bottom of Maya. This will bring up the animation preferences. Alternatively, you can go to Windows -> Settings/Preferences -> Preferences -> Time Slider

-
Make sure playback speed is set to 24 frames per second (fps). This means that for every 24 frames, a second of animation occurs. Additionally, make sure your playback speed is set to 24 fps x 1 and NOT play every frame.
24 fps is the animation industry standard.
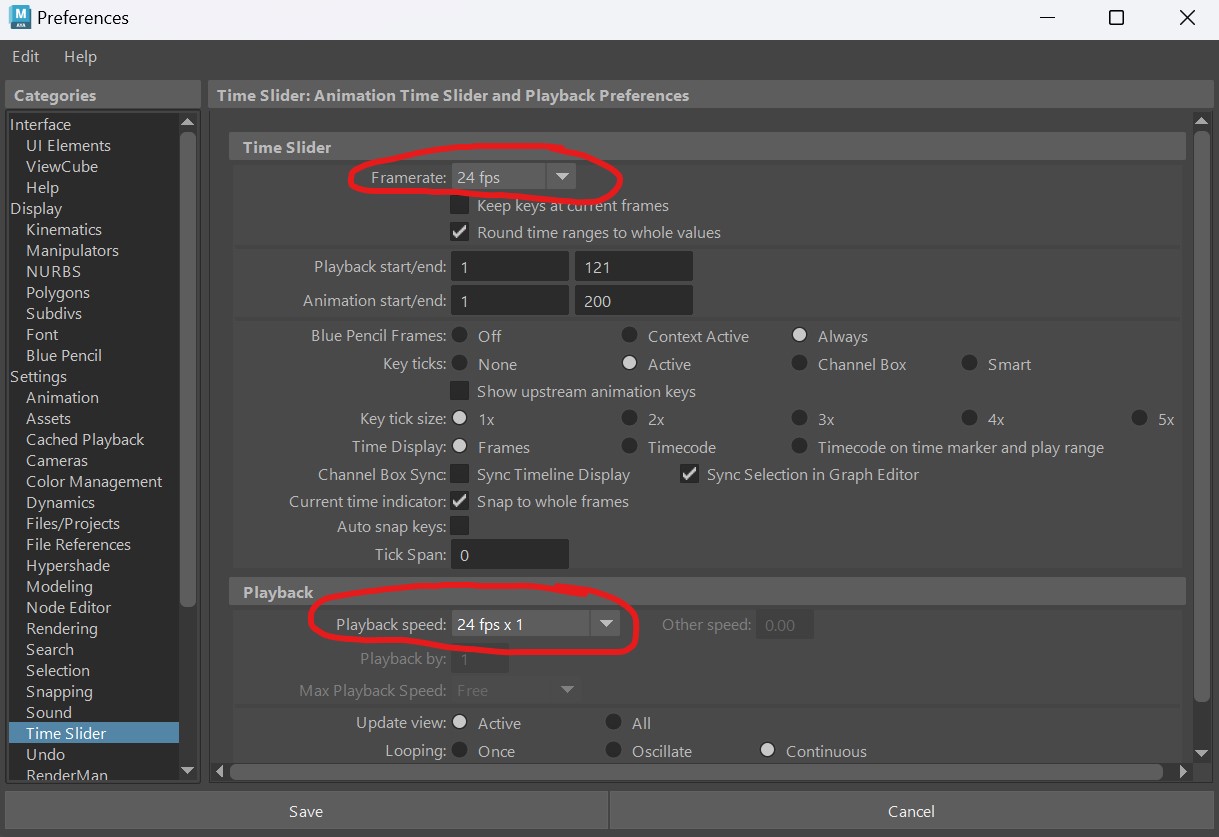
The reason why you don’t want play every frame is because although your framerate will make renders play at 24 fps, your preview in the viewport (playback speed) won’t necessarily be at 24 fps. Thus, when you’re creating animations, your frames could play slower or faster than what they’ll actually be playing at in your render, making you mess up your timings.
If you’re working with simulations (IE: bifrost), set this to play every frame and set the Max Playback Speed to 24fps. This will make your simulation math calculations more accurate and if it slows down your frame rate because it takes a long time to calculate, it won’t skip frames and thus skip calculations in order to maintain that 24fps.
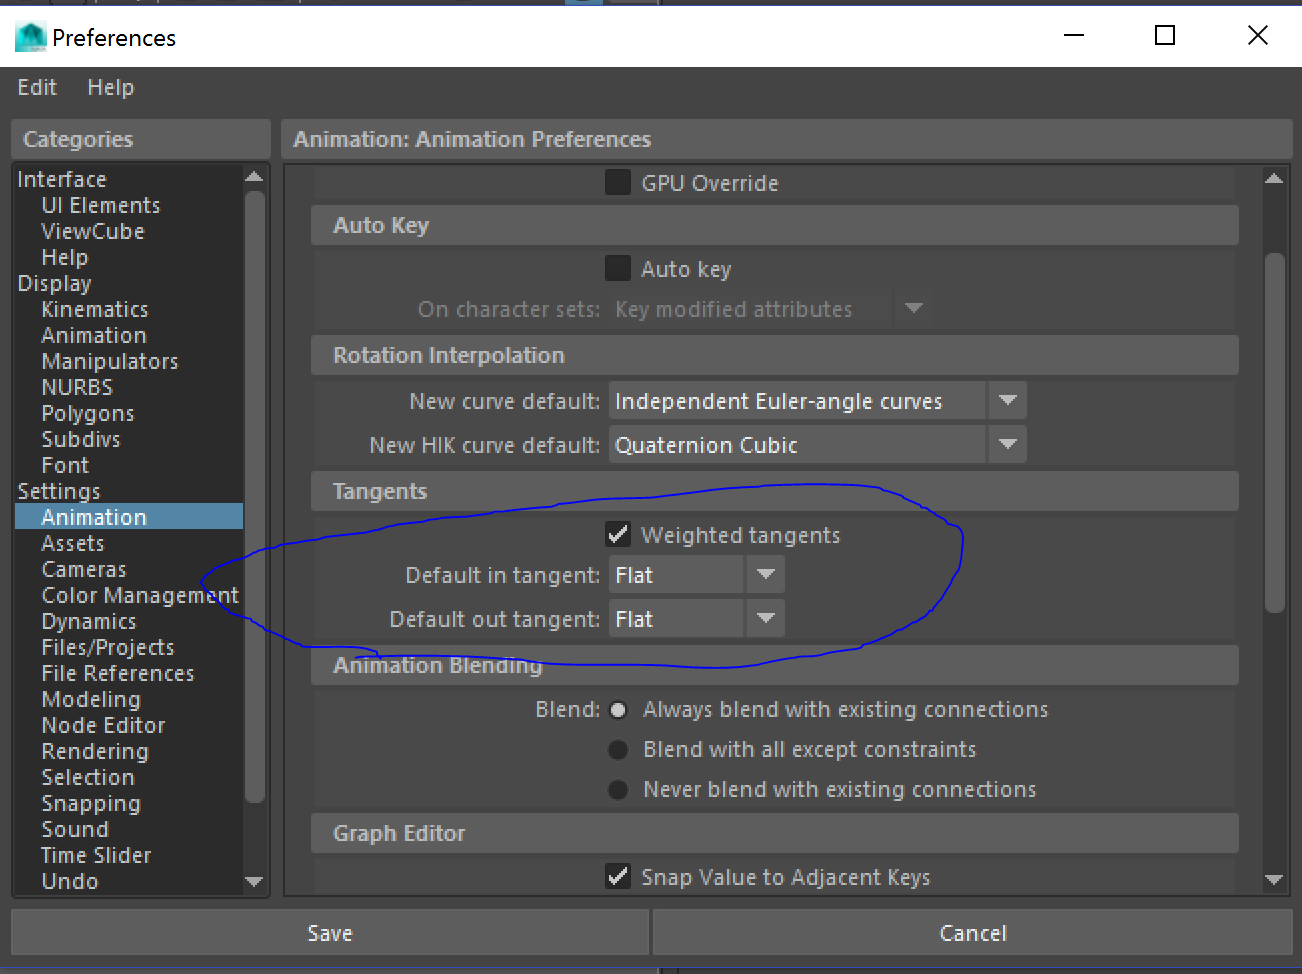
- In the left categories menu, go to Animation under Settings. Under tangents, make sure you’re defaulting to weighted tangents. Also make sure in and out tangents default to flat. We’ll explain these settings later.
UNDERSTANDING THE GRAPH EDITOR
-
To get to the graph editor: Windows -> Animation Editors -> Graph Editor
-
What is this?
The graph editor plots the motion of an object against time (frames) and allows us to play with that motion.
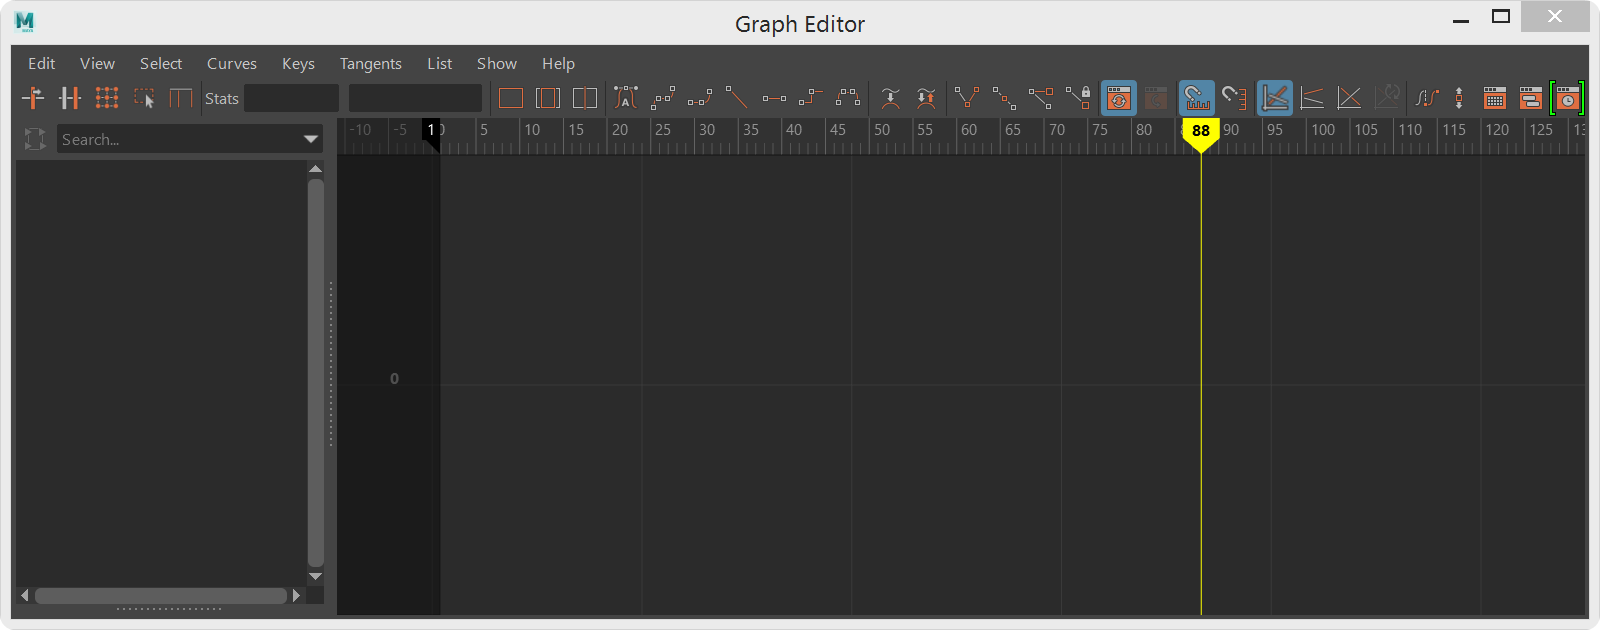
If you don’t have any objects selected the graph editor should be empty like this:
- What’s the yellow bar?
To understand the yellow bar, we need to understand the time slider at the bottom of Maya.

The start number is the frame at which your animation begins when you hit the play button.
The end number is the frame at which your animation ends when you hit the play button.
If you only want to see frames 35 to 177, change start to 35, and end to 177.
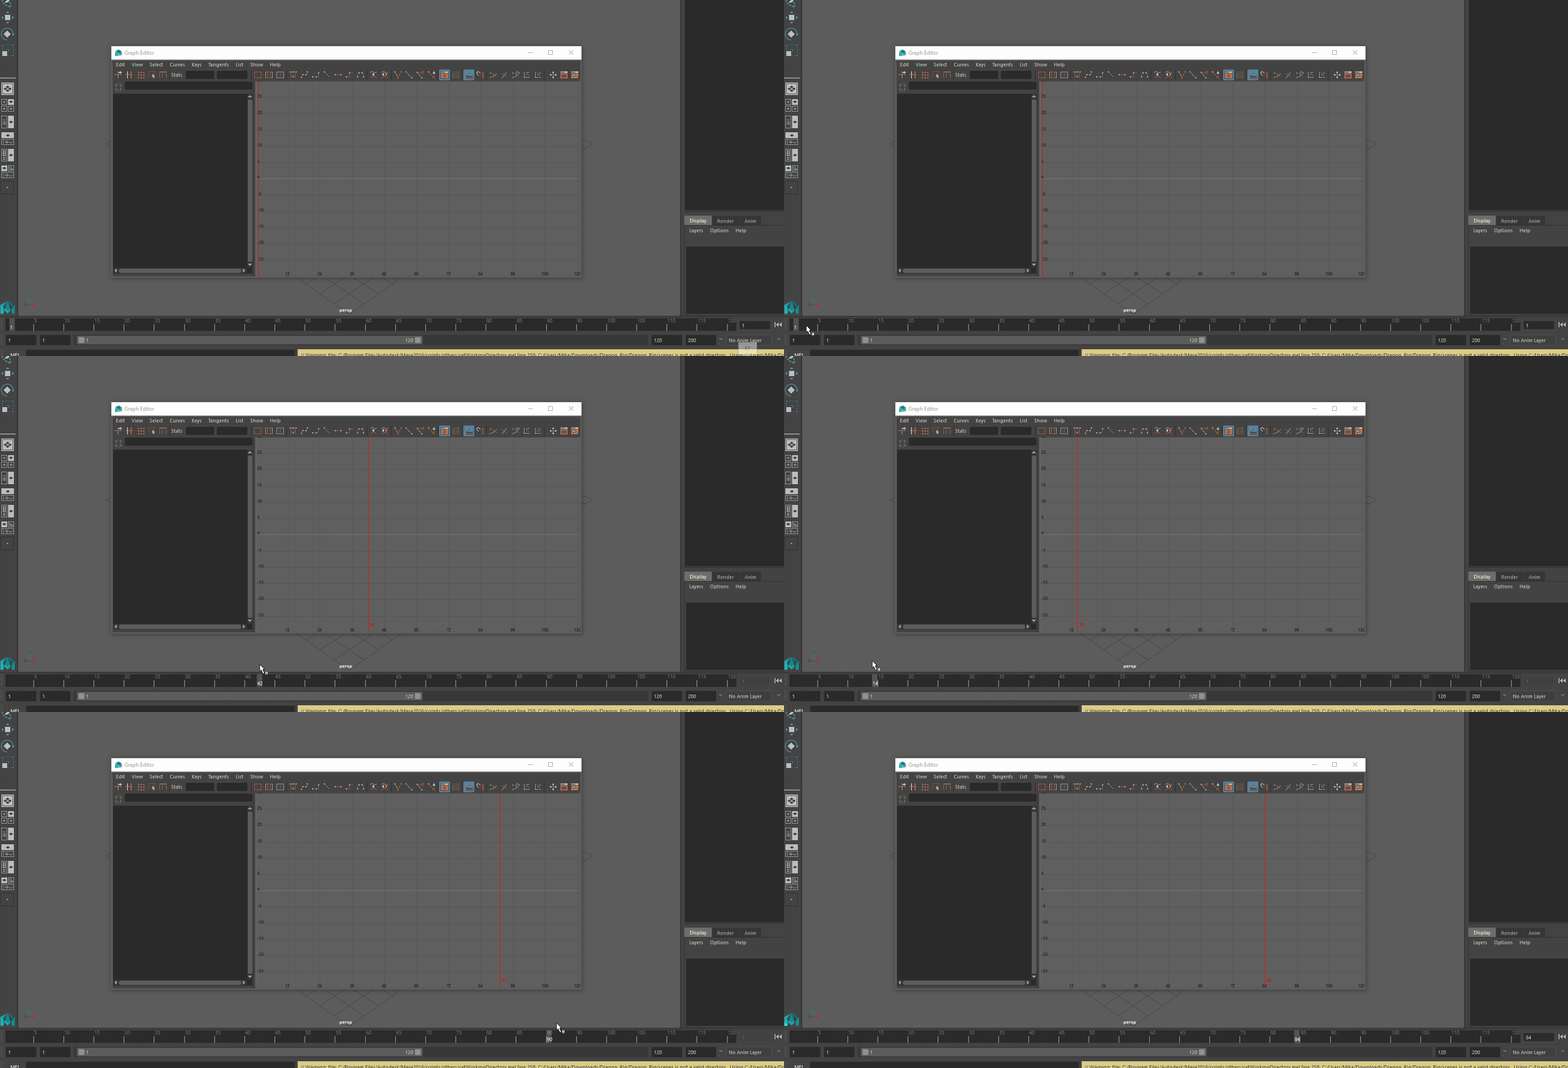
To change the frame you’re on you can either change the current number. Or simply left click drag across the timeline itself. Notice, that as you left click drag your mouse across the timeline, the red bar in the graph editor is moving. The red bar is the frame you’re on.
- How do I get anything on the graph editor?
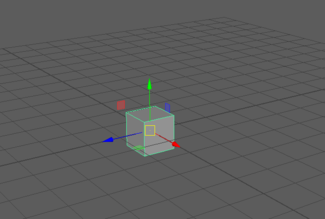
First, create a cube from the polygons menu.
With the cube selected, open the graph editor (if you closed it).
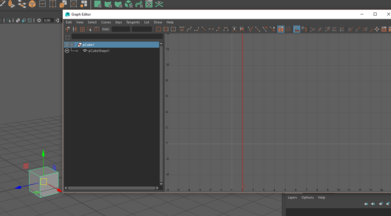
On the time slider, make sure you’re at frame 1. You’ll notice that the red bar is now at frame 1 as well.
Now let’s say, at frame 1, we want the box to be on top of the grid, like the grid is the floor. Use the move tool and move the box on top of the grid.
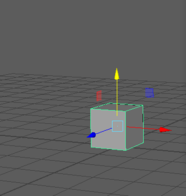
With the box selected, hit S. This will make a “key frame” at your current frame (should be frame 1). By hitting S, what we’re saying is: “at frame 1, I want this box to be here”
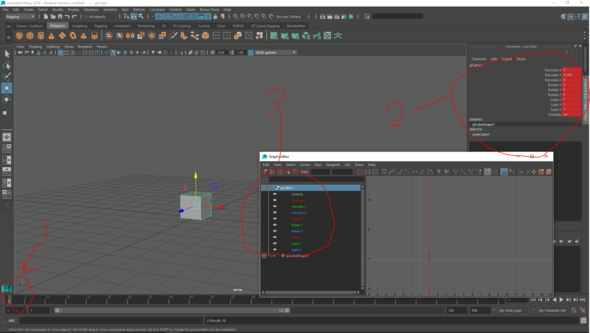
A few things happened.
At 1, we have a red tick mark at frame 1. This means that for whatever we have selected, we have a key frame at that frame.
At 2, our channel box has turned red. This means that we have “keyed” aka set those attributes of the box at the current frame.
At 3, the graph editor sensed that we made a key for all those attributes aka channels.
Now lets say we want the box to move up in the air for half a second.
Move to frame 12 (24 frames in a second, therefore 12 frames is half a second) on your time slider.
Use the move tool to drag your box up in the Y direction.
Hit S.
You should now have two key frames. One at frame 1 (Box on ground), and another at frame 12 (Box in air).
Hit play.
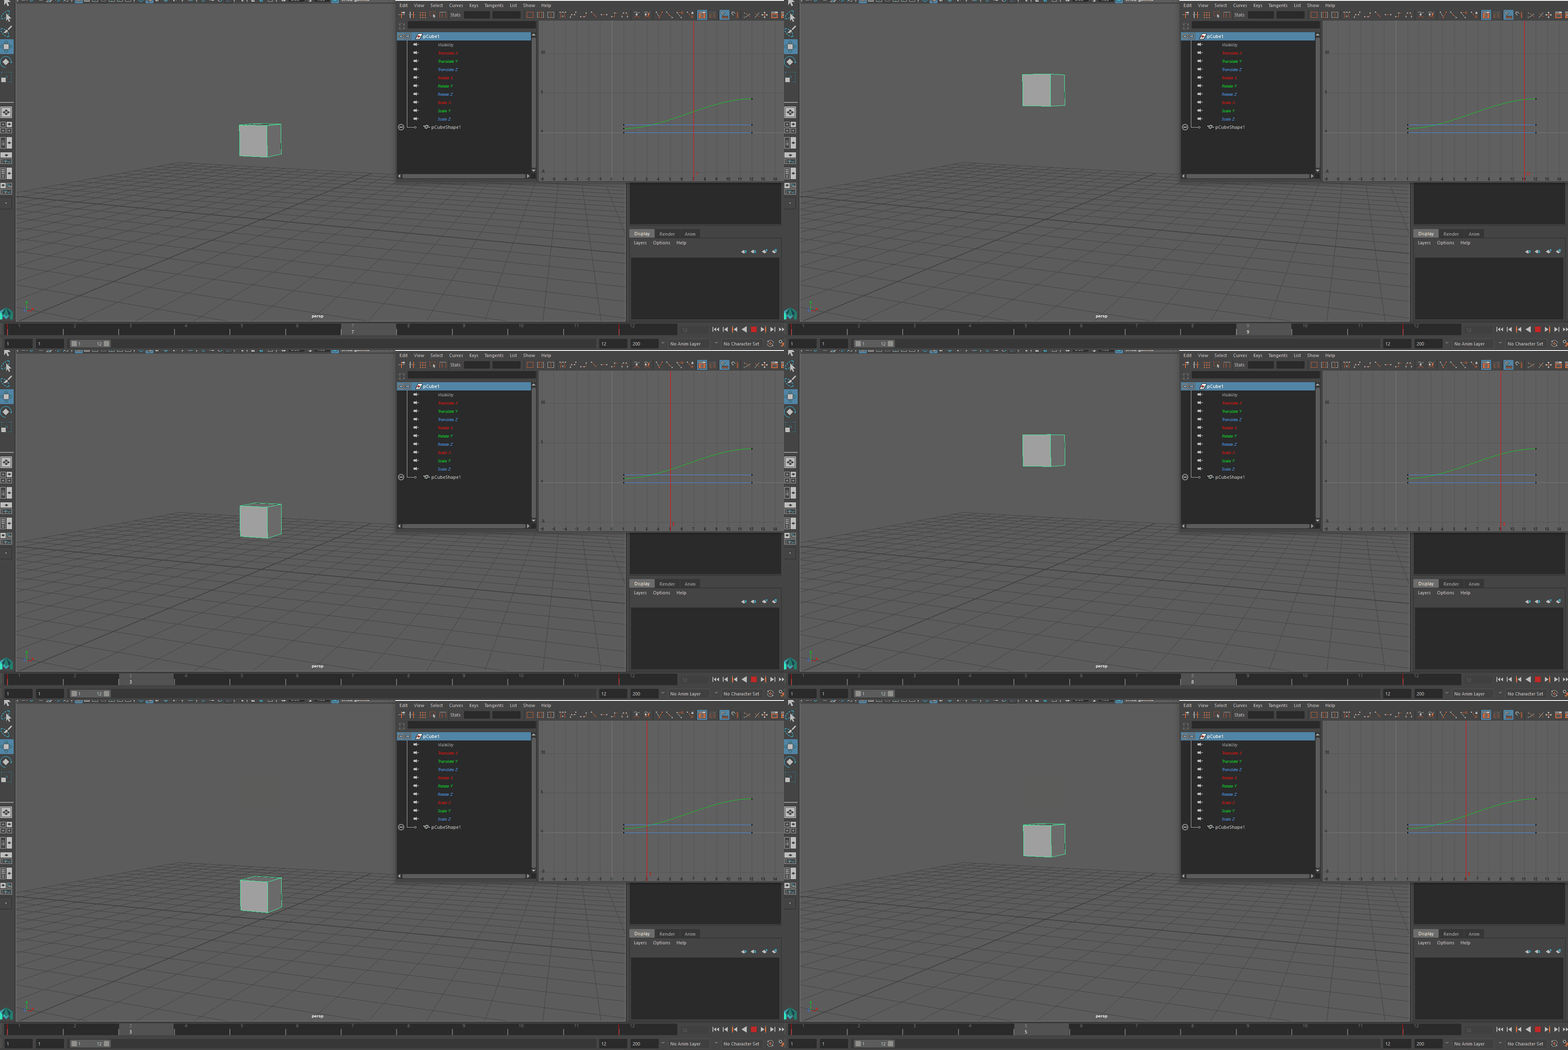
Now you have an animation. Lets check out what the upward motion of the box looks like in the graph editor.
Since the upward motion was a translation in Y, go to the Translate Y channel in the graph editor (make sure your box is selected).
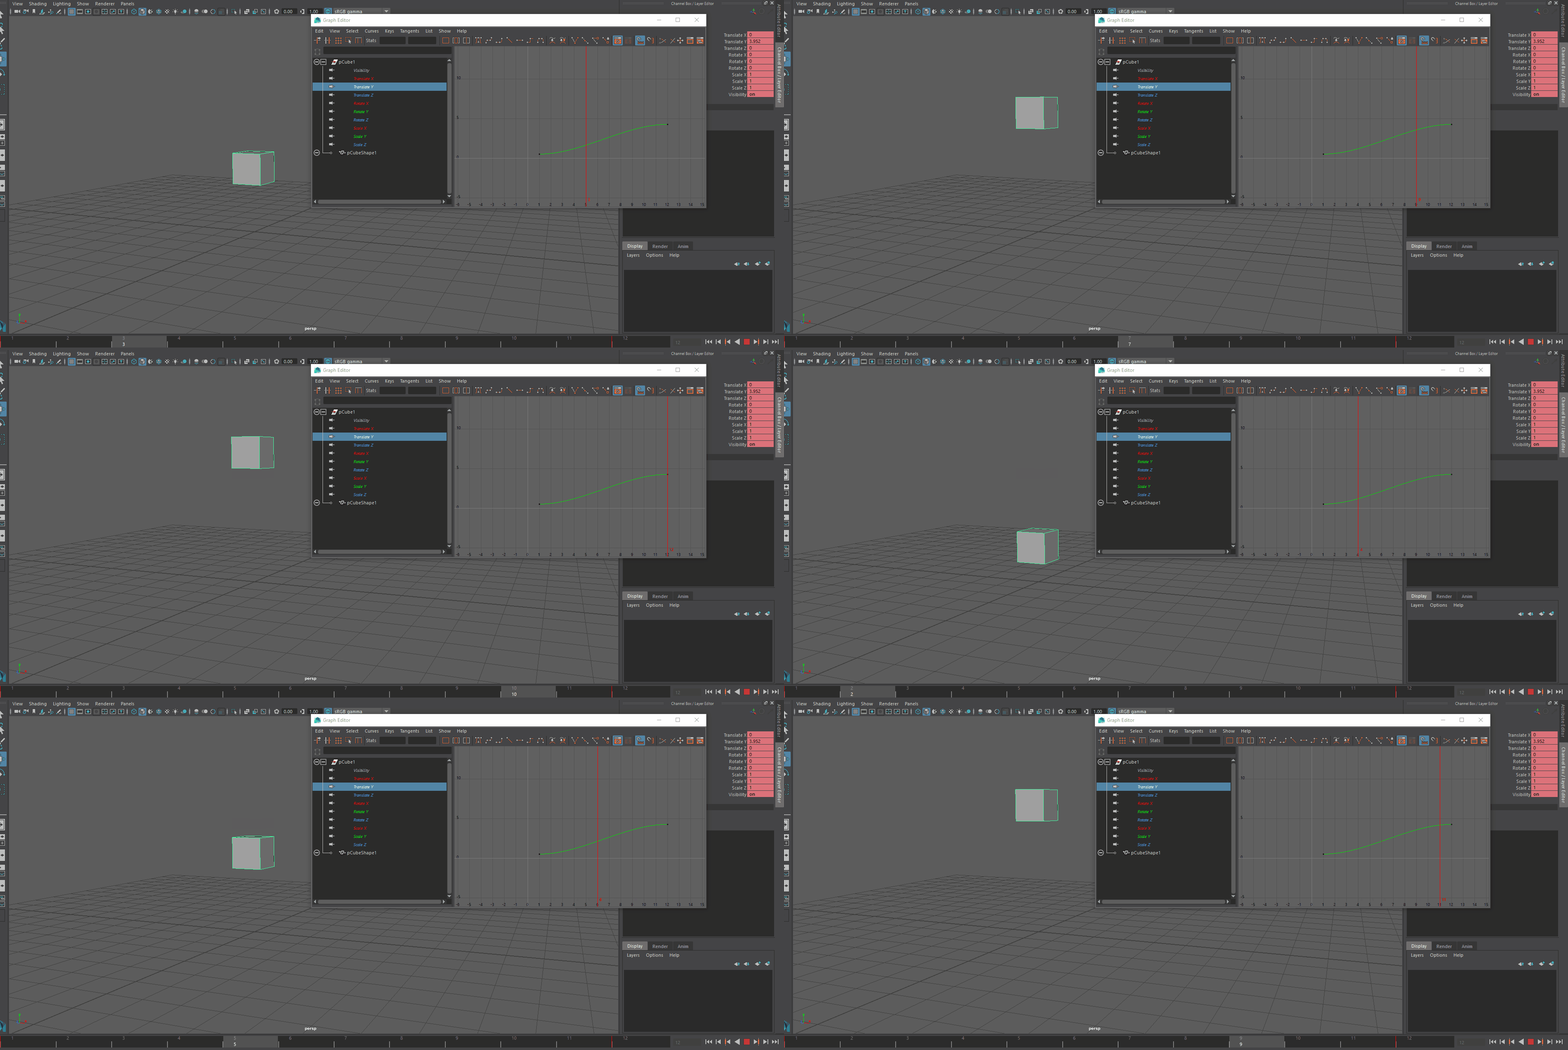
Lets look at this.
- As time passes, the red bar goes forward in time, indicating that we’re moving forward in frames.
- The graph has two black dots which are the keys we put in at frame 1 and frame 12.
- The graph has a green curve called a spline connecting the keys.
Ok cool, but why do we care about this graph? Again, on the x axis we have frames, and on the y axis we have magnitude.
So lets say we want our box to go higher. Just grab the key at frame 12 and move it up (with the move tool selected)
in the graph editor by left click dragging or middle mouse button dragging. To make sure the key only moves in one direction, hold down shift while moving.
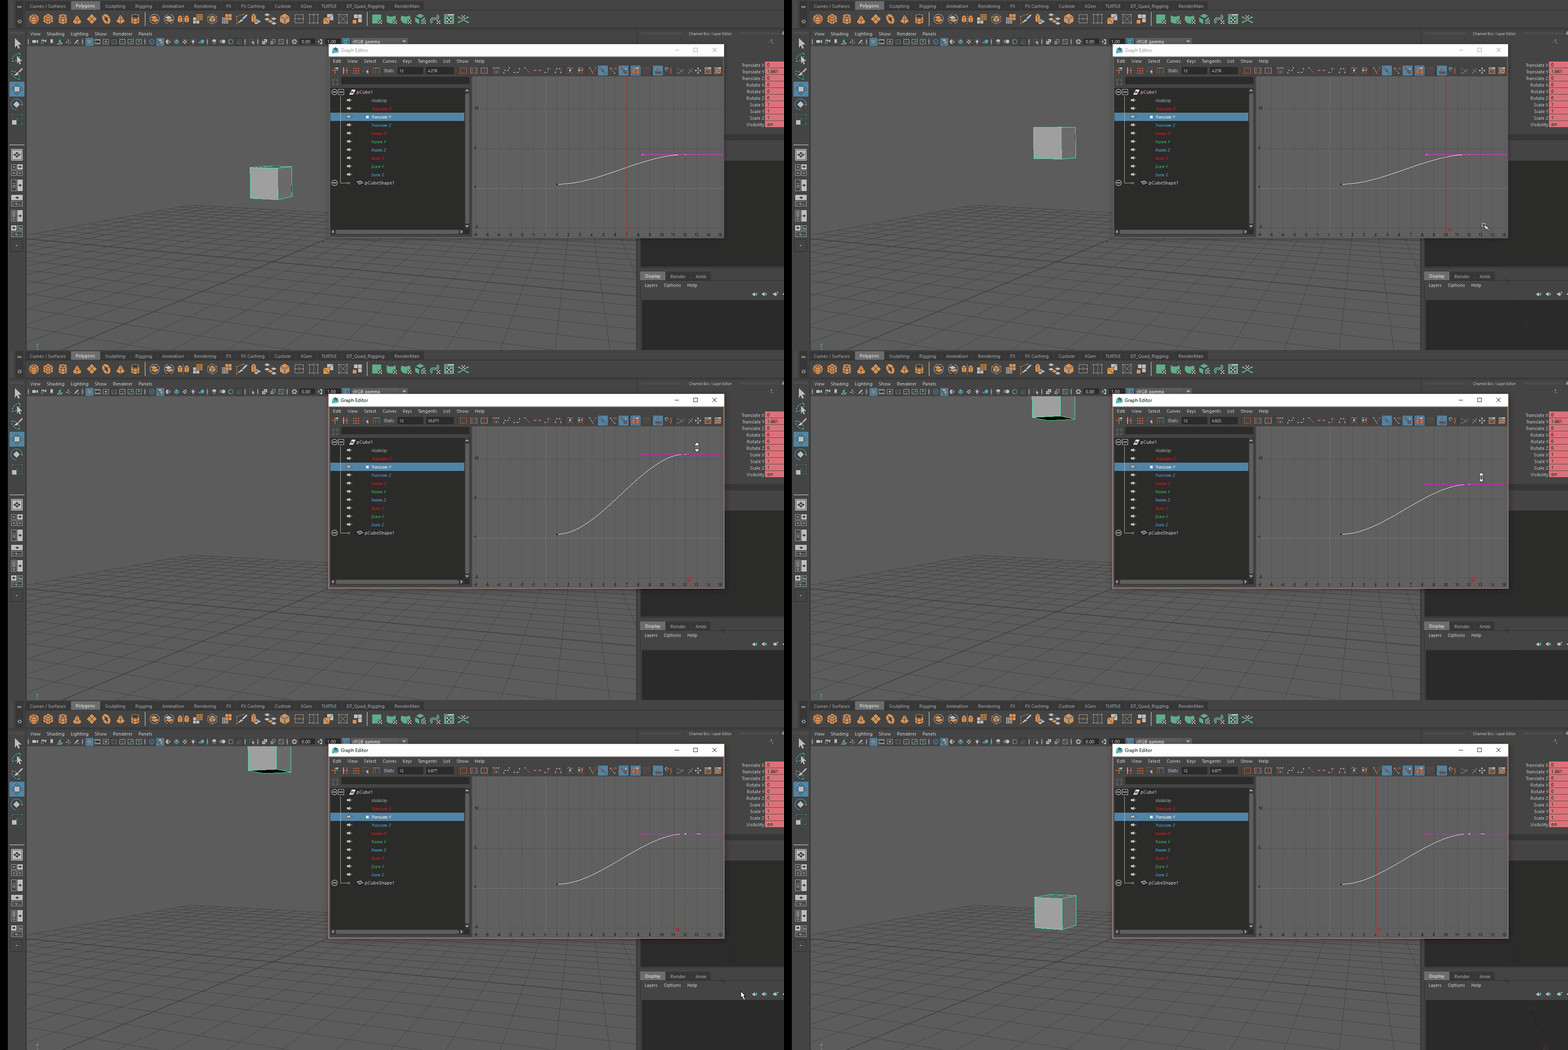
Now lets say we want the box to reach that height, but later, like after a second. So lets drag that frame 12 key frame to frame 24.
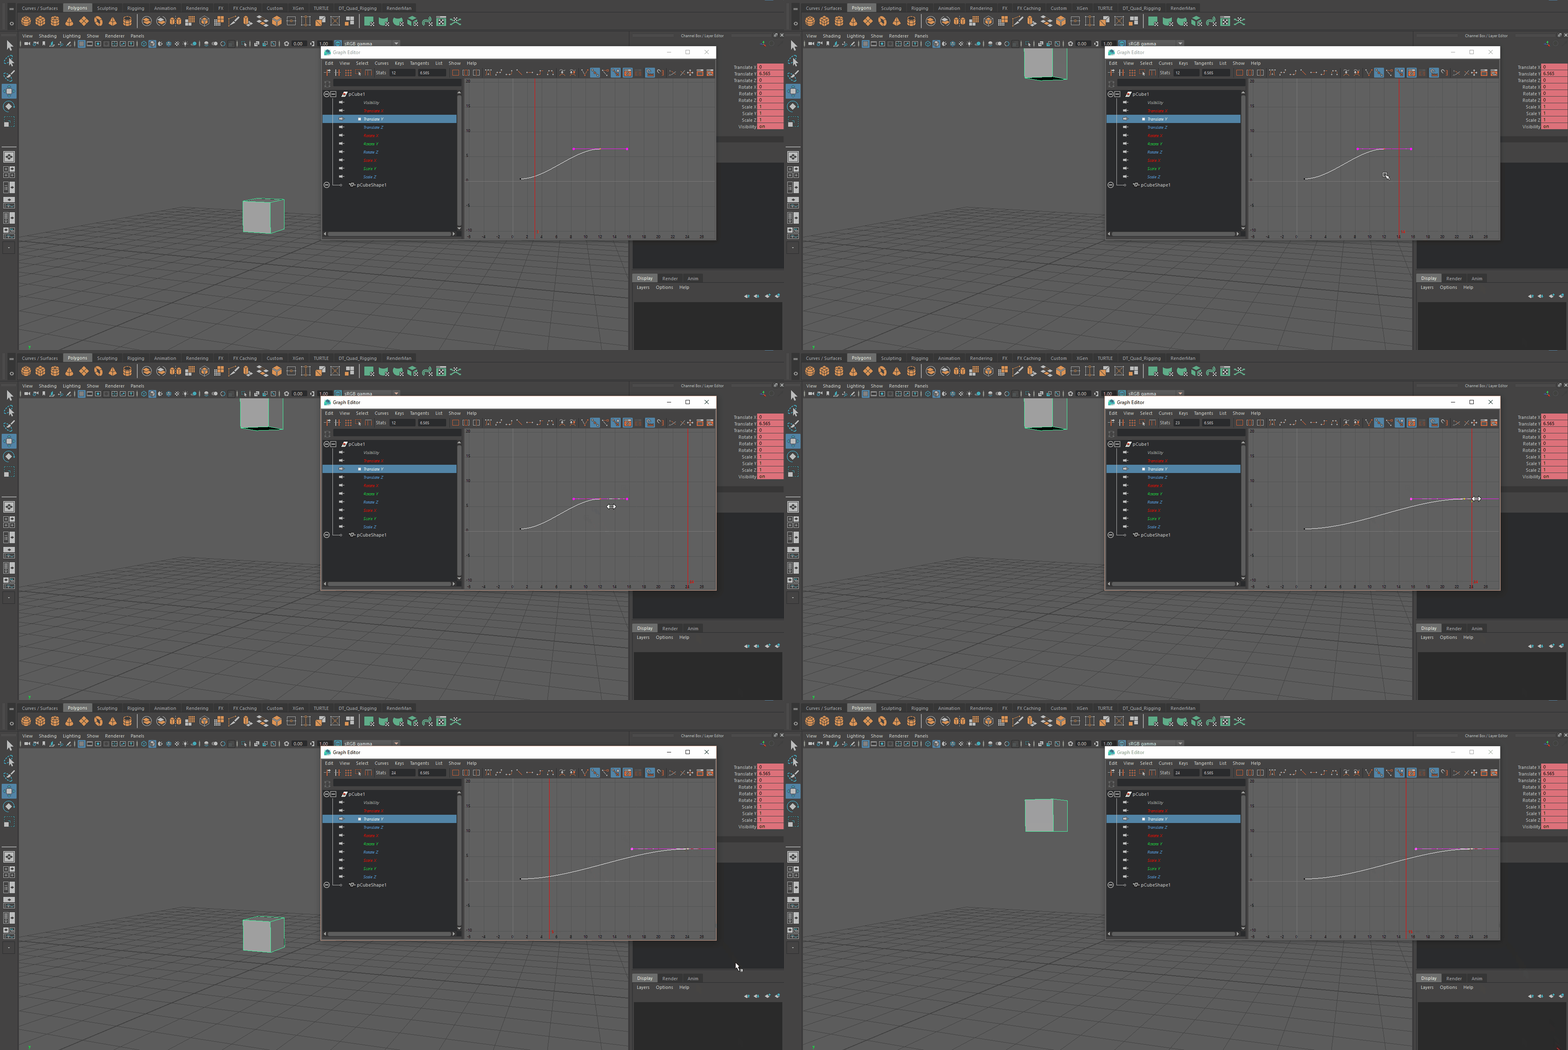
Can’t see your whole animation? Make sure your time slider goes at least to frame 24.
Now lets say we want the box to go down, then up.
- Go to frame 12
- Drag the box down to where you think the box should go down to.
- Hit S
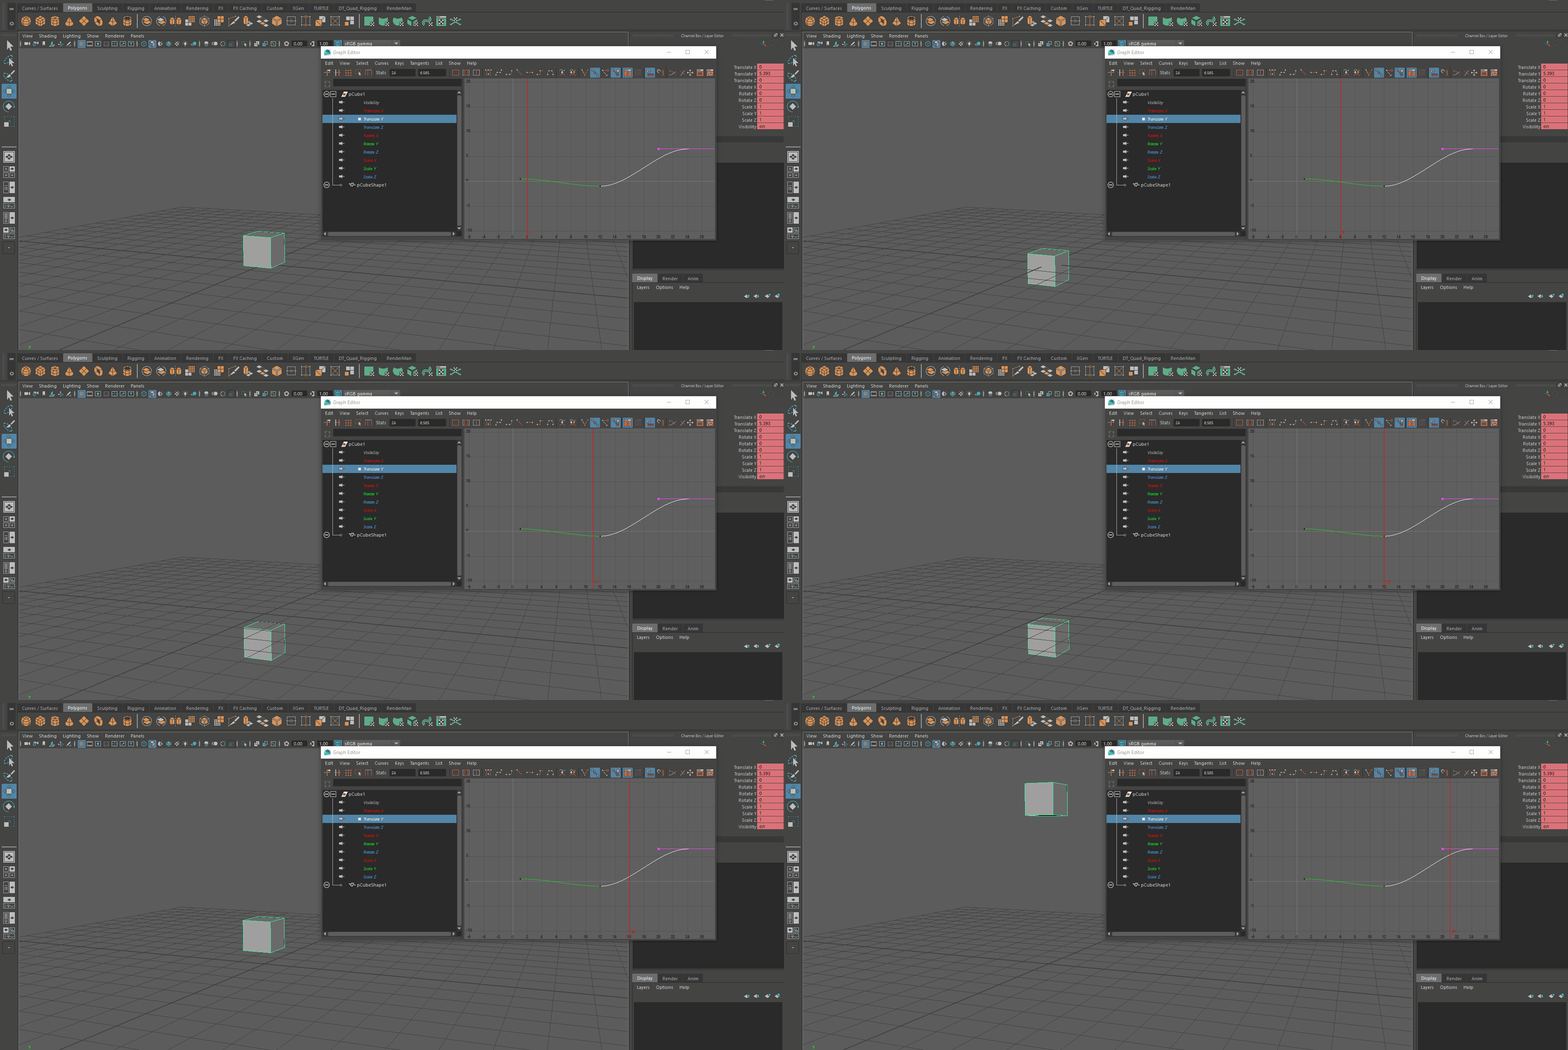
Notice how we now have a new key frame at frame 12 on the graph editor that’s at a lower magnitude than the initial key frame at frame 1.
So now we know how to get our box somewhere at some time in one axis. But what if we want the box to do this up/down motion but also go forward?
Go to the translate Z channel. What’s happening here?
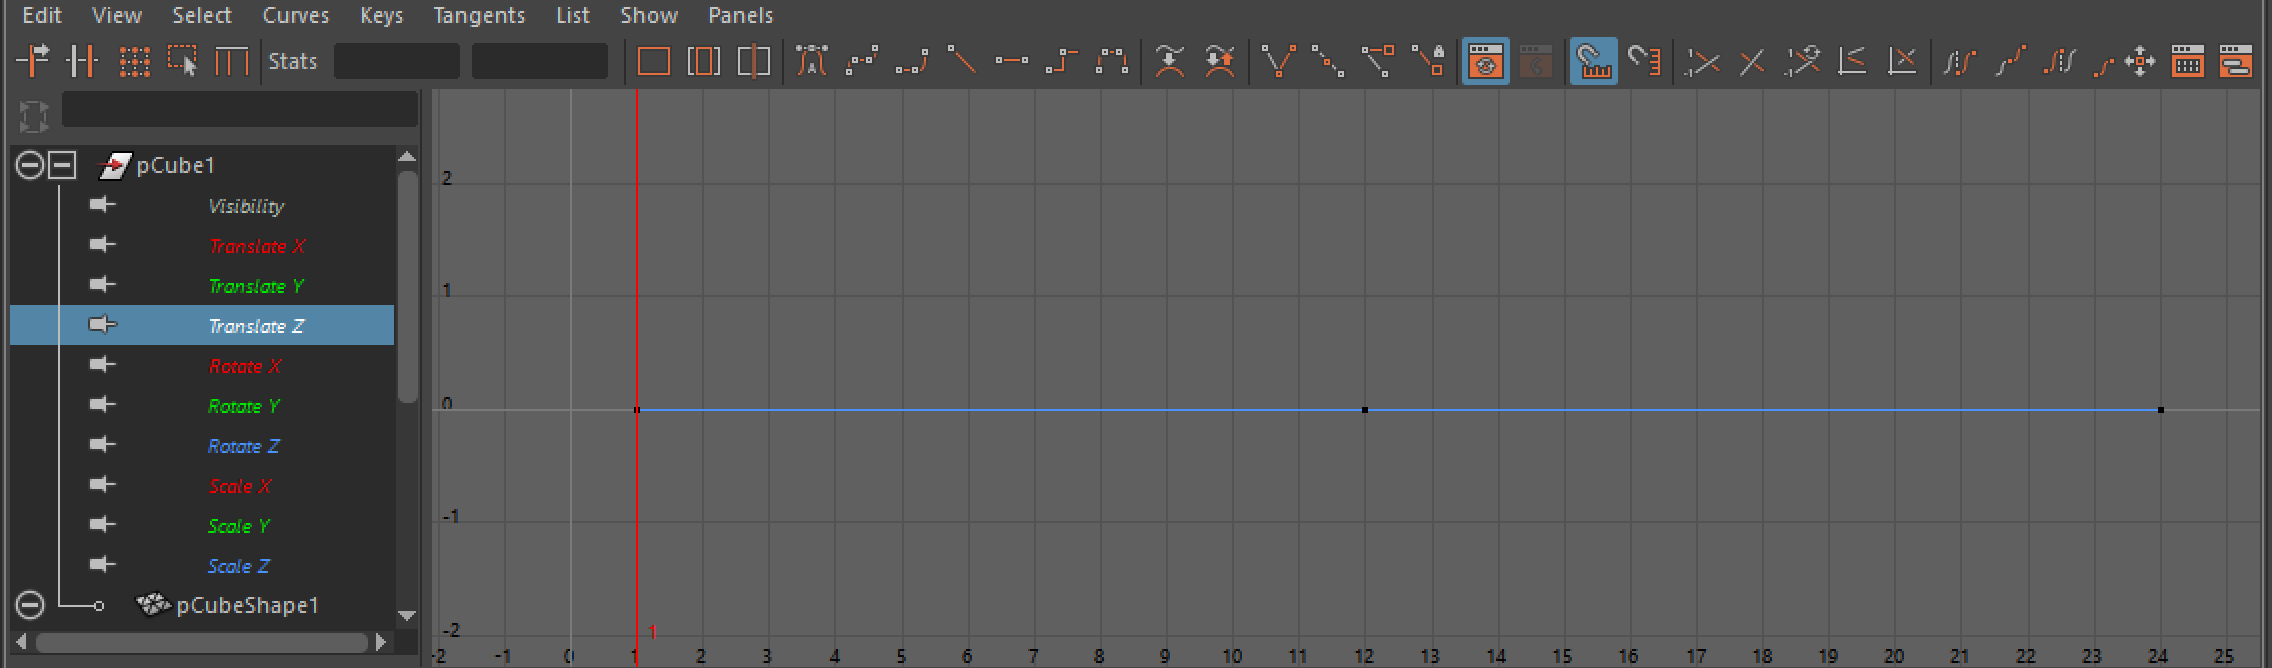
Why is the spline flat? Well, the box isn’t moving in the Z axis. So the magnitude of the curve doesn’t change.
Lets have the box come towards the +Z direction until frame 18. From my camera’s perspective that’s towards the viewer.
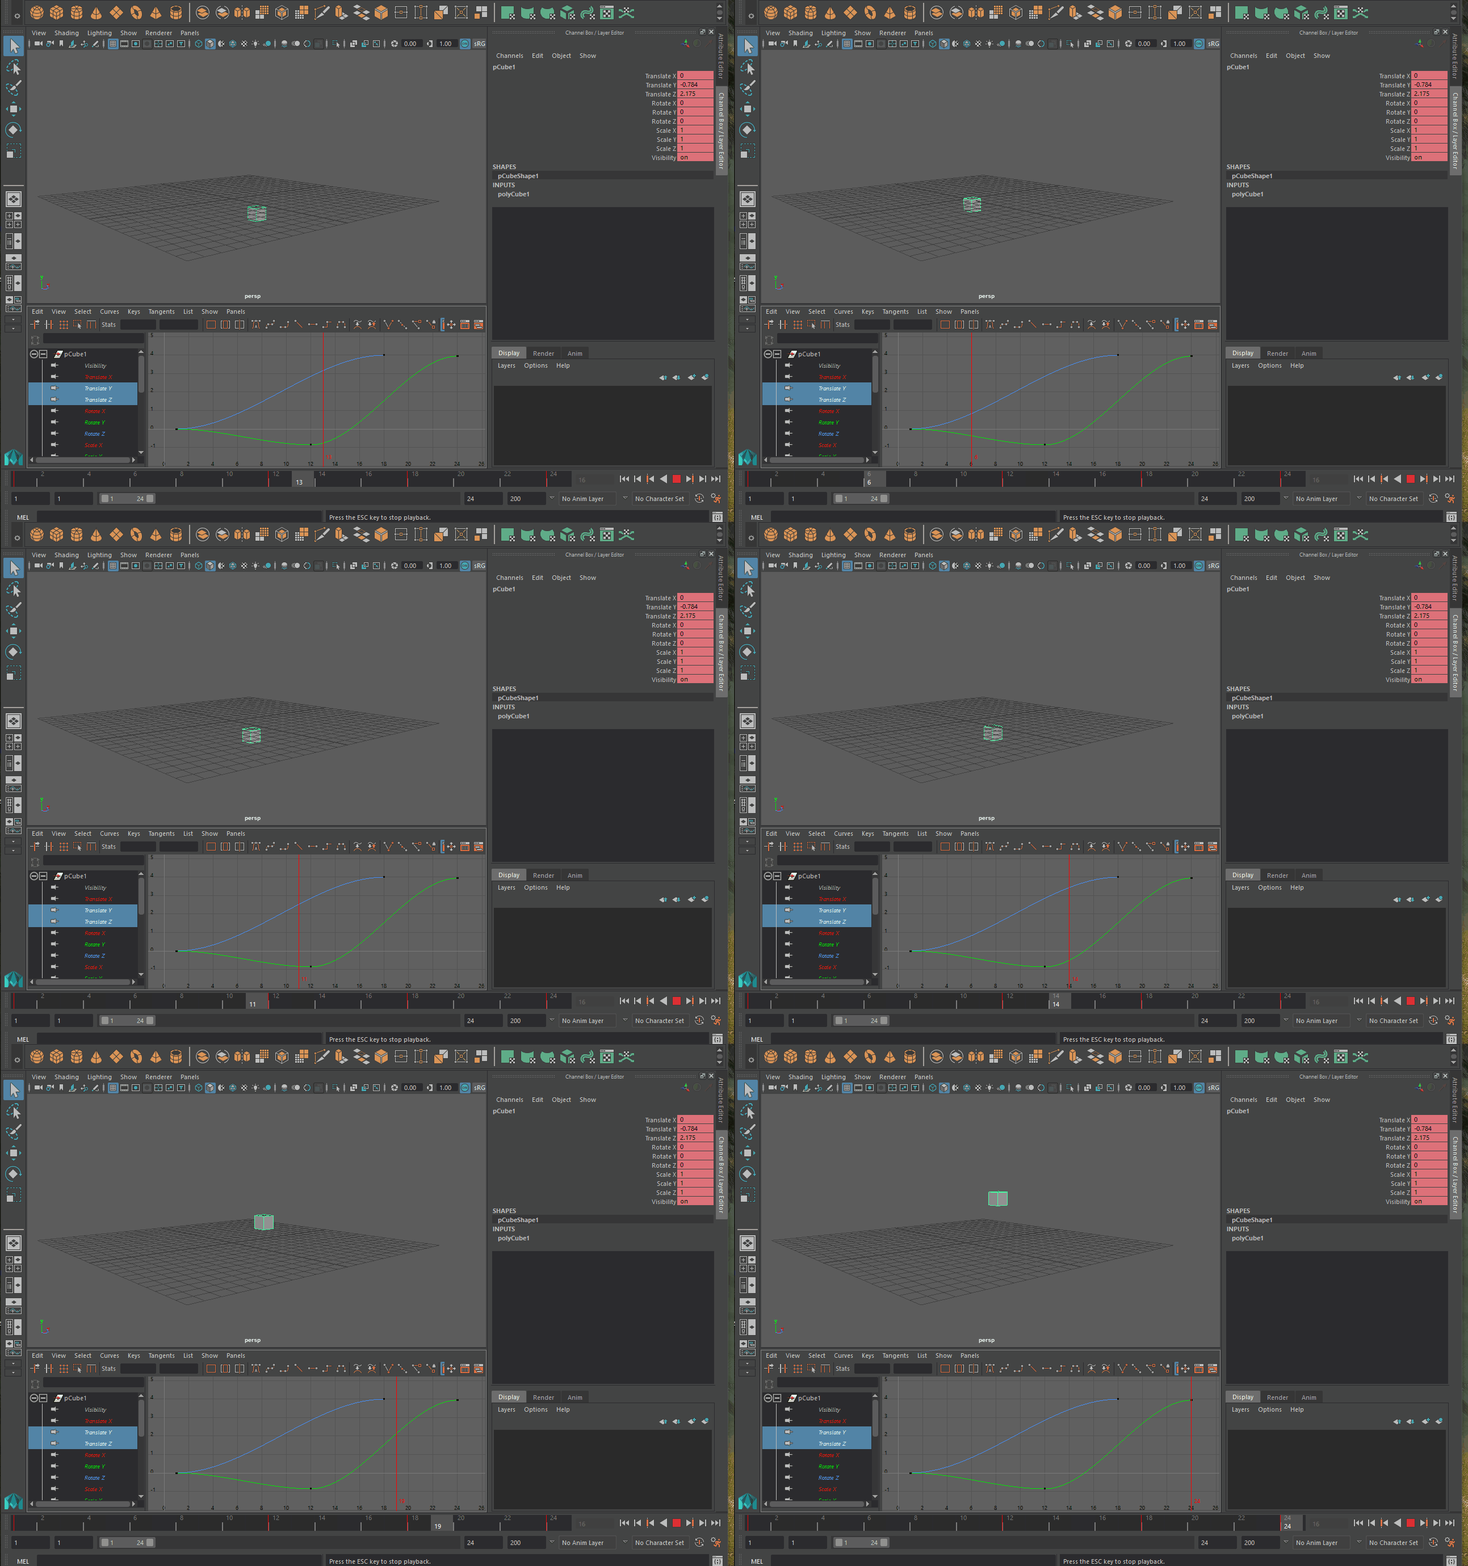
Stacking splines on top of each other like this to get the motion that you want is 3D animation at its core.
PLAYING WITH TANGENTS
Changing the time and magnitude of key frames isn’t all that we can do in the graph editor. We can also change the curvature of the graph by playing with tangents.
What’s a tangent again? Its the small grey nodes that pop up in the graph editor when you select a key frame. The tangent allows you to manipulate the spline .
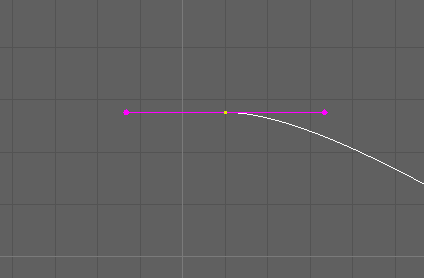
Unweighted tangents can’t be pulled in and out, just rotated.
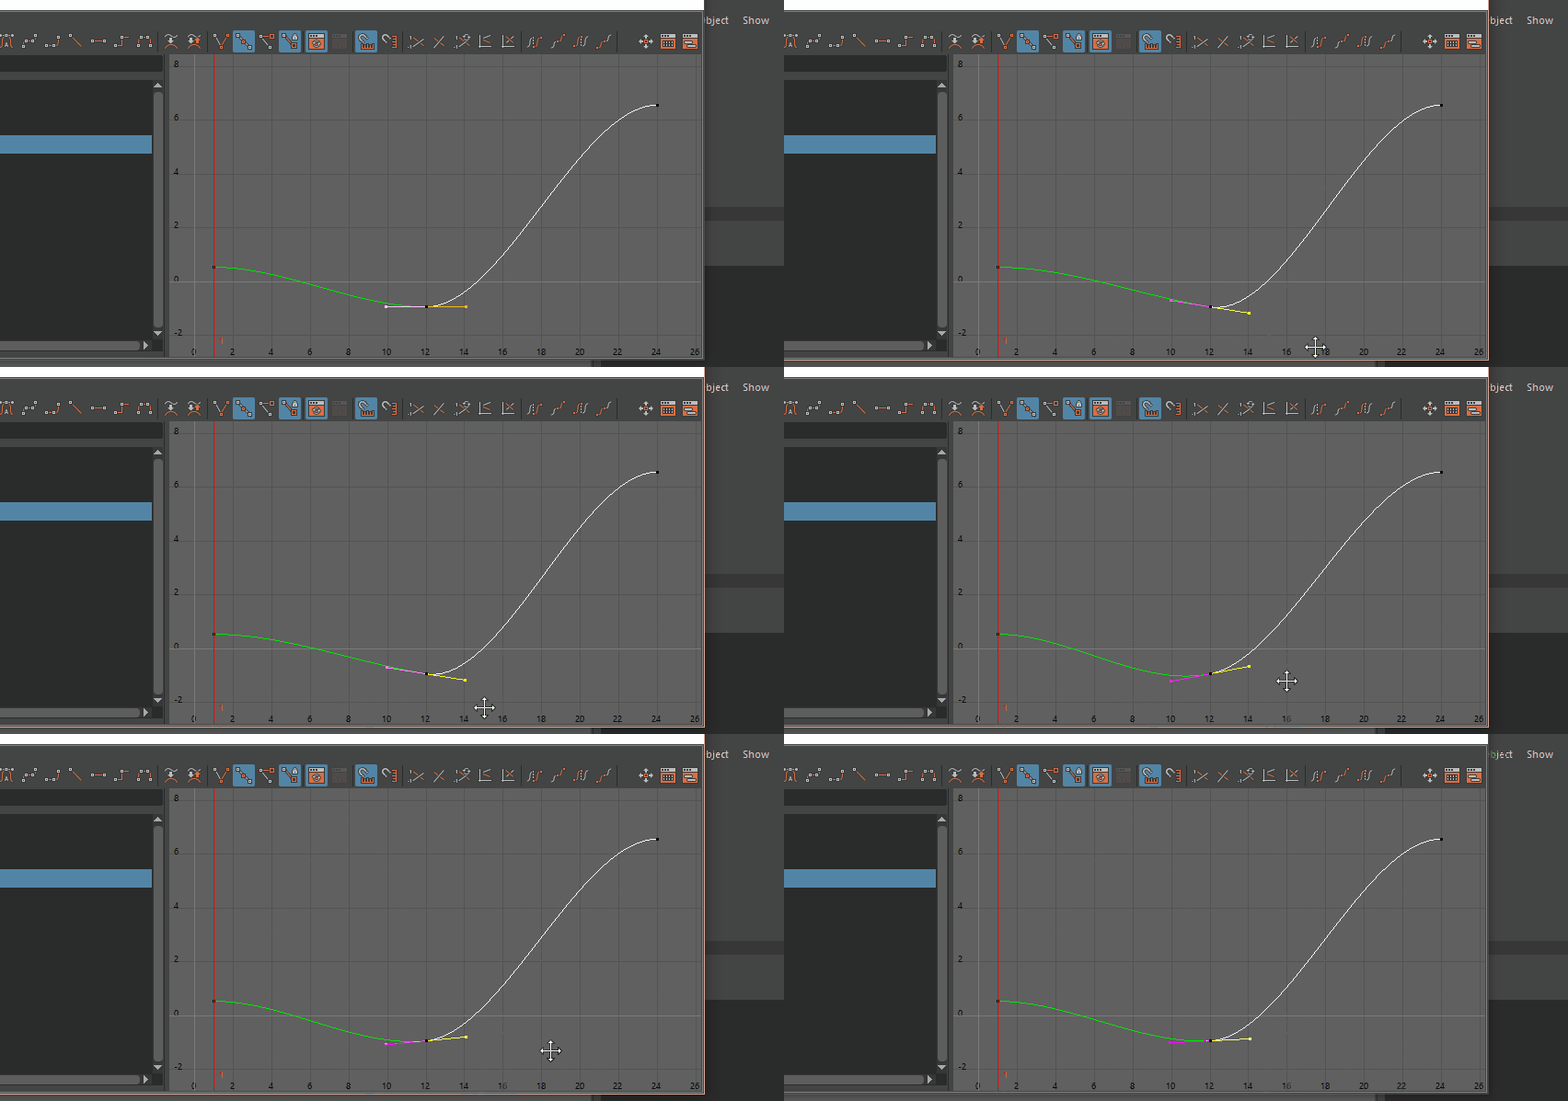
On the other hand weighted tangents allow you to pull them in and out.
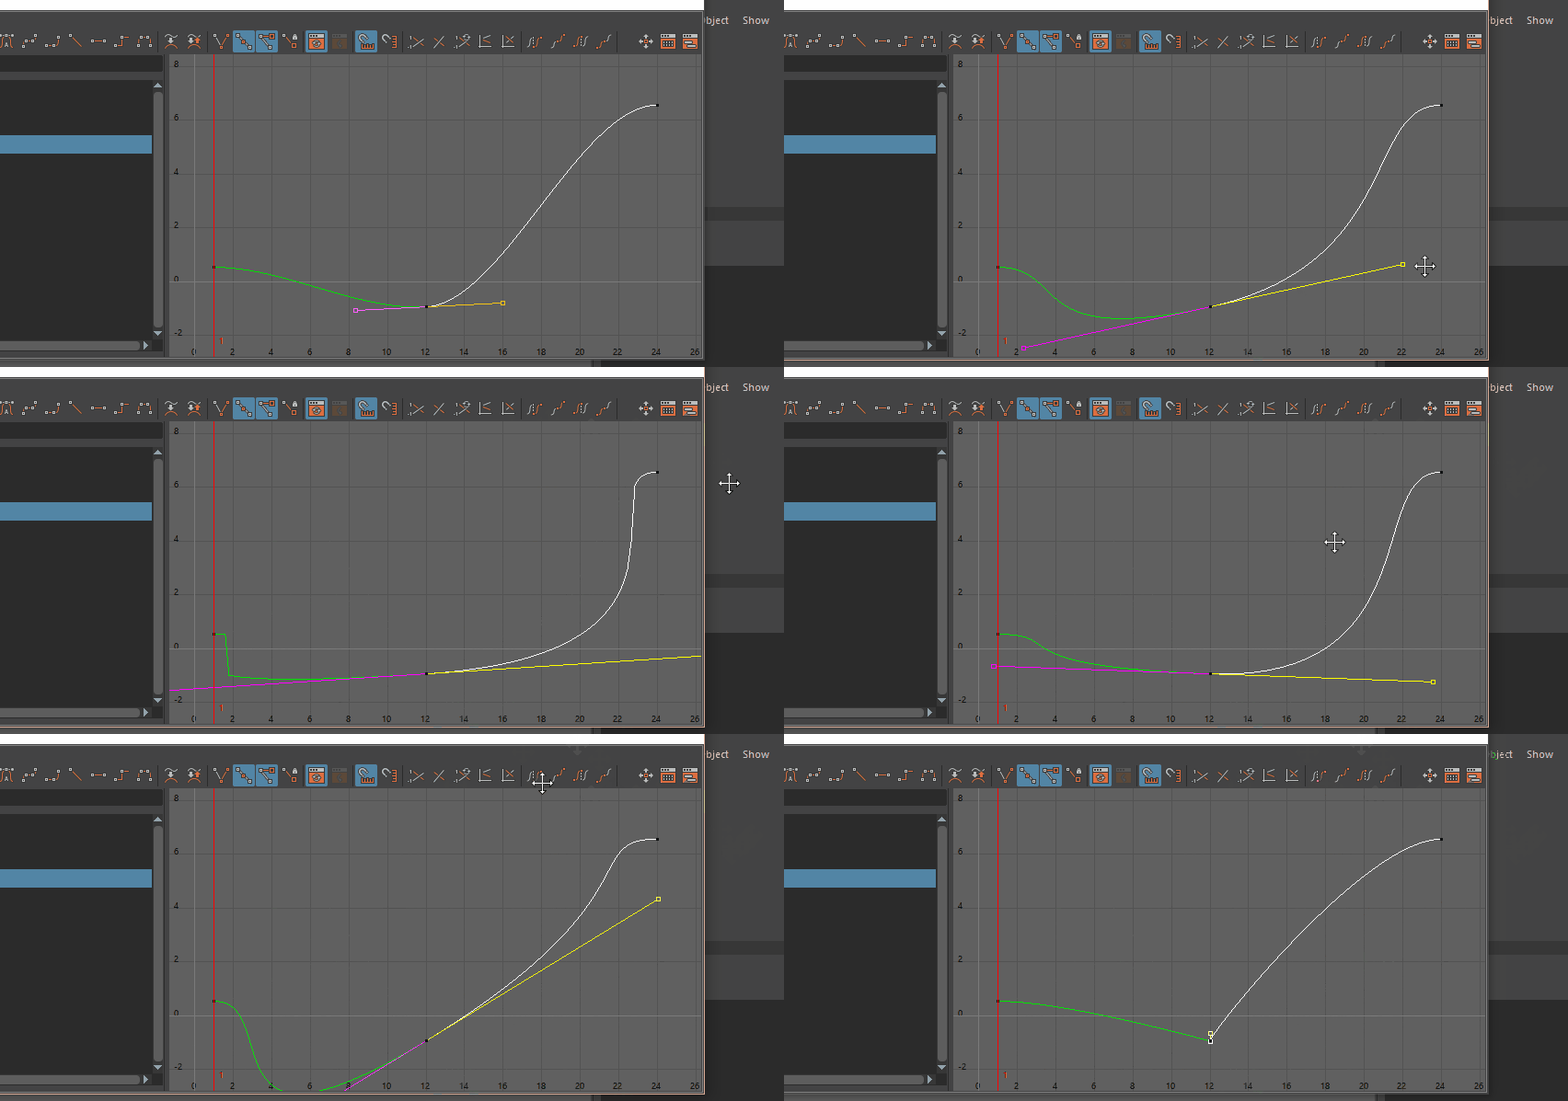
This gives us more control over the curve. Hence, in the first part of the tutorial we set the default tangent type to weighted!
How do you manipulate the tangents?
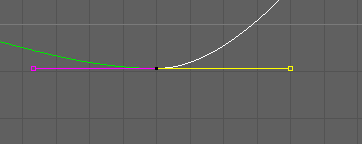
Notice the tangent has two sides. To play with a tangent around a key, select the key and then select one side of the tangent handle. Then left click drag or middle mouse drag to rotate and pull out the tangent handles.
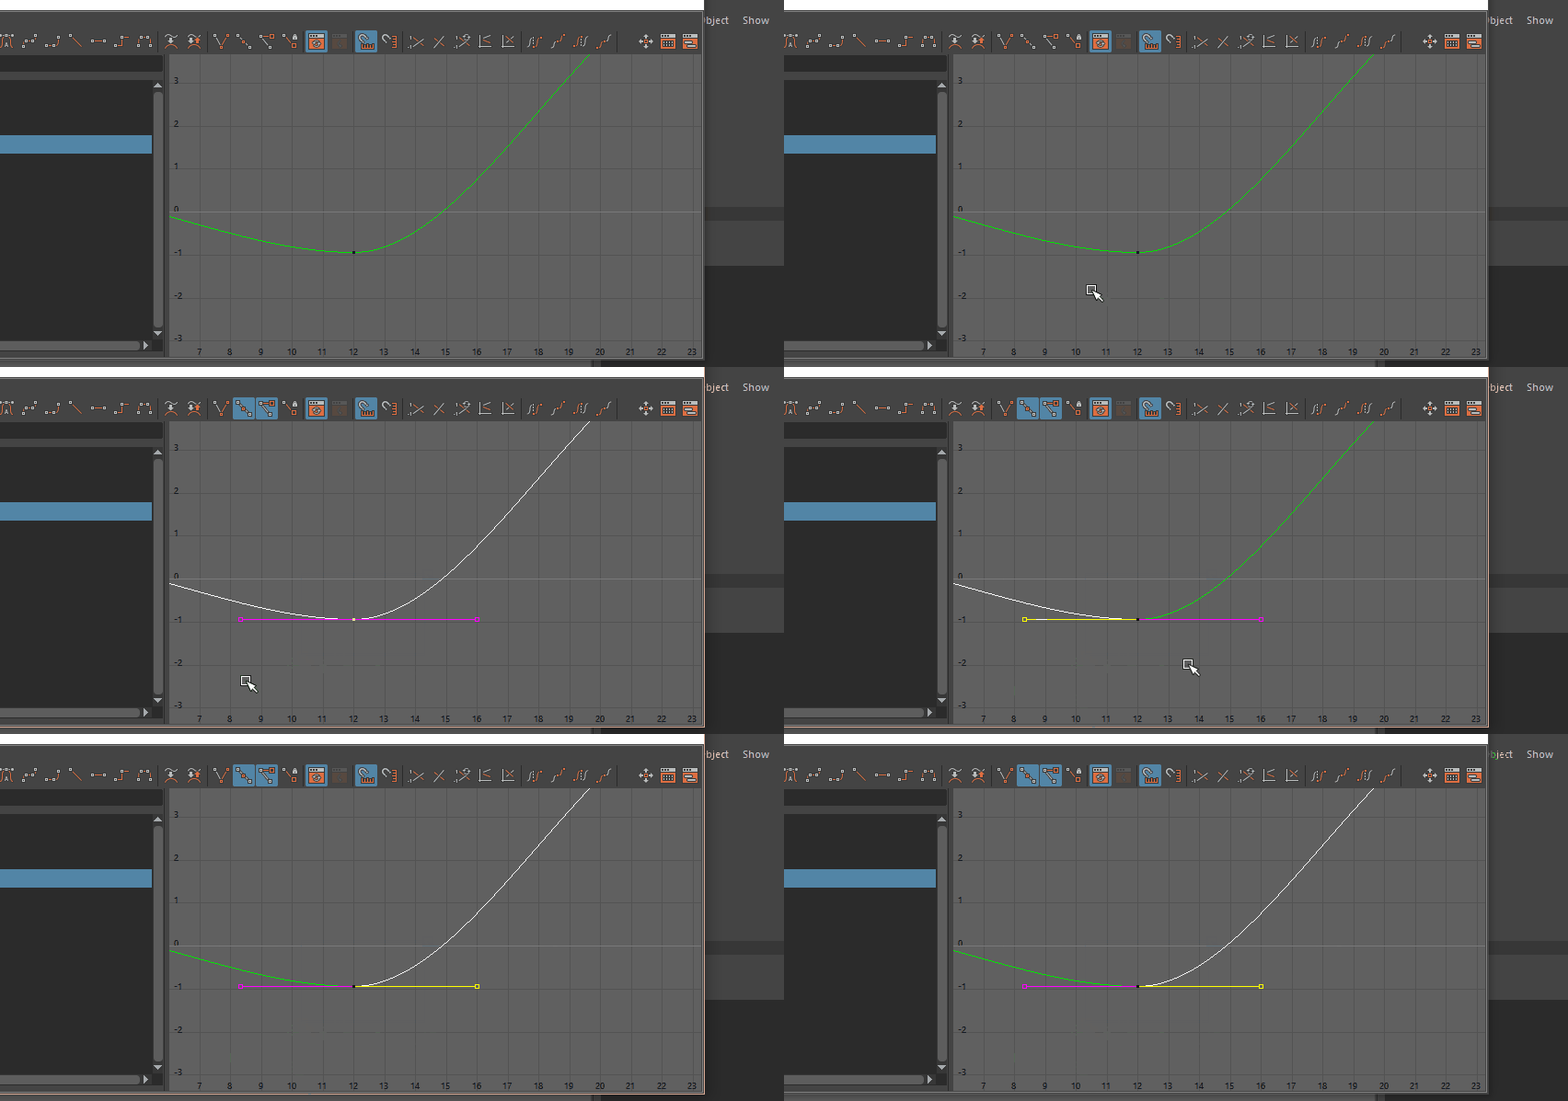
As you can see from this gif from up above, when you play with one of the tangent handles, the other one goes with it. In other words, playing with one side of the tangent messes with the graph on both sides of the key frame.
But what if you want to only modify one side of the graph? Break the tangent handles by right clicking while having a tangent handle selected and hit Break Tangents.
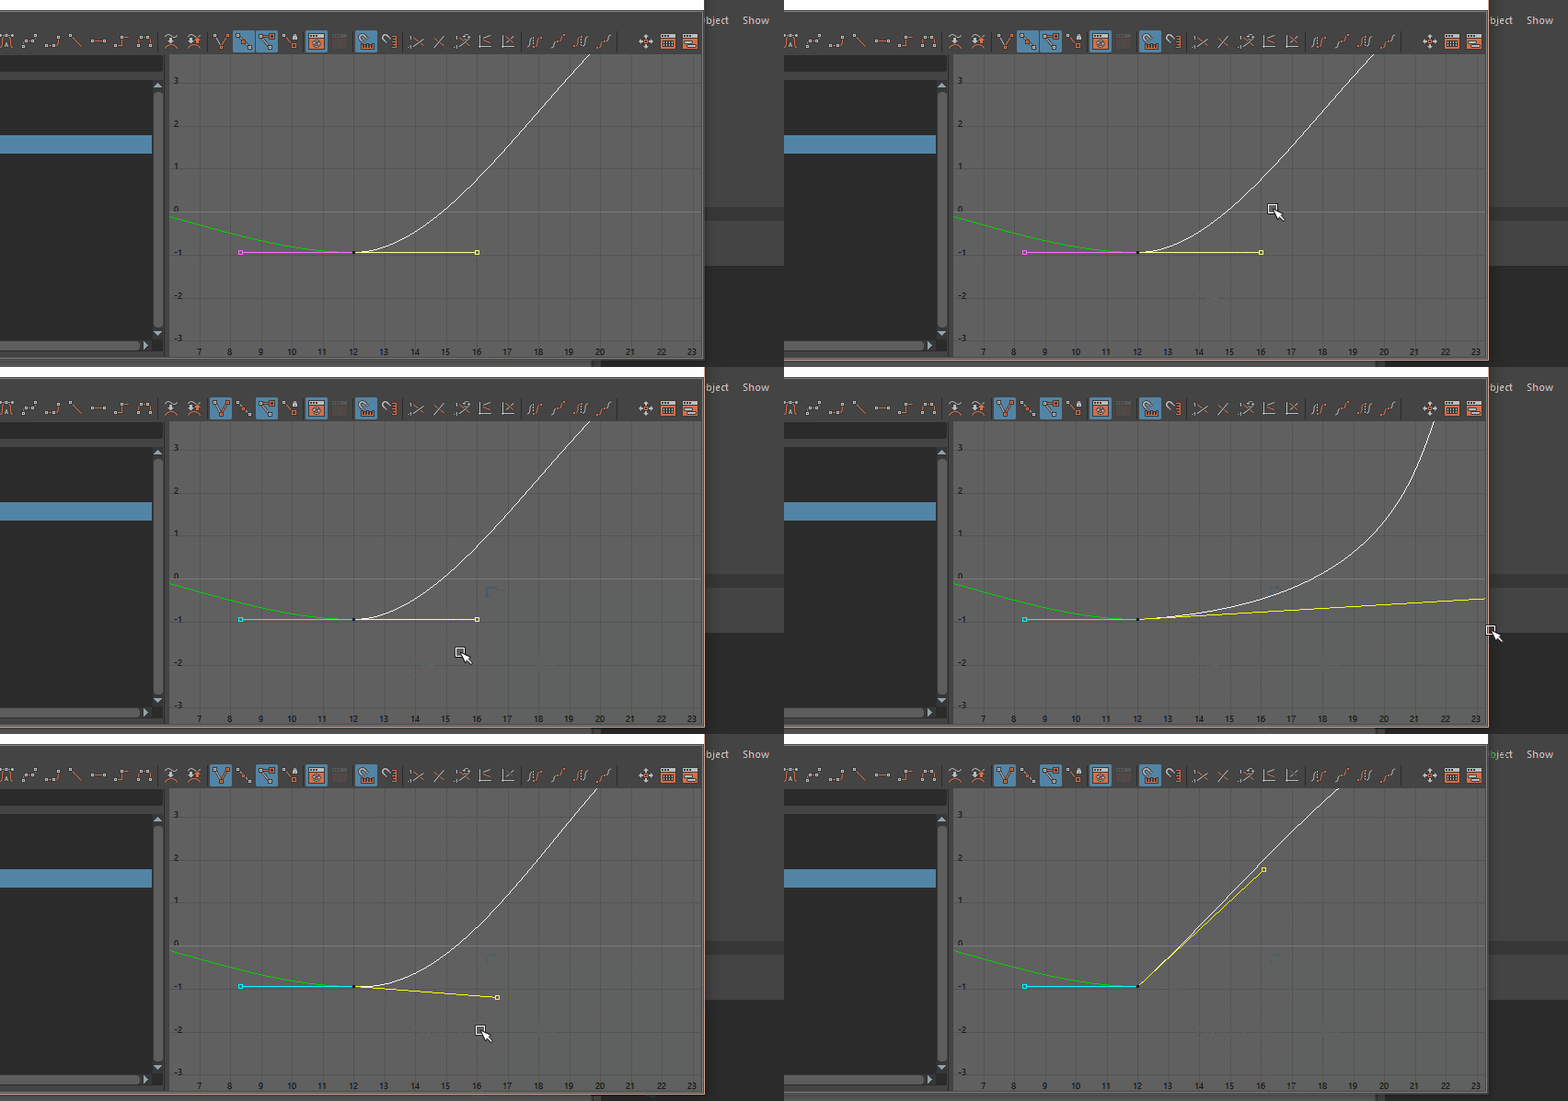
Don’t think you have enough control with your current key tangents? Add another key right in the graph editor by navigating to the frame you want add the key on in your timeline, selecting your curve, right click -> insert key.
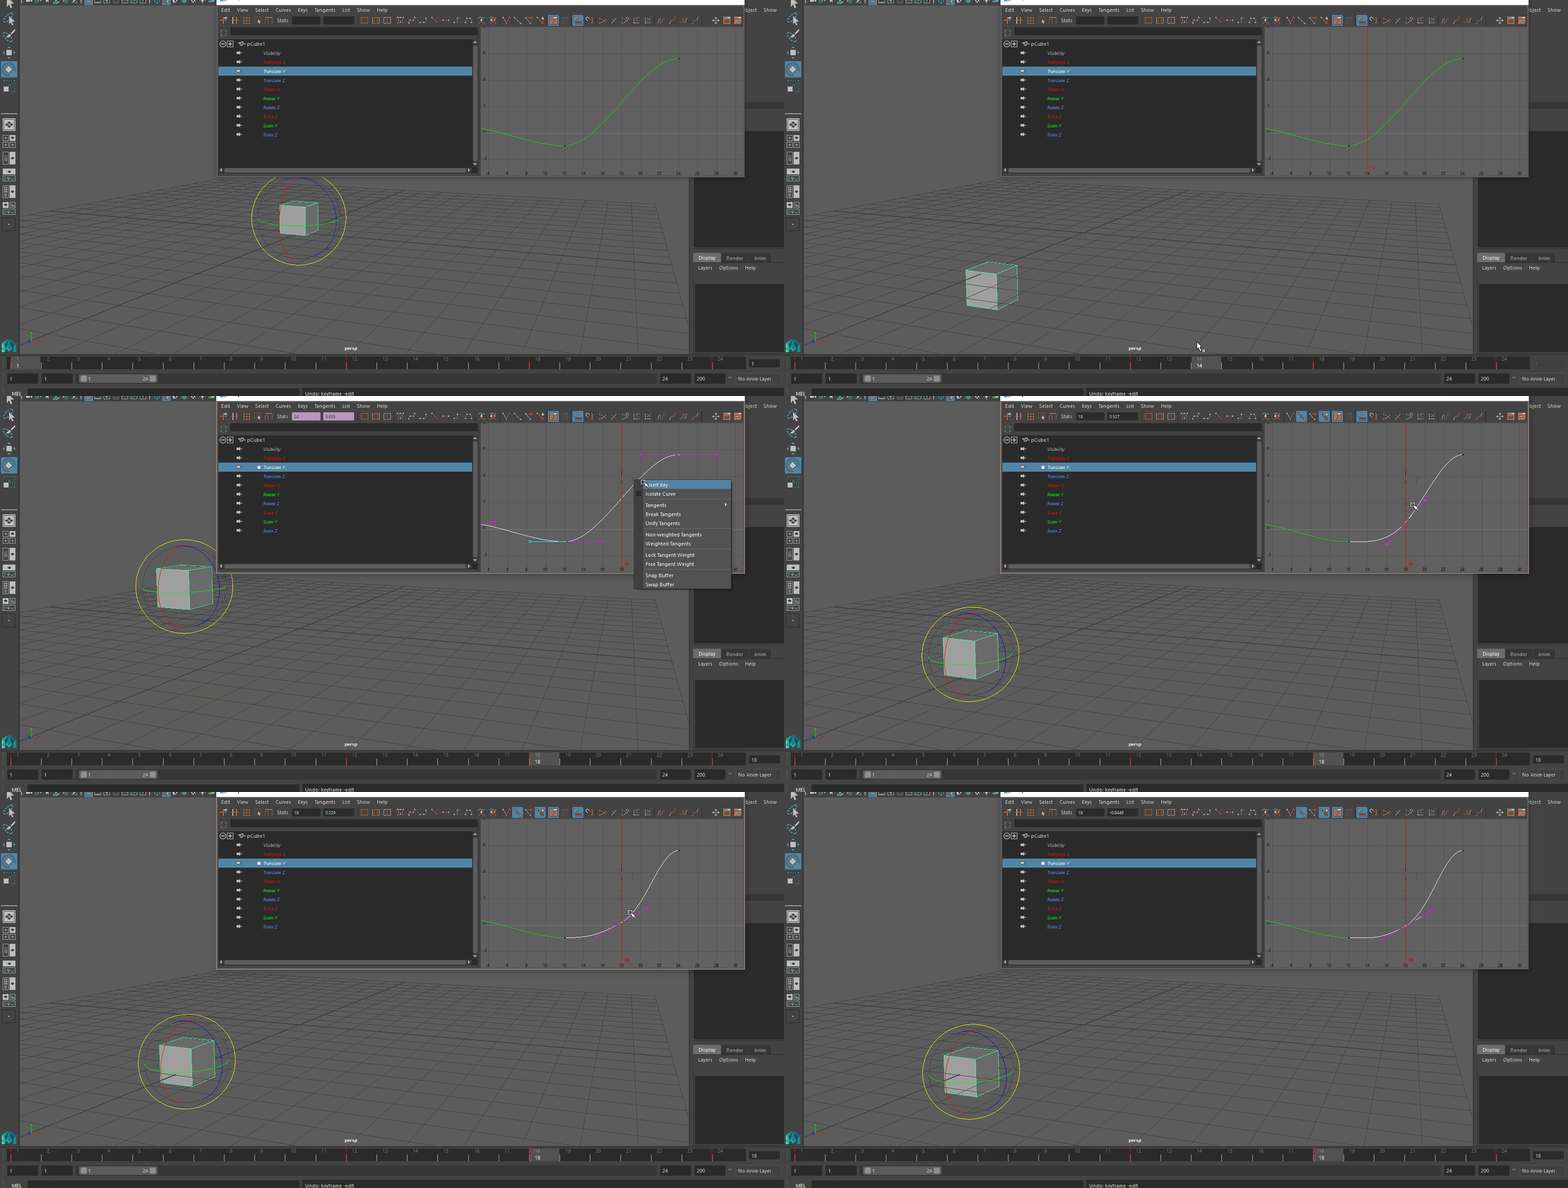
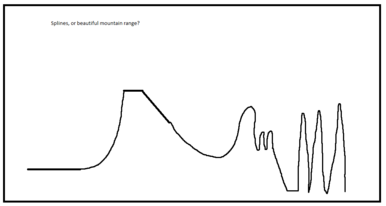
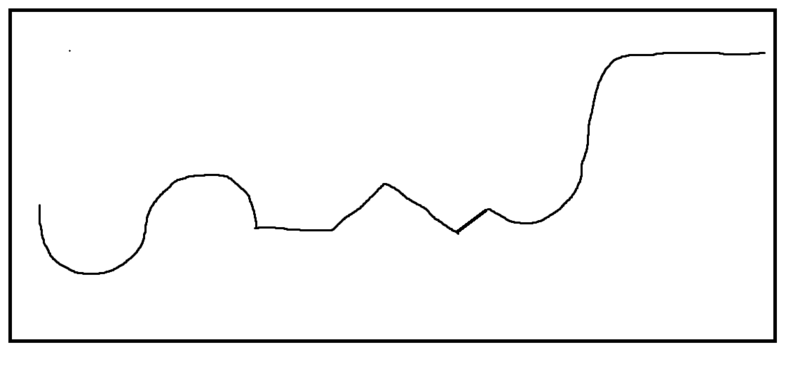
A great test to see if you have your tangent operations down is to create a spline in Paint or on paper and see if you can replicate it in your graph editor. Let me show you what I mean. Lets say I want to replicate this curve.
Here’s video of me doing it:
HOMEWORK, PART 1 OF 2
The first part of your homework is to generate a graph for this curve below starting from the key I set in the translate Y of the box at frame 1.
Once you open up spline_tracer.ma you should see this.
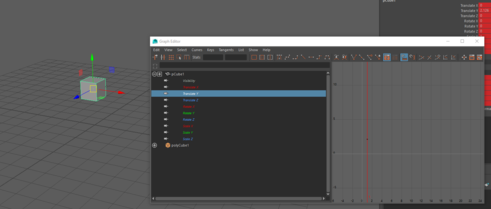
Your job is to turn that into the curve above just like I did with the previous curve in the youtube video. Don’t worry about the box. It’s just there so you have something to attach the curves to.
CURVES
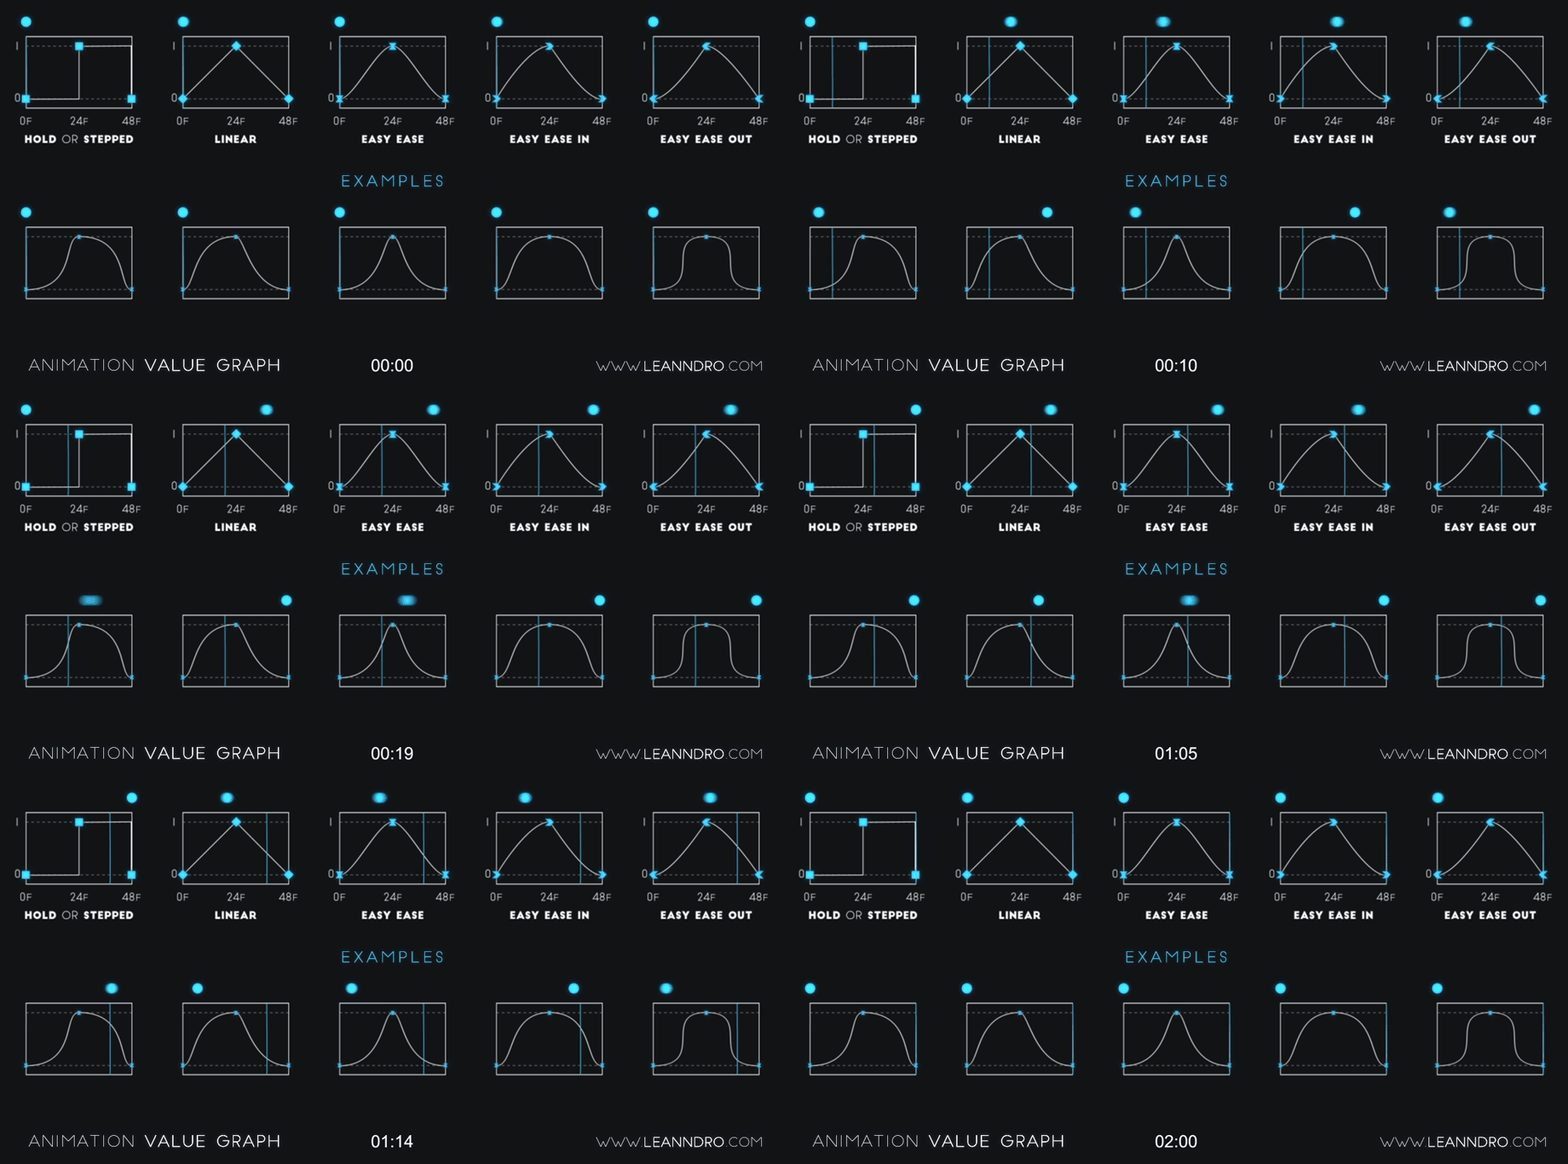
Now that you know how to manipulate curves. What do they actually mean? Lets take a look at a few curves and see if we can describe the motion of an object just by looking at the graph.
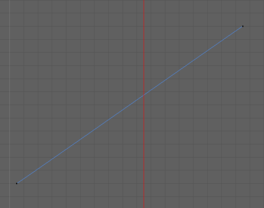
An object with a linear graph like this is moving at a constant rate. It’s not slowing down or speeding up anywhere on this interval.
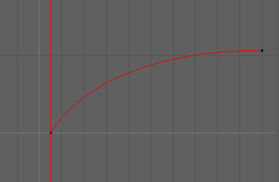
An object with a graph like this is slowing into a stop. You’ll notice that as you get closer to the end of the interval your position is changing less and less.
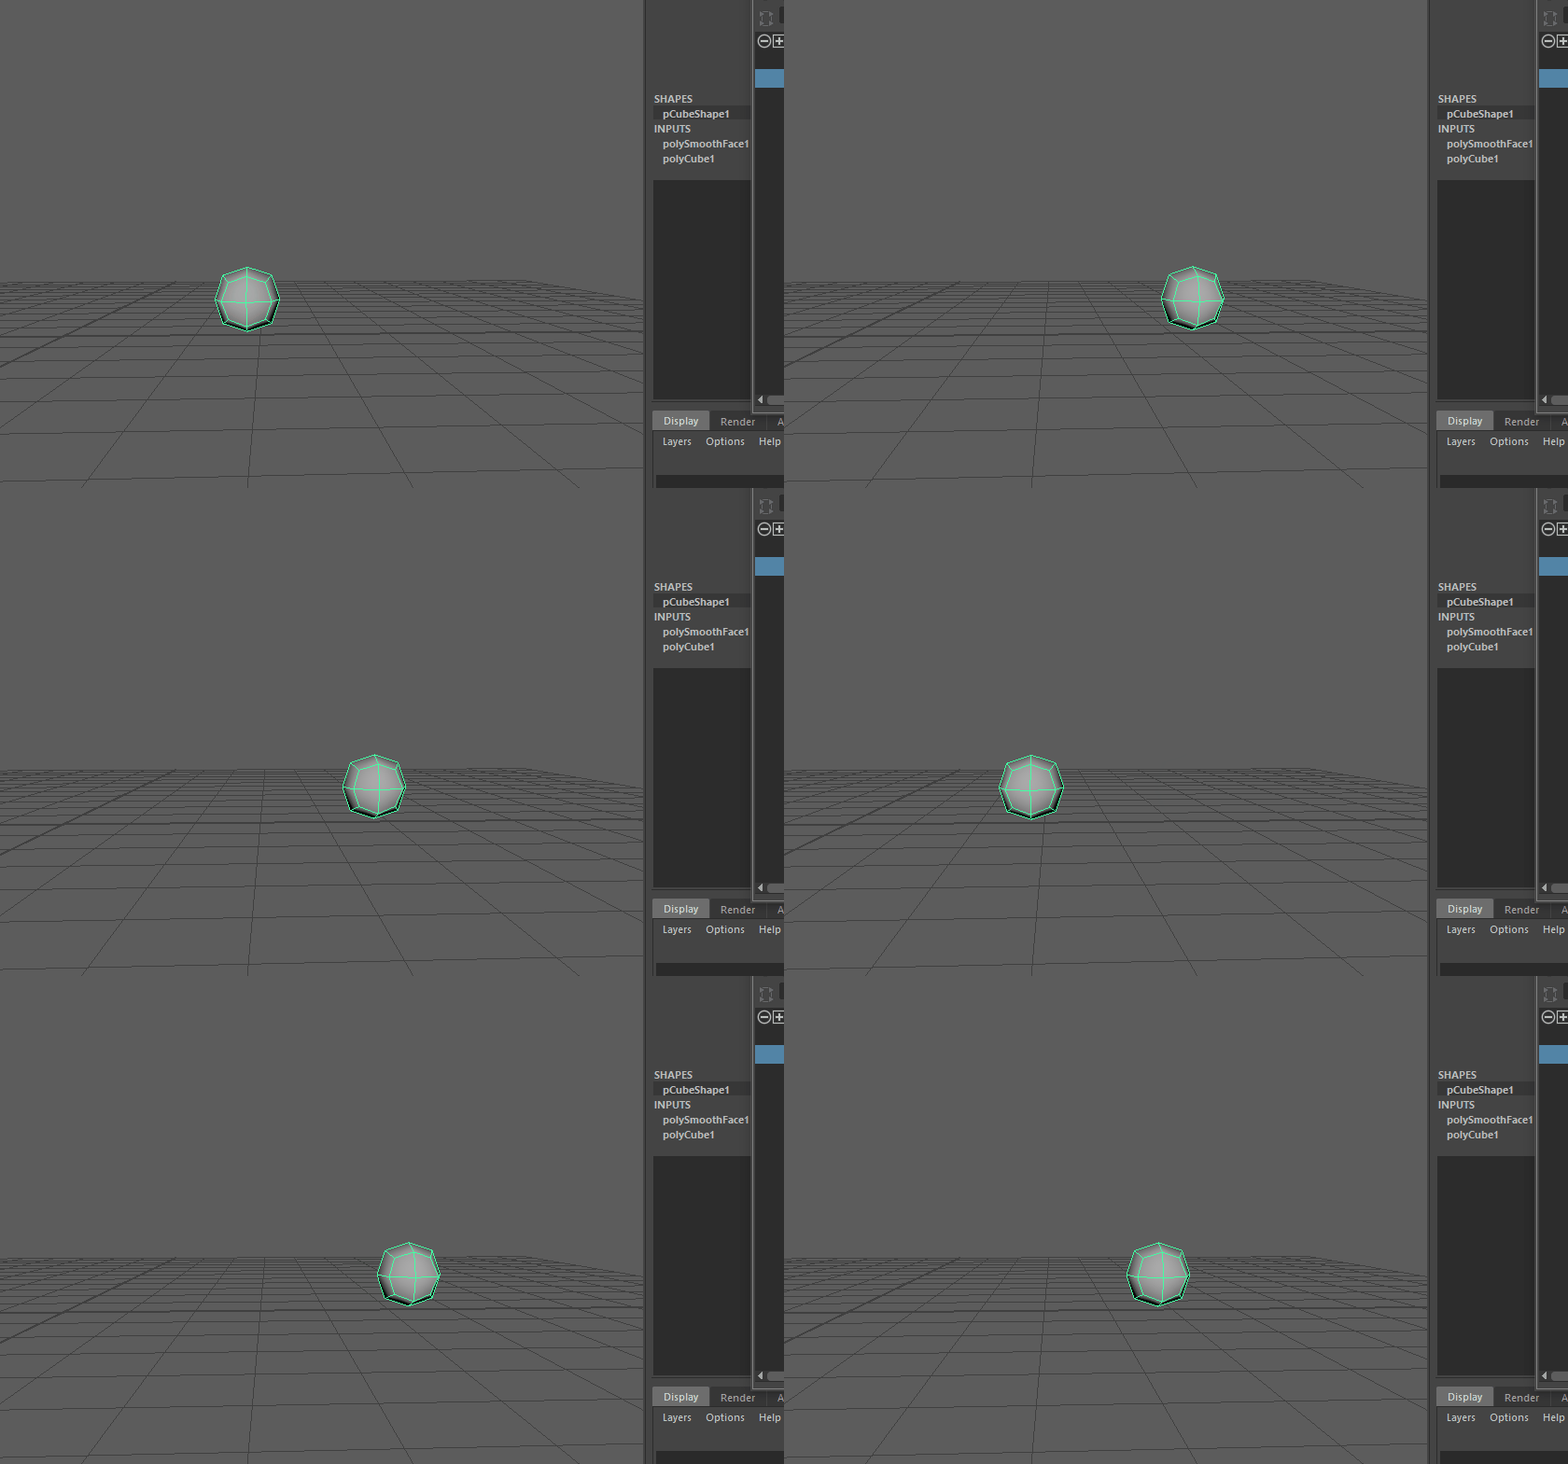
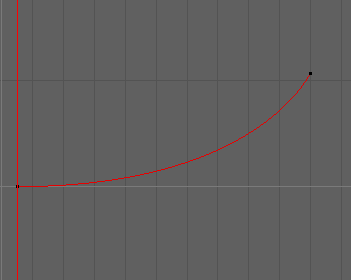
An object with a graph like this slows out of a stop into some type of motion. In other words, the object is accelerating.
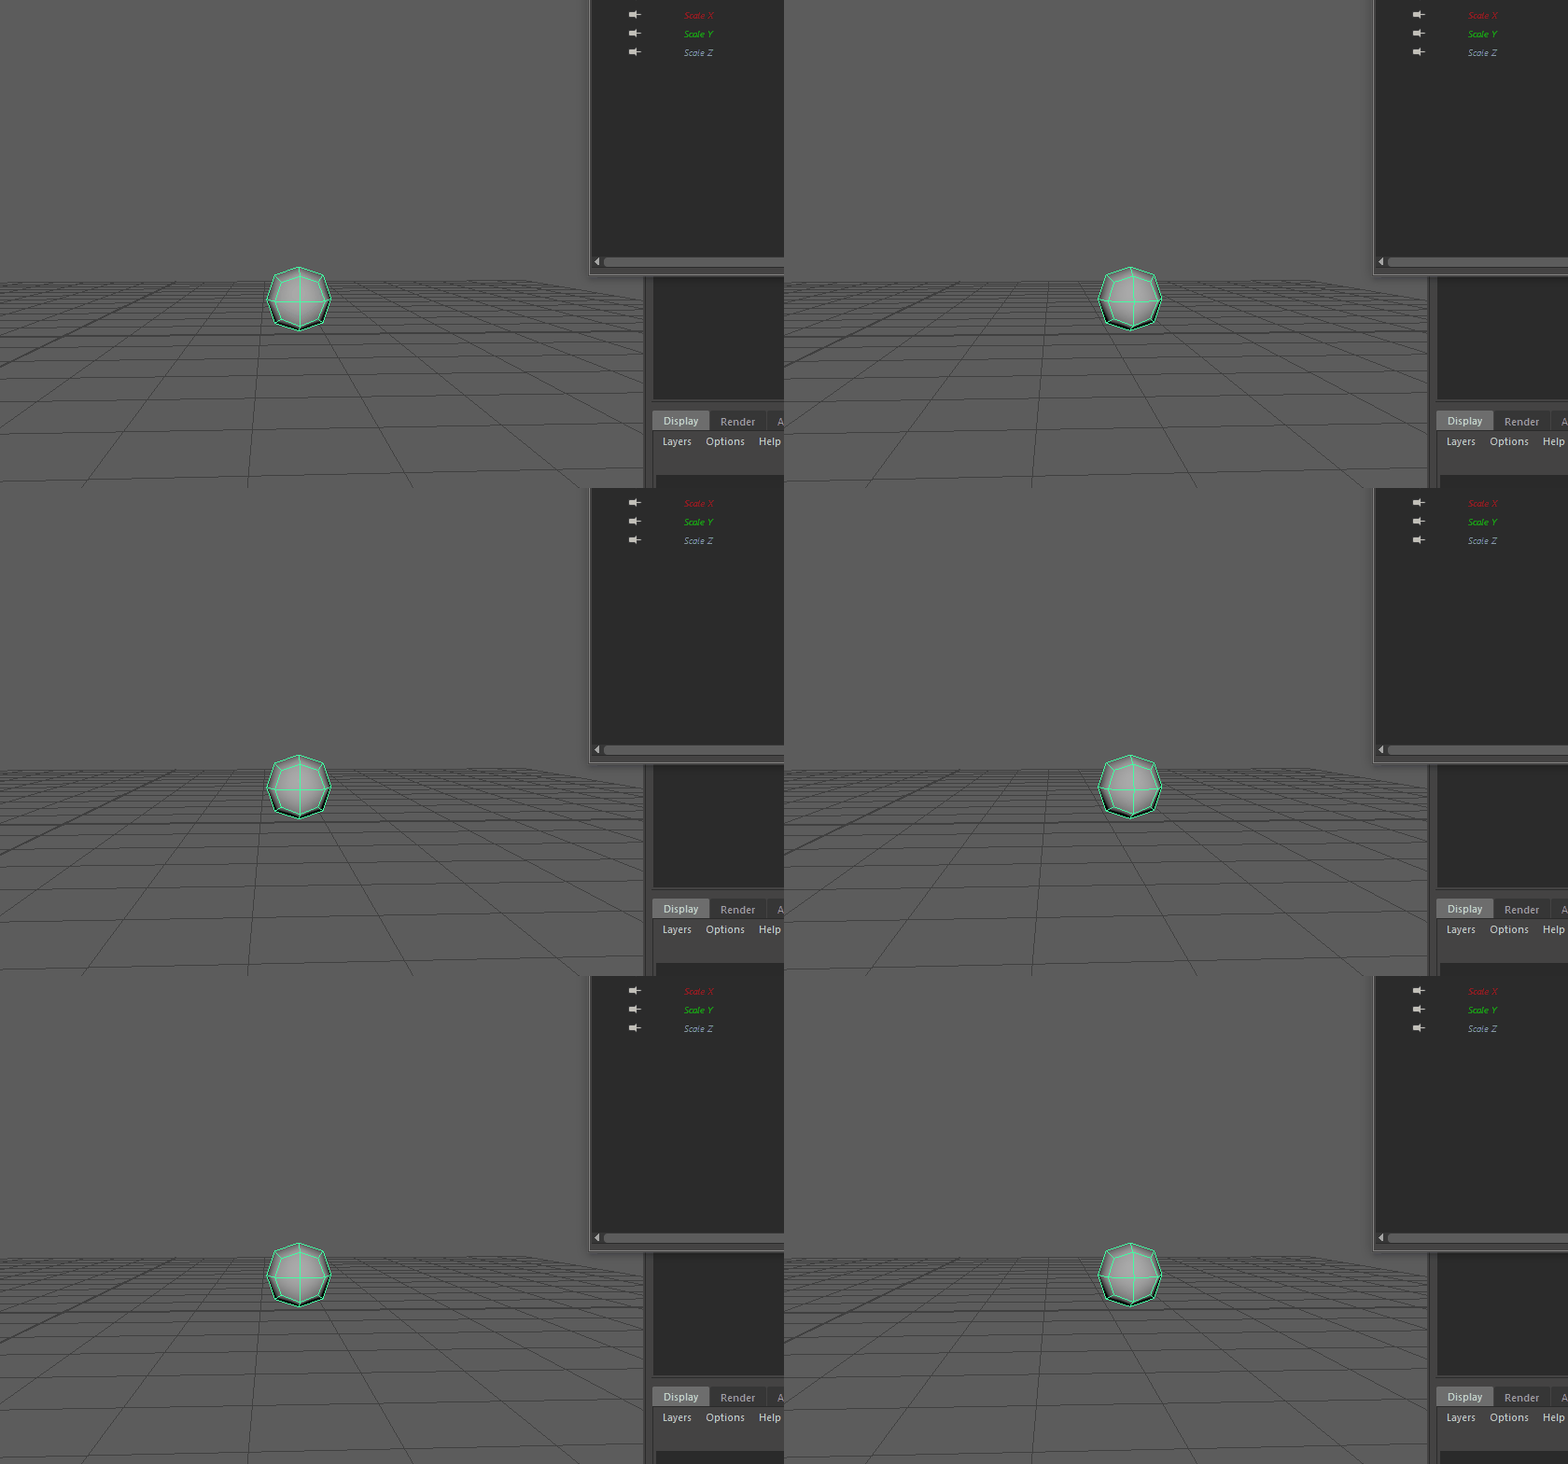
Using the three up above, can you tell why the ball moves the way it does for the curves in this gif?
HOMEWORK, PART 2 OF 2
The second part of your homework is to animate a ball falling from a height. Your job is to make sure that the ball dissipates energy correctly until it comes to a stop naturally.
In case that isn’t clear, here’s what I submitted when I had this homework assignment. You only have to do one ball, but it can be any type of ball.
If you’re feeling overwhelmed, your ball doesn’t have to move horizontally. However, it would be pretty hard to drop a ball and have it only move vertically.
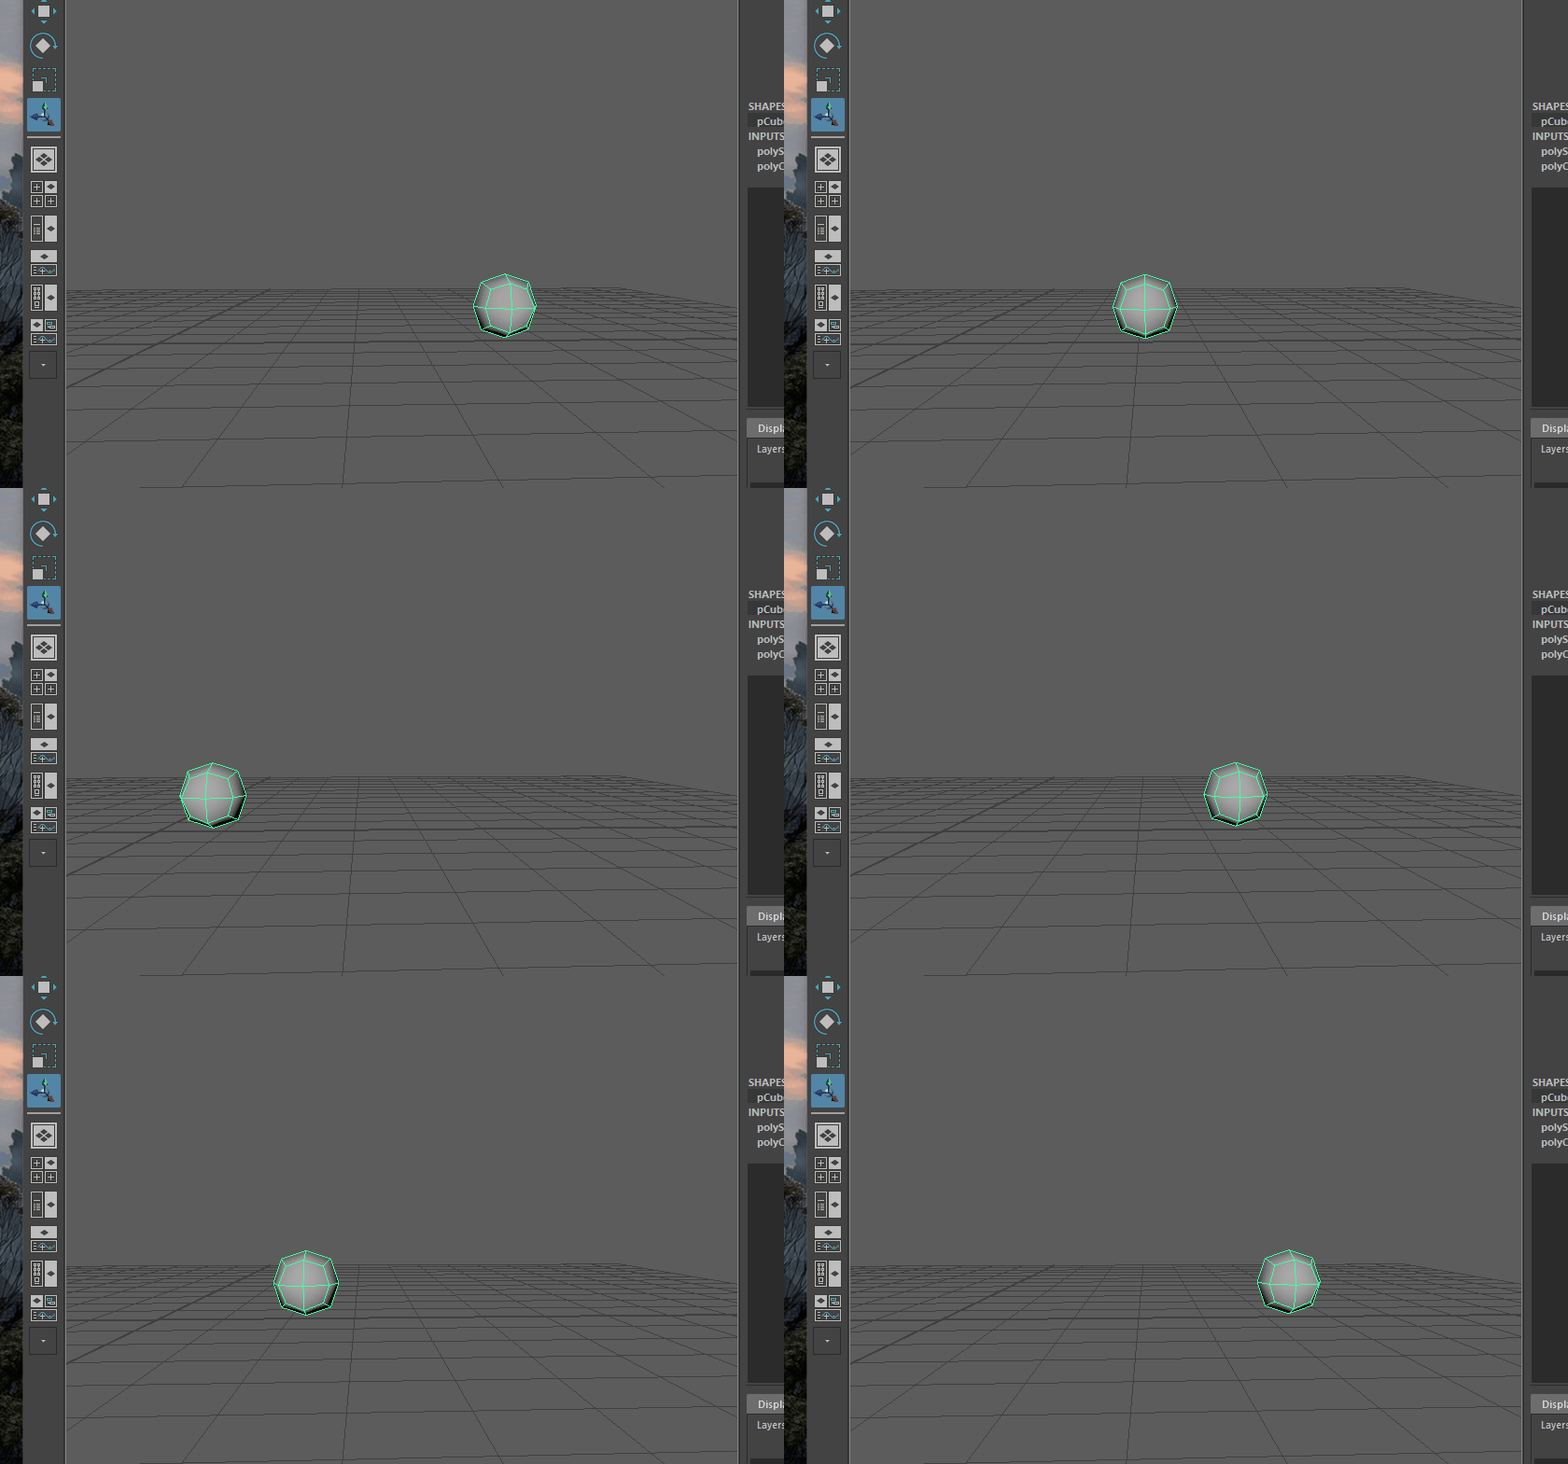
left to right: bowling ball, basketball, ping pong ball, beach ball
Approach: Here’s how I’d approach this assignment.
Step 1: Study reference footage
Before you jump in and start animating, it’s always best to look at videos of what you’re animating. It’s even better if you can shoot a live-action video yourself, so you can incorporate the specificity you want in your animation. Also, keep in mind that animation is typically about 30% faster than live-action footage, so make sure you adjust your timing accordingly.
Here’s some reference footage I found for bouncing balls:
https://youtu.be/01cm7H1QoJg (height and timing)
https://youtu.be/dEMjMFD_XaU (spacing)
https://youtu.be/zd2V4_FNMls (squash and stretch)
You can also try playing videos on YouTube in slow motion or press the < and > keys to go frame by frame.
Step 2: Understand the rig
I like to play around with each controller until I understand what they do and know which ones I’ll need.
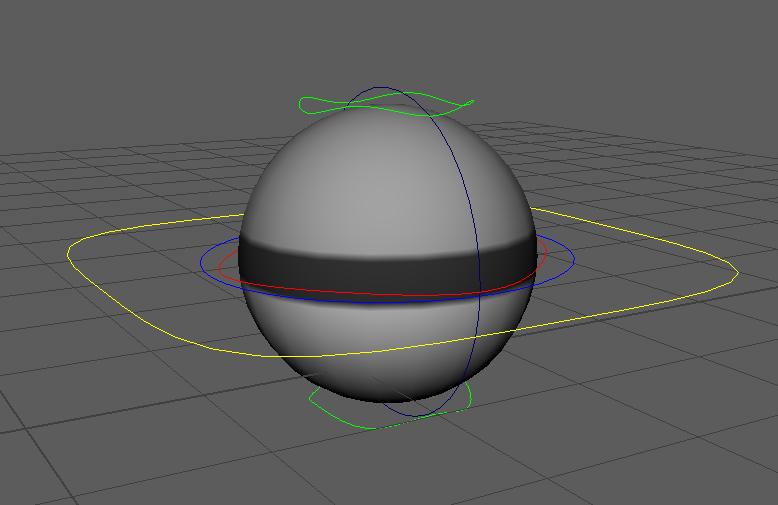
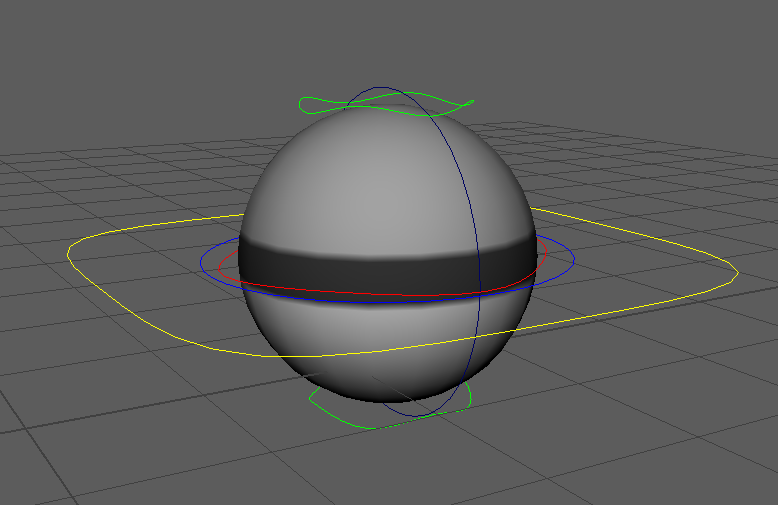
The large yellow rounded square is the master controller. This is typically used for initially positioning your object in the scene. We’re not going to put any animation or keyframes on the master controller. Why not? Say we animate our ball bouncing to the right, but then we find out that we placed the ball on the wrong end of the scene and that it was supposed to bounce to the left. If I had set keys on the master controller, then I would have to either change a lot of my animation or deal with constraints and a new controller. If I didn’t set any keys on the master controller, then I can just move and rotate it to reposition my entire animation!
The blue circle is the main controller. This is what we’ll use to animate the ball’s motion. When we think about applying the bouncing ball to character animation, we’ll often think of the hip as a ball. This controller would correspond to a hip controller on a character.
The green squiggly circles squash and stretch the ball. You can move them to the sides too.
The red rounded square inside the main controller is the rotation controller. Why don’t we just use the main controller for rotation? When we rotate our main contoller you will see that the squash and stretch controllers rotate with it. This is not ideal because we want the ball to roll while still just squashing up and down, so we have this controller which rotates the ball without rotating the squash and stretch controllers.
The dark blue circle that goes from the top to bottom of the ball serves the exact opposite roll of the rotation controller. This controller will just rotate the axis of the squash and stretch. We won’t be using this controller much but it would be usefull in a situation where the ball was boucning off of a wall and we needed to make it squash along the x or z axis instead of the y axis.
Step 3: Get the vertical motion down for the ball
This might be the most important step. You can usually tell how heavy something is just by watching its vertical motion. This is where I tend to spend most of my time.
I can figure out the timing of each jump down by just setting keys at the top and bottom of each bounce. The amount of bounces required to dissipate the ball’s energy will depend on how high the ball started and what kind of ball it is. A tennis ball would bounce more times than a bowling ball.
To get an idea of the spacing we should have, let’s look at this image from The Animator’s Survival Kit:
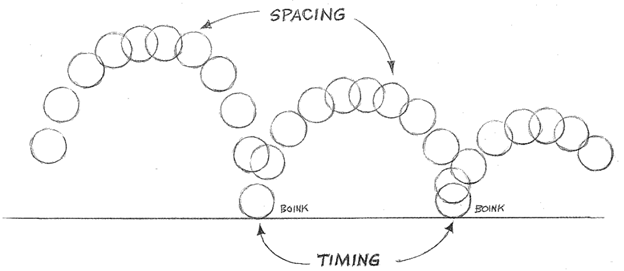
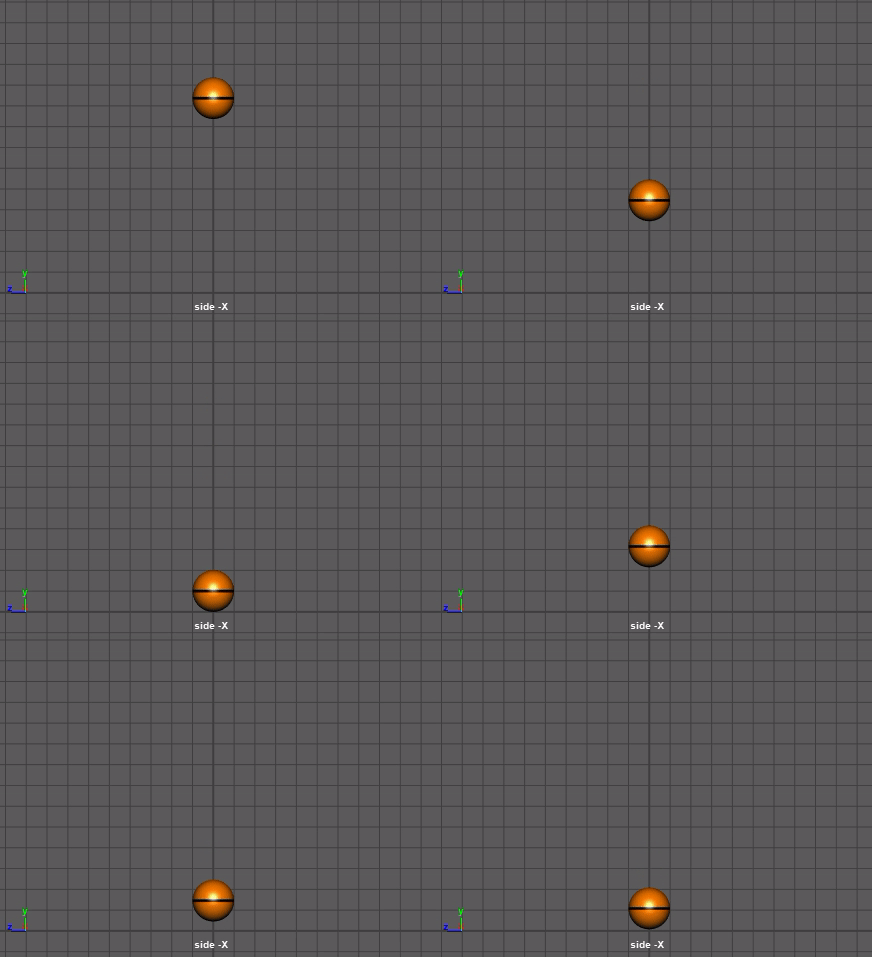
The ball should ease in and out of each high point, which is why there are more drawings in the high parts of this drawing. It should also accelerate as it approaches and leaves the ground. We can achieve this by editing our tangents in the graph editor. Here’s what my curve looks like:
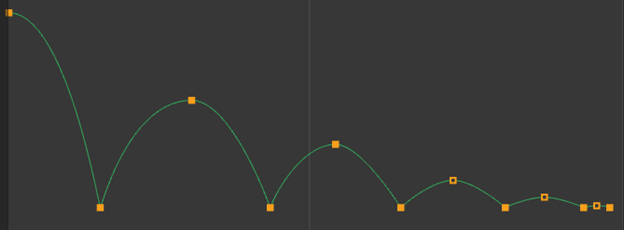
As with timing, spacing can look pretty different depending on the type of ball you are using. Here’s my animation so far:
Step 4: Squash and Stretch
Here’s another image from The Animator’s Survival Kit that demonstrates squash and stretch:
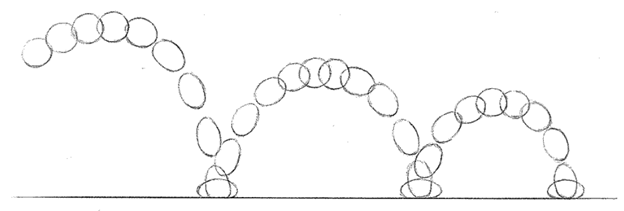
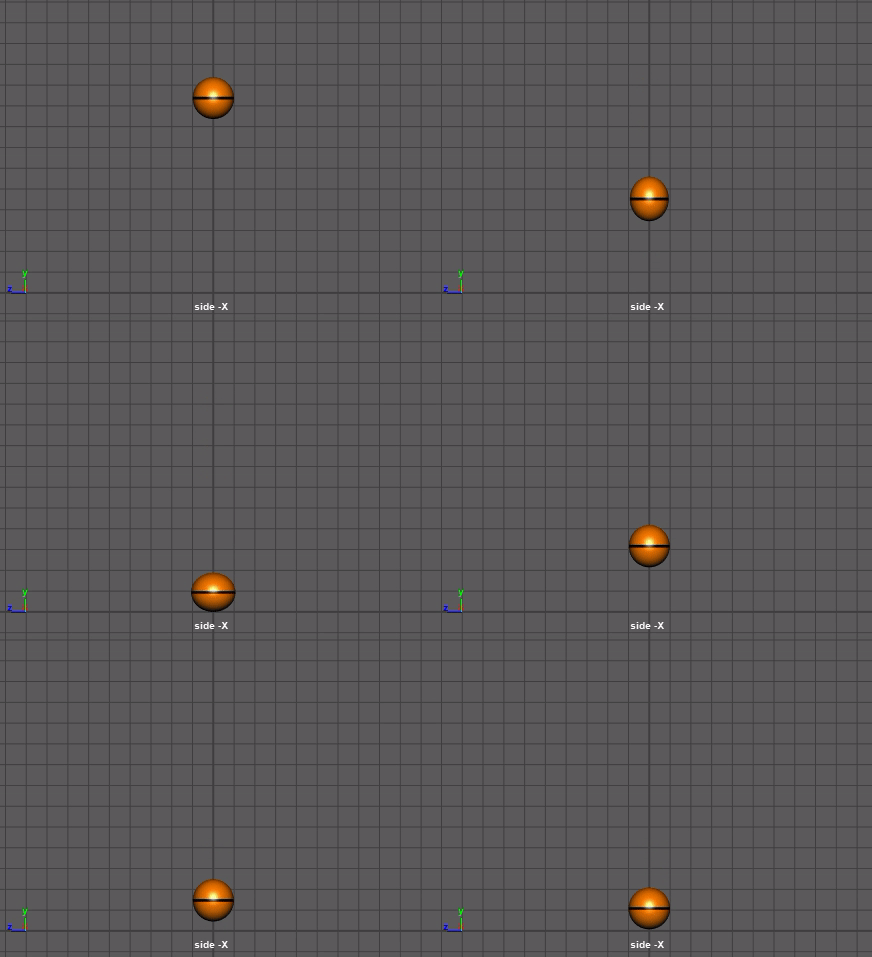
You’ll notice the ball is a perfect circle at the top of each arc. It stretches the most on the frames before and after impact, and it squashes on its impact frames. Try not to get carried away with too much squash and stretch. It’s best if it’s something that you feel but don’t really notice or get distracted by when you watch it. Here’s what my ball looks like with squash and stretch:
Step 5: Horizontal motion
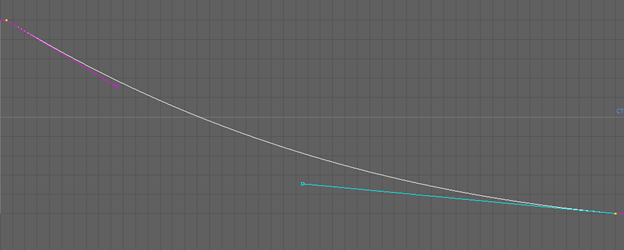
I want my ball to move horizontally at a mostly constant speed. To do this, I only need two keys on my translate Z curve, one at the start and one at the end. I want my ball to roll to a stop, so I’ll put some ease in to the second key. Here’s what my translate Z curve looks like:
Here’s a neat trick that can help you check your arcs. Select the ball’s main controller (the yellow one), and go to the Animation tab in the shelf and press this button:
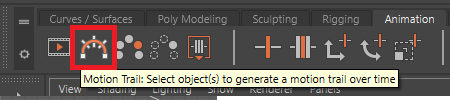
This gives you a nice visual representation of your animation in your viewport:
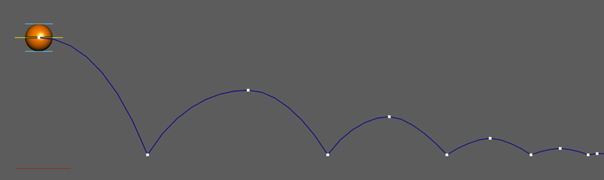
You can also move those white dots around to edit your keyframes if you like.
Just make sure you hide or delete the motion trail when you’re not using it because it can slow down your playback speed.
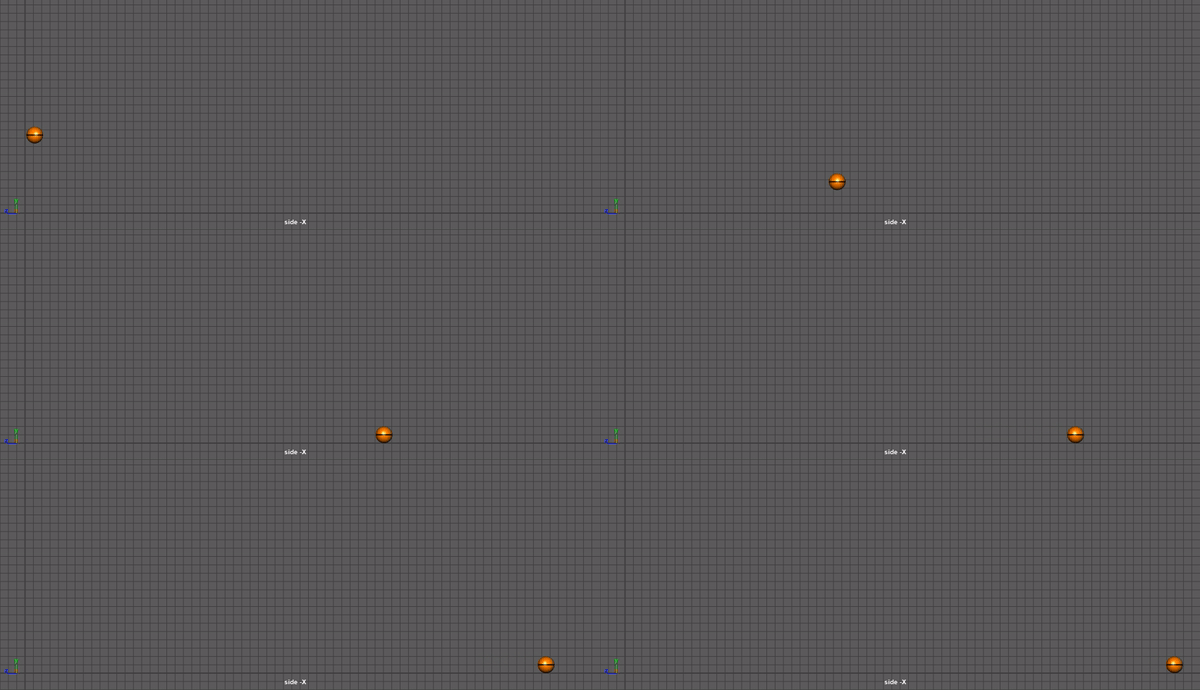
Step 6: Rotation
The ball’s rotation will slow down at about the same speed as its horizontal motion. My ball’s rotation curve looks almost identical to its horizontal translation curve. You can judge whether you have the right amount of rotation by whether it looks like your ball is rolling or sliding at the end.
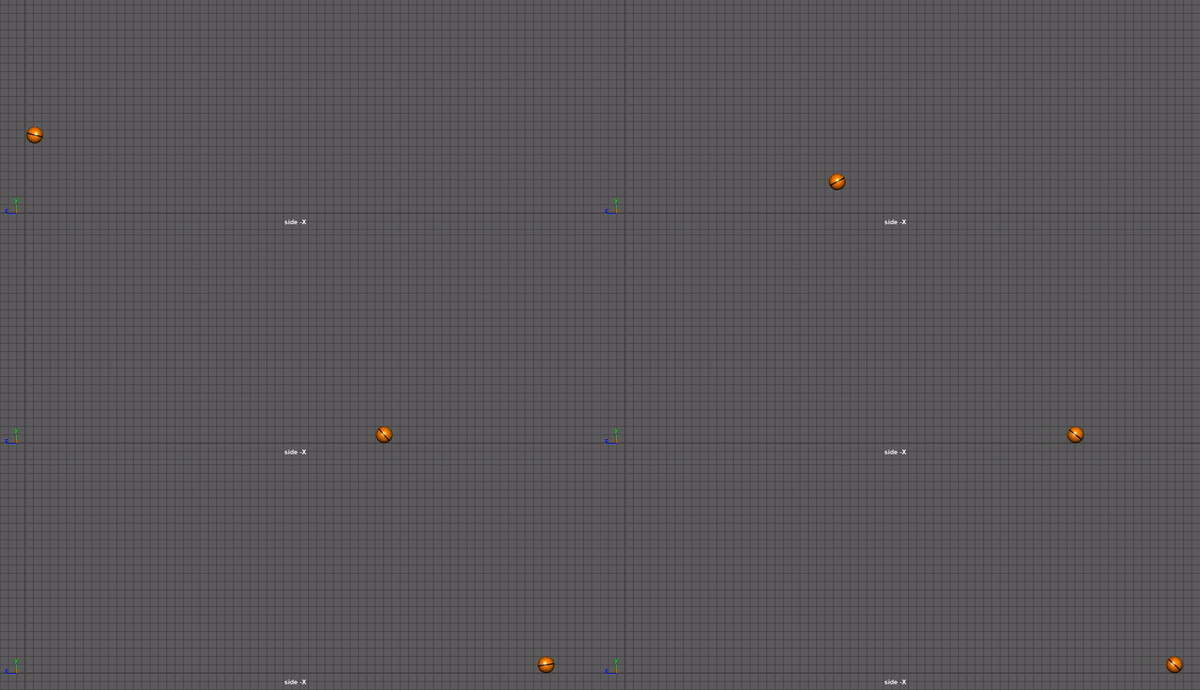
For more practice, try animating a bowling ball or a beach ball. They’ll really give you a sense of how weight can change timing and spacing. Don’t forget to study reference footage.
Now go to the Playblasts Lab and make a video of your animation!