
INTRODUCTION
Sometimes, we want to see what our scene looks like without having to render. You (probably) haven’t rendered using Renderman or any of the other renders yet, but rendering can take anywhere from 3 minutes a frame (that’s fast) to 20+ minutes a frame. We expect your shorts to take about 5-7 minutes per frame but sometimes, we want immediate feedback. That’s what playblasts are for.
Maya also doesn’t always play back your animation at a full 24 fps, but watching a playblast in a video player will. You can see Maya’s playblack speed by turning on Frame Rate on the HUD. It’s under Display >> Heads Up Display >> Frame Rate.
RENDERS VERSUS PLAYBLASTS
Renders calculate how light reacts with the shaders and objects in your scene, which is why they take so long. Playblasts, however, essentially take a screenshot of your viewport at every frame and spits out a video. Renders will ignore things like joints or nurbs but playblasts show everything. I suggest hiding what you don’t need to see in a layer so that you can better critique your playblast.
CREATING PLAYBLSTS
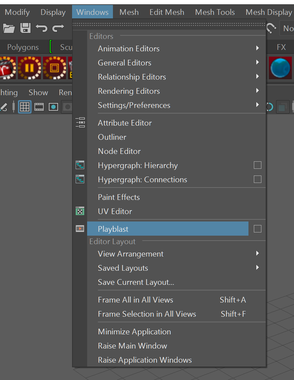
First, go to Windows >> Playblasts >> option box
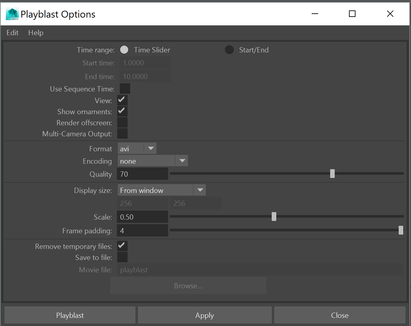
I’ll go over a couple of the options.
For Time Range:
If you select “Time Slider”, the playblast will include whatever frames are visible in your timeline.
If you select “Start/End”, you can more precisely control which frames will be playblasted. I suggest you use this option.
For Format:
Your default Format might be different for Mac and Windows users. Our goal is to export as a .mov file because they are relatively small in size, have good quality, and clearly show individual frames.
Mac: As long as your format is set to avfoundation, and you get a good quality, small-sized .mov file, you’re good to go!
Windows: By default, your format may be set to avi. Avi files are unnecessarily large for playblasts. Change Format to qt. You may have to download Quicktime here for this option to show up: https://support.apple.com/downloads/quicktime
For Encoding, I recommend H.264 since it’s a popular standard, but you can good results with other encoders as well.
For Display size:
“From Window” will take a screenshot of exactly what is happening in your viewport
”From Render Settings” will take whatever you have in your Render Settings, which I go over in the next section.
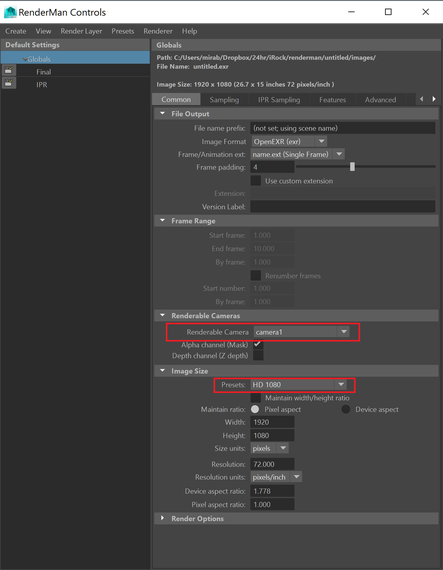
The size of your playblast video must be specified in Render Settings as well.
Make sure you have “Save to file” checked! Otherwise, your playblast will only pop up in your default video player but disappear once you quit.
Quick Preview of Render Settings
We’ll talk more about render settings in a couple of weeks during the rendering and composting lecture but for right now, all you need to know is how to specify the camera and the size of the image.
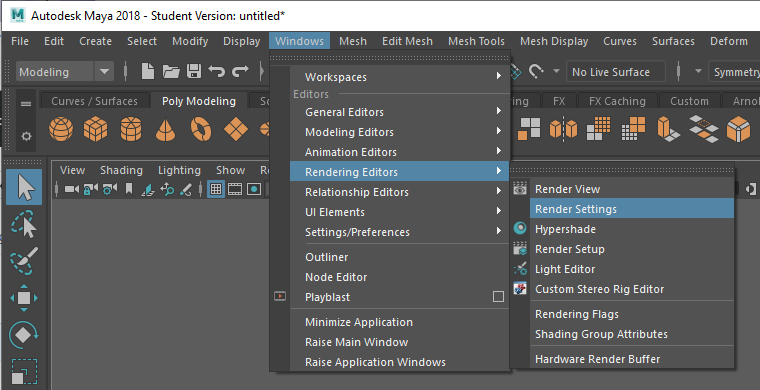
To get to render settings, go to Windows >> Rendering Editors >> Render Settings.
Now set “Renderable Camera” to whatever camera you need (camera1 in this case). Here, I have Image Size>>Presets set to HD1080 but HD720 is fine for playblasts.
There’s still one more option to change. If we tried to playblast now, all our joints and controllers will show up. Let’s make sure we hide those, so we can get a better view of our animation.
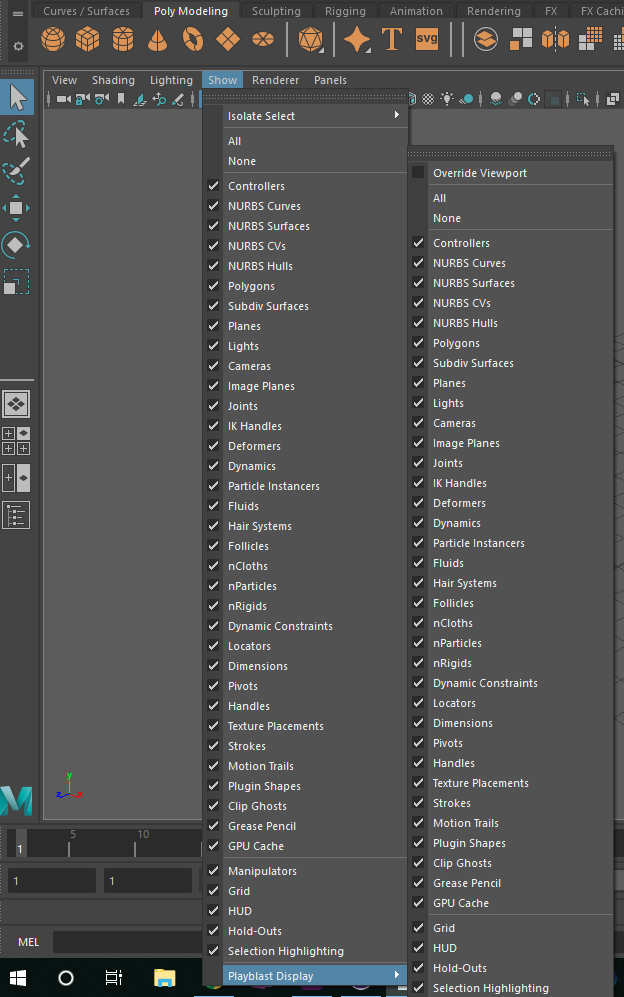
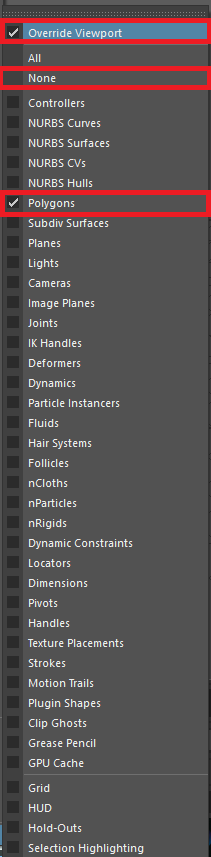
At the top of your viewport, go to Show >> Playblast Display. Check Override Viewport, so you can have different settings specific to playblasts. Press None to quickly uncheck everything you don’t want. Check Polygons, so that your models will be visible. You can also check HUD if you want to see the name of the camera you’re using, but I usually uncheck it.
That’s it for playblast settings! Now you’re all set to create the playblast by going to Windows>>Playblast or click Playblast in the option box. You can also right click the Time Slider to playblast.