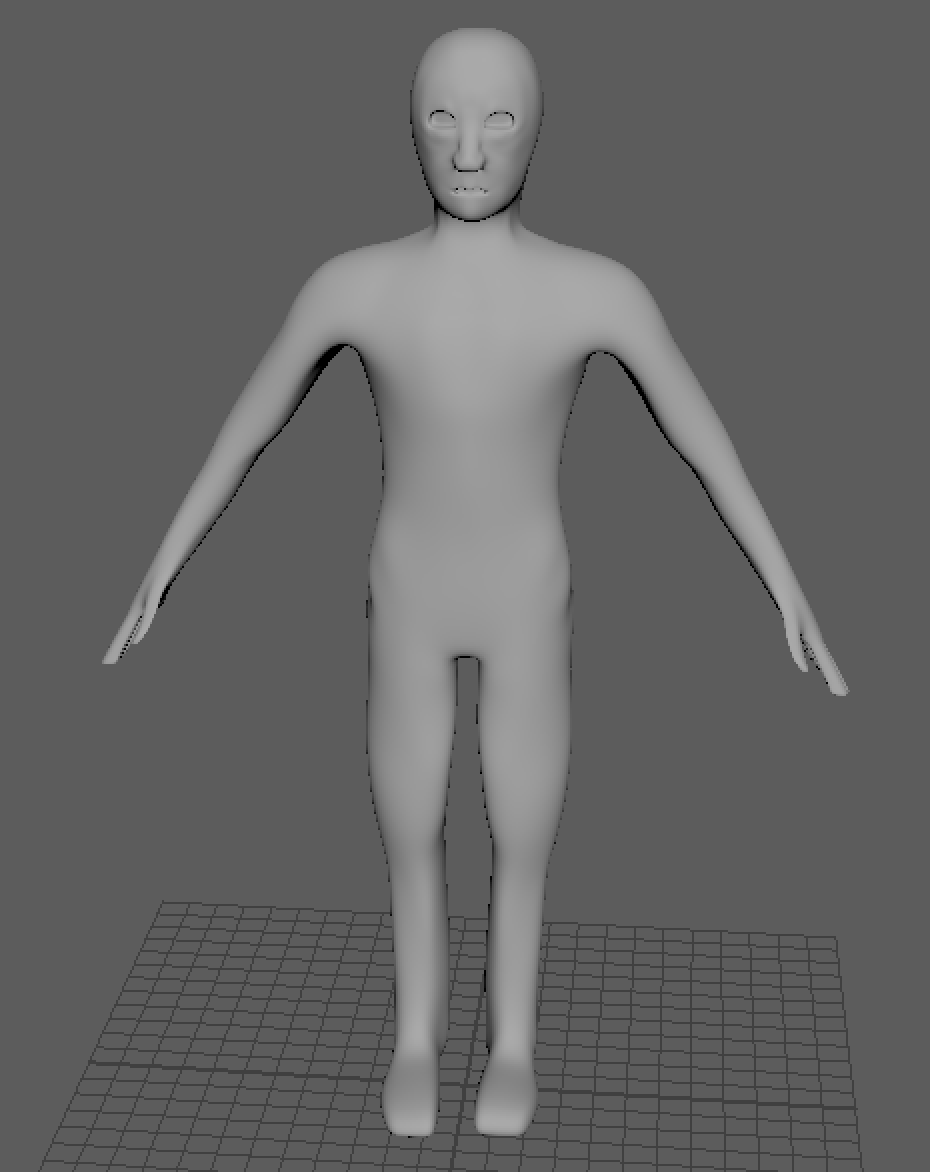
INTRODUCTION
Although modeling a human character might seem like a big challenge at first, it is an incredibly rewarding experience and essential knowledge to have as advanced 3D Modelers! In this lab, we will be breaking down the general workflow, important concepts, and useful tools that all go into organic modeling.
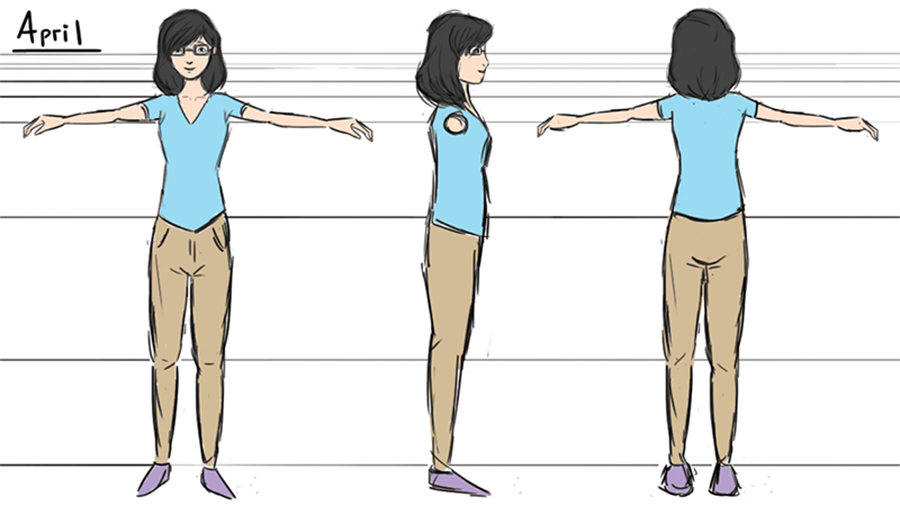
Keep in mind that for this lab, we will be modeling a specific character we created (her name is April), but we ask that you follow this lab with your OWN character in mind. Most likely, this will be a character that you’ll be using in your short, but you are welcome to come up with another design if you’d like. (Original characters/concepts are preferred so that you are challenged to create a human model that does not already exist)
The point of this lab is to teach you the general concepts and workflow of organic modeling, therefore don’t worry about following every single step EXACTLY as we do it. Rather, try to consider the logic of what we do, and apply a similar logic to your own characters to get the end result you want.
GENERAL WORKFLOW
Before we go into the actual modeling, we want to review the general workflow or process that goes into modeling human characters.
There are many different workflows for creating human models, all of which are equally effective, but the workflow that we will be teaching looks something like this:
CHARACTER DESIGN/CONCEPTS -> SCULPTING -> RETOPOLOGY -> ADDING DETAILS
To explain in more detail: first we start with our character designs and sheets, next we create an initial sculpt of our character which serves as a base for our model, then we retopologize the model so that we make sure to maintain good edge flow and topology, and lastly, we insert the important details back into our model.
There are many powerful programs that are made specifically for the sculpting phase of modeling and allow artists to create HIGHLY detailed sculpts. However, since we primarily use Maya in this class, we will be doing this entire process in Maya. If you are interested in seriously going into character modeling in the future, then we recommend that you look into programs like Zbrush or Mudbox for organic sculpting, however in this class, we’ve seen many students create impressive models entirely with Maya.
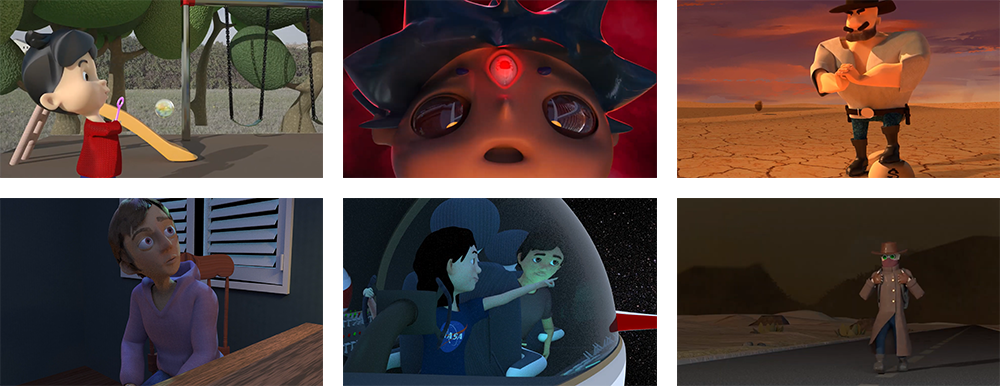
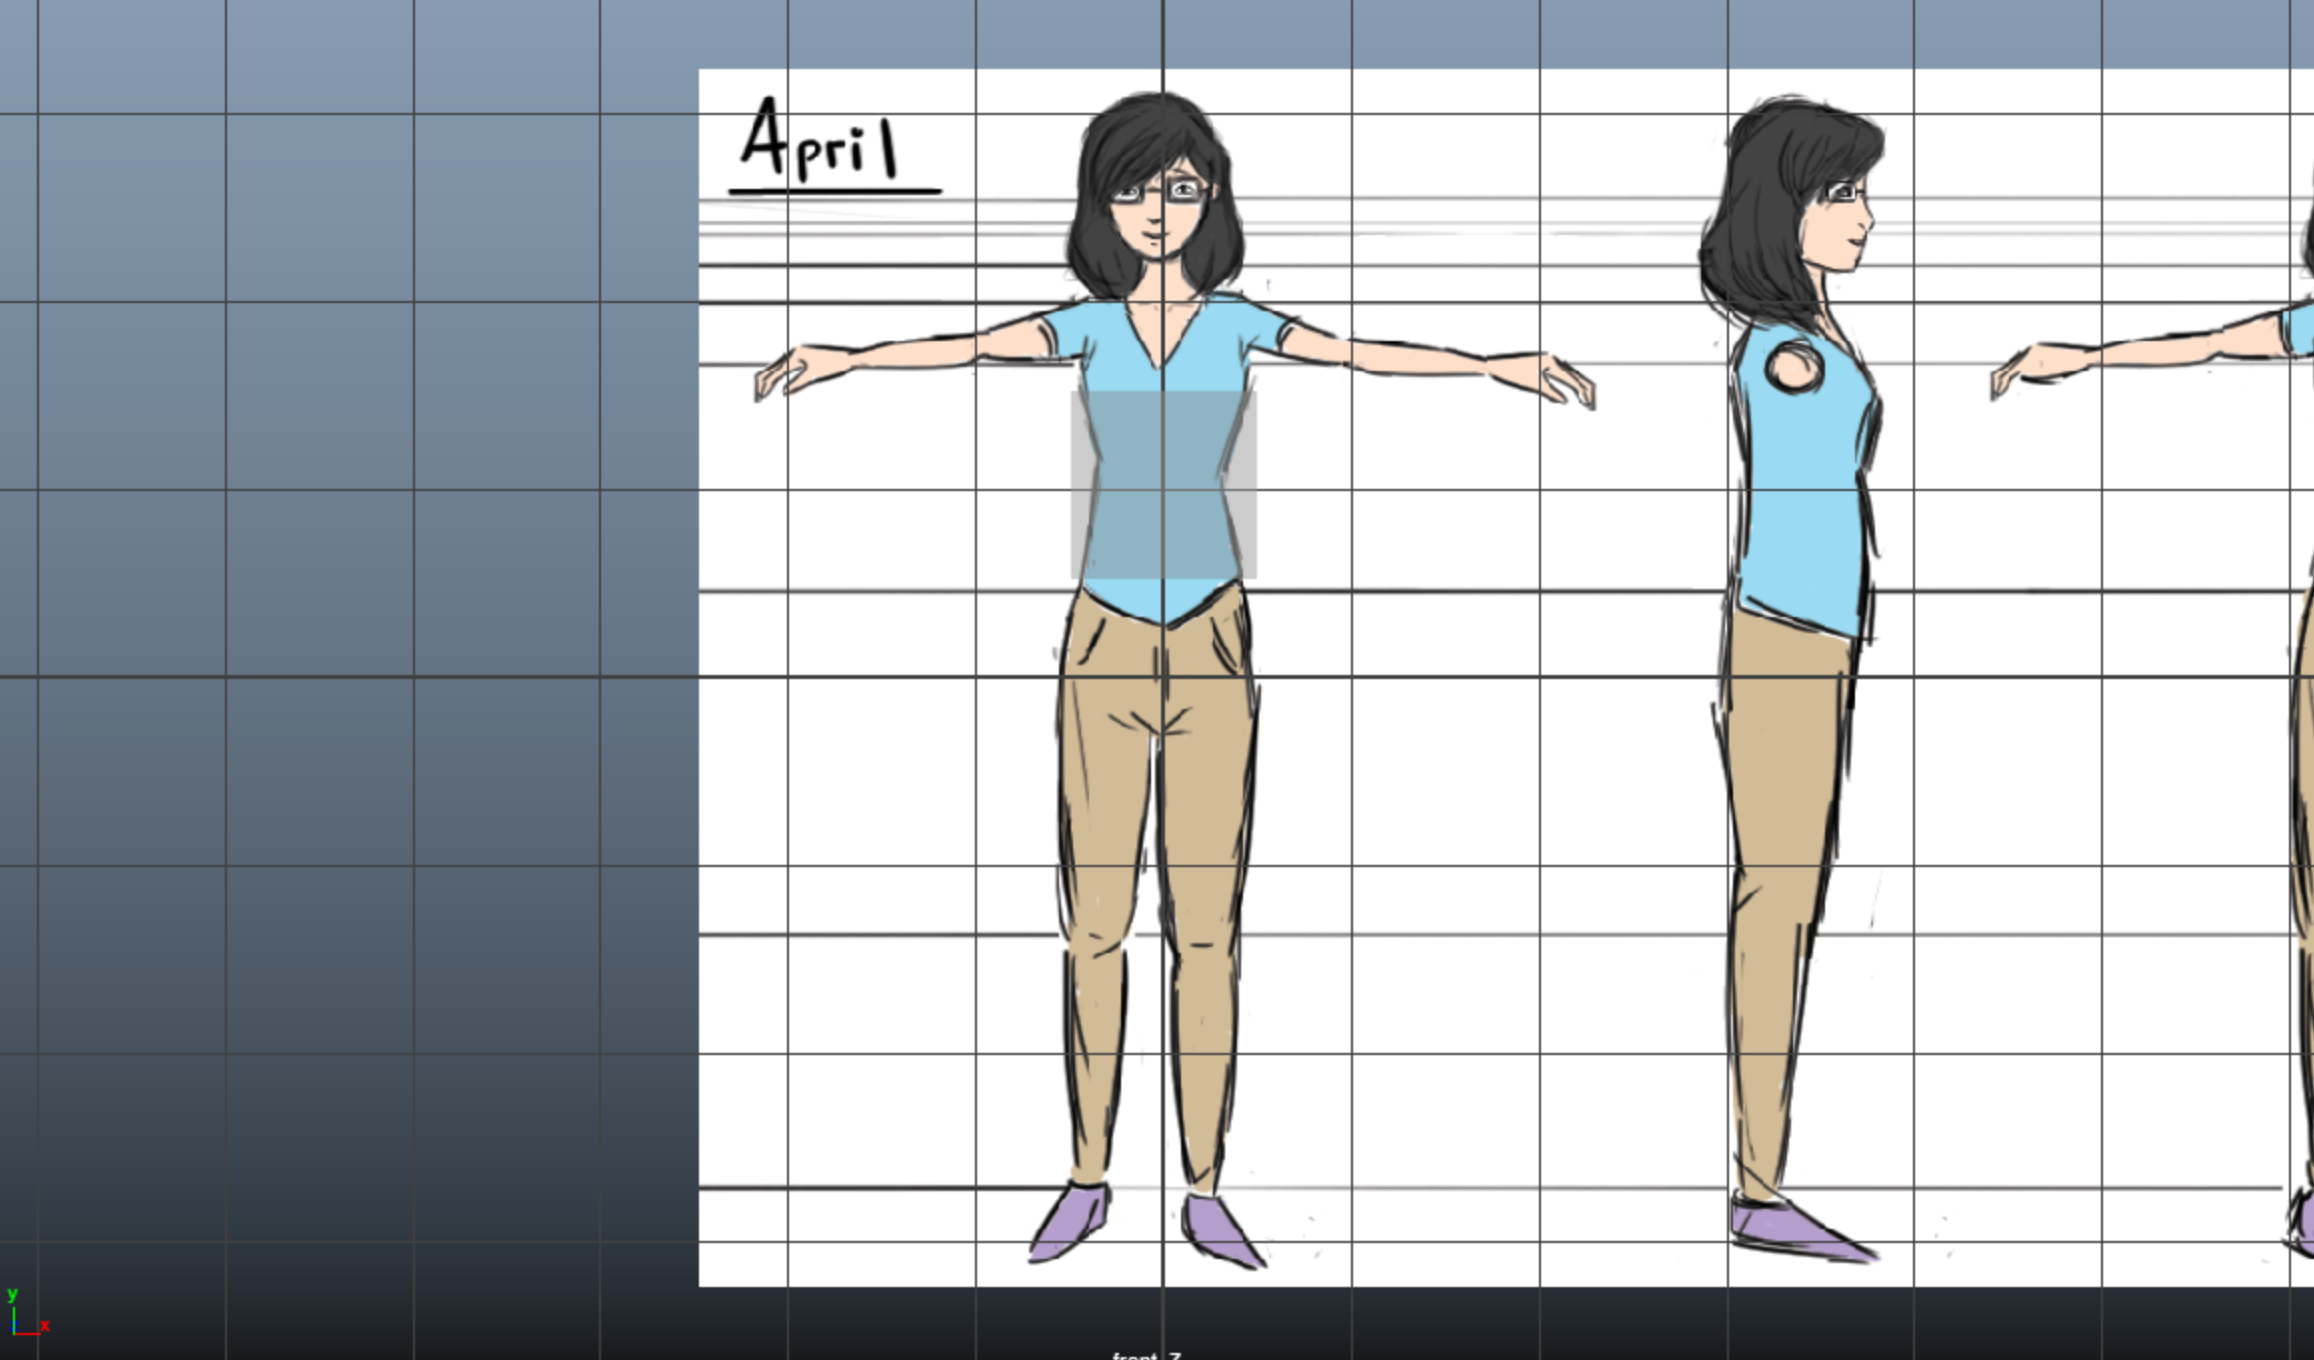
At this point, we already have our character designs ready! Below is my character design for April, which is the character we will be modeling in this lab.
We are ready to go into the sculpting phase of modeling!
SCULPTING
Once again, as we walk through these steps remember that you don’t have to follow exactly what I do; as long as you follow the general process you will be fine.
The first thing we need to do is properly set up our scene. I am going to create two image planes perpendicular to each other and import my character sheets in like so:
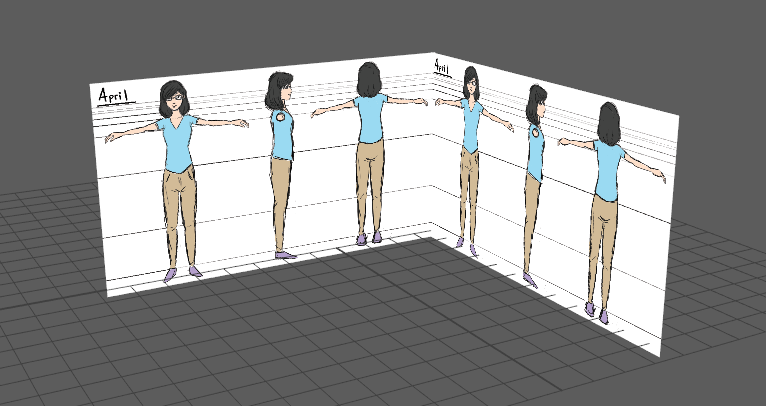
Now that our scene is set up we are ready to begin sculpting.
We are going to start with a basic sphere. Give yourself enough edge loops so that you have a decent amount of resolution to work with.
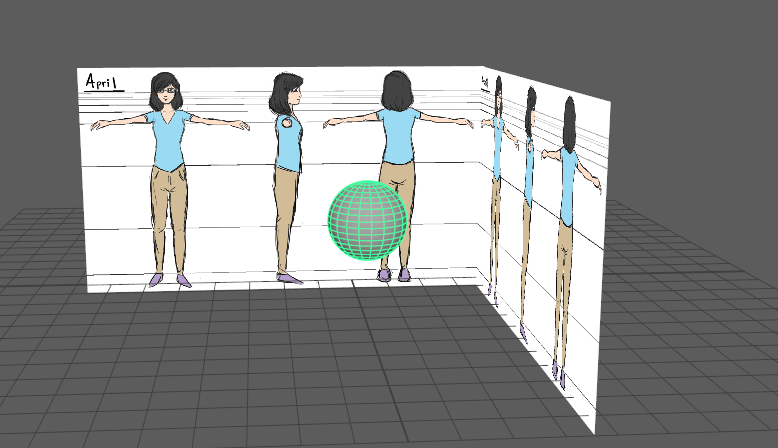
Once you have created your sphere, you want to make sure to scale it down to properly match your character sheets.
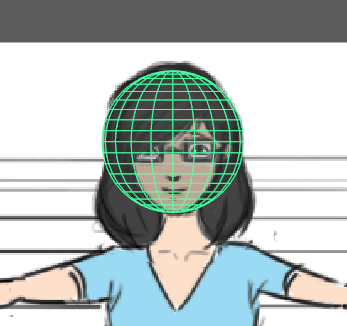
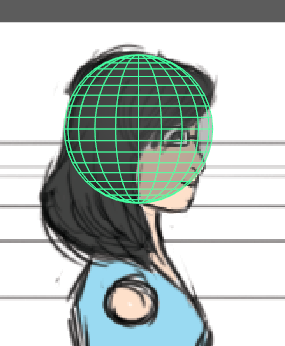
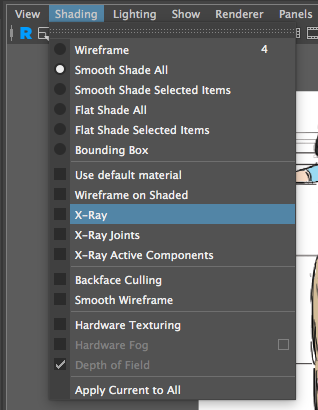
If you haven’t already, at this point I would recommend turning on X-Ray shading to be able to see through your model. I would also recommend turning Symmetry On. This is very important to ensure that your model is SYMMETRICAL and maintains good topology on both sides.
Now, we are going to roughly shape our sphere into the head and neck of our human. You can do this however you like, but I find that the easiest way to do this is with the Sculpting tools. Here is a brief explanation of what the first four tools in the palette do.
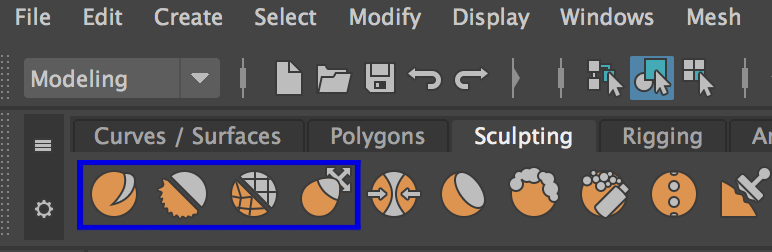
SCULPT
Pulls up on the surface, or pushes in when inverted. This is very useful for defining shape in your character. Make sure to adjust the Strength of this tool by double-clicking it to open up the tool options as the default strength for this tool tends to be too high for most models.
SMOOTH
Smooth will make the topology of your mesh spread out more evenly as you draw over vertices. You can access the Smooth tool while you are using any sculpting tool by holding down the Shift key.
RELAX
Relax is very similar to smooth, but it will attempt to retain the shape of your model while spreading out your vertices.
GRAB
Grab lets you move whatever vertices fall underneath your brush. If you use this tool with a big radius, you can adjust the size and proportions of your mesh quickly. This is the tool I recommend using to block out your shape later.
There are way more tools than just these 4, and I suggest you experiment with them, but these are the most important ones and are pretty much all you need to start making your character.
Now without caring about the current topology, I am going to push this sphere into a really really rough shape of the human head by using various sculpting tools. I want to emphasize that you shouldn’t spend too long trying to get this perfect as this won’t be our final mesh. Our sculpt will inevitably look weird and blobby and that is totally fine since we will only be using it as a reference in the future. This will make more sense once we reach the Retopology phase of modeling.
First, I’m going to use the grab tool to sculpt the sphere into the rough face shape of April. Remember to refer to your character sheets for this step!
If your grab tool radius is too large remember that you can change it by double-clicking on the tool icon and adjusting the size parameter. You can also hold down b and left-click and drag to adjust the brush size.
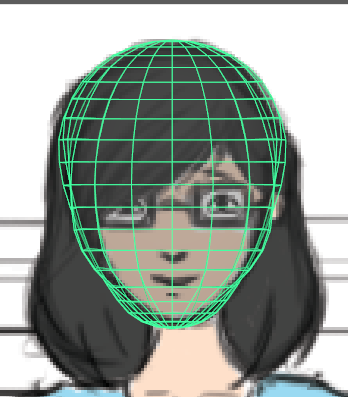
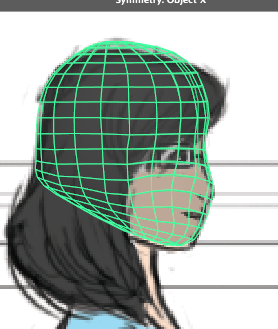
Next, we are going to sculpt a basic nose shape. For this, I used a combination of the grab tool as well as moving individual edges and vertices.
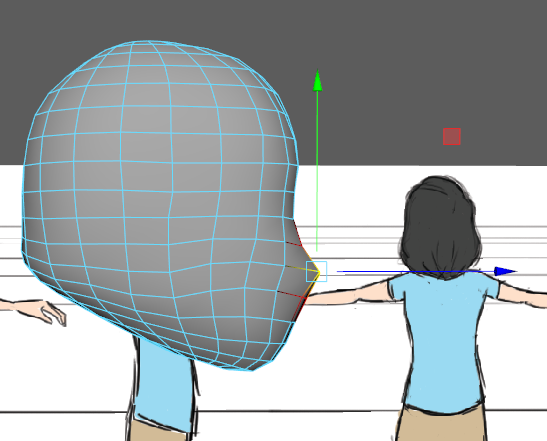
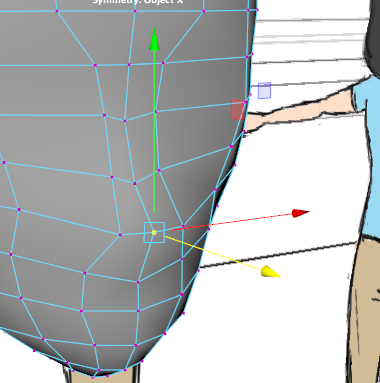
Now we are going to include some really rough indents where the eyes should be. Once again, I used a combination of the sculpting tools and move tool with soft select on to push a very very basic eye socket shape into our sphere. Remember to refer back to your character sheets to get an idea of where you want to put the eye shape.
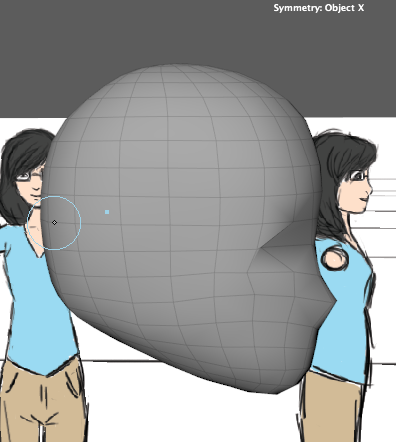
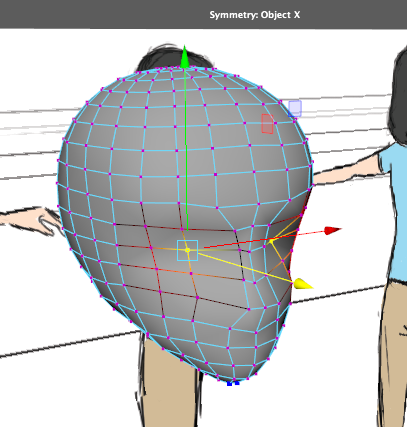
Finally, we want to sculpt a basic neck and chin shape for April. The easiest way to do that is to select the ring of faces on the bottom of the sphere and extrude them downwards
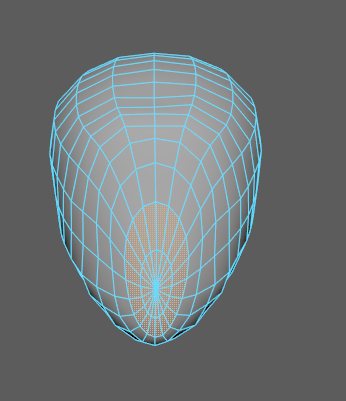
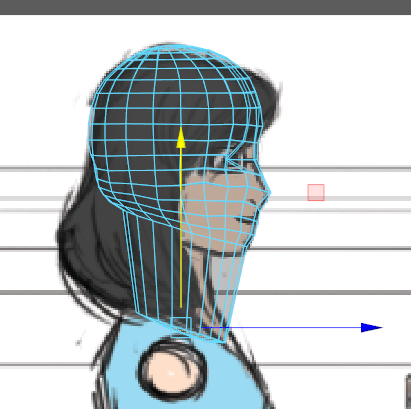
At this point, you might need to add in a few edge loops to be able to sculpt on the shape you just extruded down.
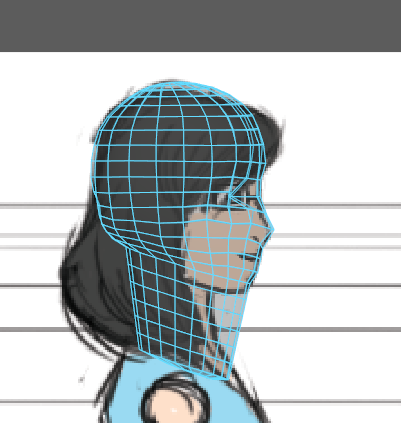
Now we can more easily sculpt this shape into a neck using the sculpting tools. This also creates a basic chin shape for April.
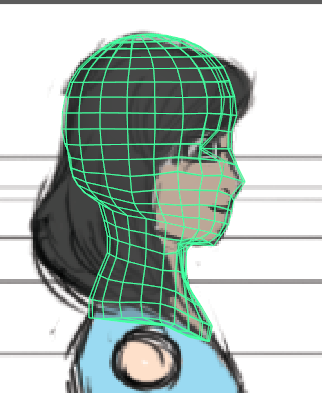
You want to make sure that you are switching between front and side view to ensure that your sculpt looks the way you want.
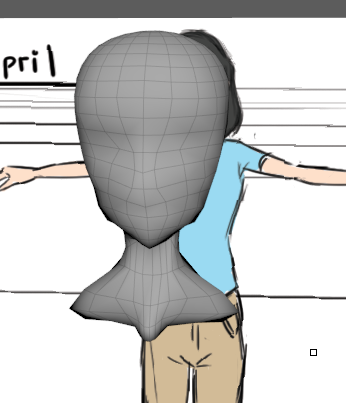
After some tweaks here and there, this is what my rough sculpt of April looks like. REMEMBER THAT THIS SCULPT DOES NOT HAVE TO LOOK PERFECT so don’t spend too much time making it look pretty.
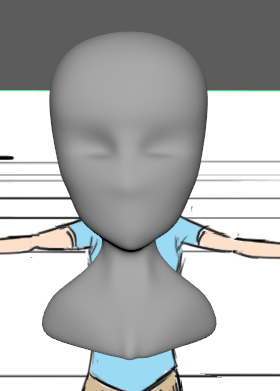
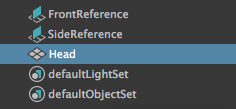
At this point, if you have not already, make sure that you rename your sculpt in your outliner.
QUAD DRAW
At this point, we’ve completed the Sculpting stage of the modeling process, and now we’re going to move onto the Retopology Phase.
Notice that the topology of our sculpted mesh is quite bad; if we actually tried to use this mesh for rigging or animation it would be a disaster. The way to fix this is to RETOPOLOGIZE our model, or essentially, create a new mesh with clean topology around the sculpt we just made.
There are a few goals to keep in mind when we retopologize a model: one, is to ensure that our model has GOOD TOPOLOGY, two is to ensure that the topology of our model is SYMMETRICAL, and three, is to ensure that our model not only has good edge flow, but that it has a SPECIFIC EDGE FLOW that makes rigging and animating much easier.
In the example image below, we can see that the retopologized version of this model has specific rings of edges in various regions of the face (i.e. the ring of edges around her eyes or her mouth). This is the specific kind of edge flow that we want our model to have and thankfully, retopologizing our model allows us to do that.
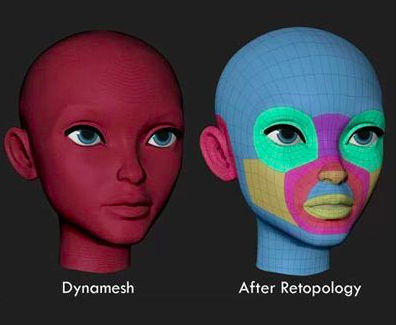
Don’t worry if these regions of edges feel confusing right now, we will go over the important ones as we retopologize our model.
To get a more thorough explanation of good edge flow and the theory behind good topology, feel free to check out the website linked below.
http://hippydrome.com/MeshDesignFace.html
Let’s get started!
We are mainly going to use a tool called Quad Draw that is super helpful to ensure that our human character has the proper topology and edge flow for animation.
Quad Draw is a really cool feature in Maya that lets you use another model as a reference to draw your new topology on. This is a commonly used industry practice that allows artists to create their models without having to focus on the technical details of edge flow and topology until the end after all the creative parts are out of the way!
The first thing we need to do is make sure we let Maya know which mesh we are going to be using as our reference. Select your head sculpt and find the button at the top of the Maya tool shelf that looks like a Magnet that says “Make Live”. Push this button and it should switch from displaying “No Live Surface” to the name of your mesh.


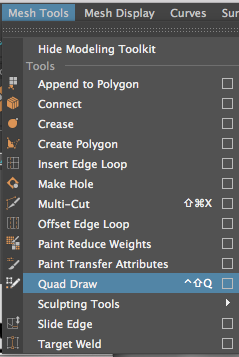
Now, to access the Quad Draw tool, go to Mesh Tools -> Quad Draw.
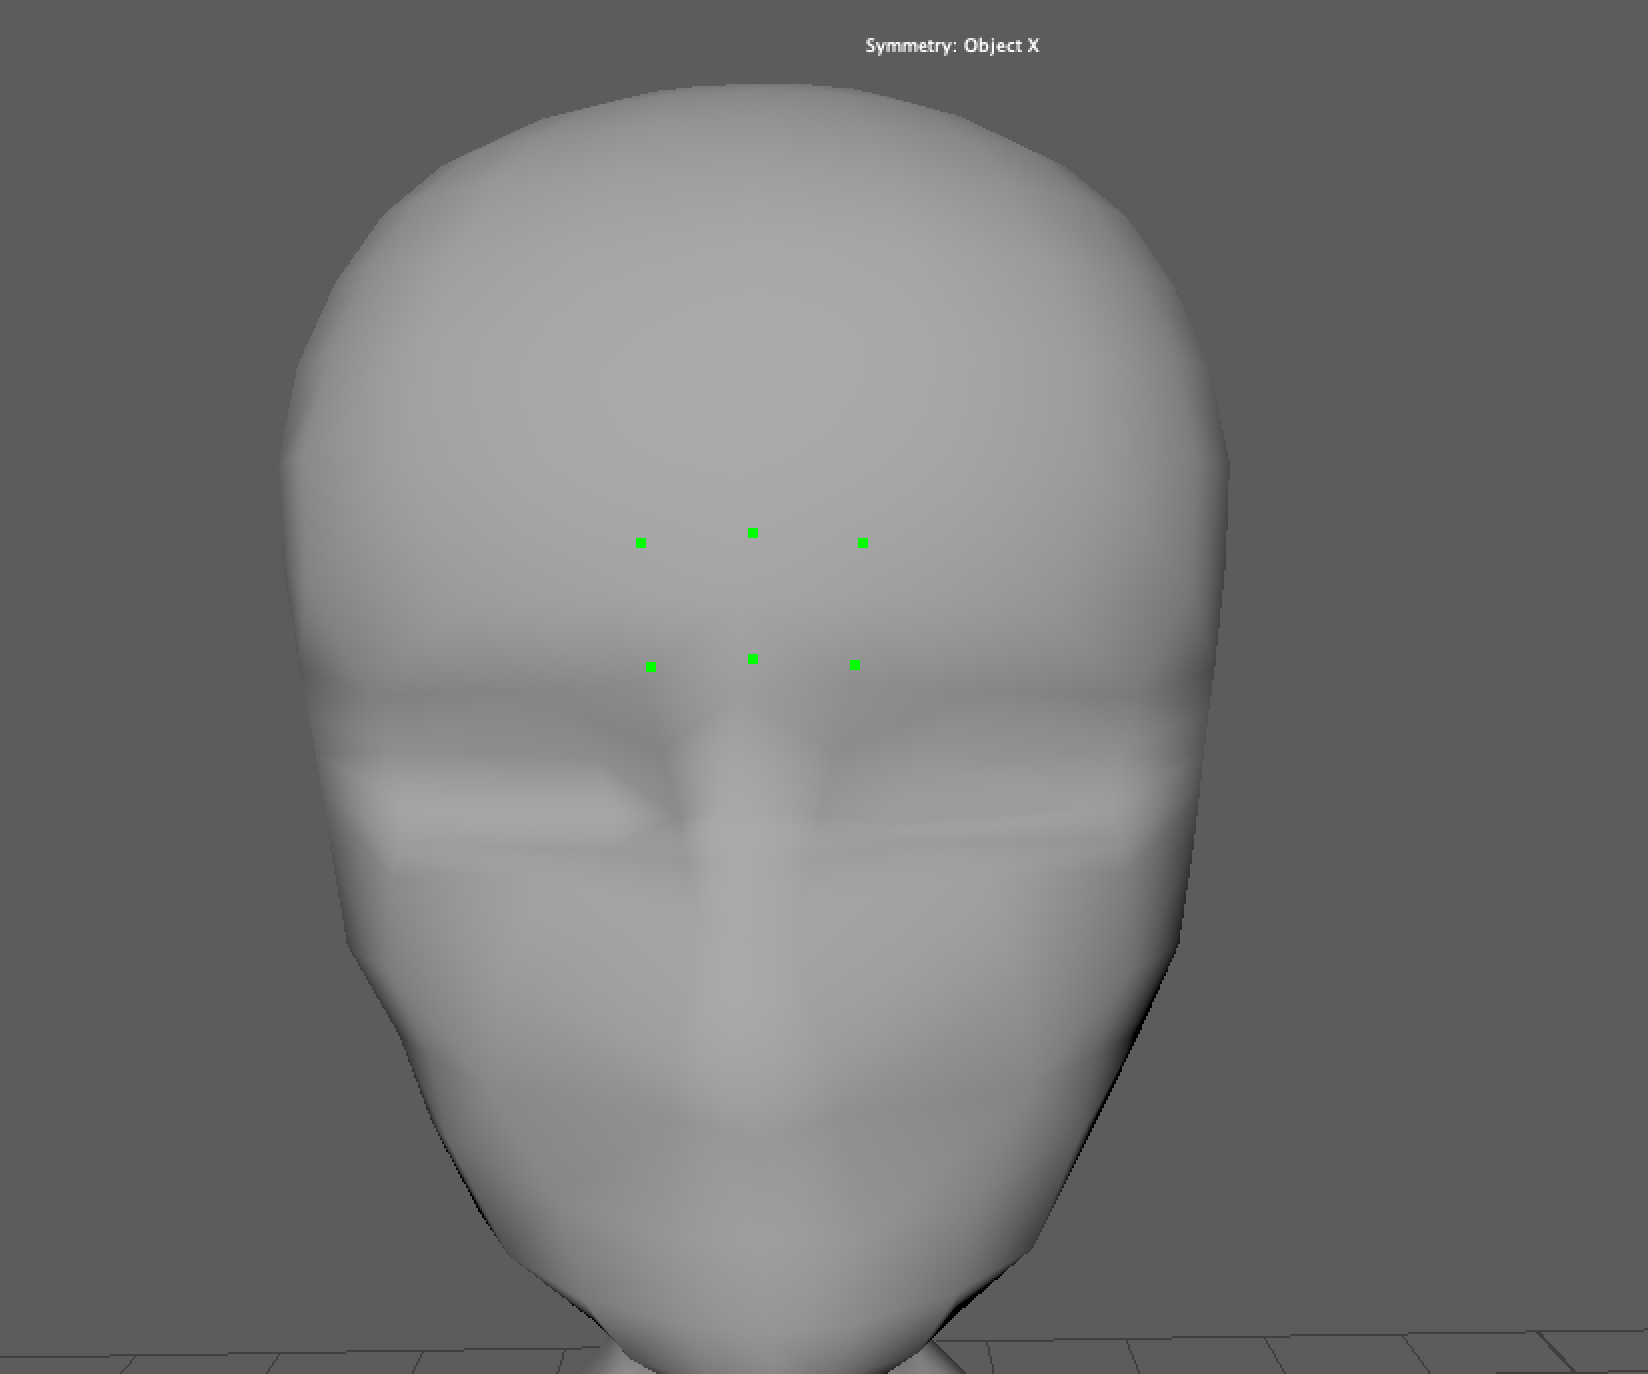
Ok, let’s start by dropping some initial points onto the mesh. With Quad Draw on, if you click anywhere on your mesh, you should see a couple of green dots appear. Remember that your symmetry should be ON at this point so any point you create on one side should appear on the other (unless you create a point in the center of the mesh).
We are going to start at the base of the forehead (right above the nose bridge area). Make a series of points in this area (I made 6 points in my model).
Now for some magic. Hold down the shift key and hover your mouse somewhere between the points you made. You should see a blue square appear. Left-click while holding shift to place this quad between your points and you should get something like this.
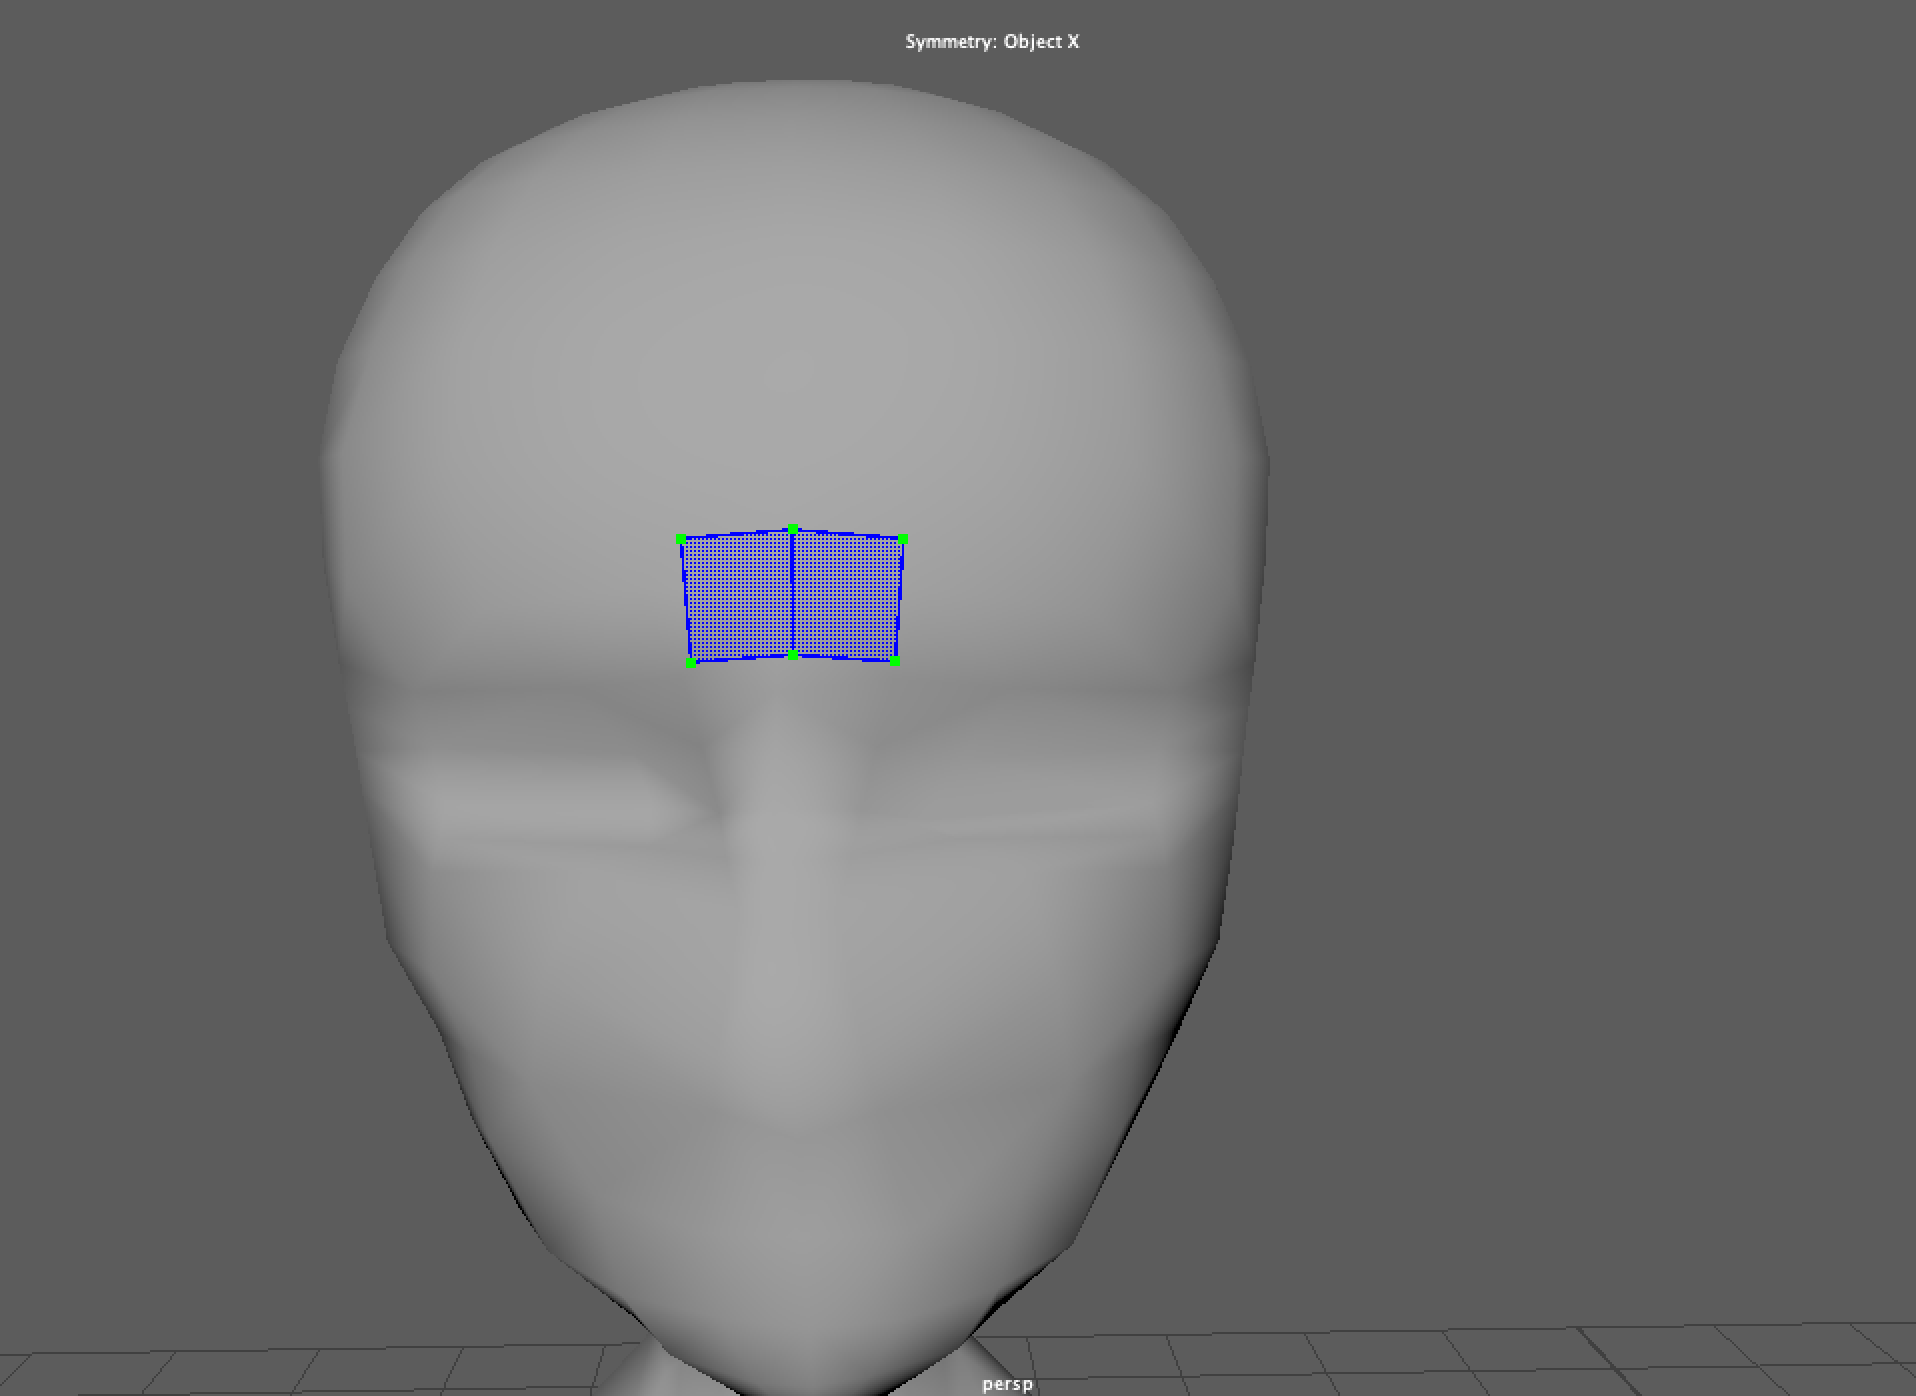
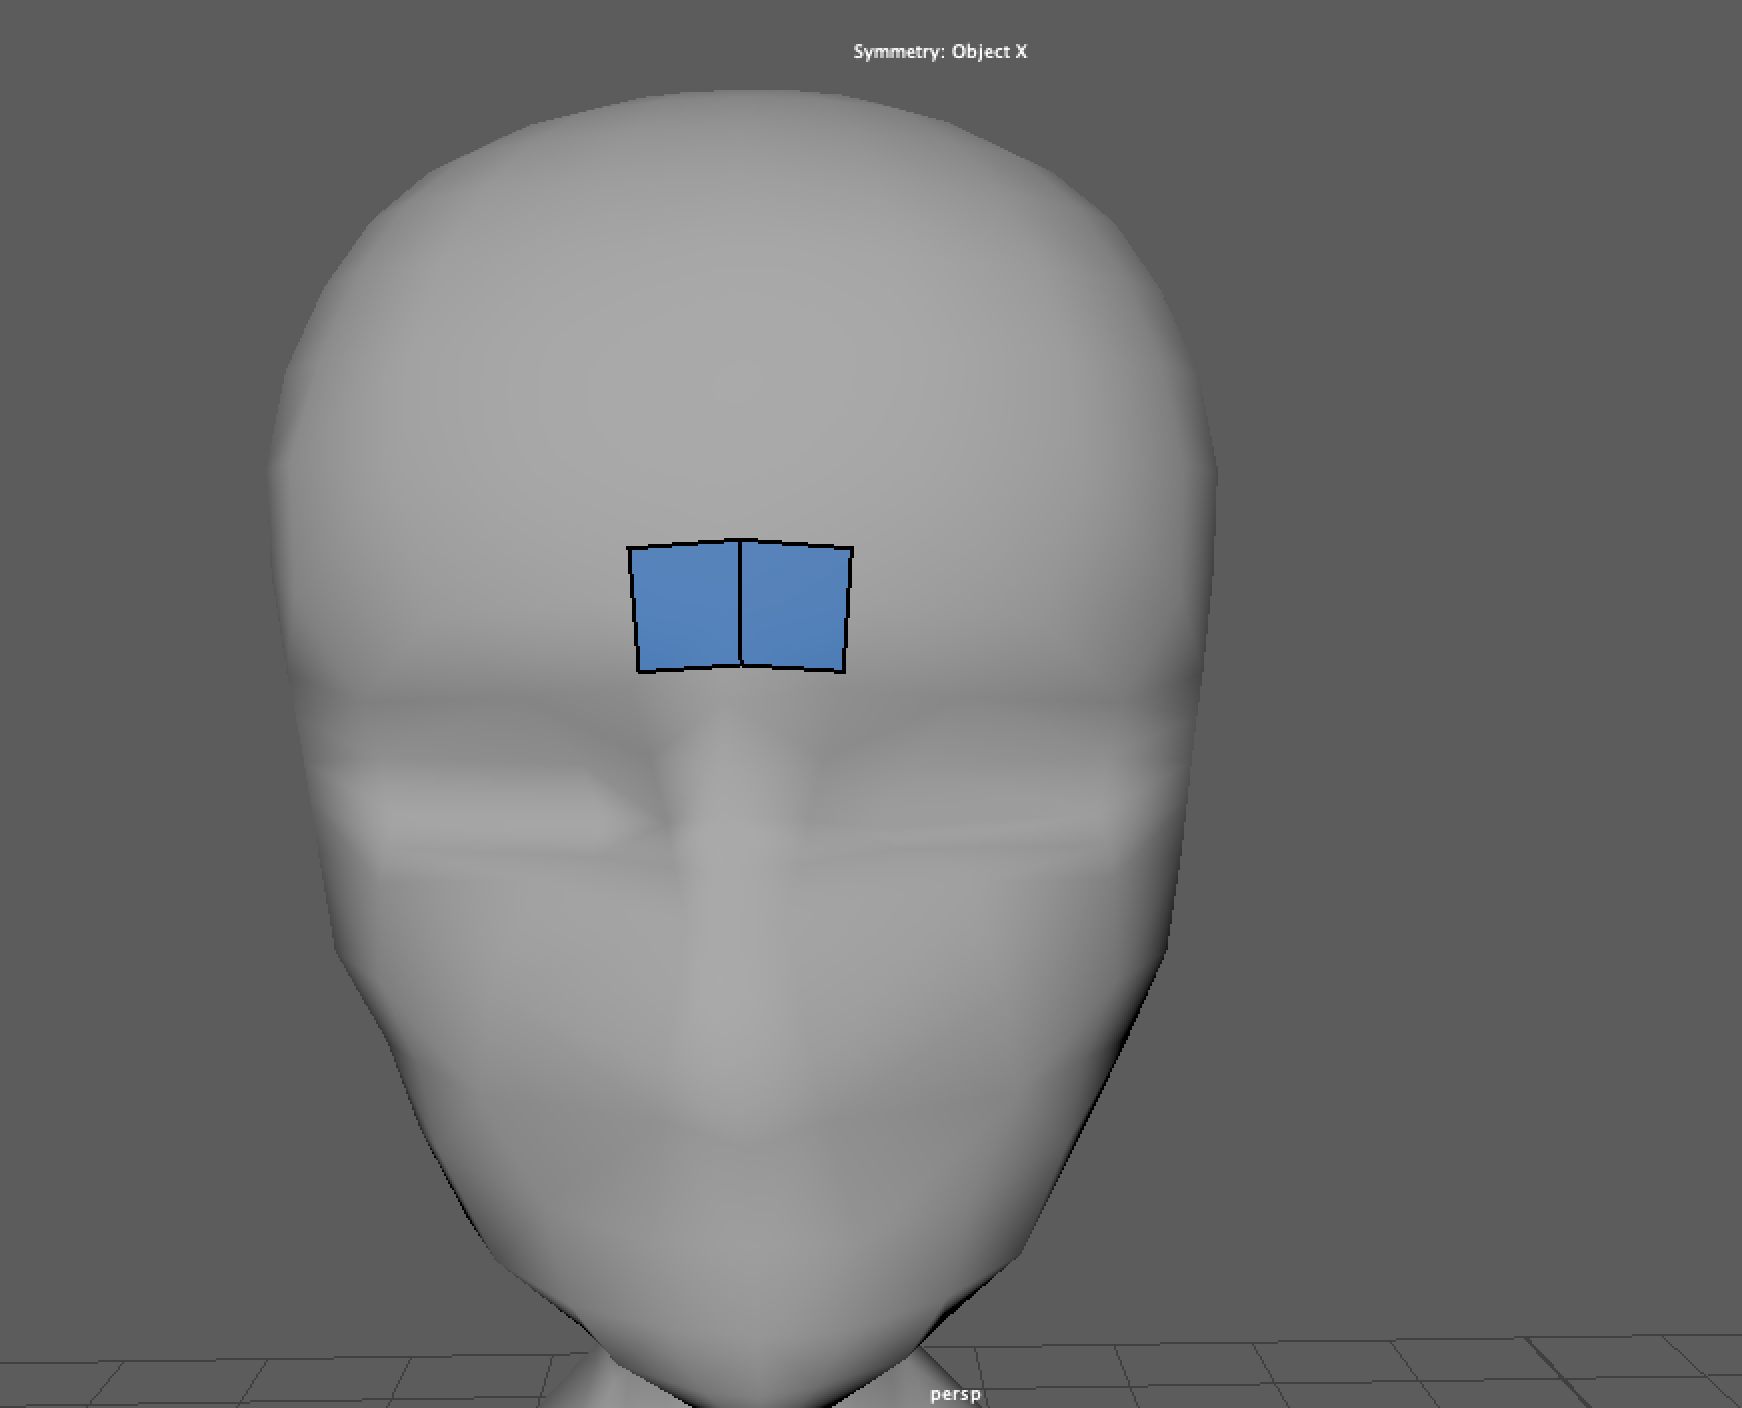
We’ve just created a quad for what will become our brand new, clean mesh of our character. However, as you can imagine, it might become too tedious to have to create a bunch of points and shift/click a many MANY times to create an entire character. Thankfully, Quad Draw has a few incredible shortcuts that will make our lives so much easier.
If you hold down TAB while you hover over an edge of the quad you just made, you should see it highlight green like this:
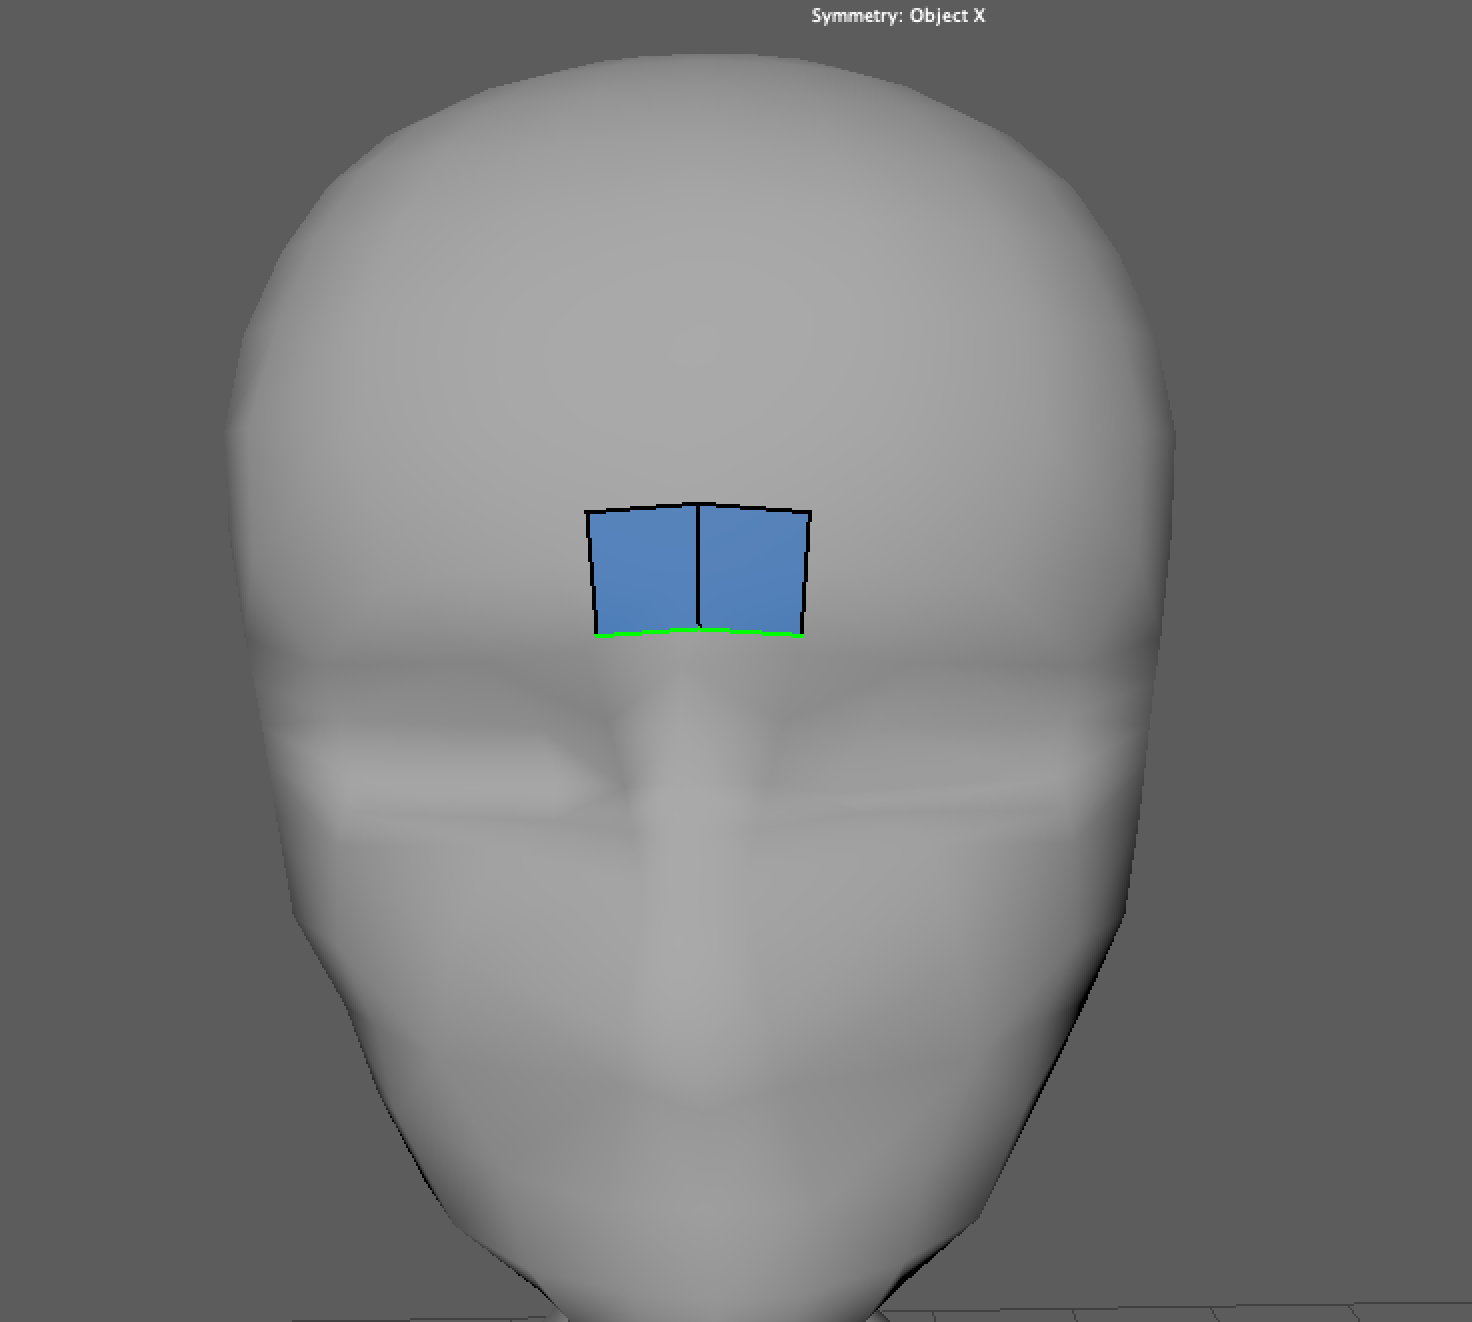
Simply, left-click and drag out that highlighted edge while holding down TAB, and a brand new set of faces will extend down from the existing one.
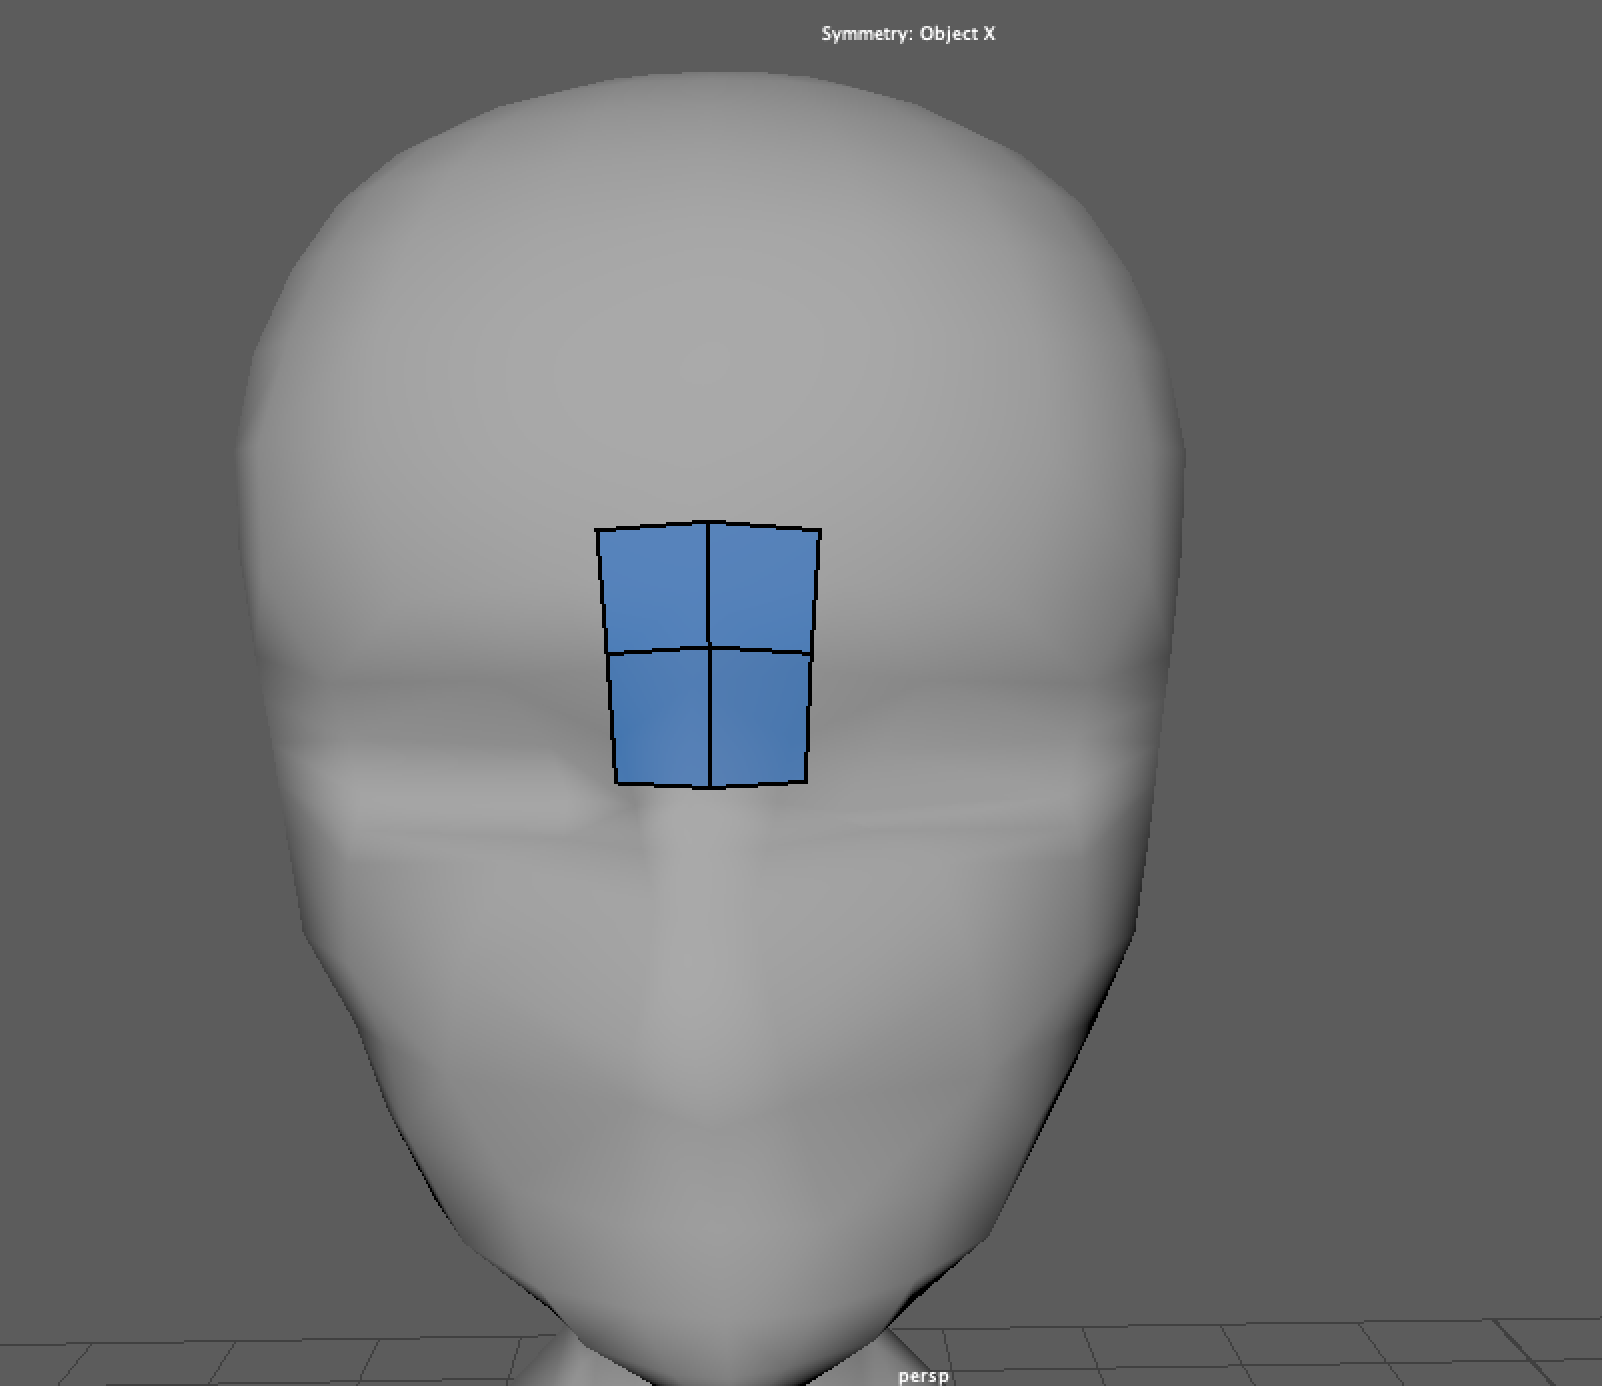
Isn’t that amazing!!? This shortcut will definitely save you LOTS of time so make sure to use it often throughout this lab. (I did not know about this shortcut when I first used Quad Draw and my life was forever changed when I discovered it)
I’m going to use our amazing shortcut to extend a few more squares down the nose bridge and forehead area.
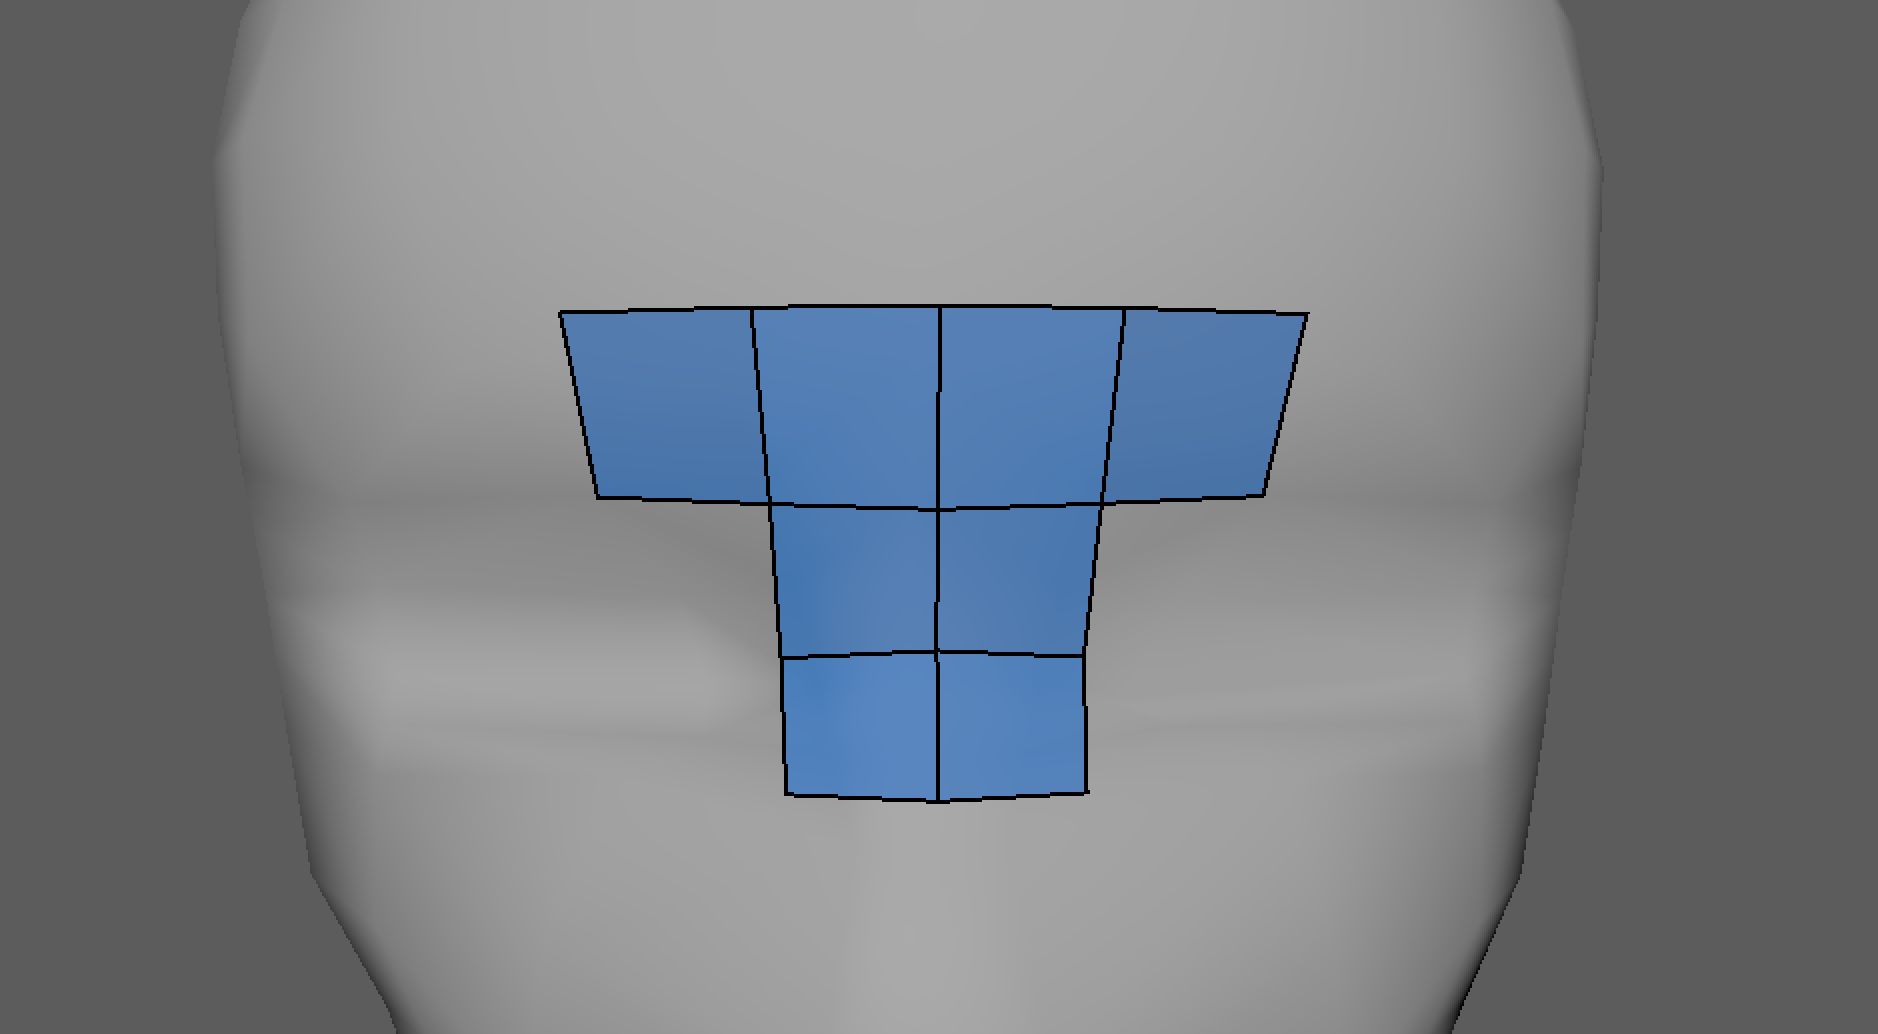
Continue creating more quads until you have a ring of faces going around the eye-to-nose region of the face. It should look something like an eye mask at this point.
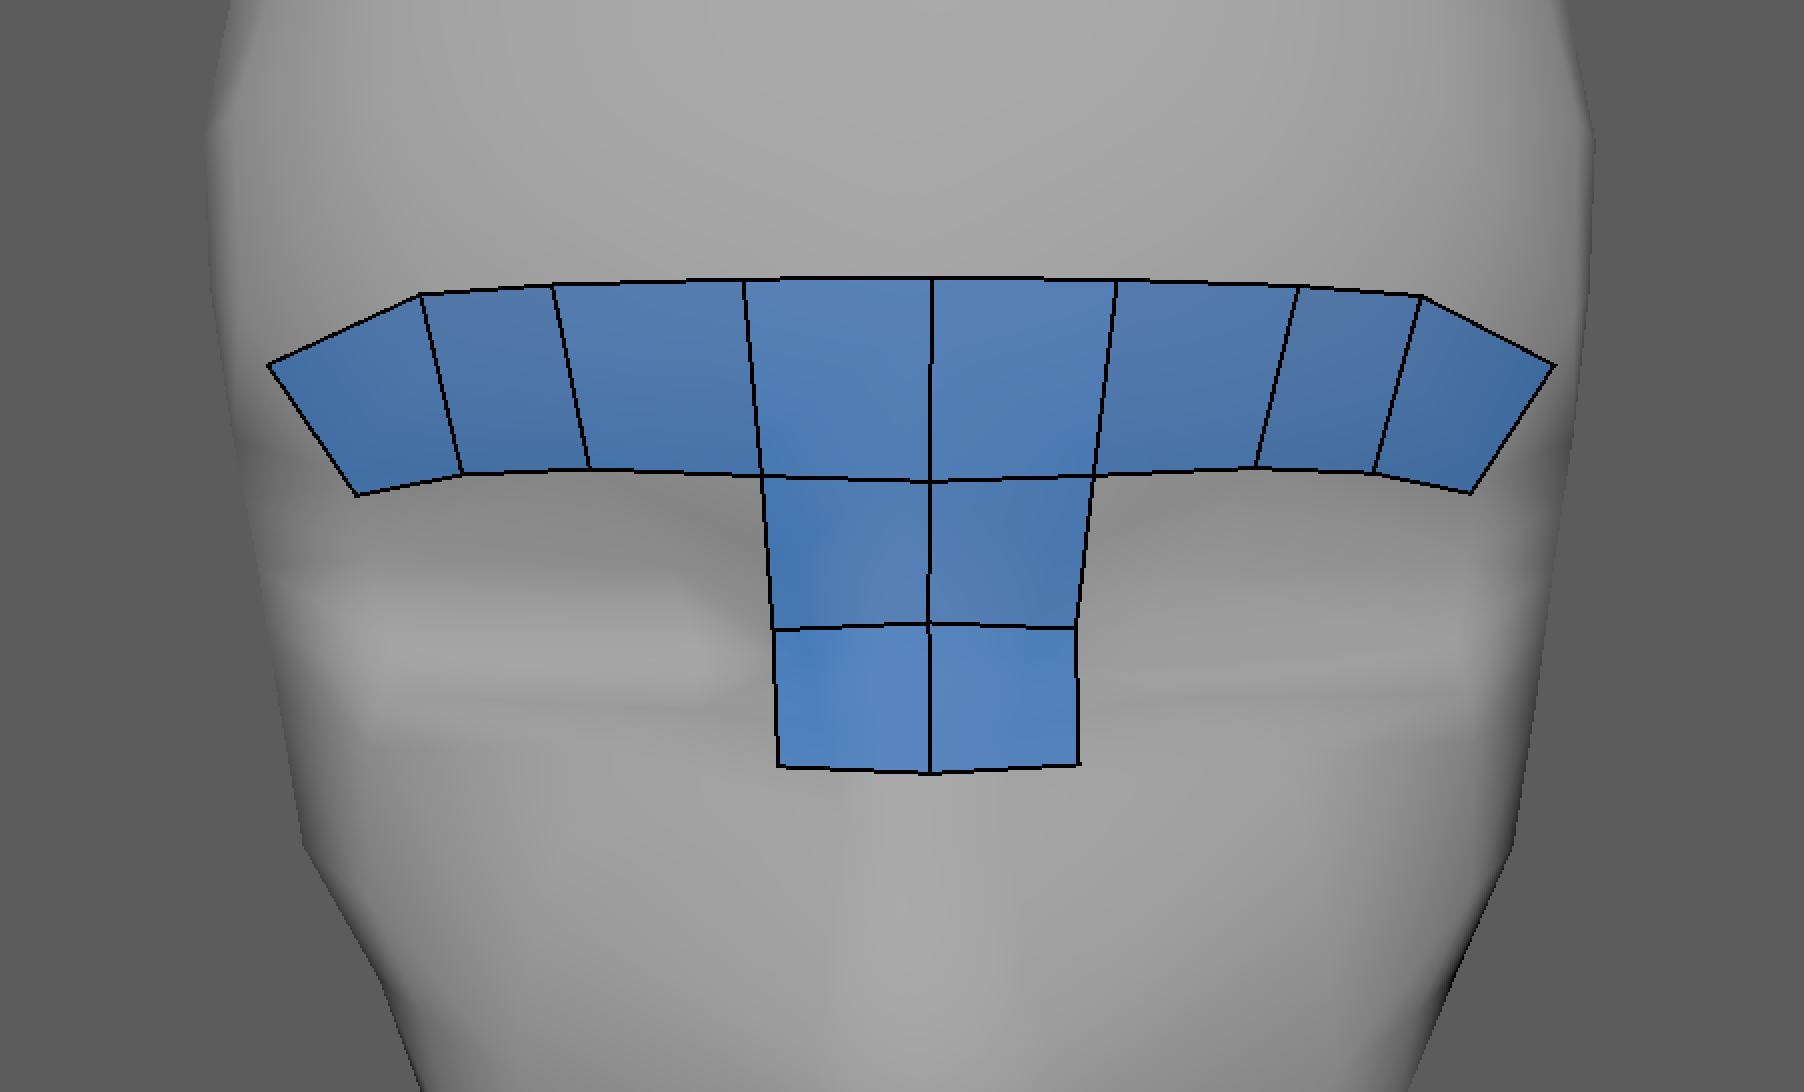
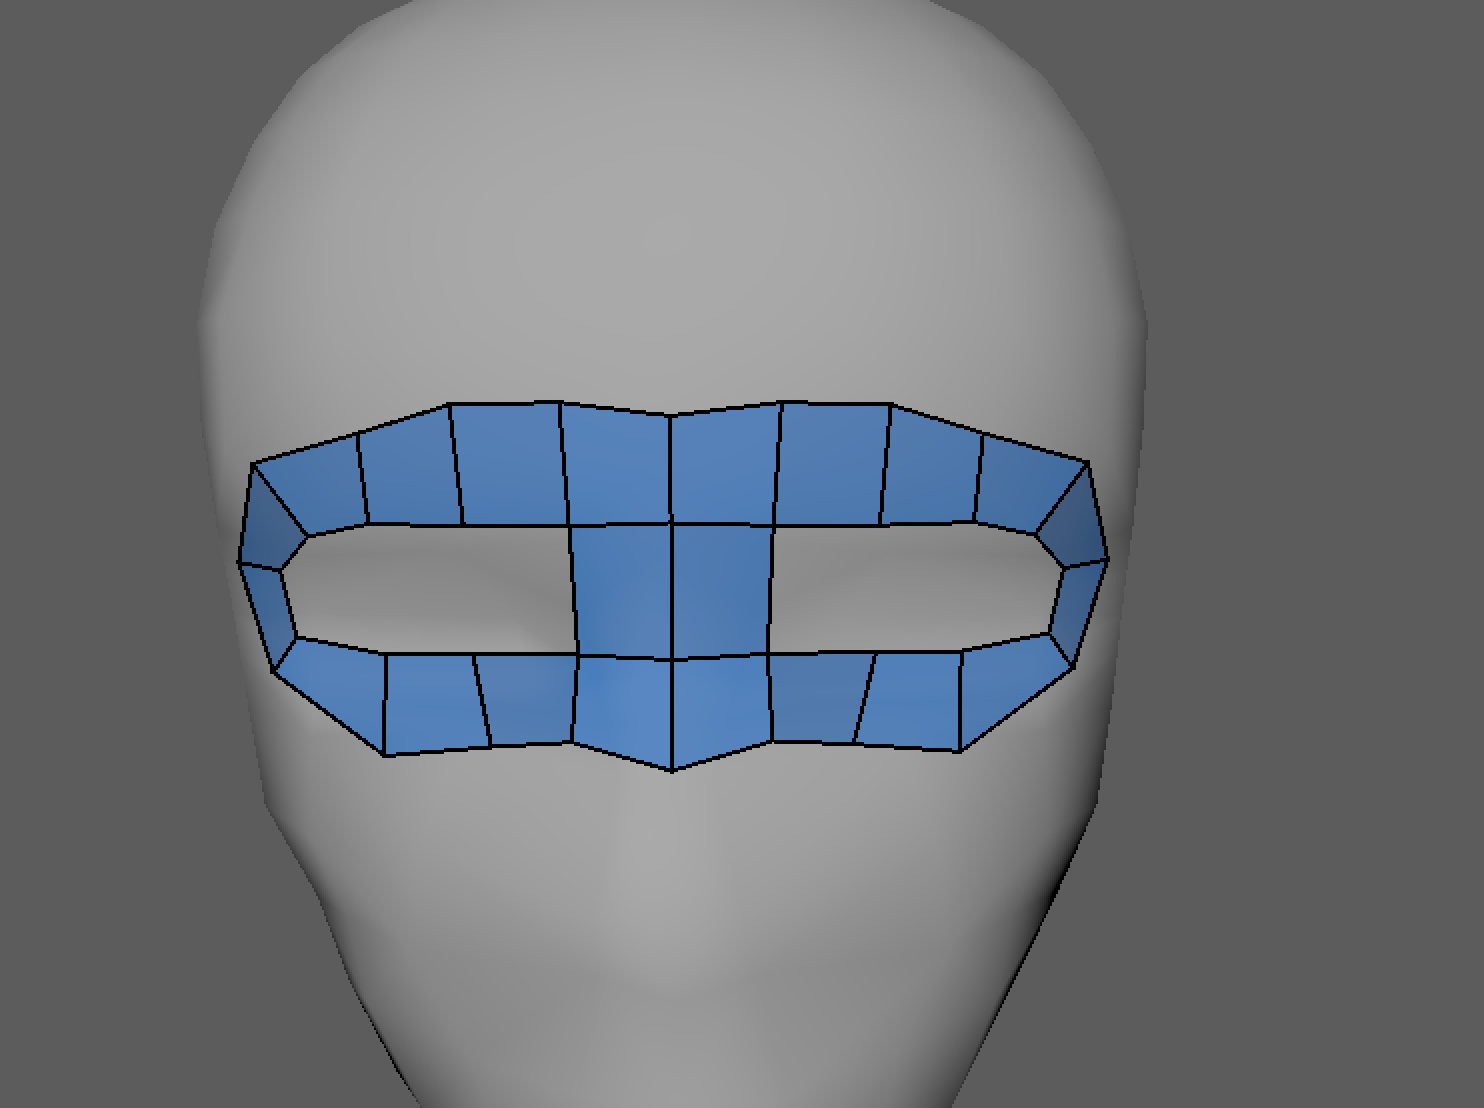
Notice that we have already successfully created the ring of edges that go around the outer eye socket area that appeared in the example image at the top of this section. This is just one of the important regions of the face that we need to consider, but thanks to Quad Draw, we’ve easily ensured that our model has the proper ring of edges in this area.
Right now, since I created my quads somewhat quickly, the vertices and edges of my quads are a bit crooked. This is also something that can be easily fixed, simply hover over an edge or vertex and drag it to adjust it’s position.
There are two tips to keep in mind as we create our quads:
-
create quads that are evenly spaced and sized
-
make your quads LARGER rather than smaller
You can imagine that it would be super annoying to fill up an entire face mesh of quads if you create tiny squares compared to larger squares, so always start big and only add more edges/faces/vertices as you see fit.
After some minor adjustments my eye mask looks something like this:
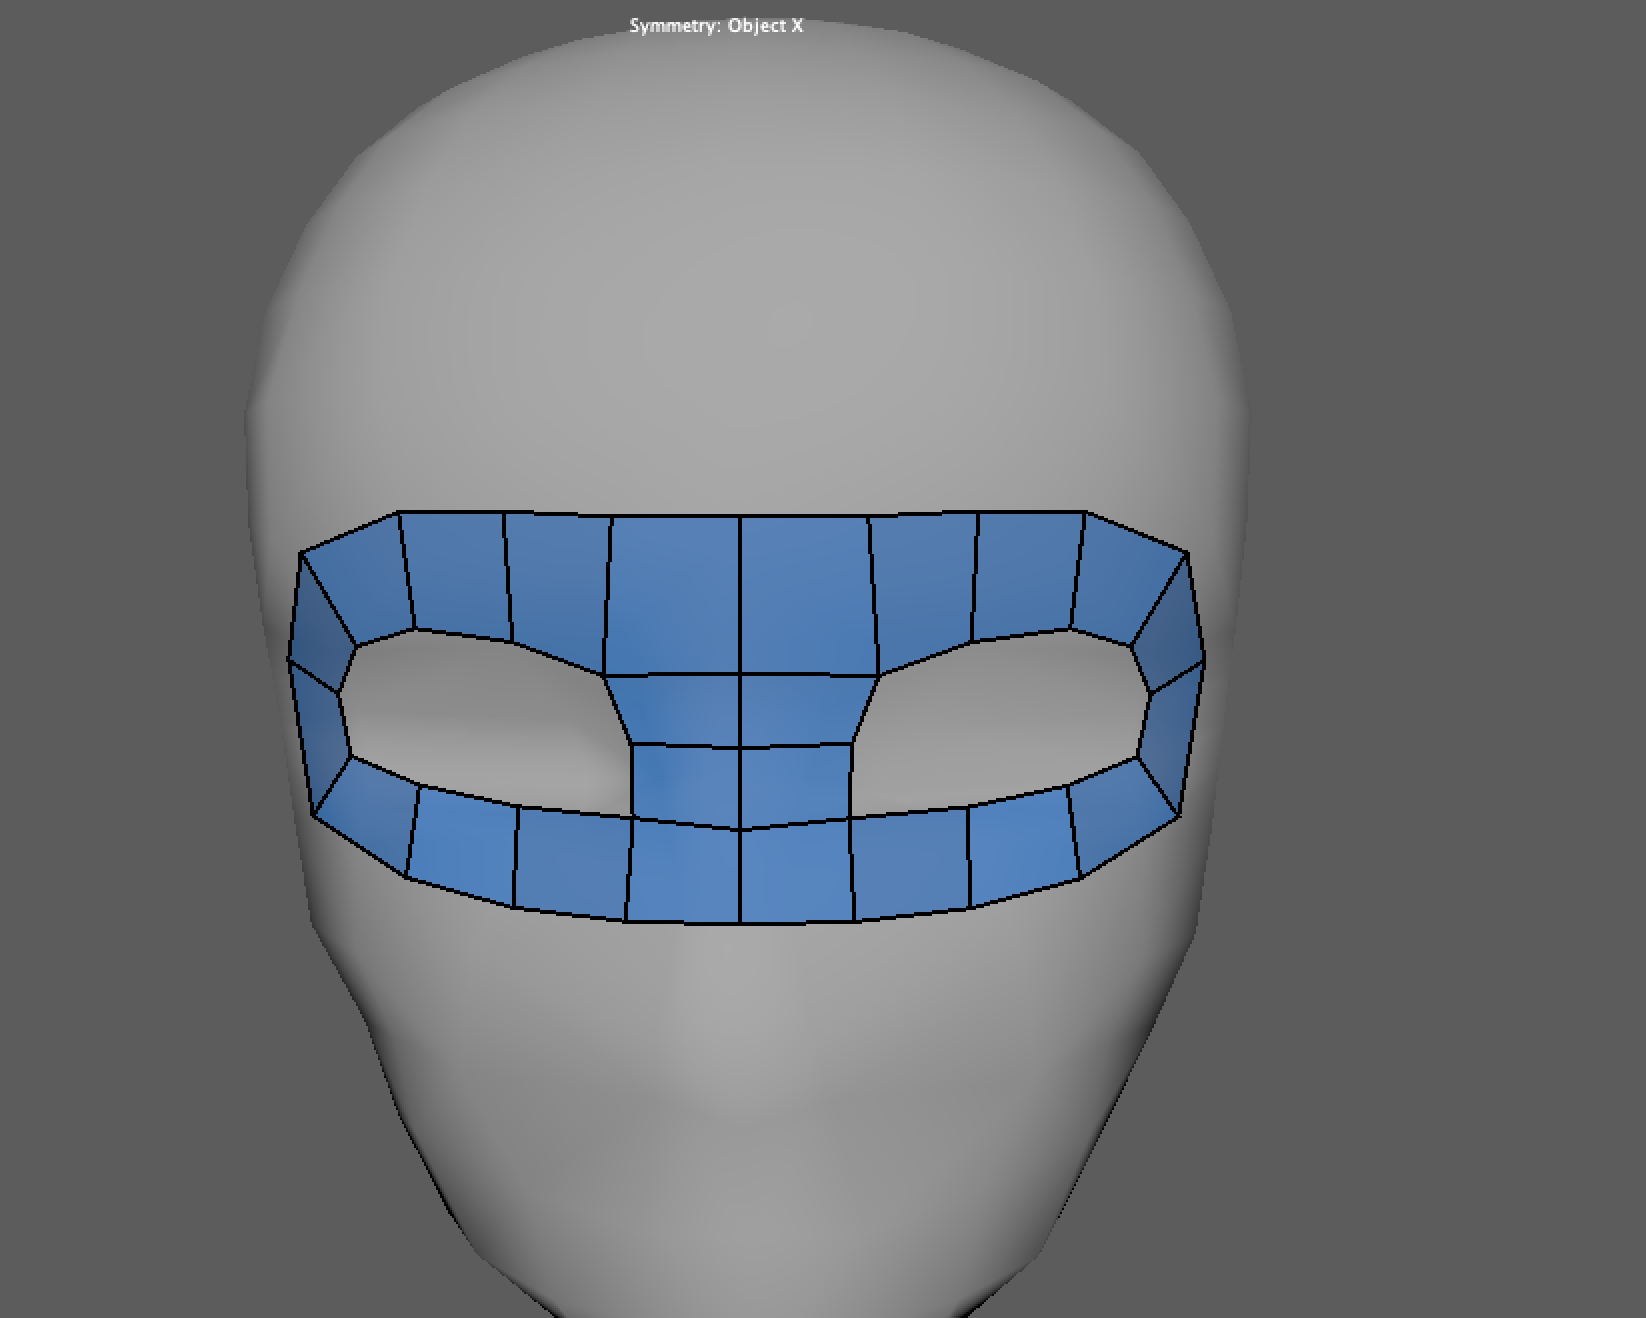
Moving on, we are now going to fill in the area of the eye sockets with more quads. The number of faces you have might be different from mine but that is okay as long as you are able to create the smaller ring of faces inside the larger eye mask area you created from before.
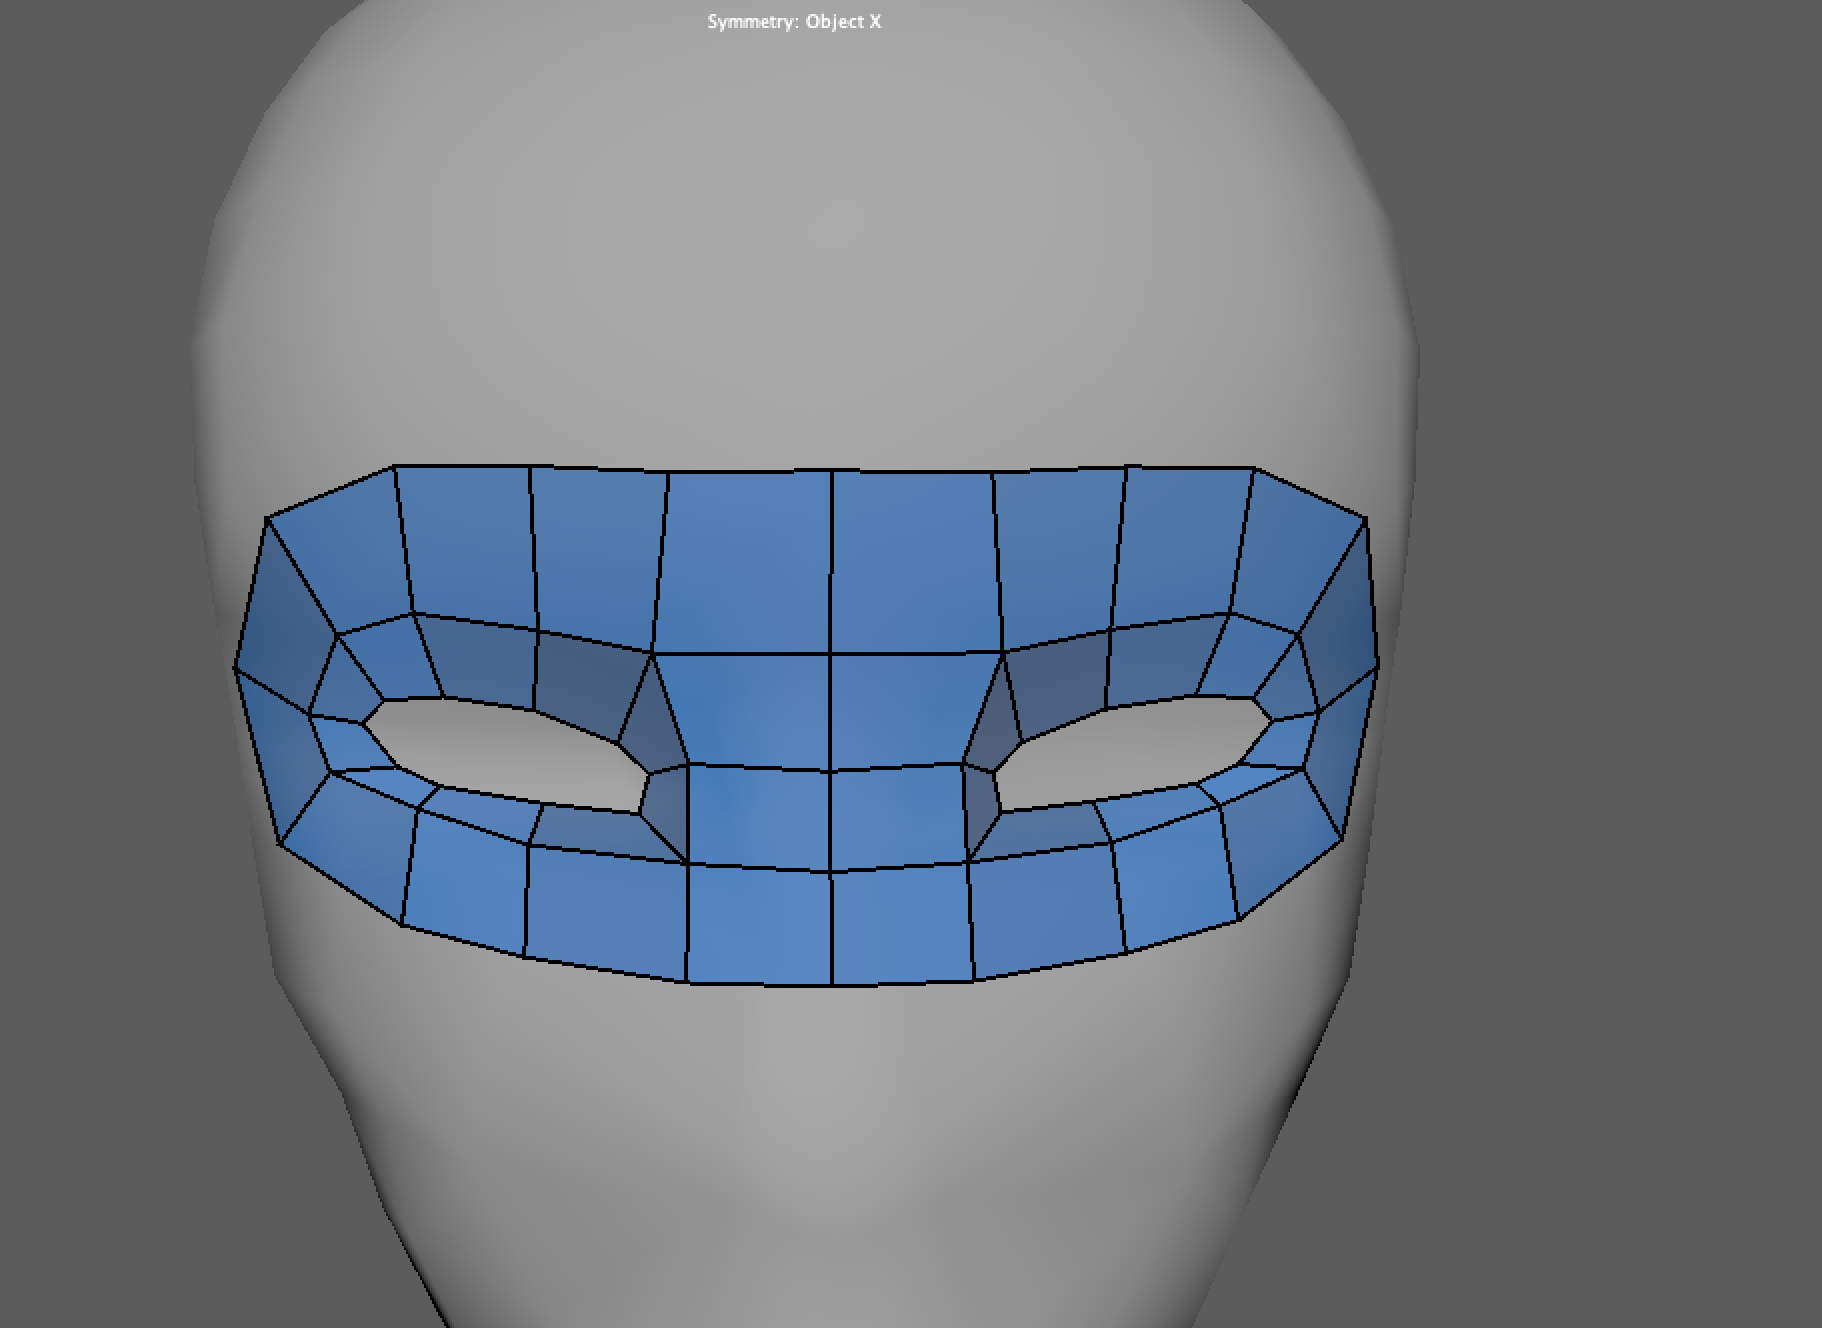
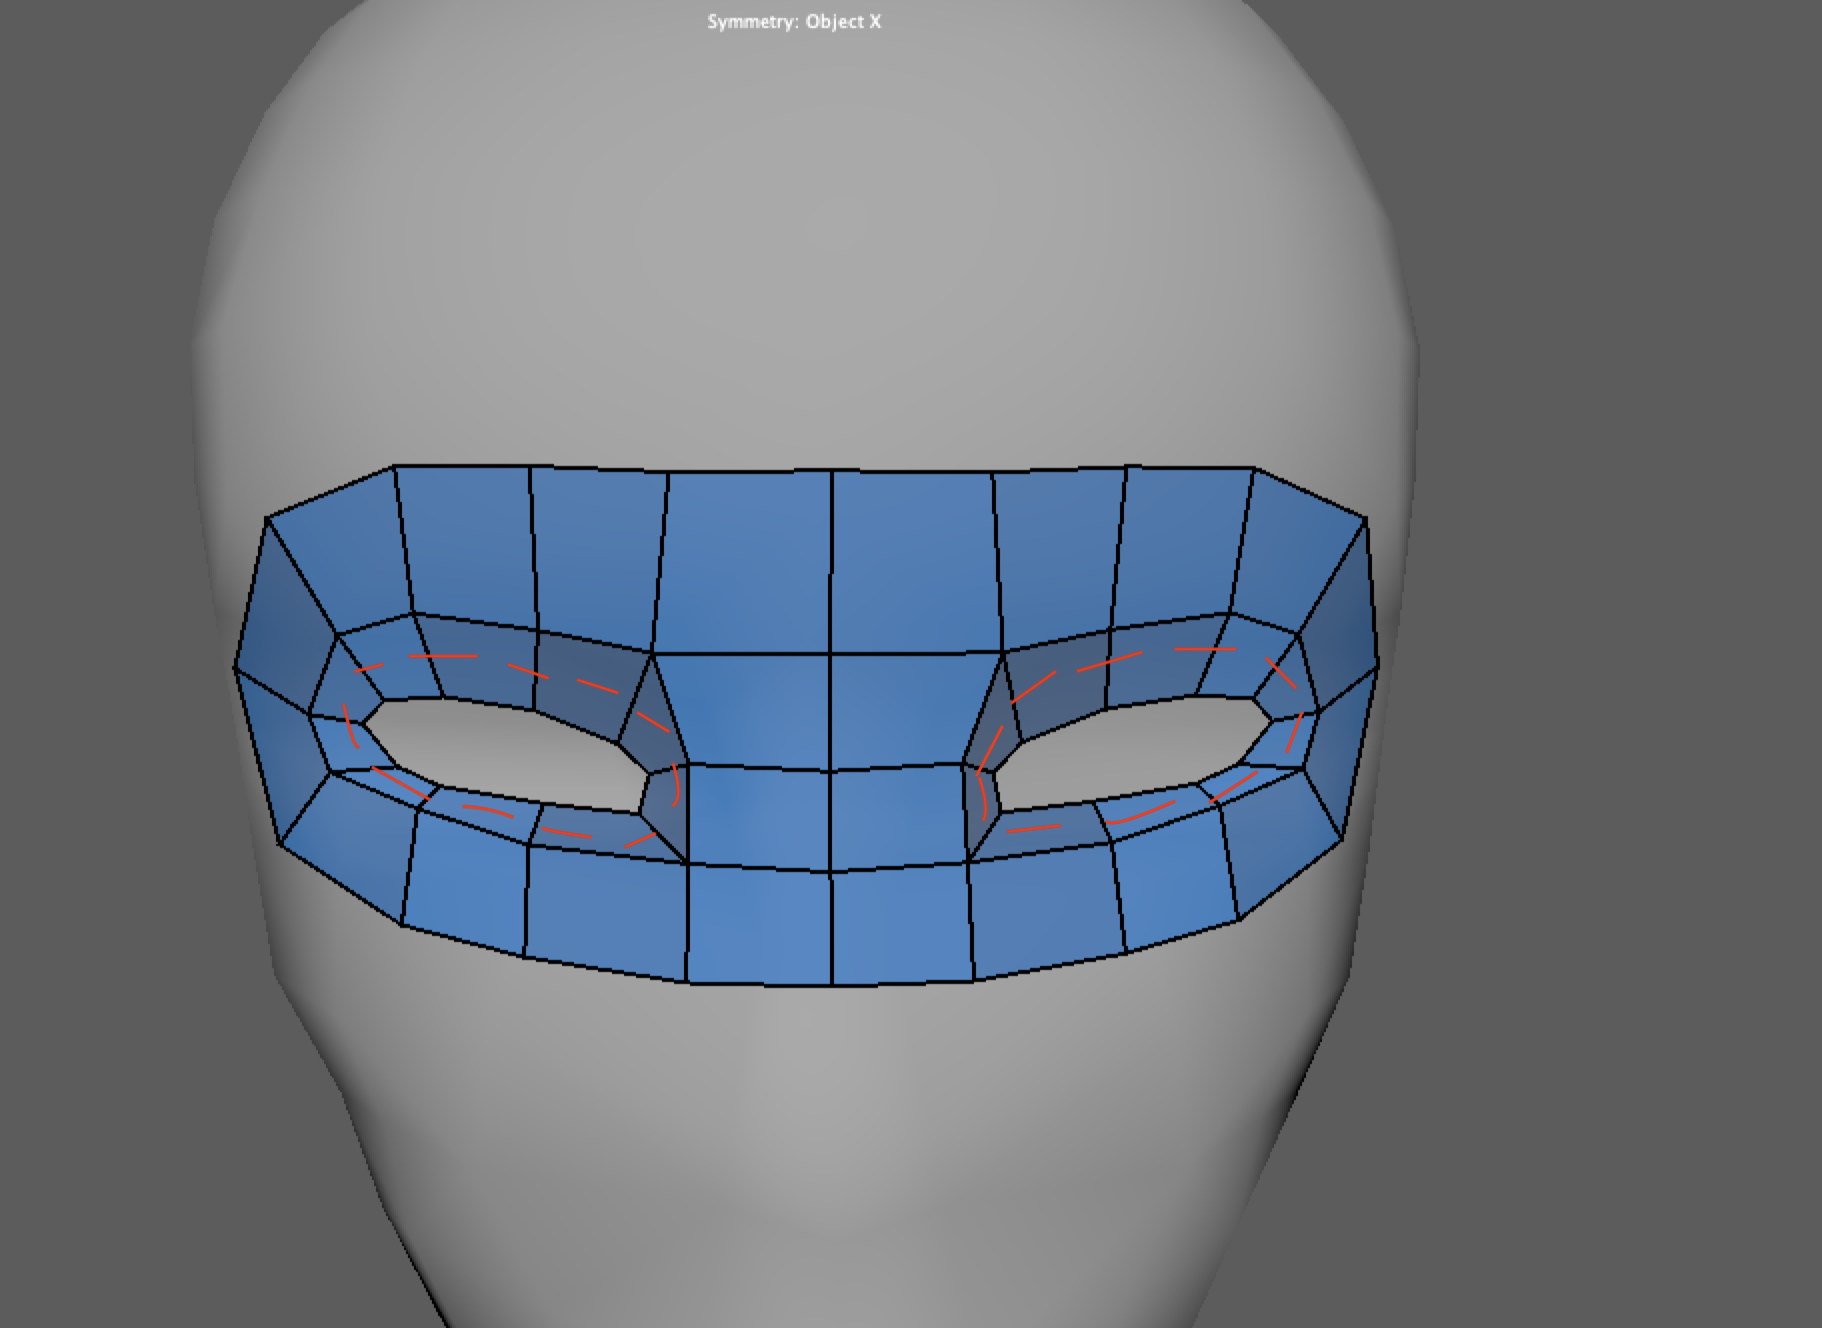
In my case, I had to add an extra edge in the nose bridge area to make it easier to fill in the eye socket. A handy shortcut for that while remaining in Quad Draw is to hold down CTRL; a green line should now appear when you hover over the mesh. Simple left-click while holding down control to add the edge in.
Now fill in the last portion of the eye socket area with more quads. It should look something like this:
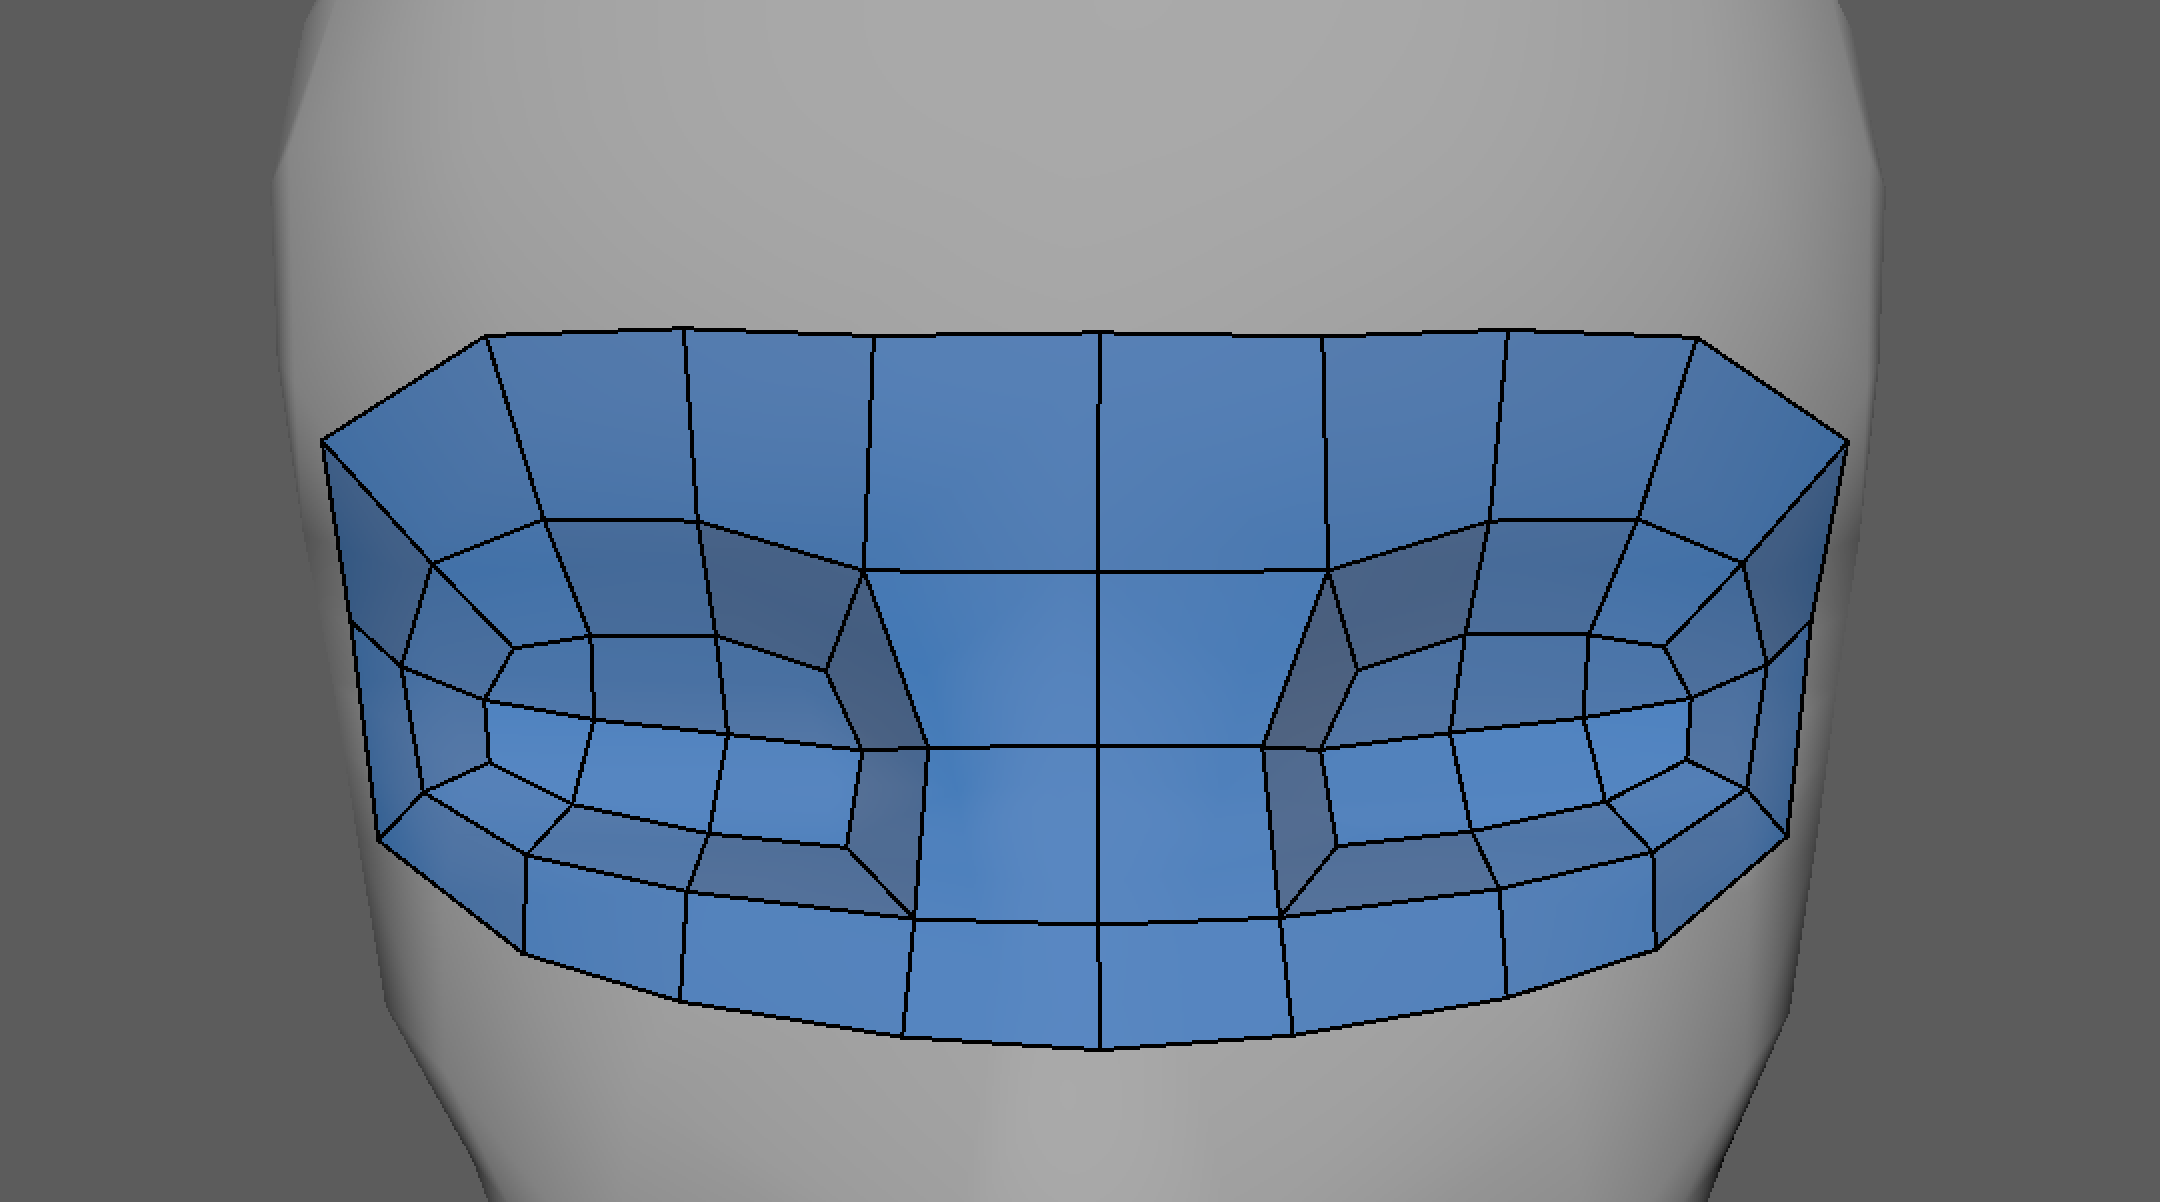
Again, don’t worry if your mesh doesn’t look EXACTLY like mine; as long as you are maintaining the same kind of edge flow in your model you will be fine. Before we move on, this is a good time to check that the edge flow of the eye area is the way we want it. I find the easiest way to check my edge flow is to use the Ctrl hotkey to add edges and hover over my mesh; if the edge flow looks as expected then you should be good to go.
At this point, the important areas of edge flow on our model should look something like this:
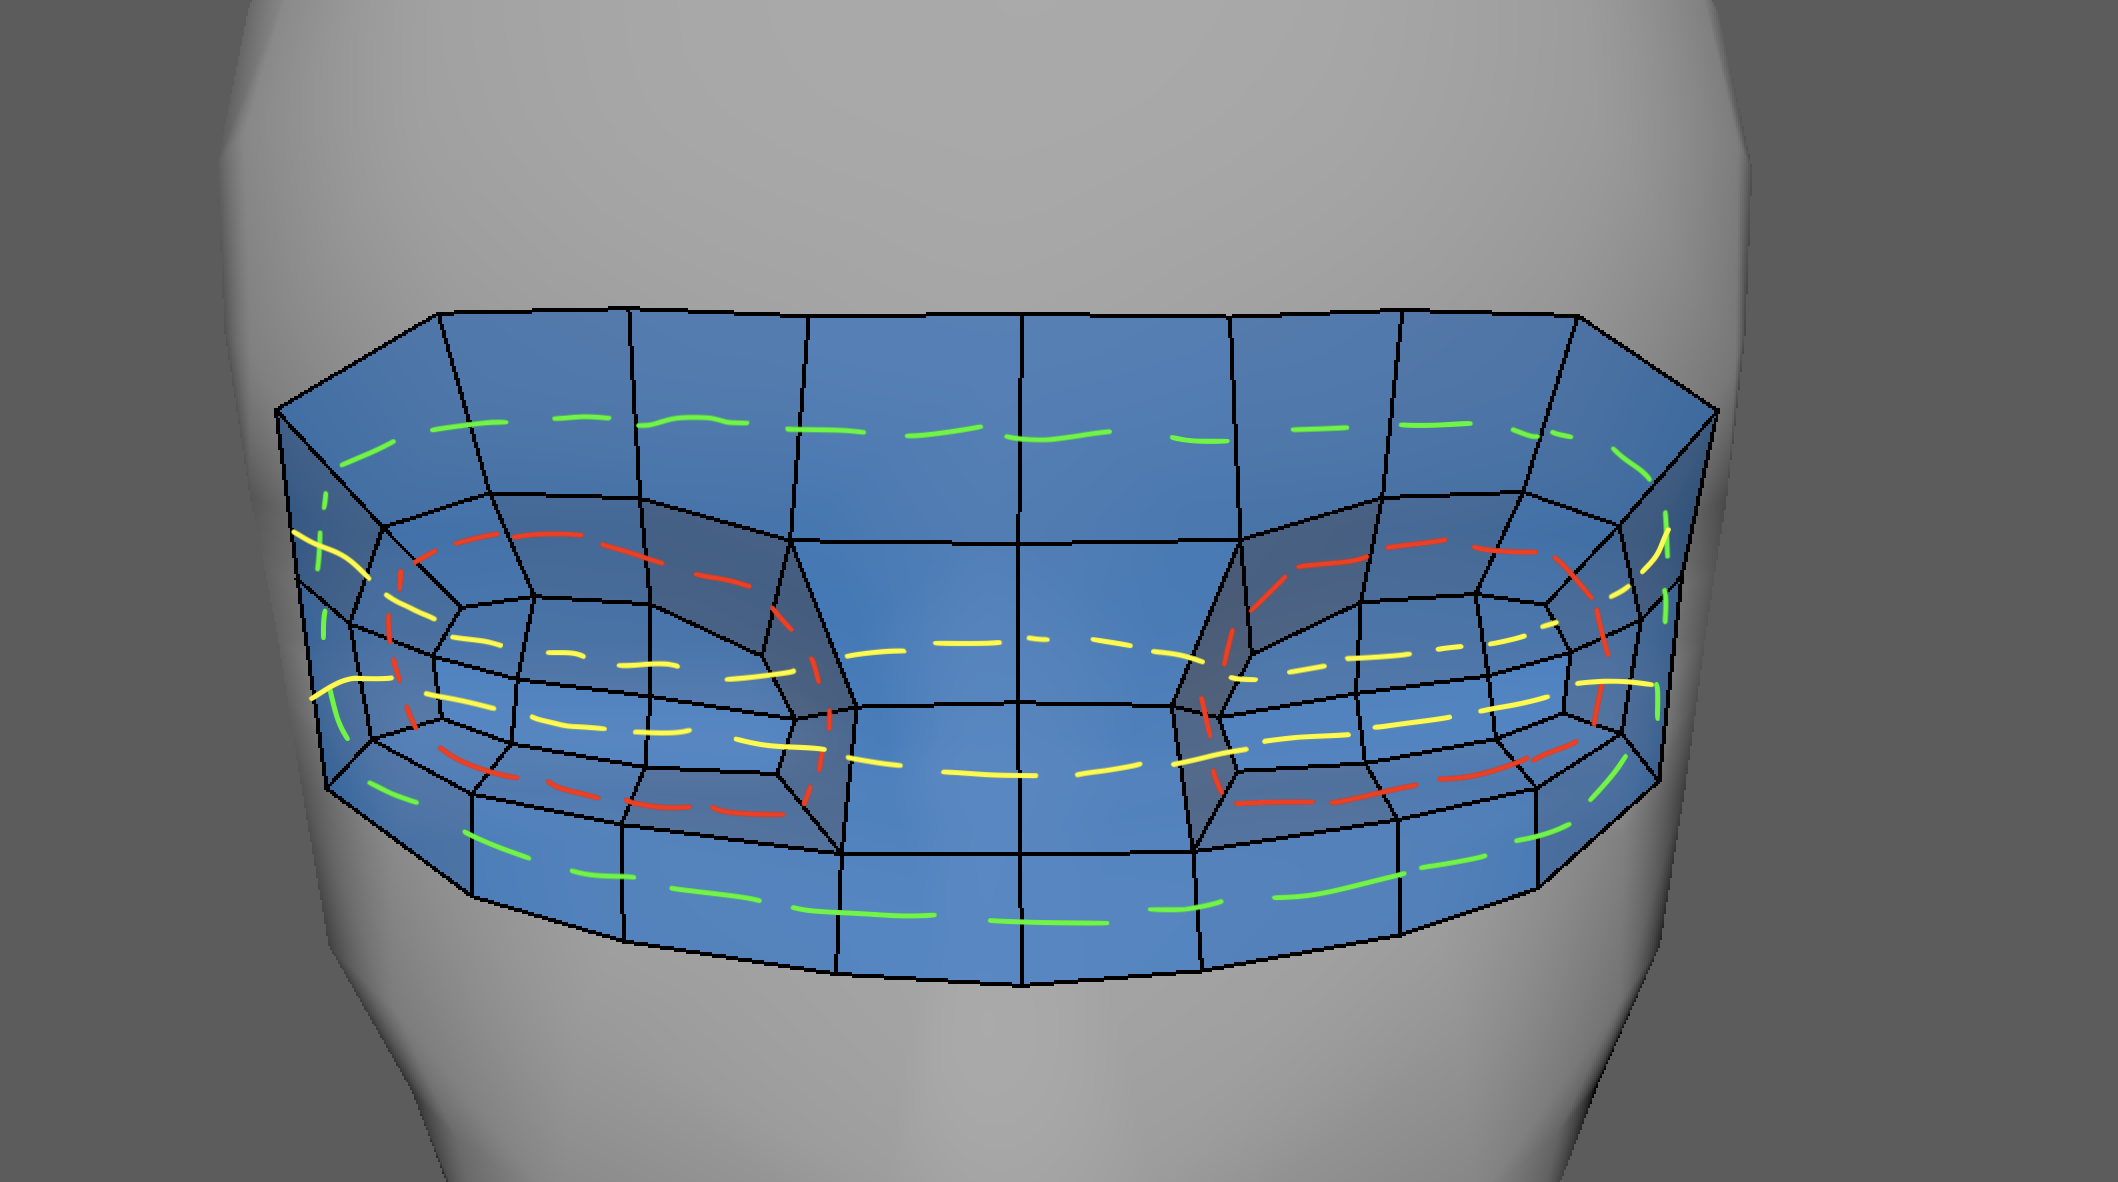
Now that you’ve checked the edge flow of the eye region, we can continue with our retopology. Go to the quads on the side of the eye mask area and extend them further towards the side of the head to look like this:
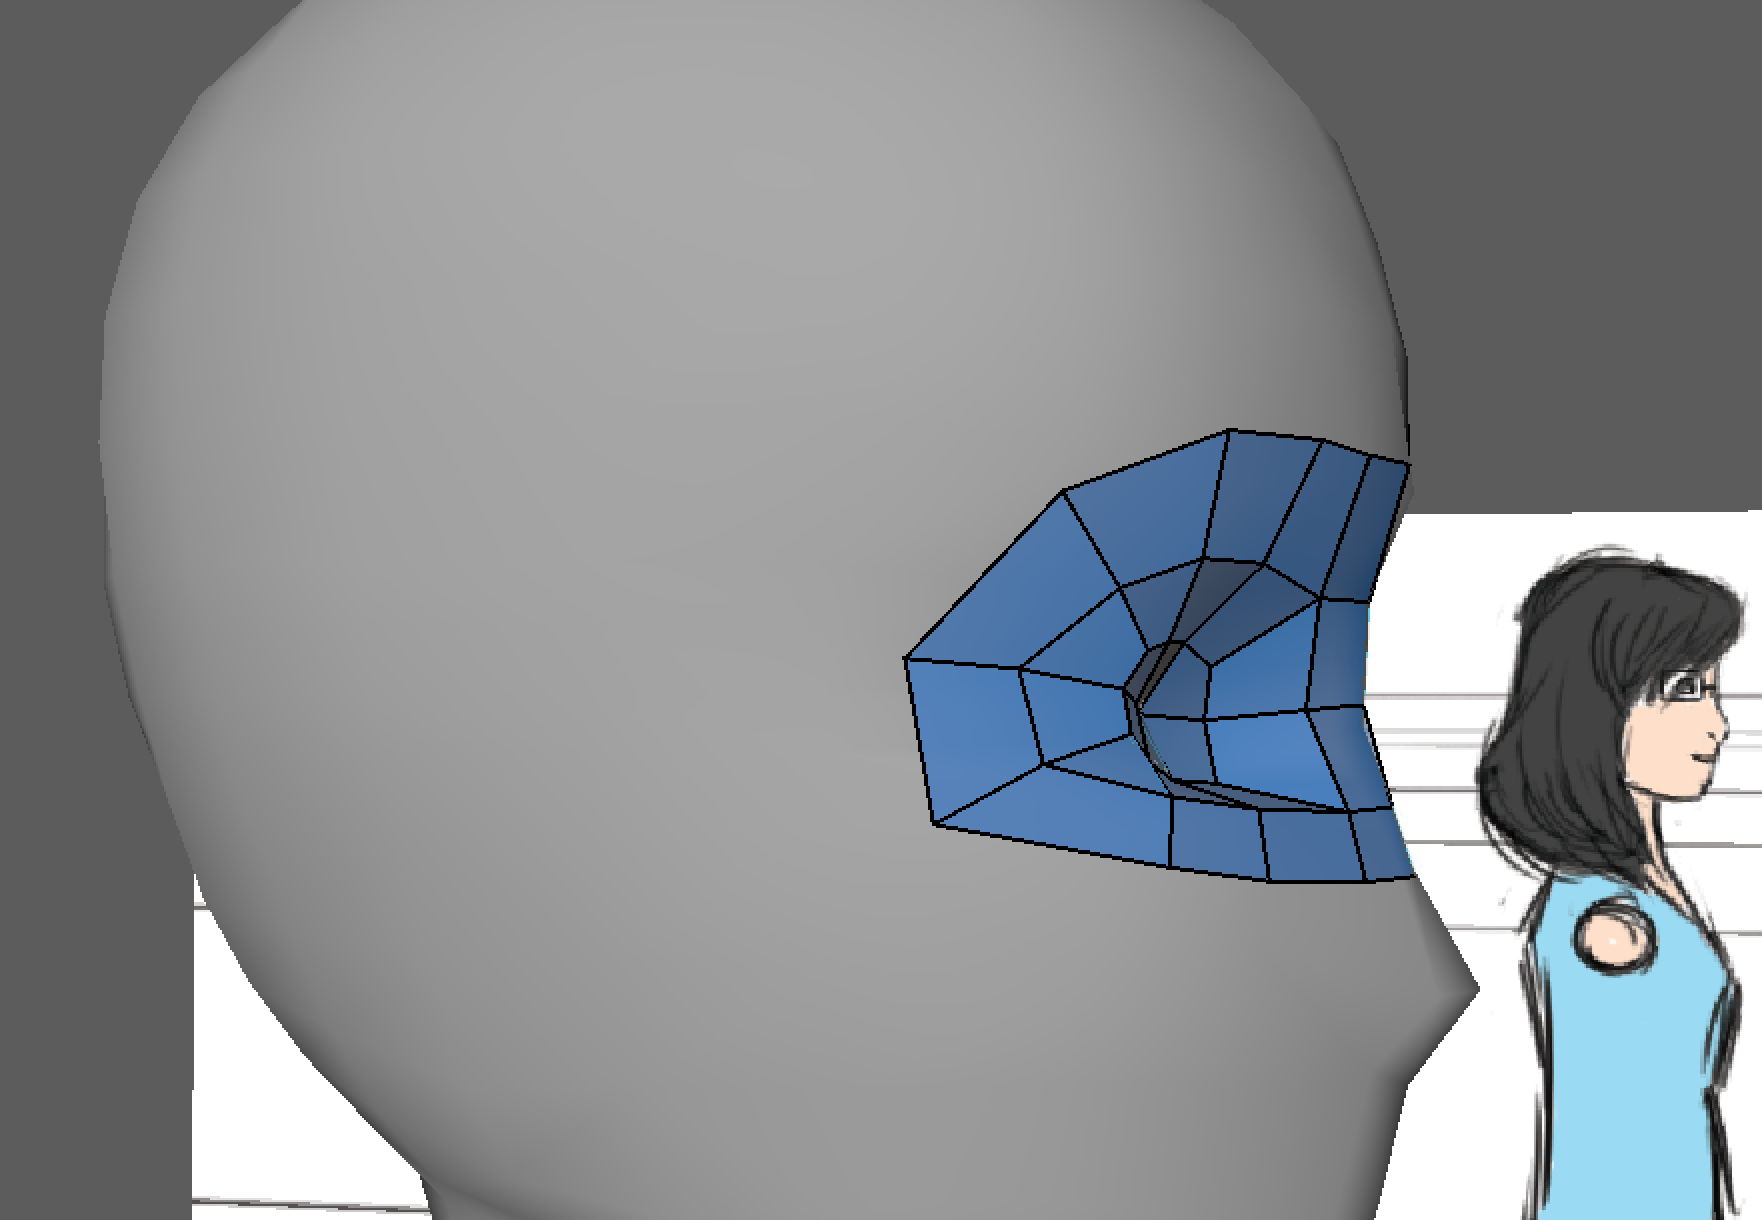
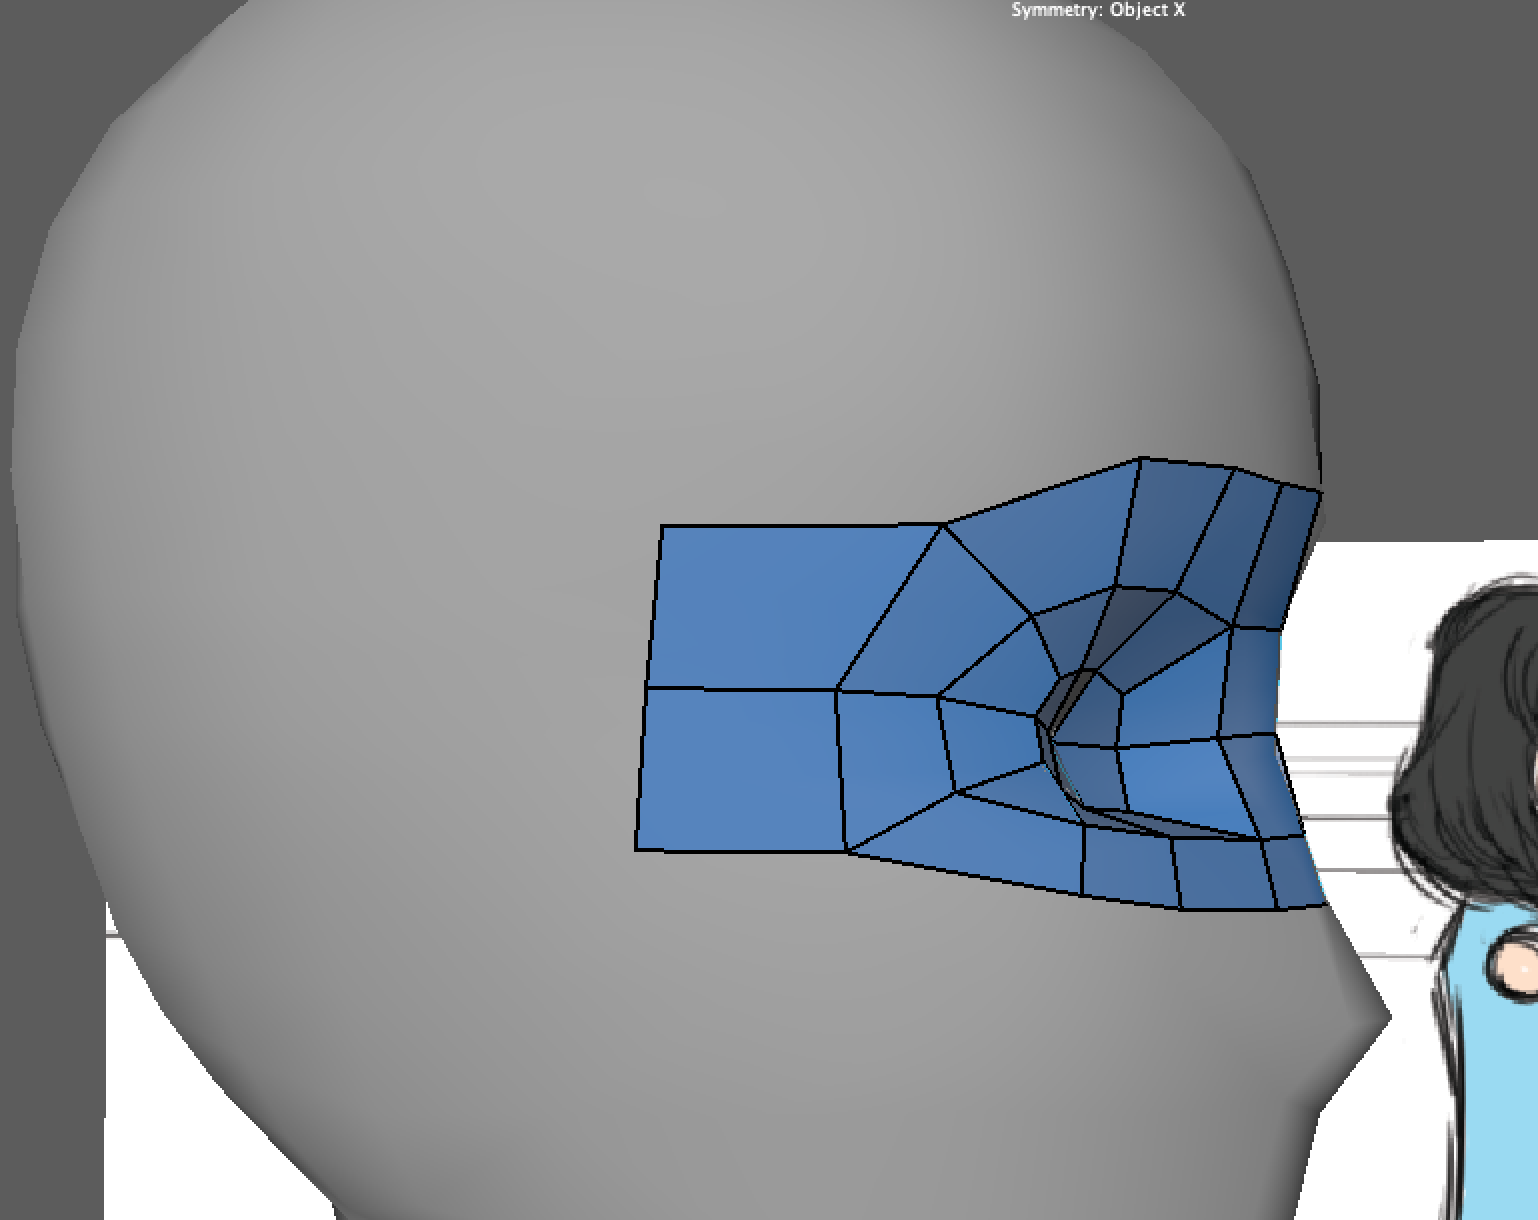
Continue extending the quads on the side of the mesh until you create a full ring of faces that connects to the back of the head.
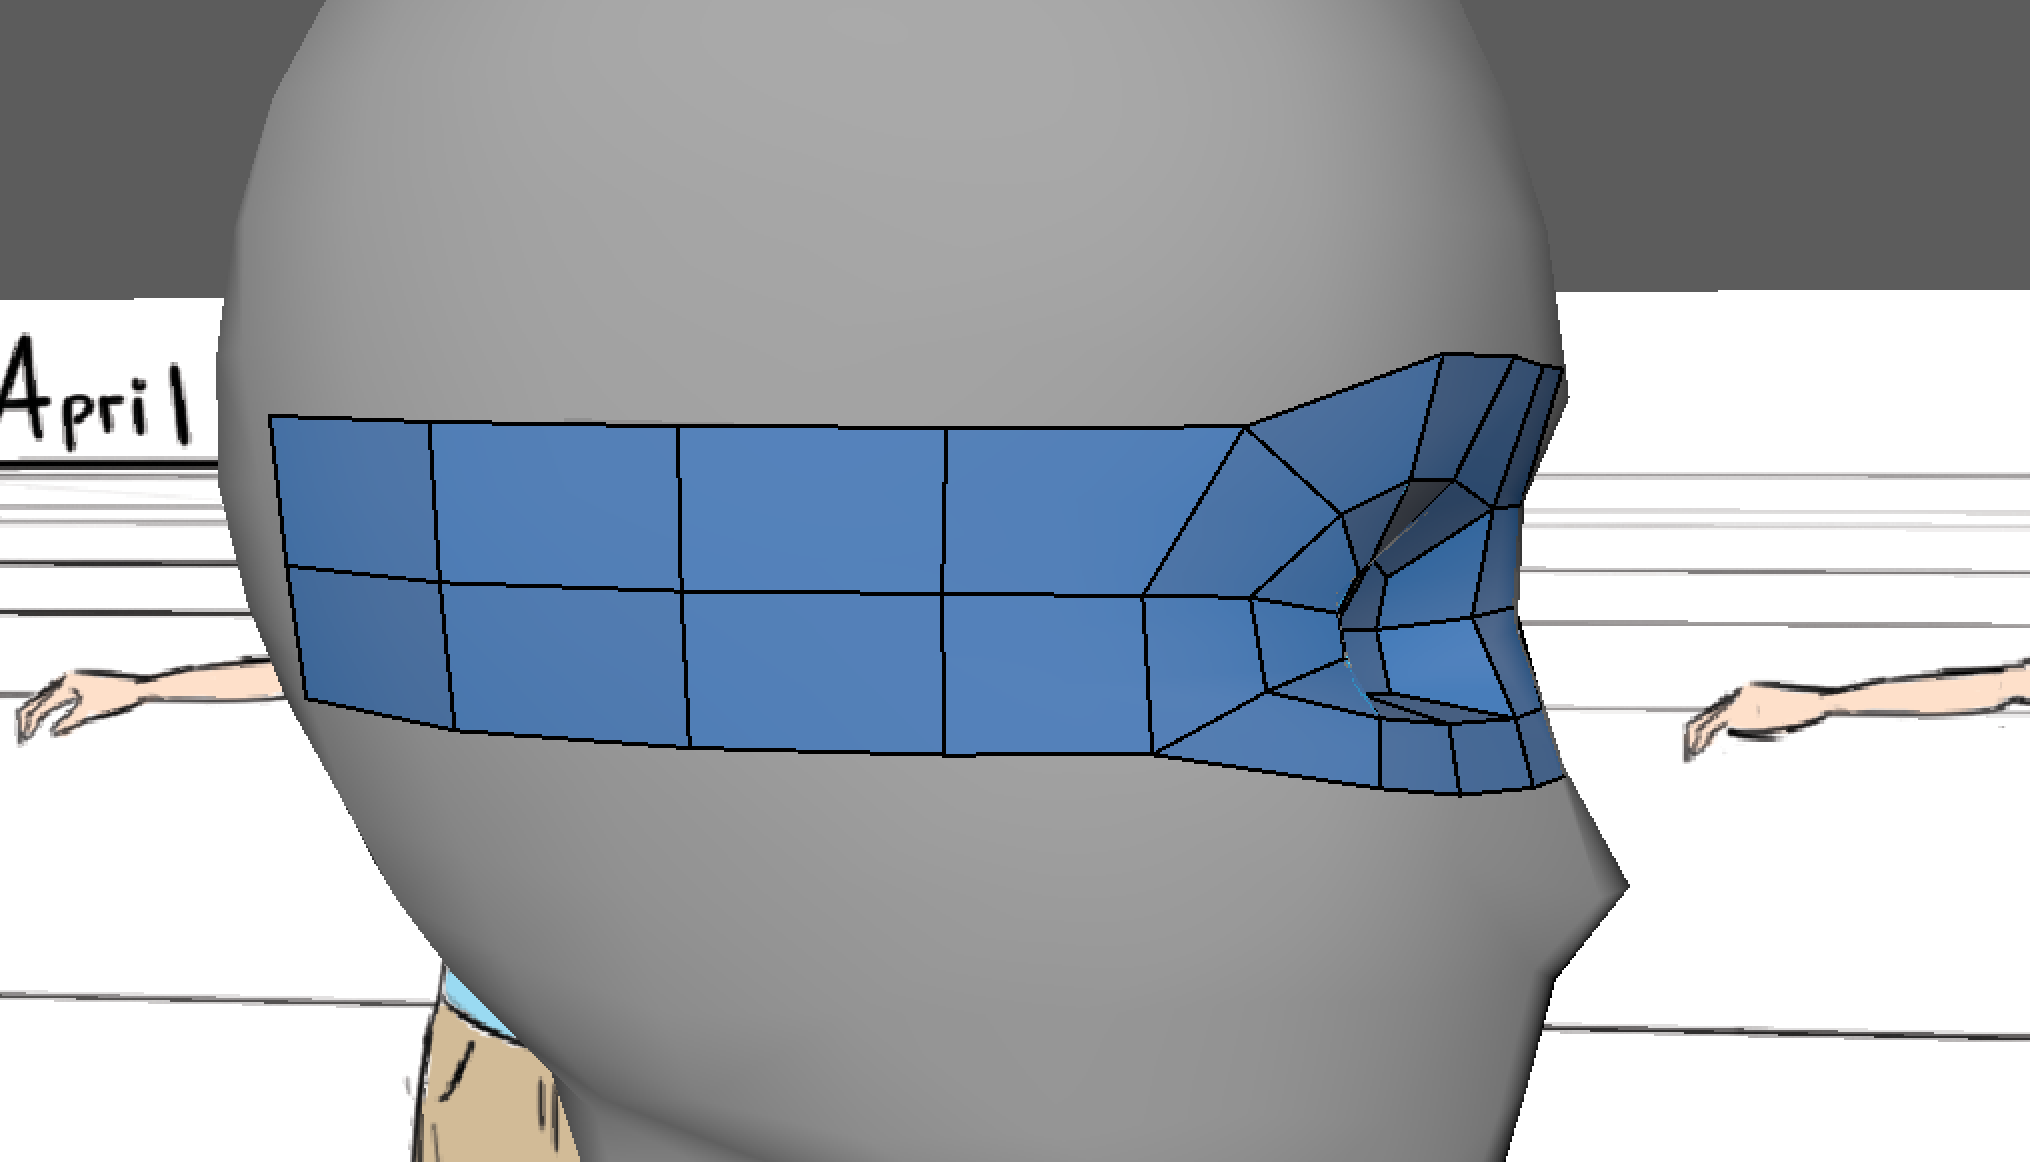
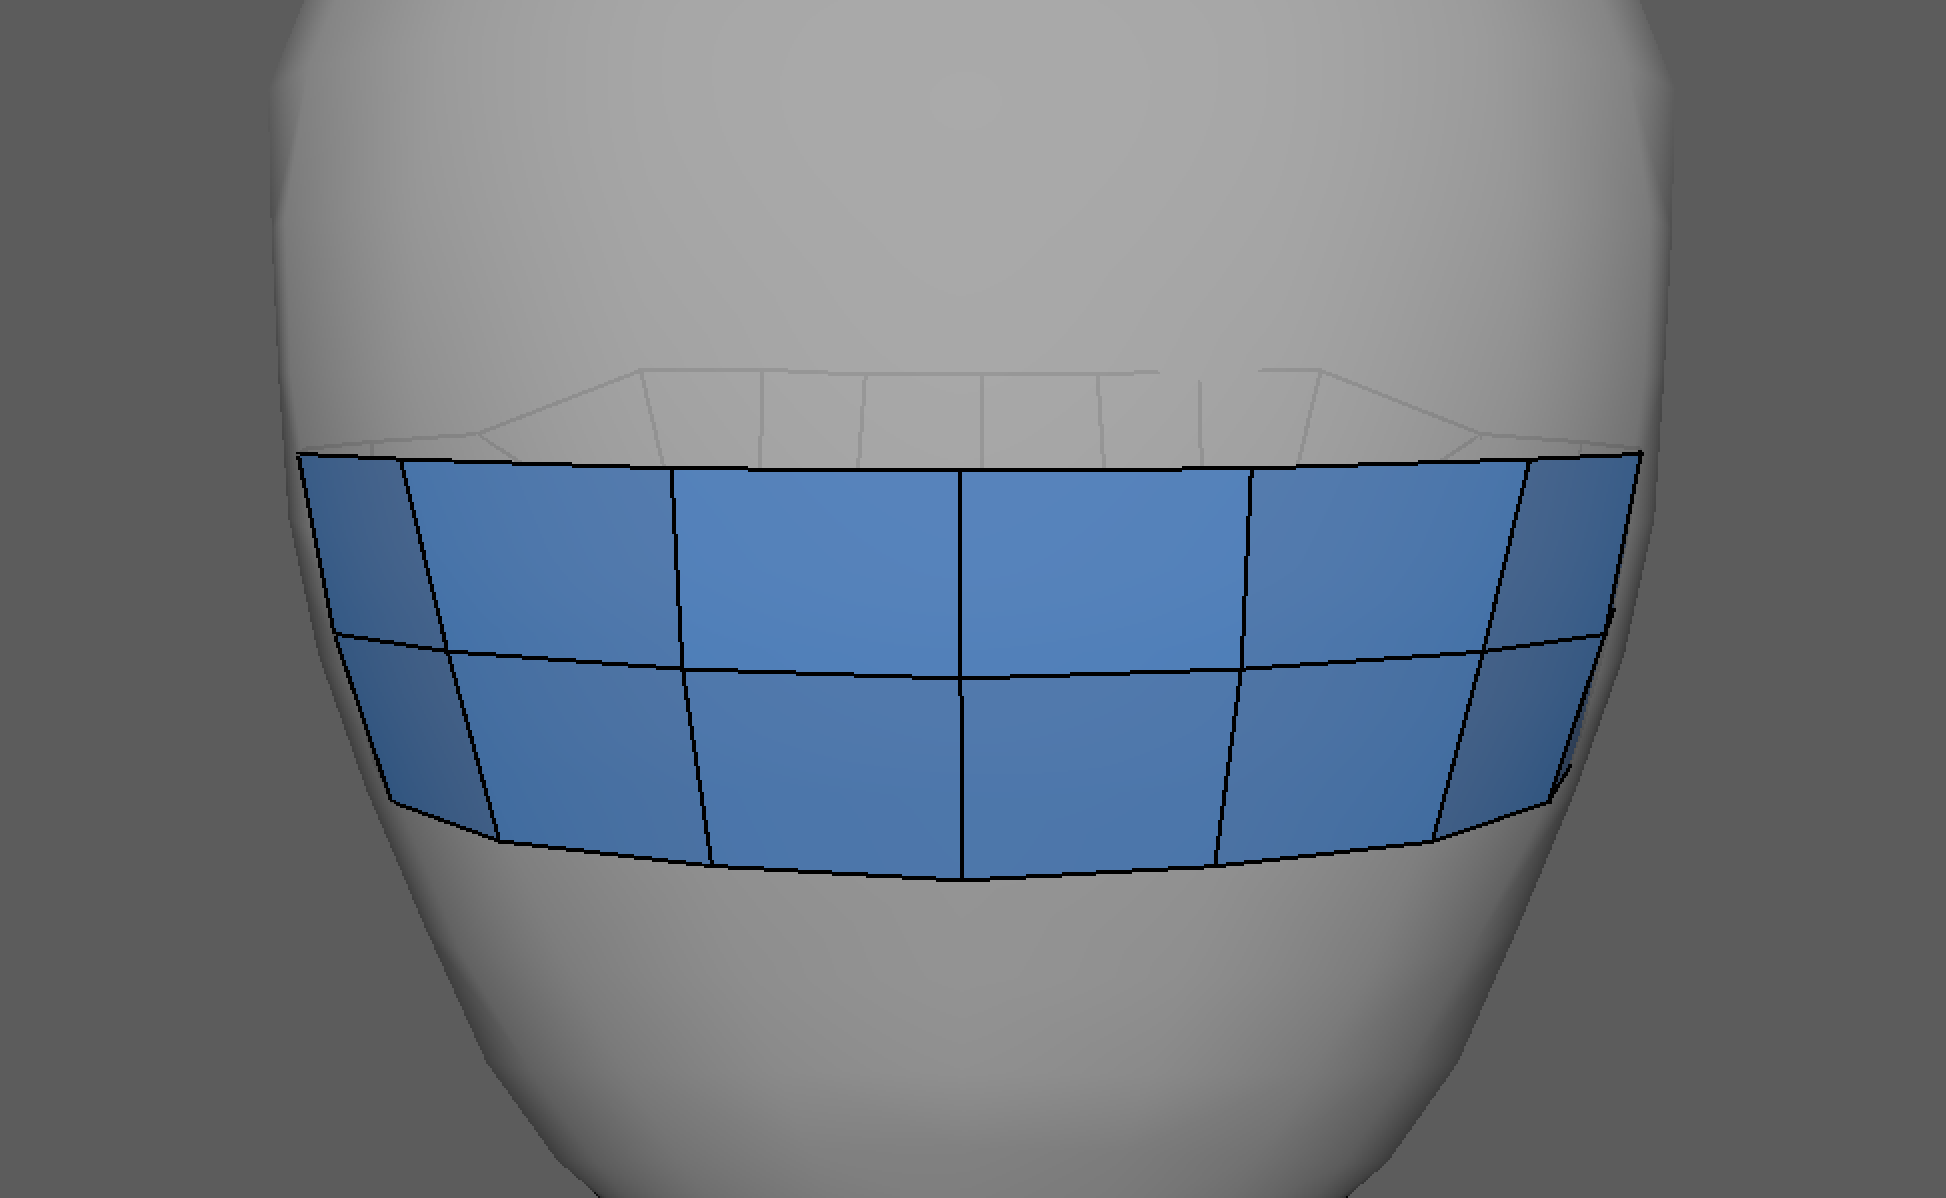
Now, I am going to go back to the tip of the quads at April’s forehead, and I am going to extend those quads all the way around the head to the back of the neck.
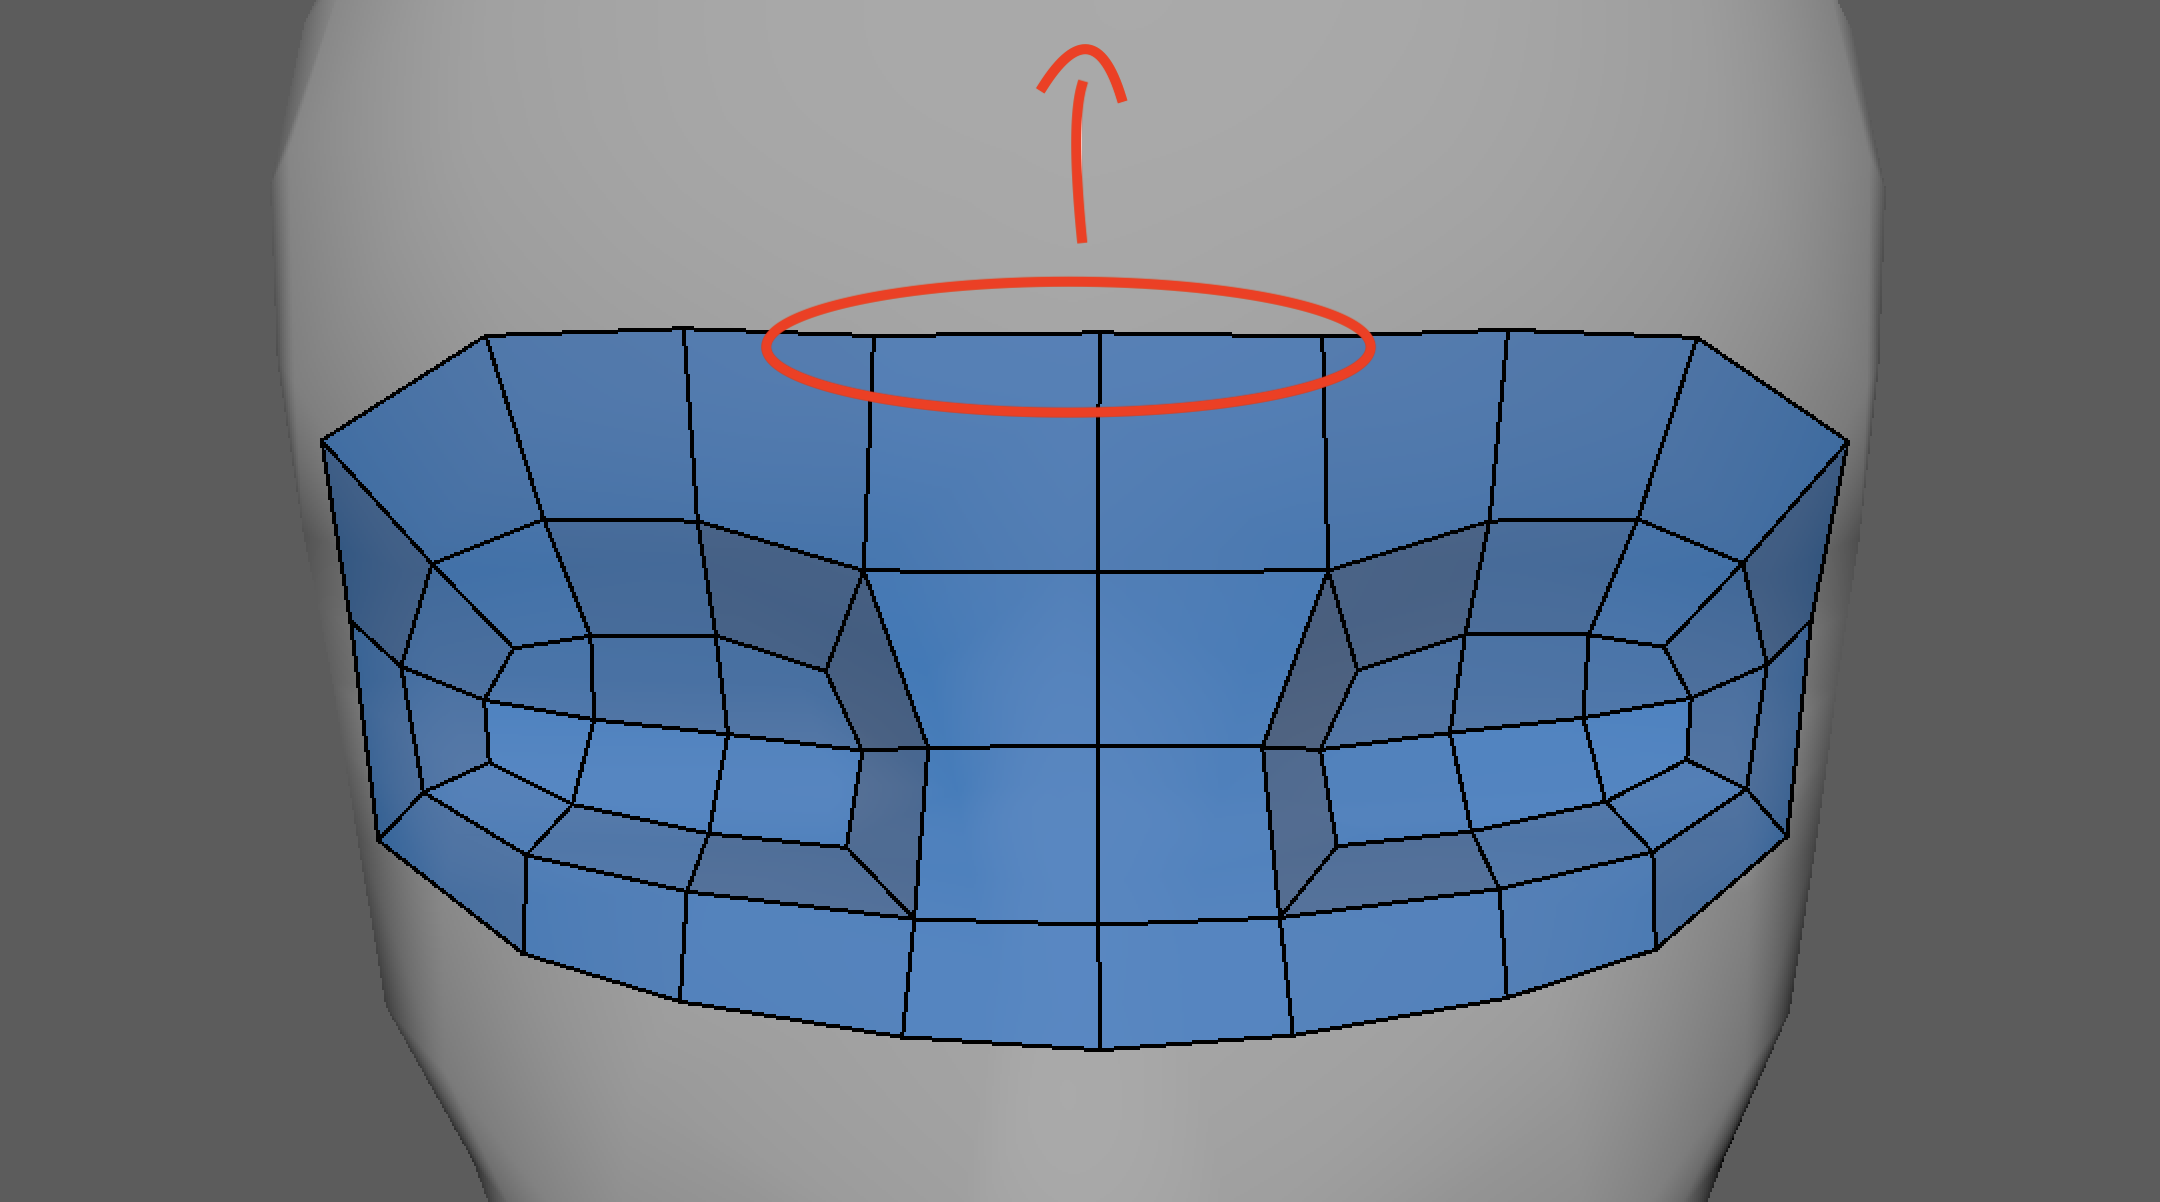
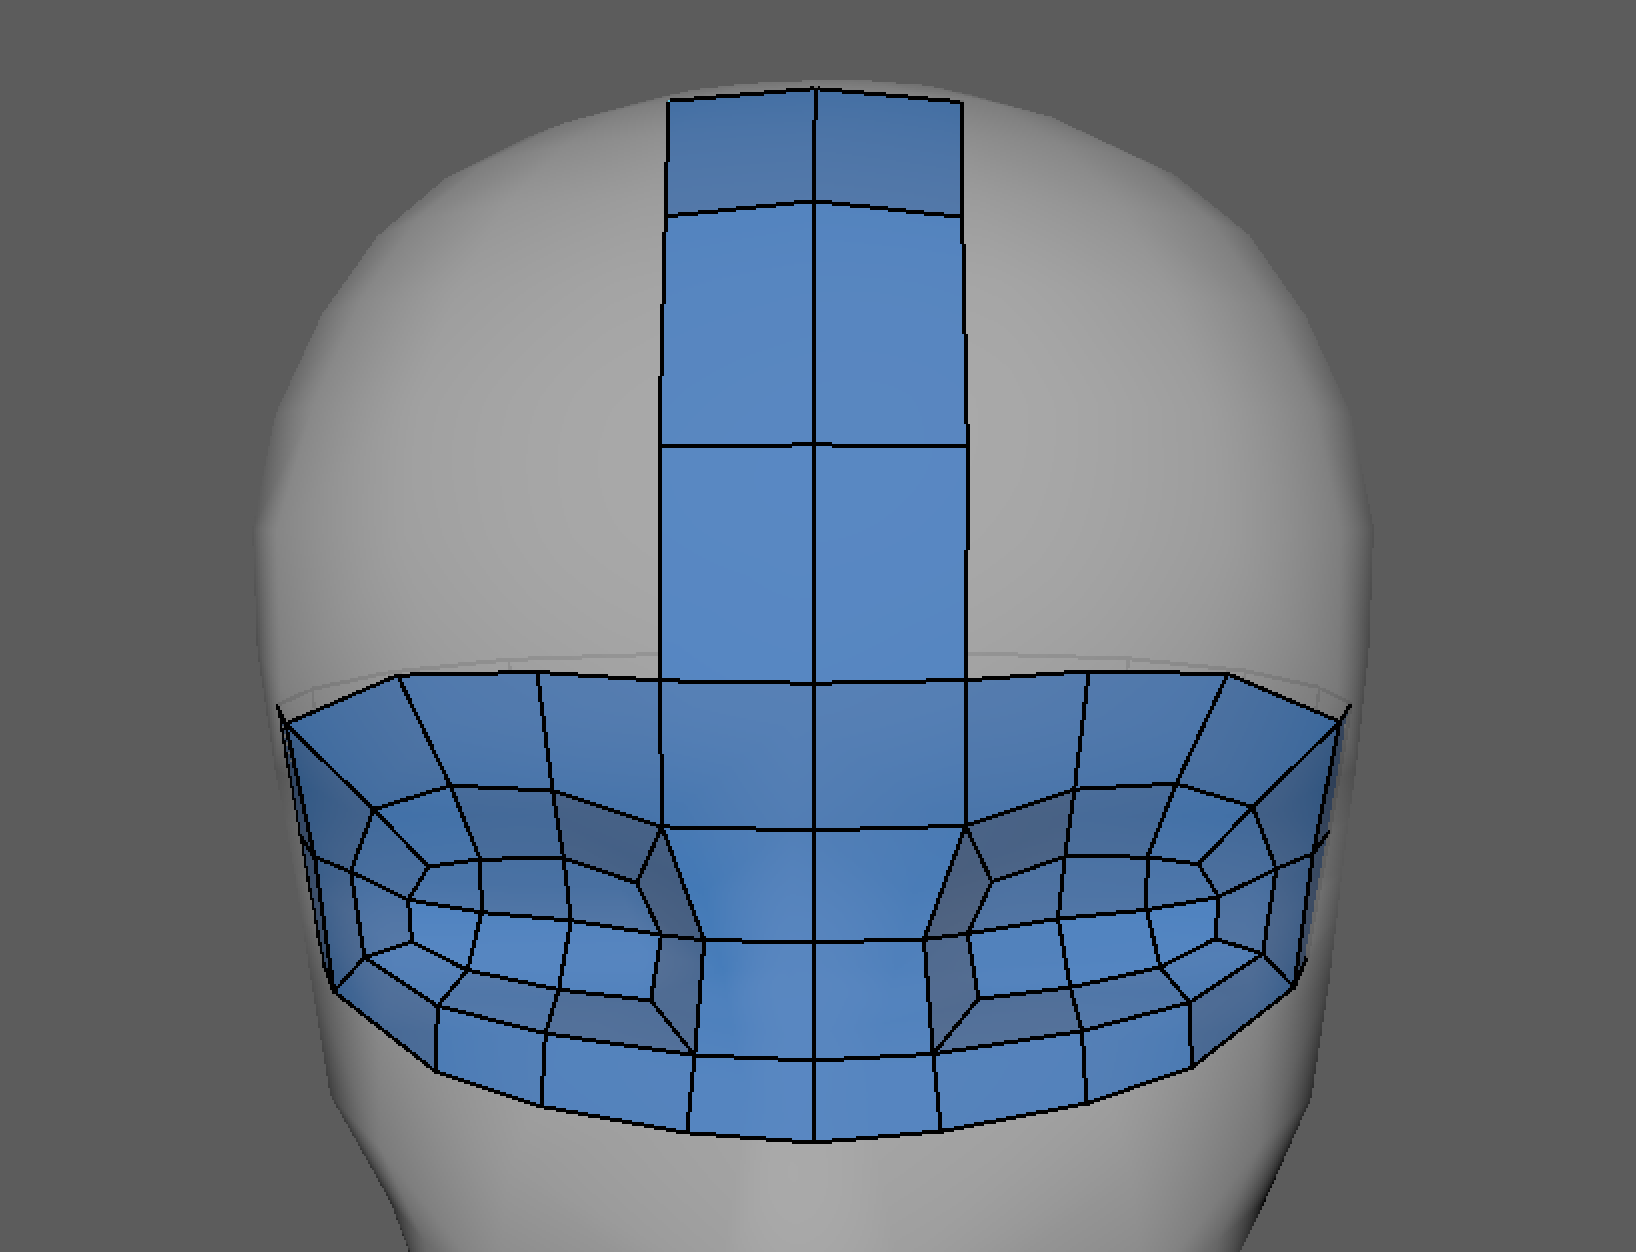
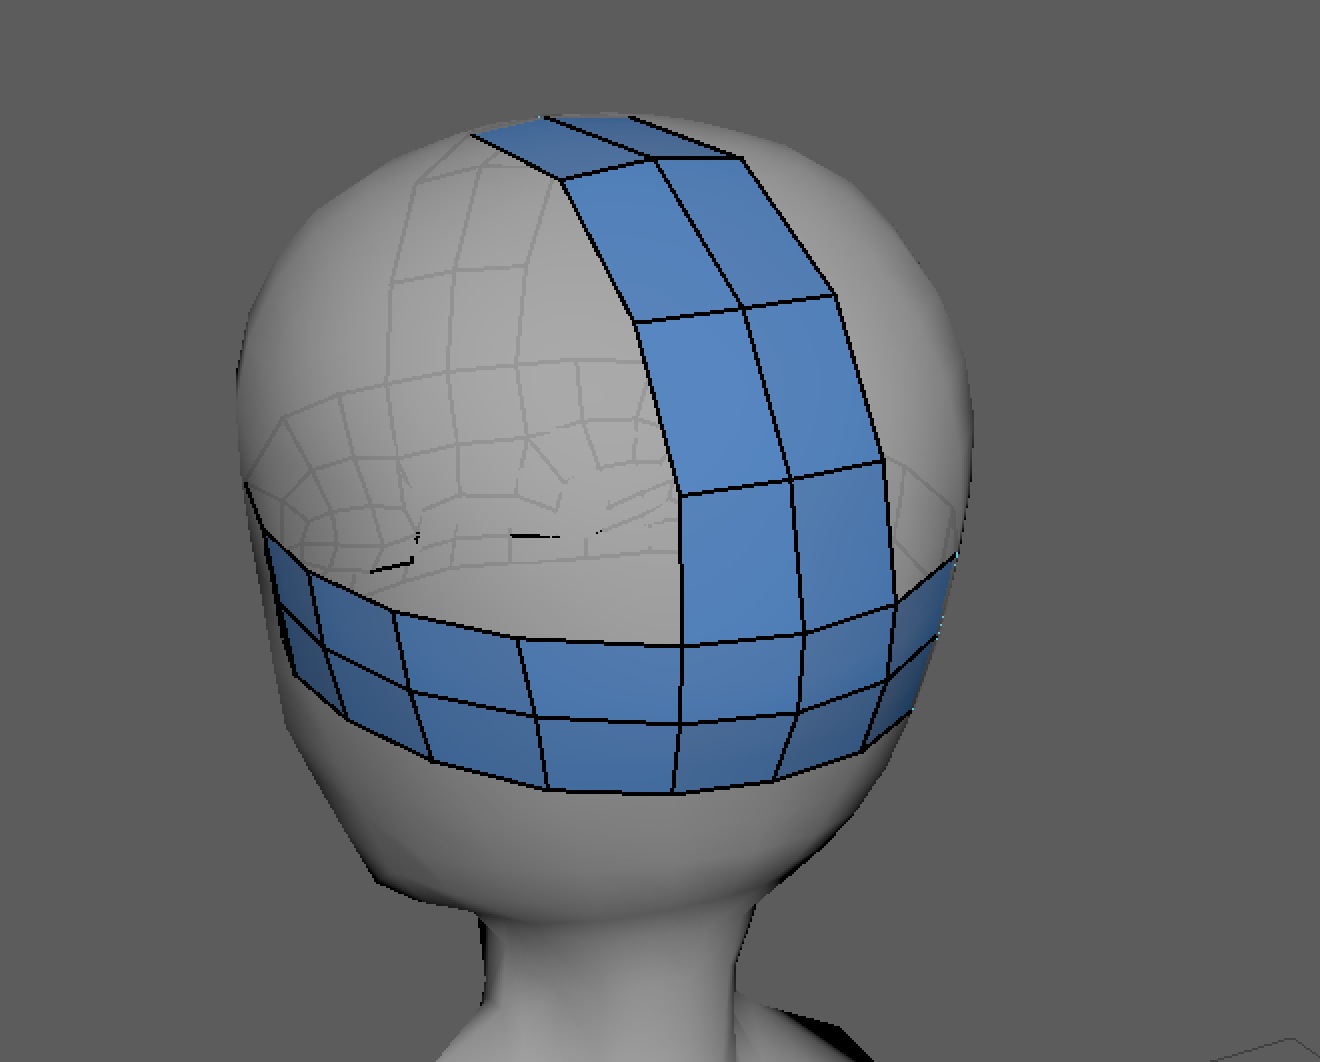
Now we are going to continue filling in rings of quads that start from the tip of the forehead and go all the way to the back of the head.
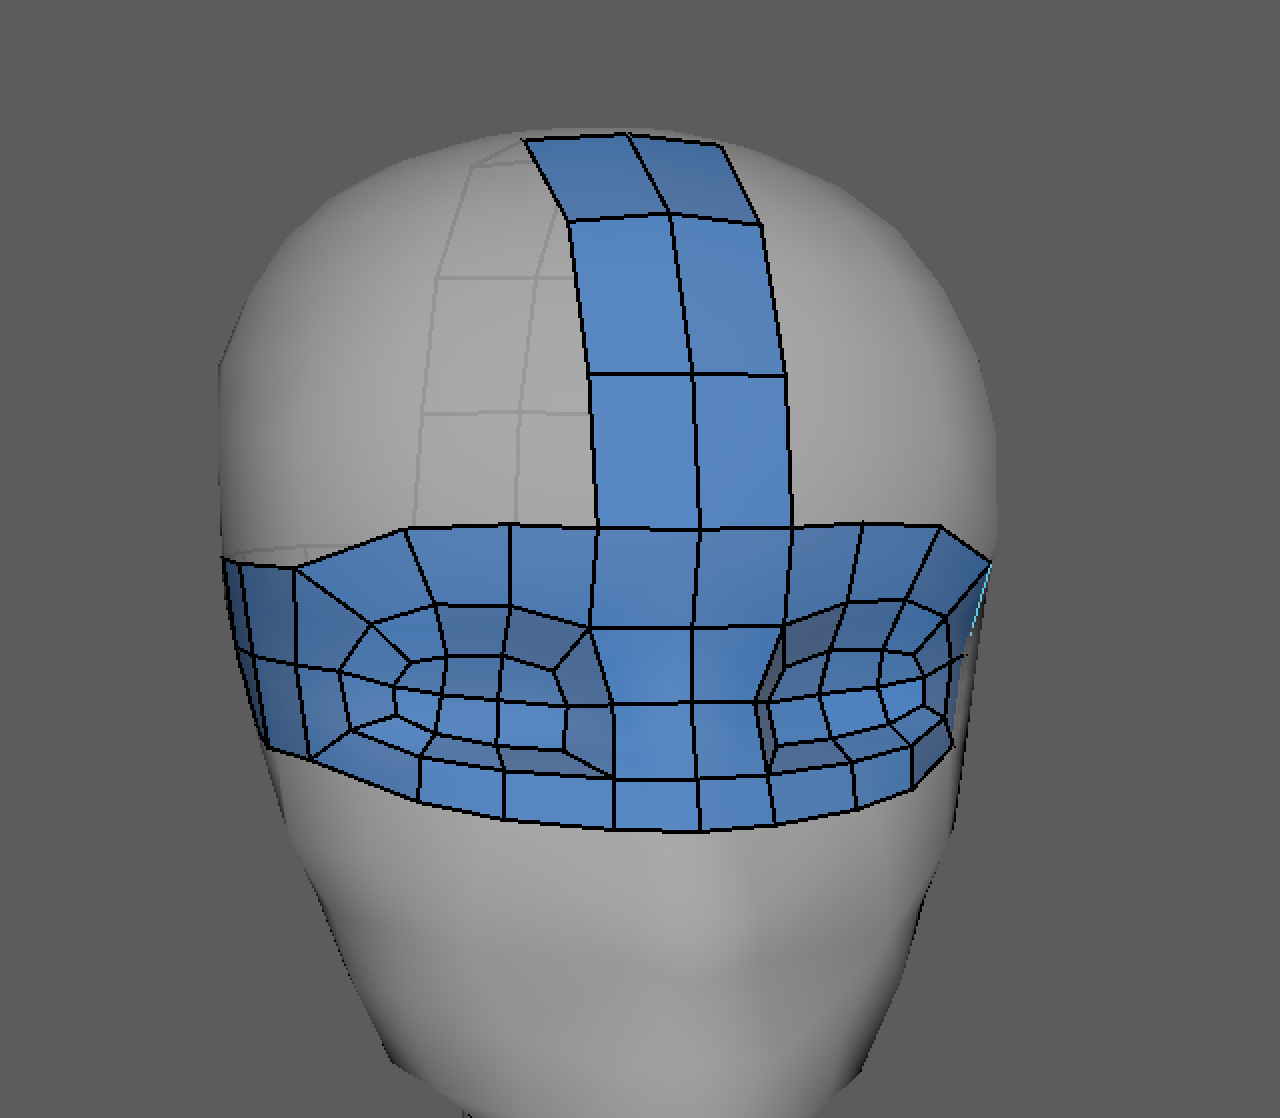
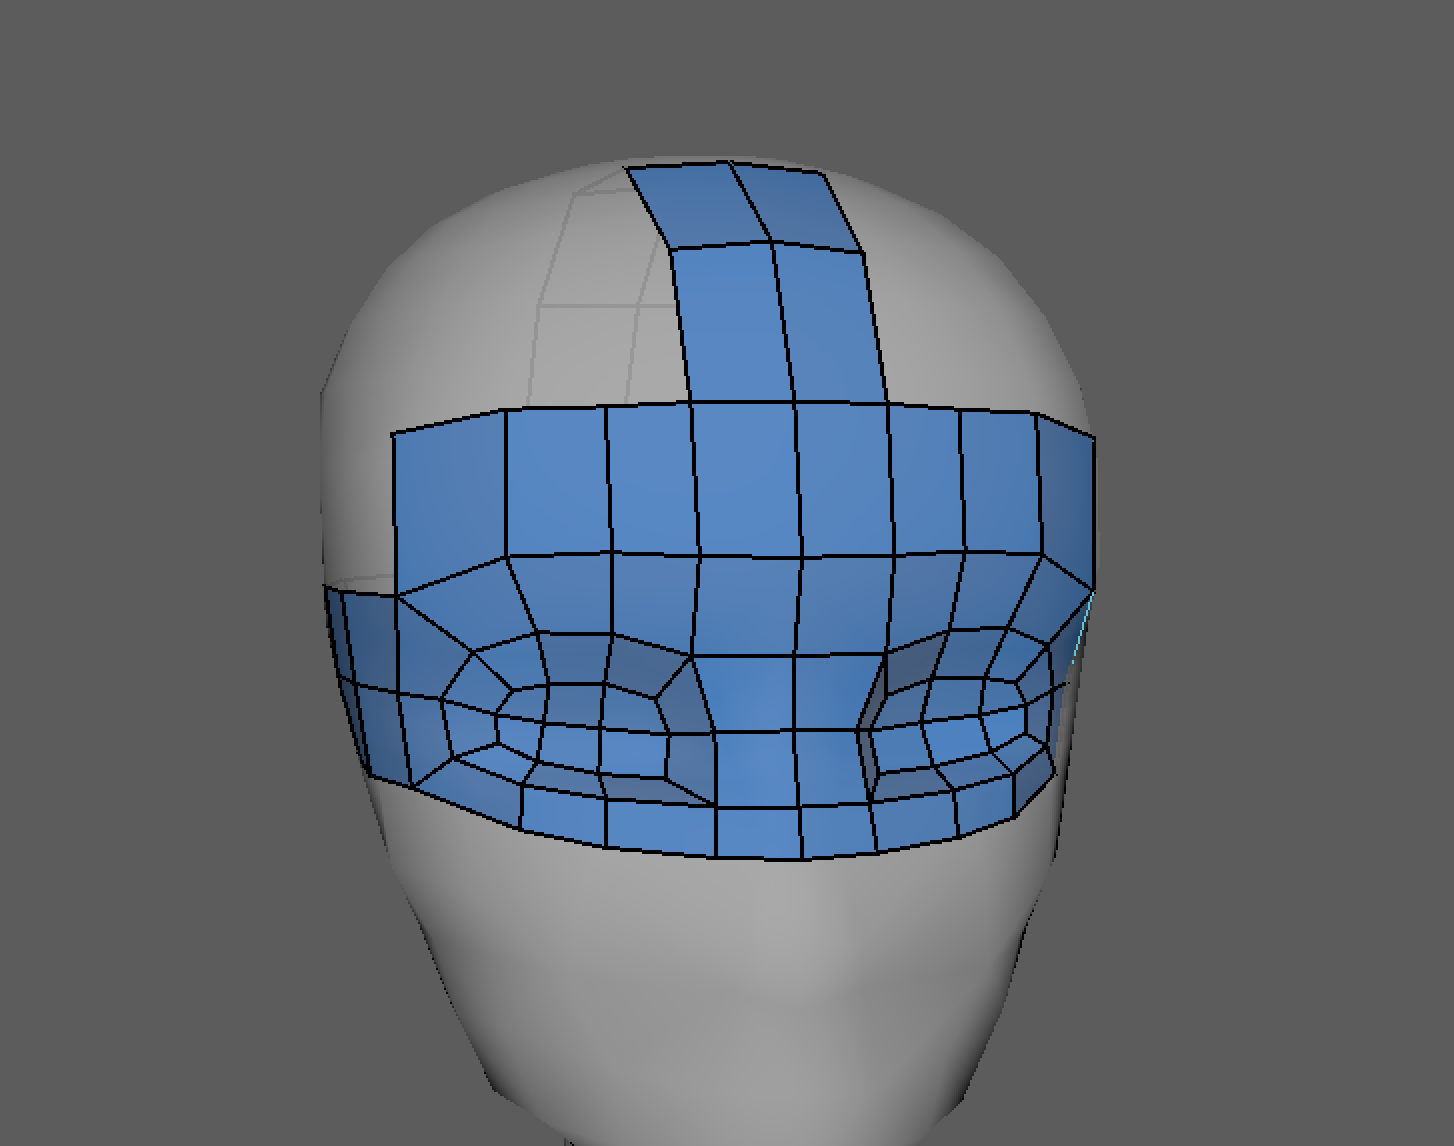
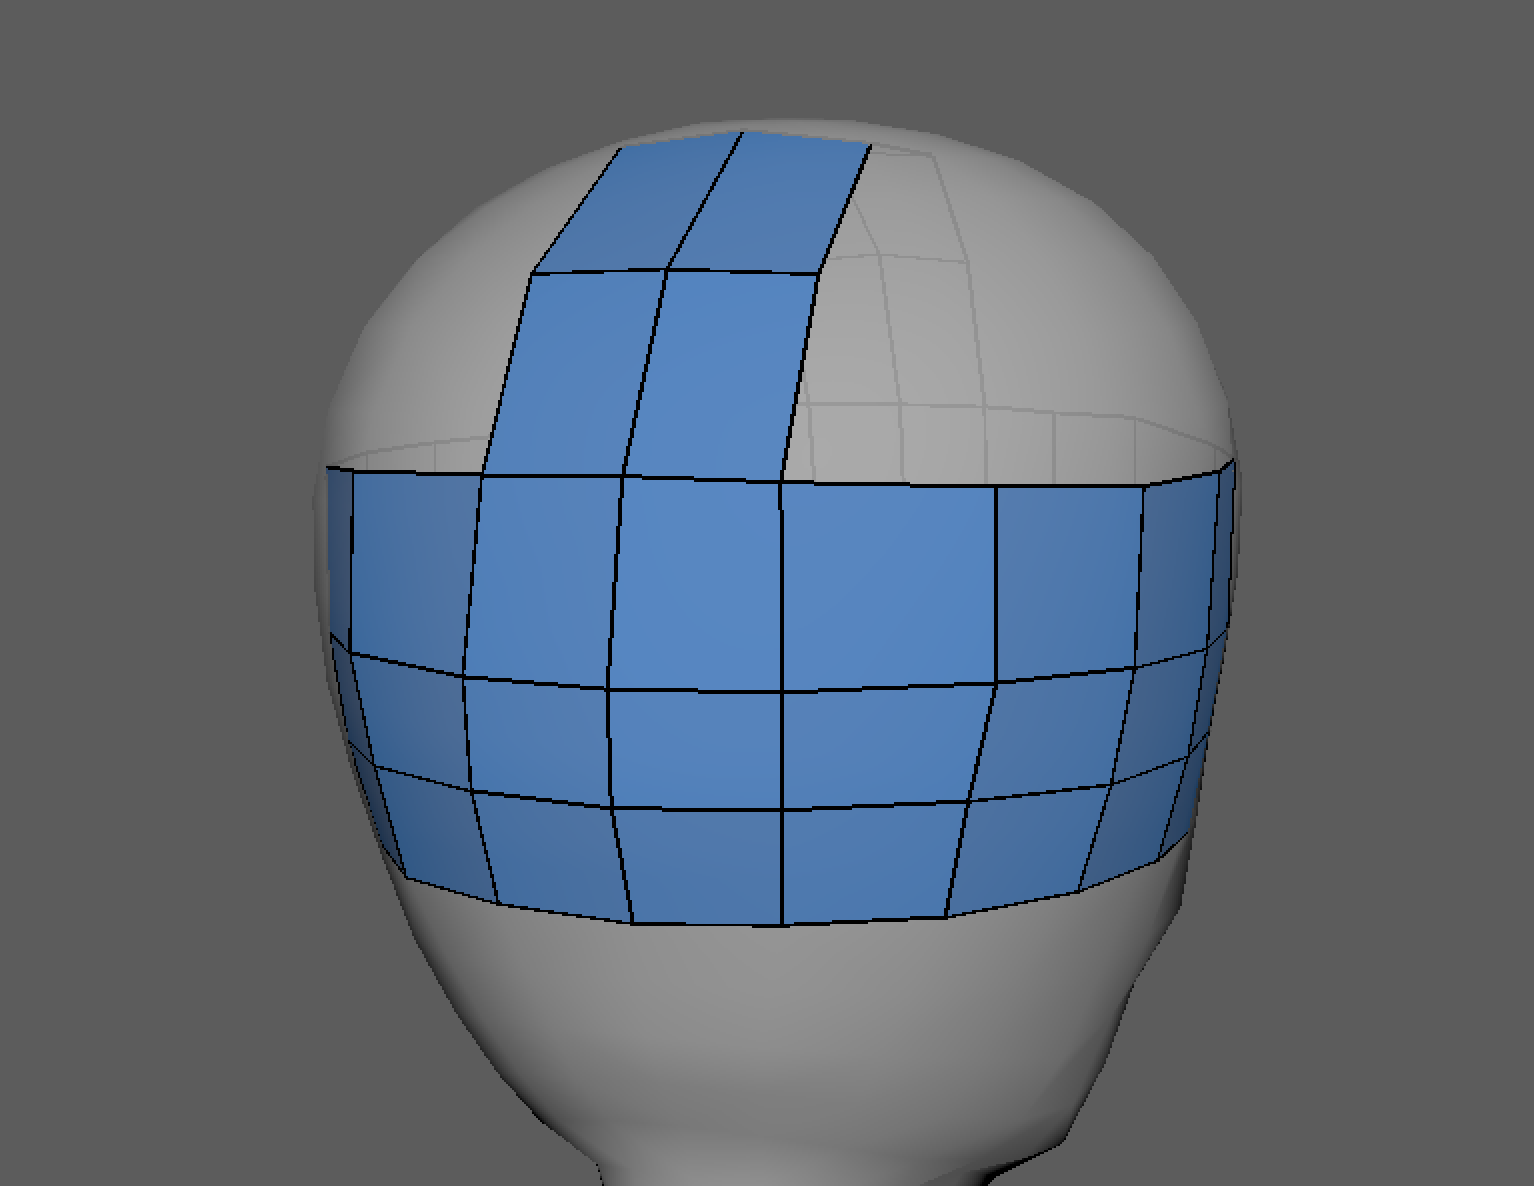
After repeating this process a few times, your model should look something like this:
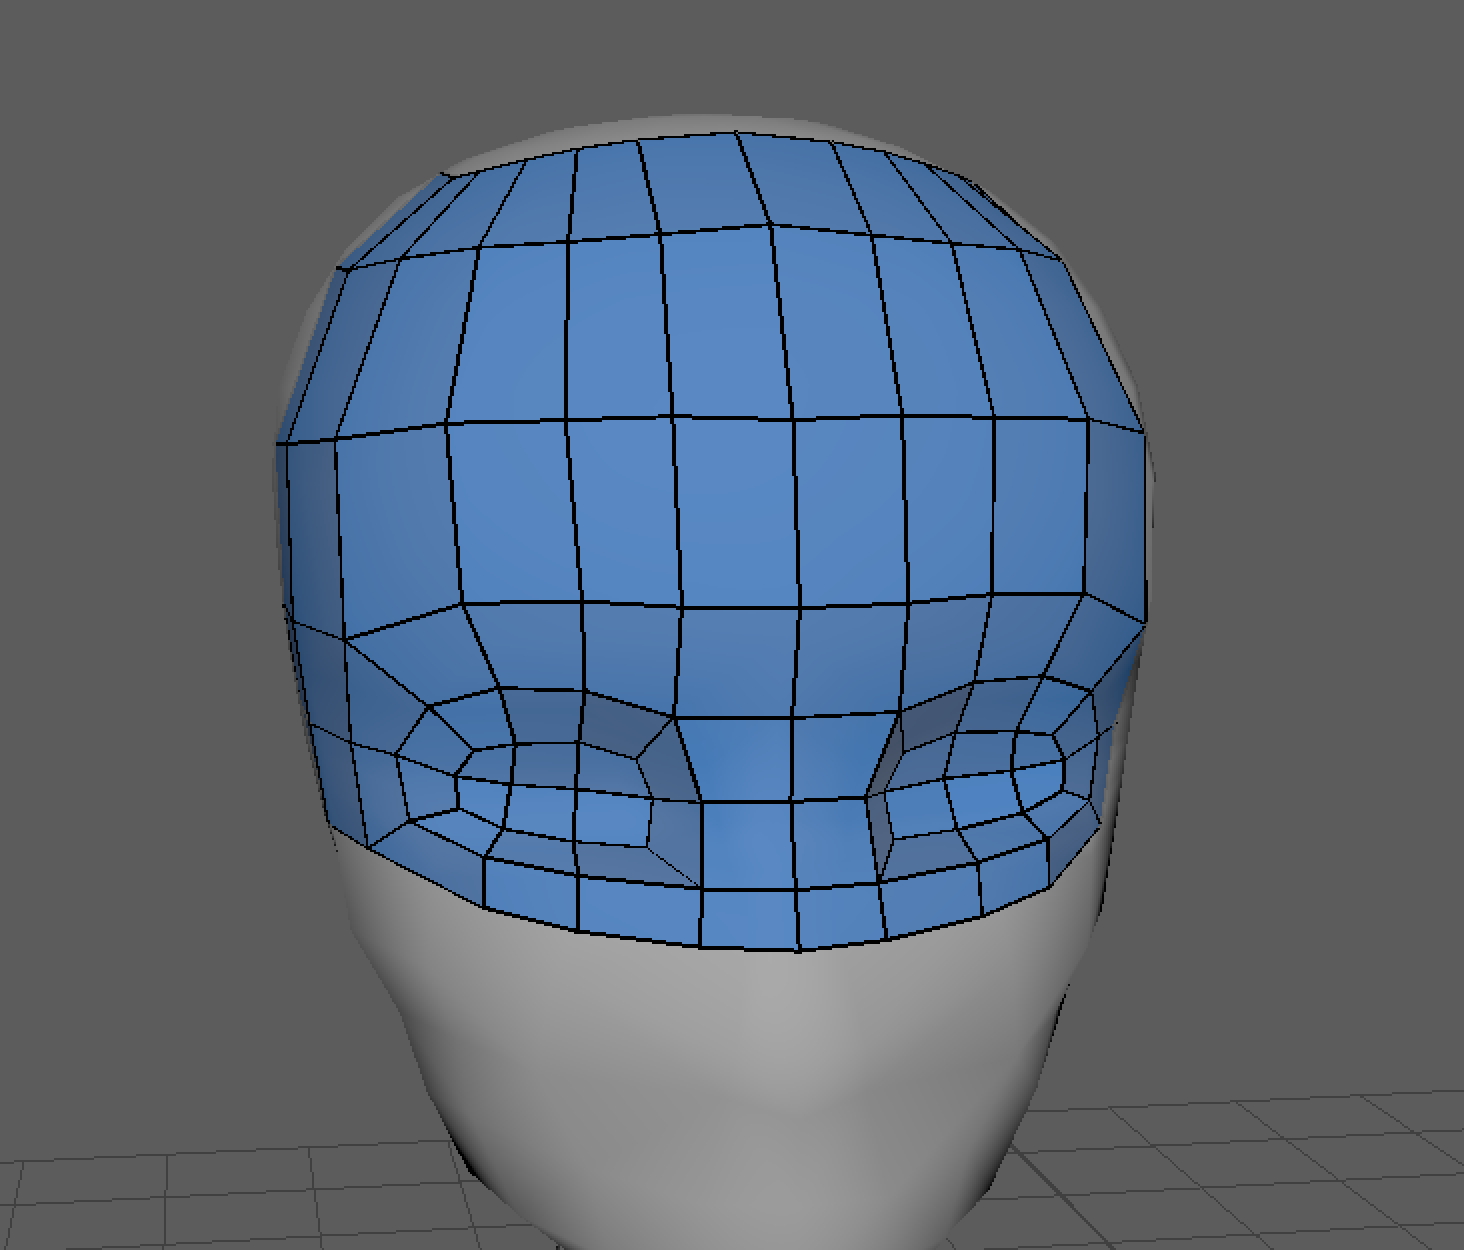
The top of my mesh currently has a gap in it like this:
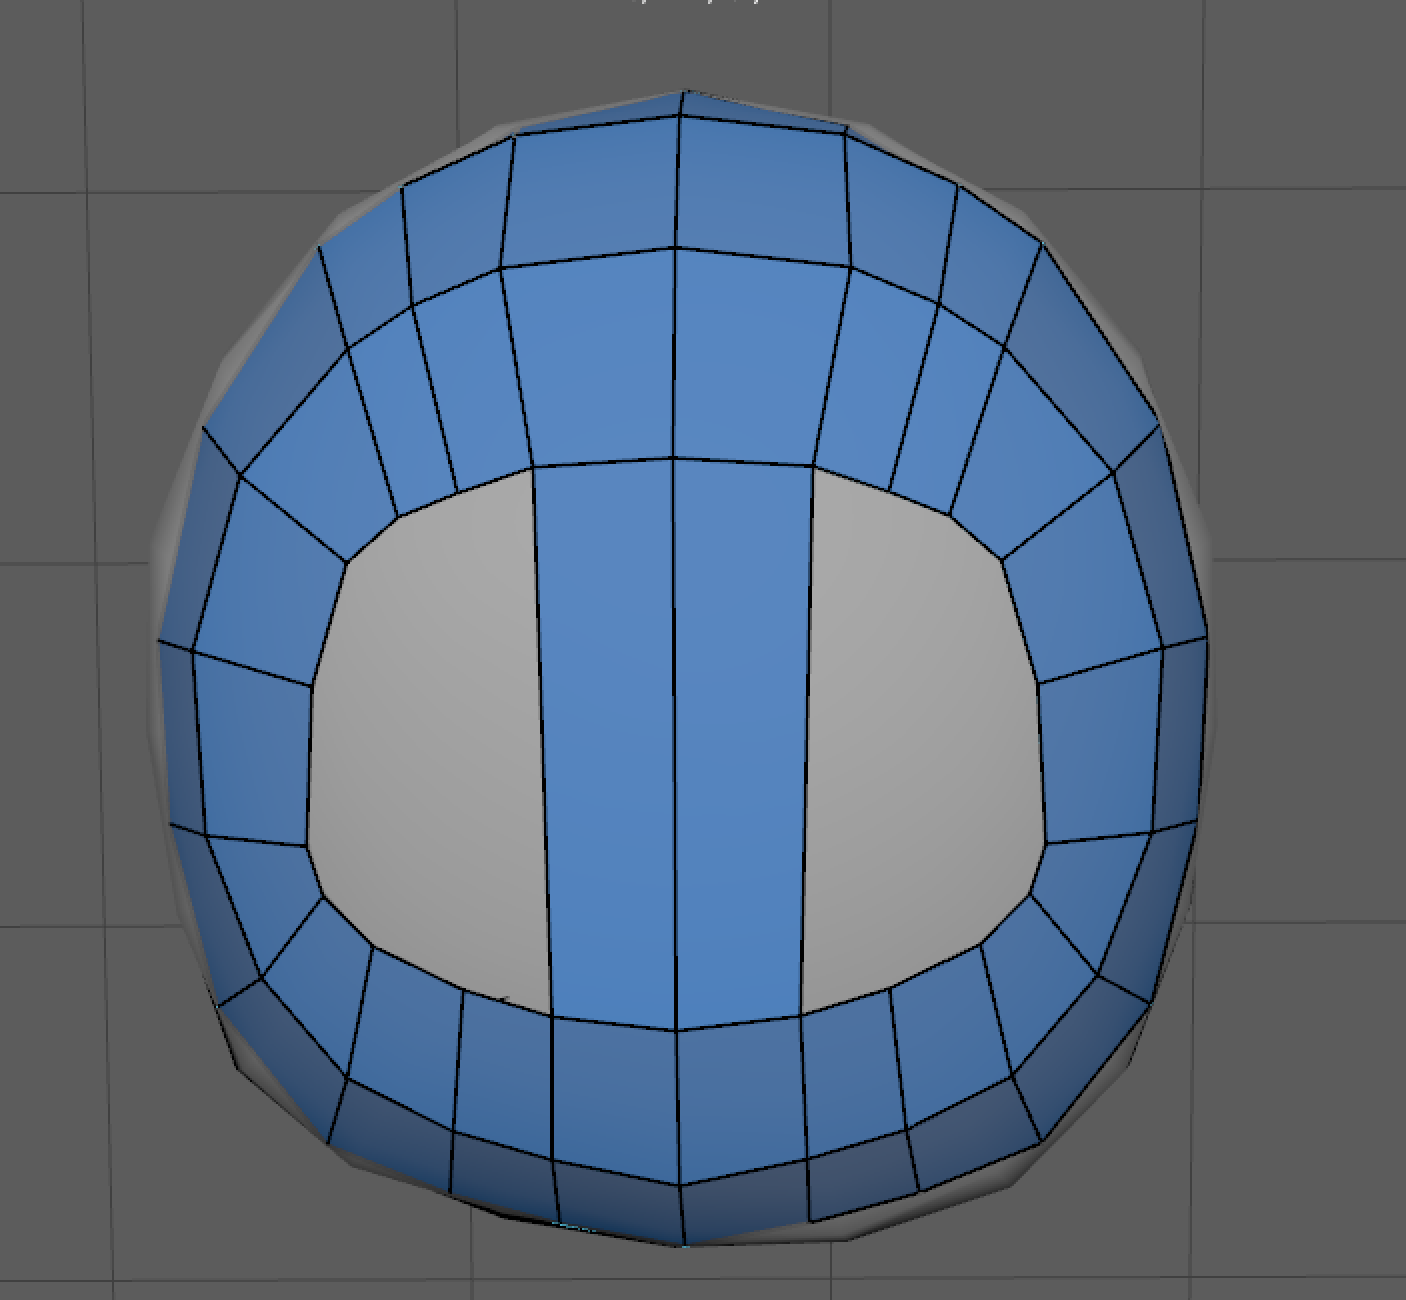
There are many ways one could approach filling in this gap but for me this is what made the most sense, while maintaining good edge flow. First, I connect the quads on the top of the gap to the bottom of the gap (I had to add one or two edges to make sure that the number of vertices lined up exactly).
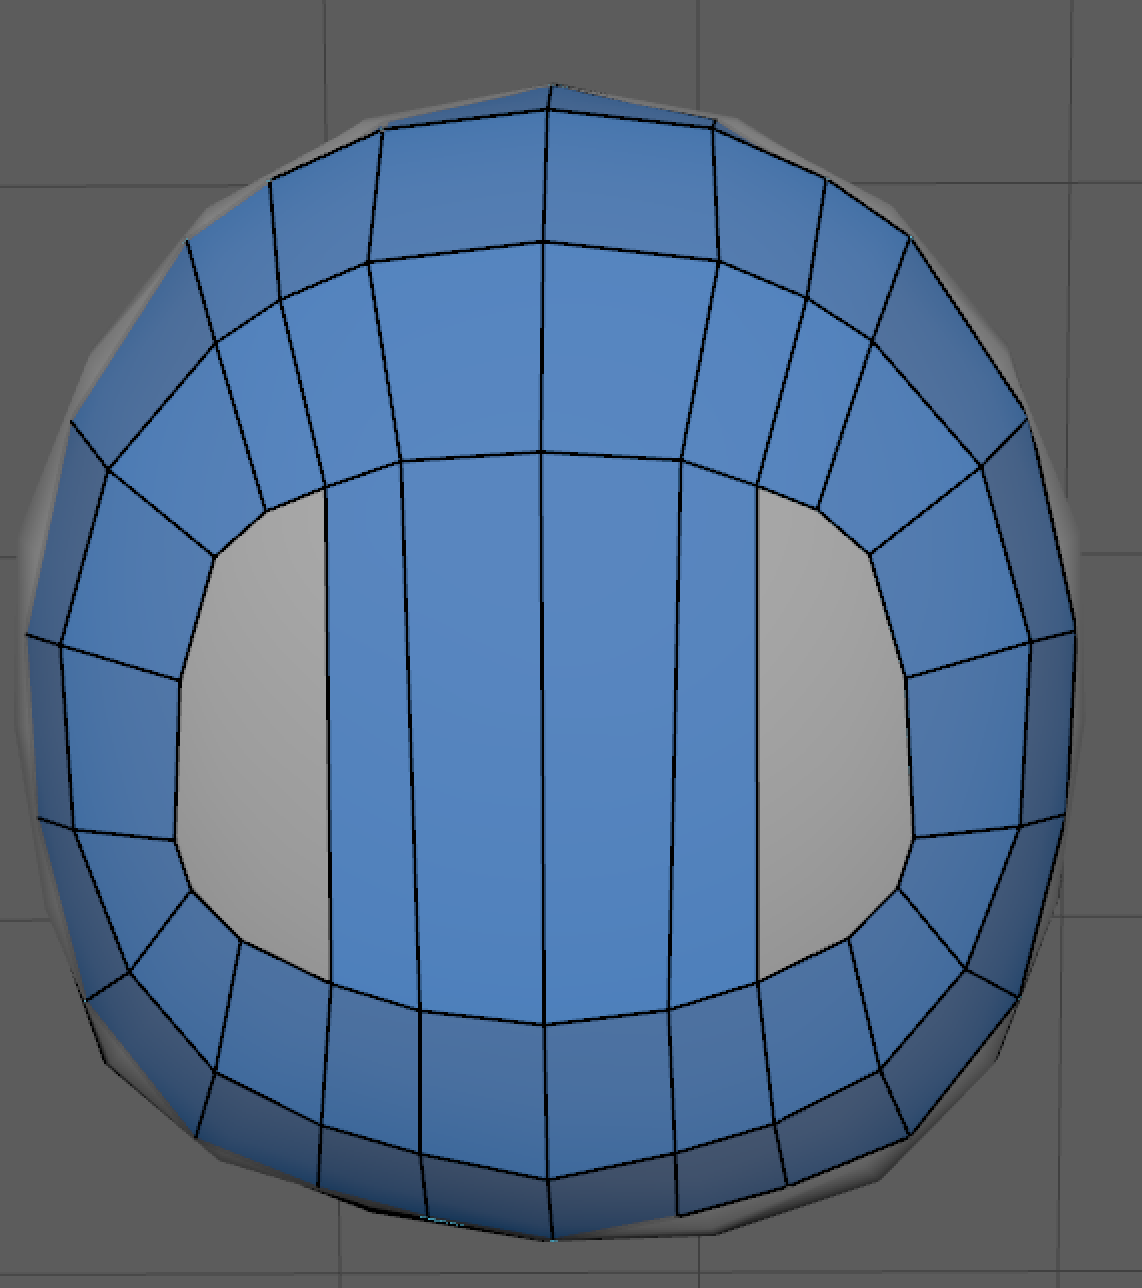
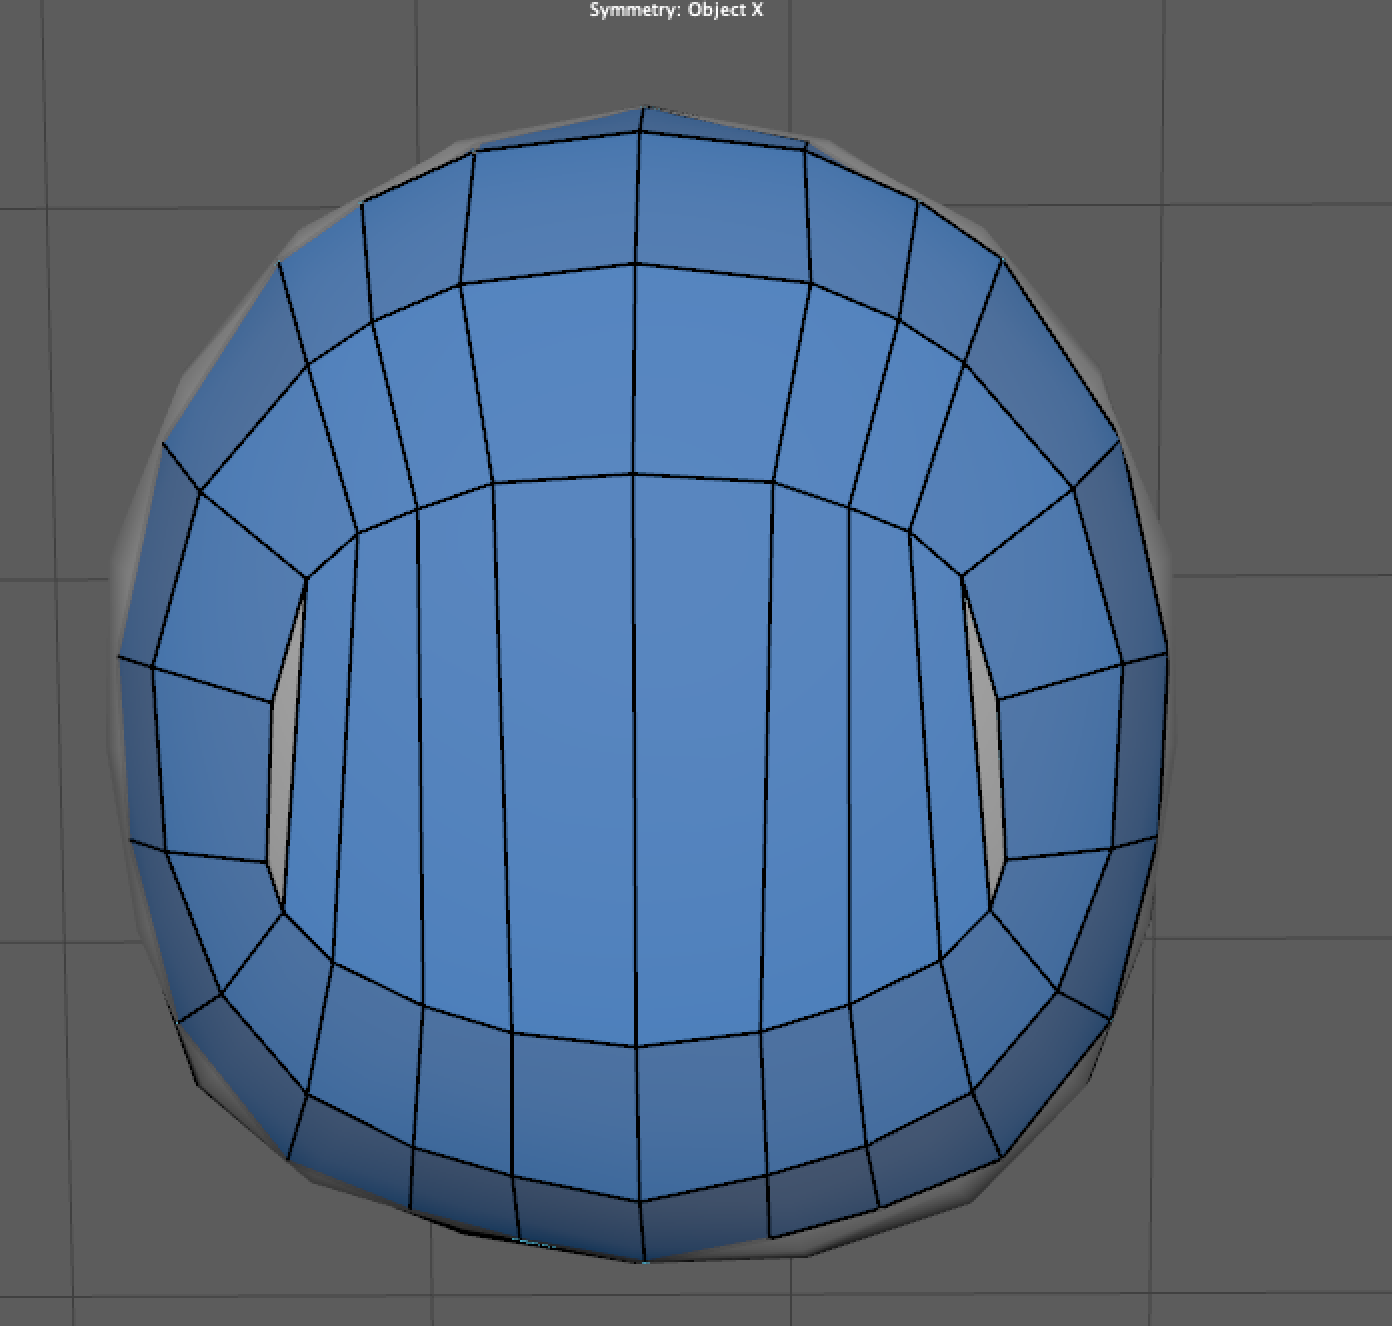
Next, I added some edges horizontally so that I could easily attach the middle section to the side vertices. In Quad Draw, you can easily merge two vertices by simply drawing one vertex into the other and they should automatically “stick” together.
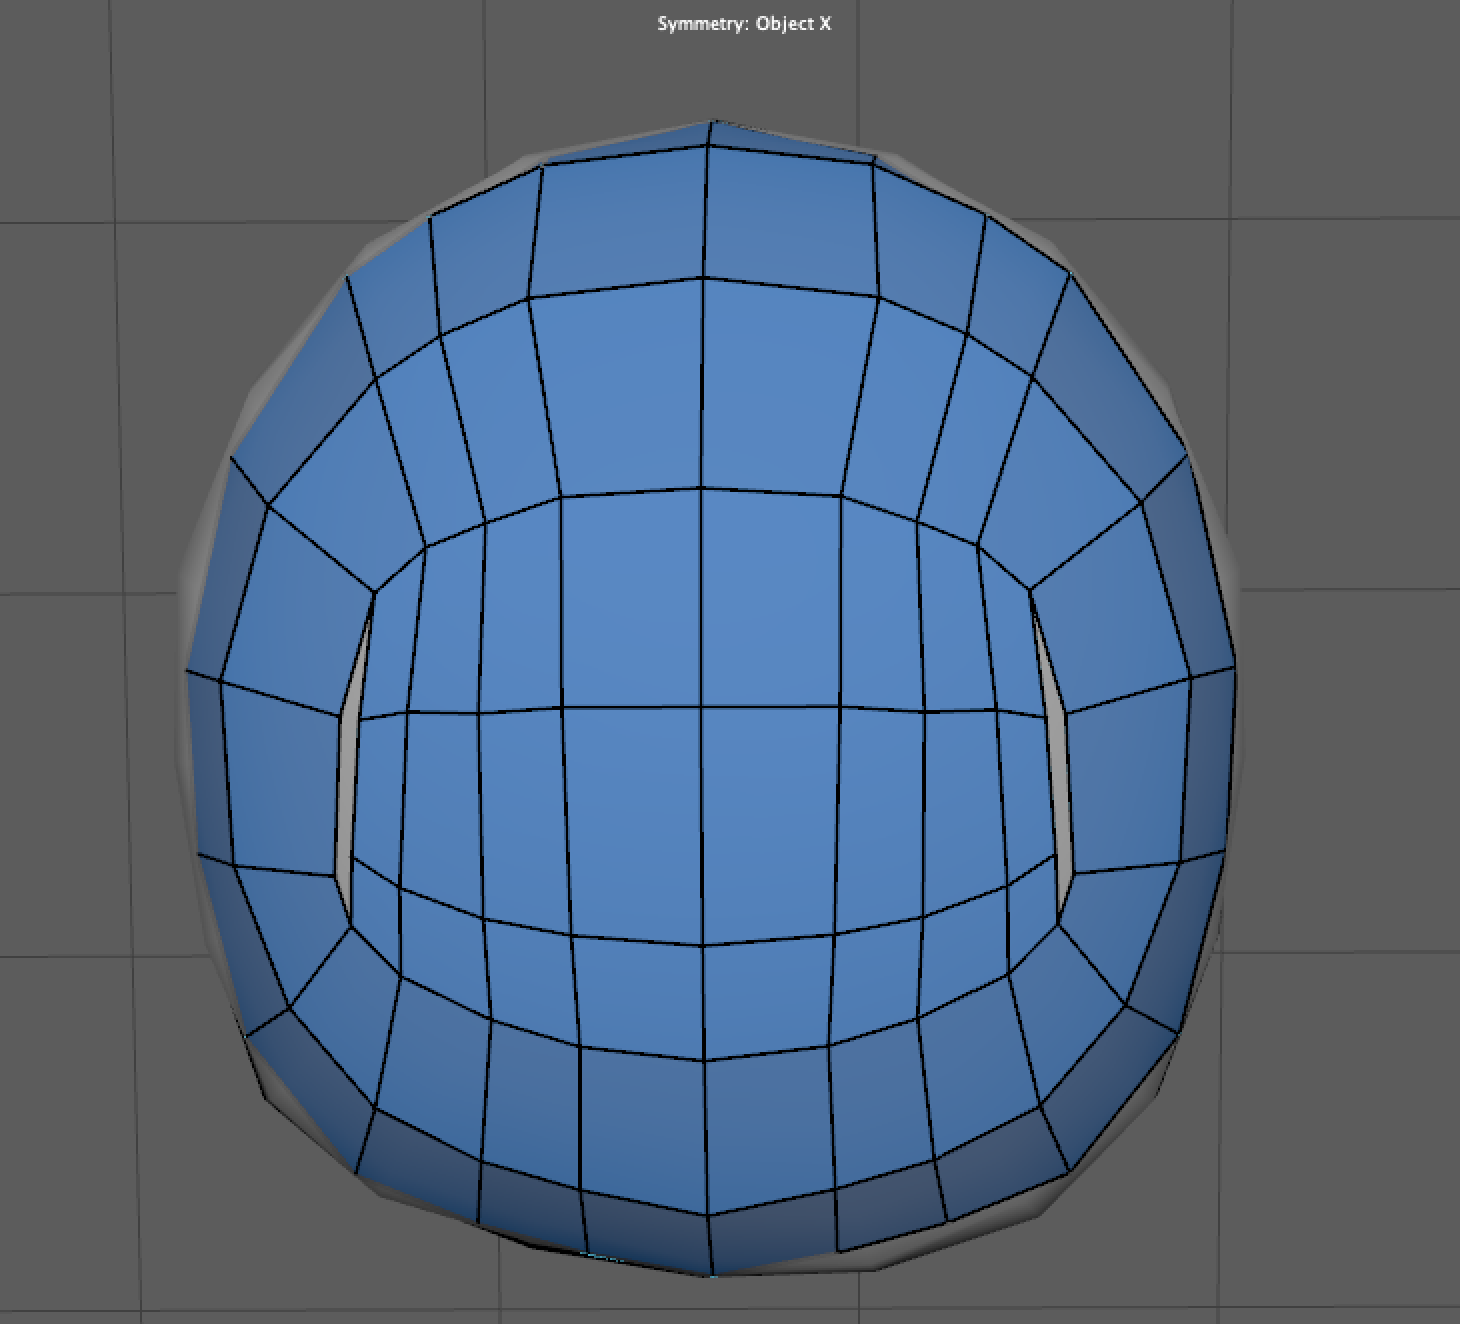
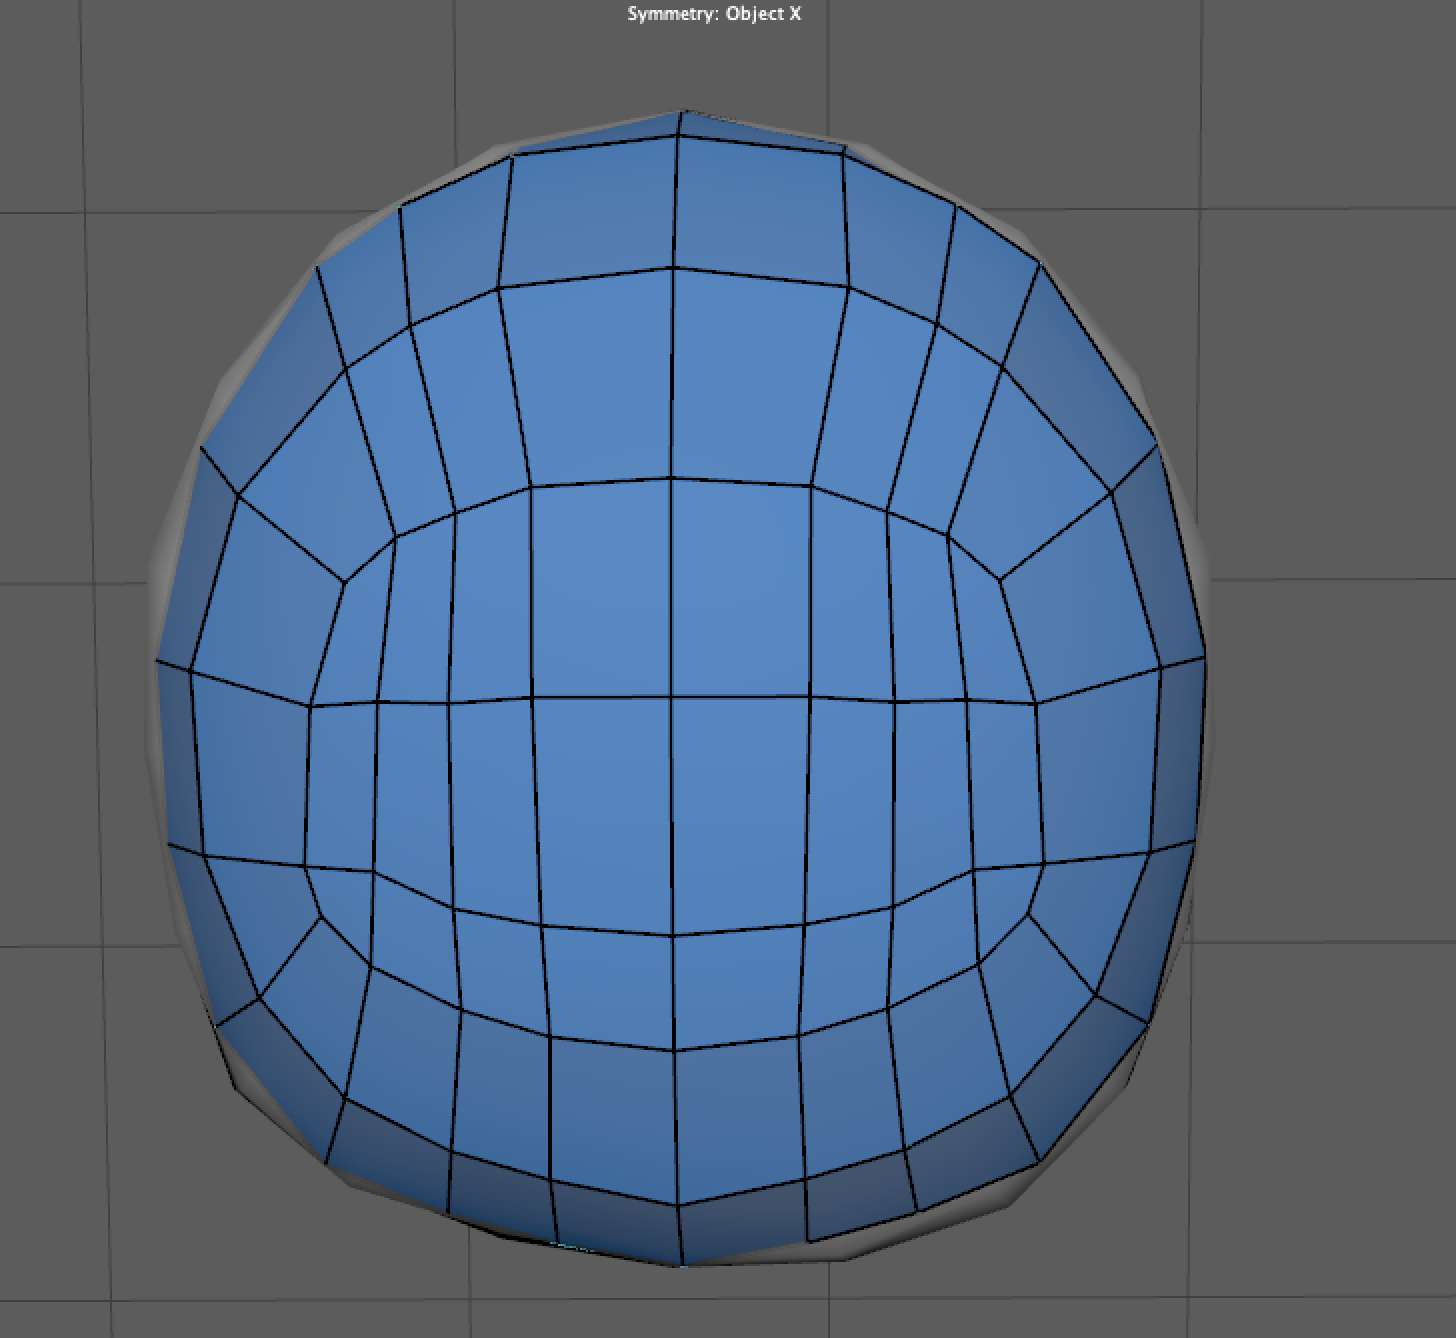
The top of the head should be filled in now, however in my case, since the placement of the edges were quite close together, some of my faces are no longer evenly spaced. Once again, Quad Draw has a helpful solution for this: by holding down SHIFT and left-clicking and dragging across the mesh, you can smooth out or “relax” the vertices of your mesh. This is an easy and quick way to evenly space out our faces and to get rid of any crooked lines.
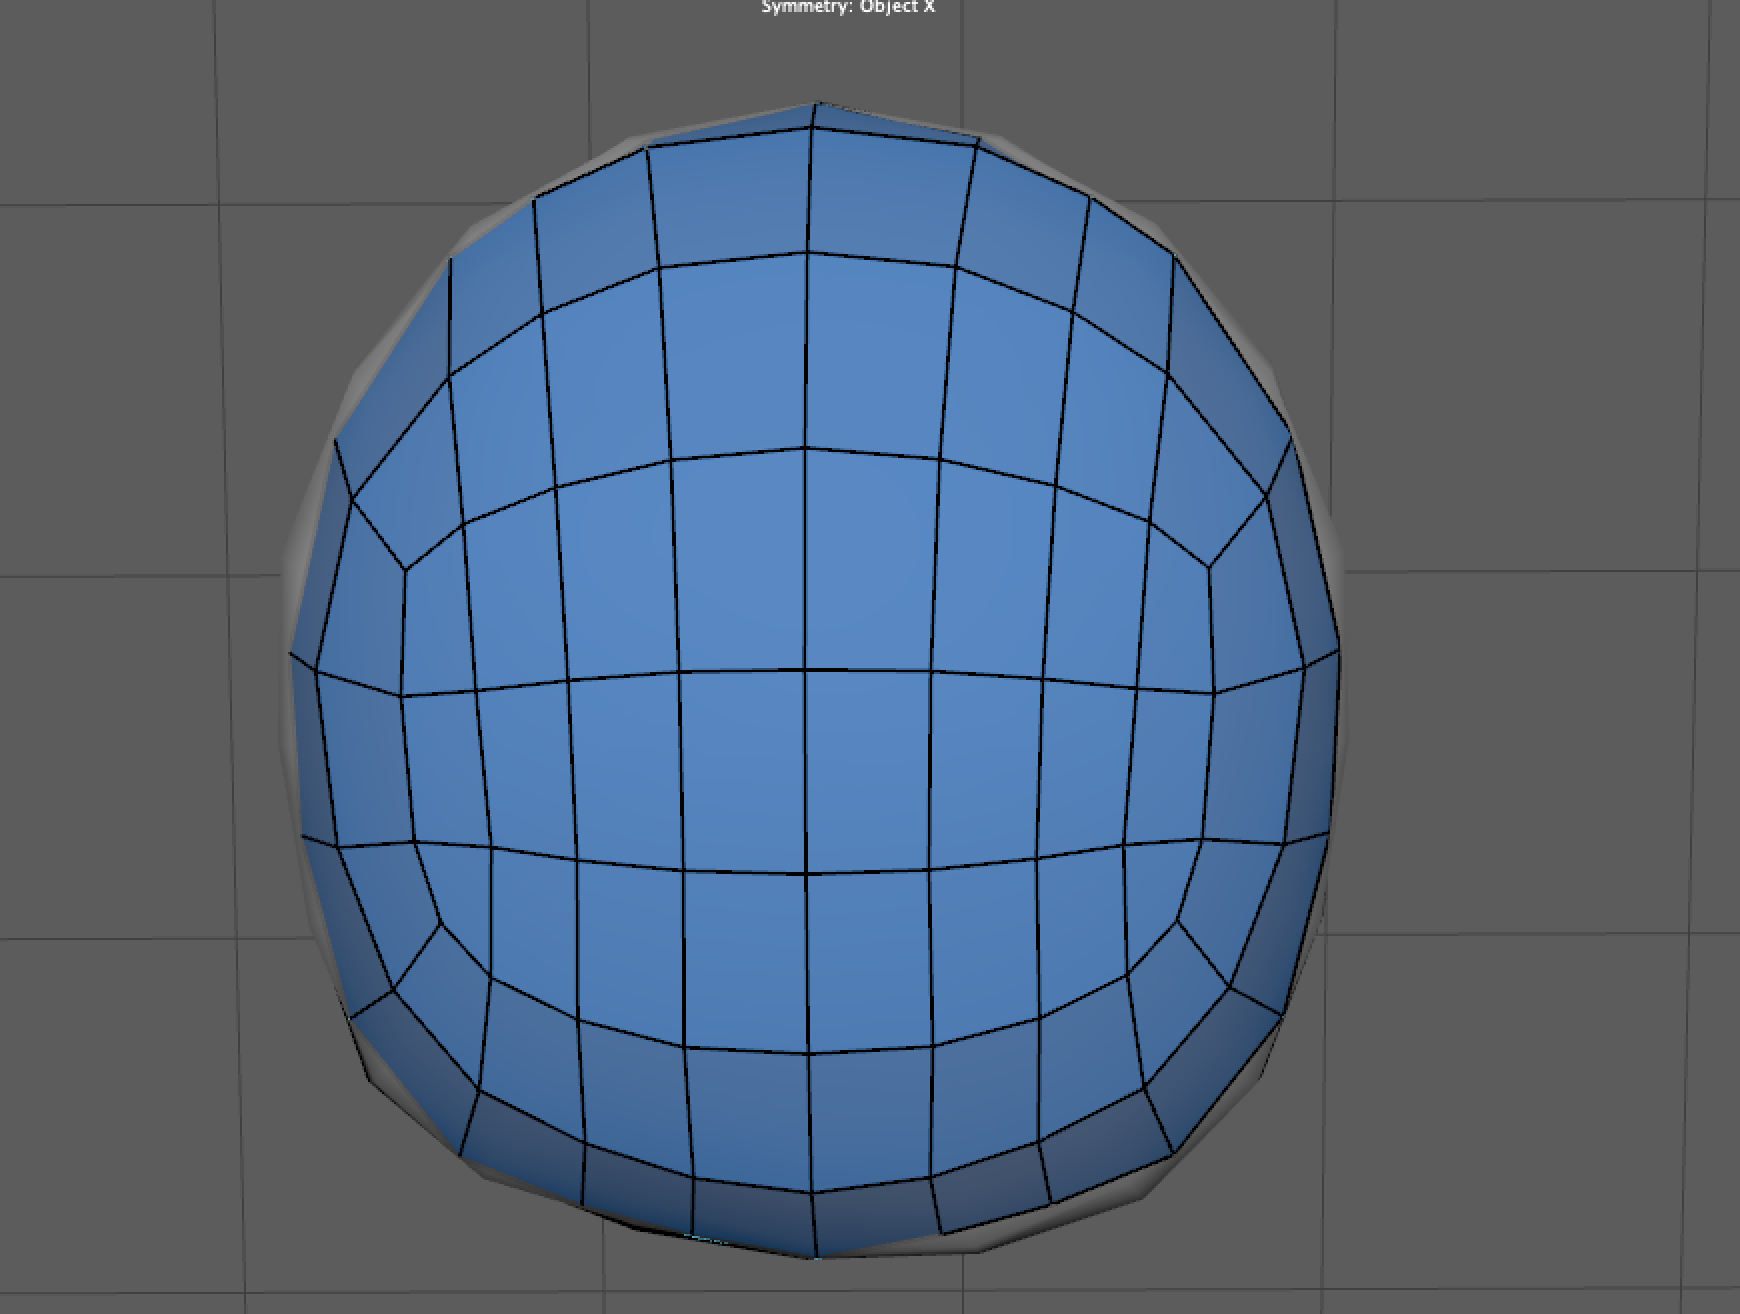
With this, we are done retopologizing the top half of our character.
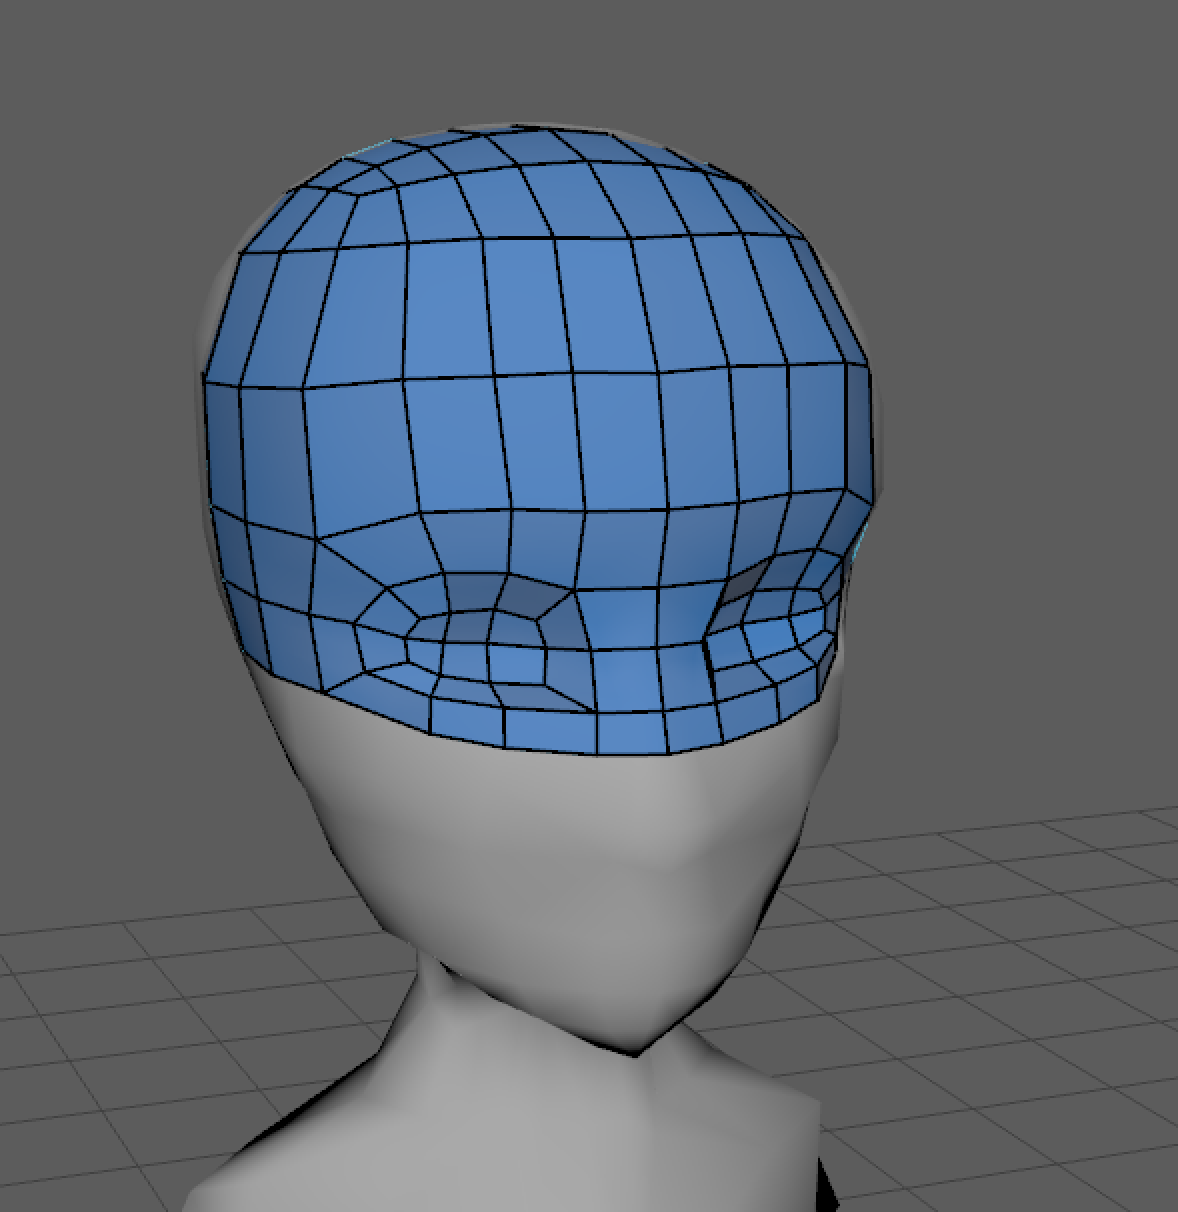
Now I am going to start on the bottom half of the face. I’m going to extend the quads on the nose bridge further down to create the full nose.
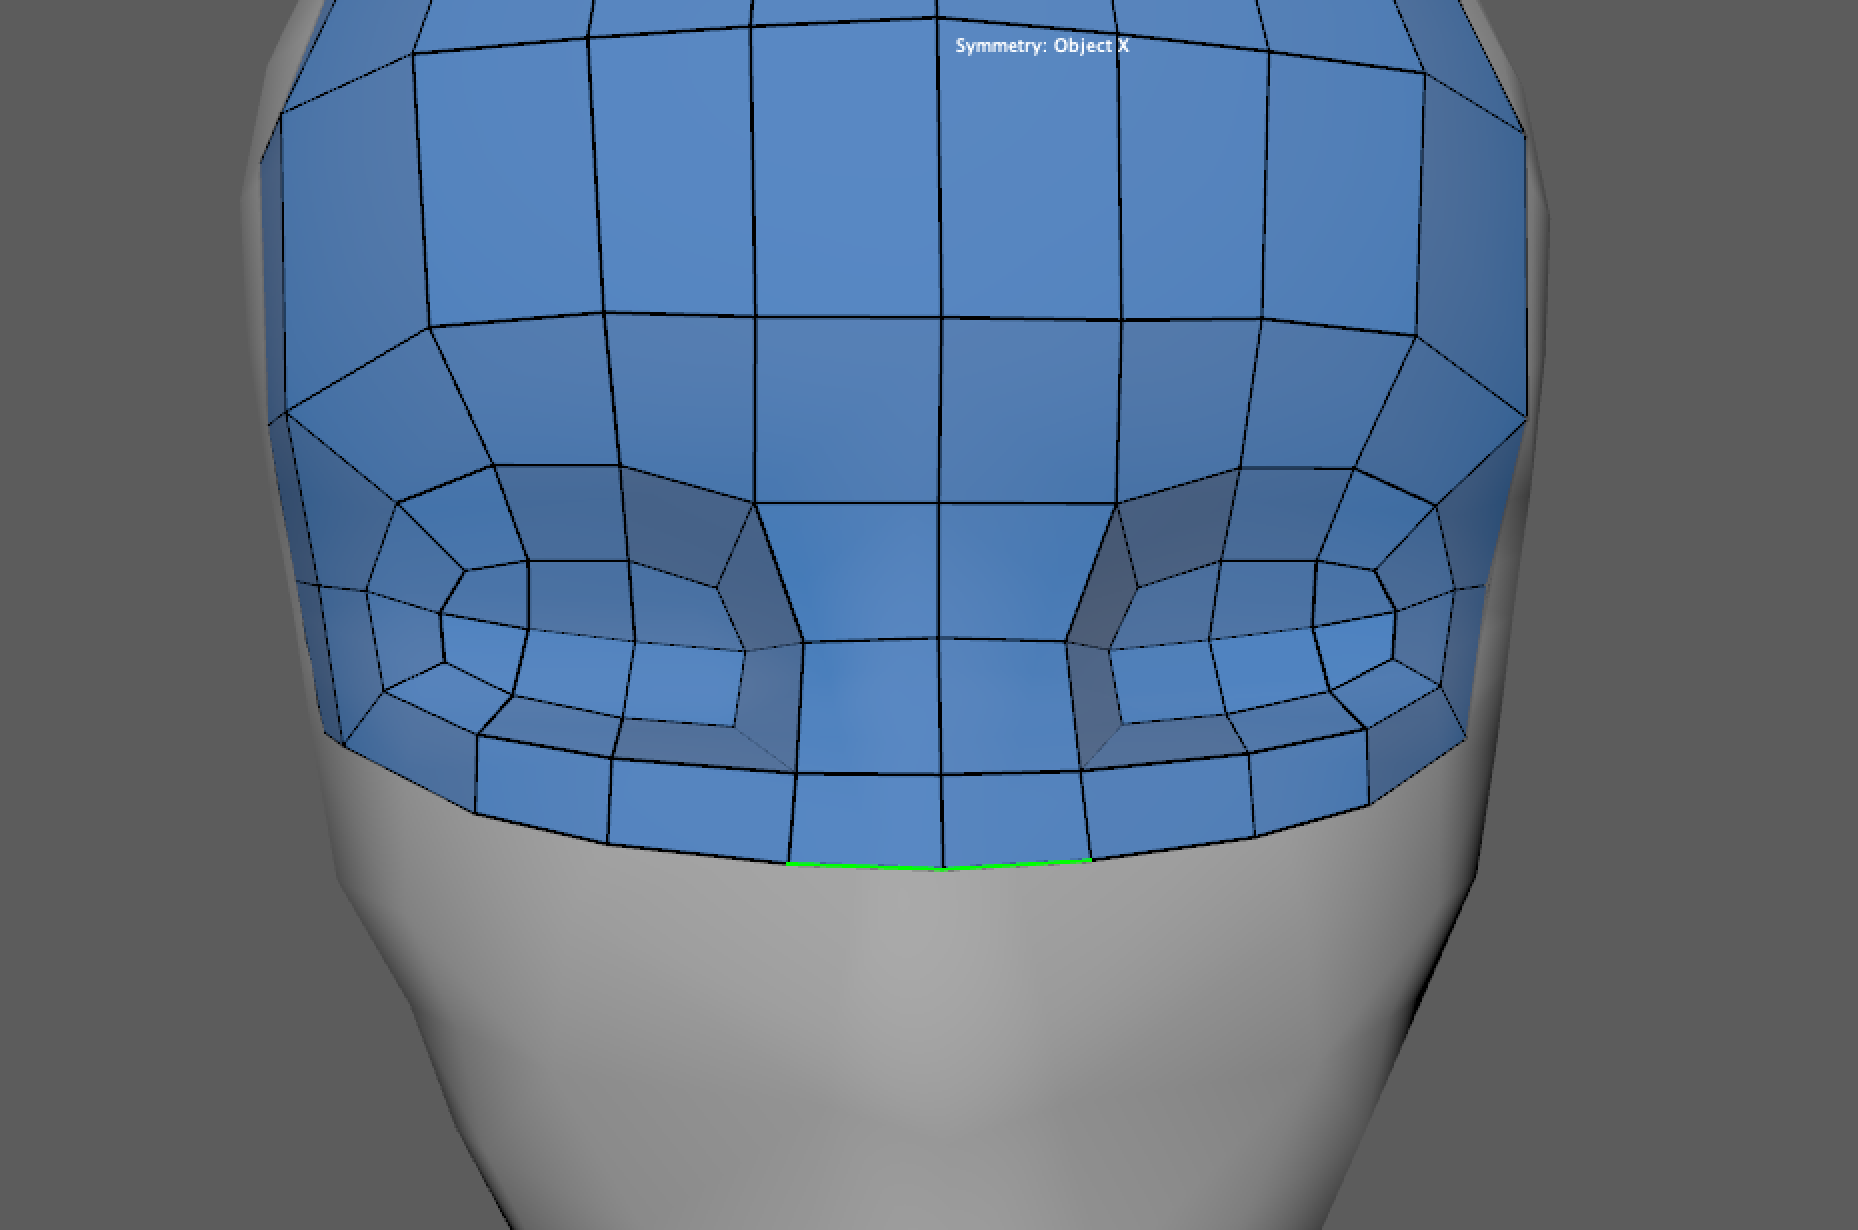
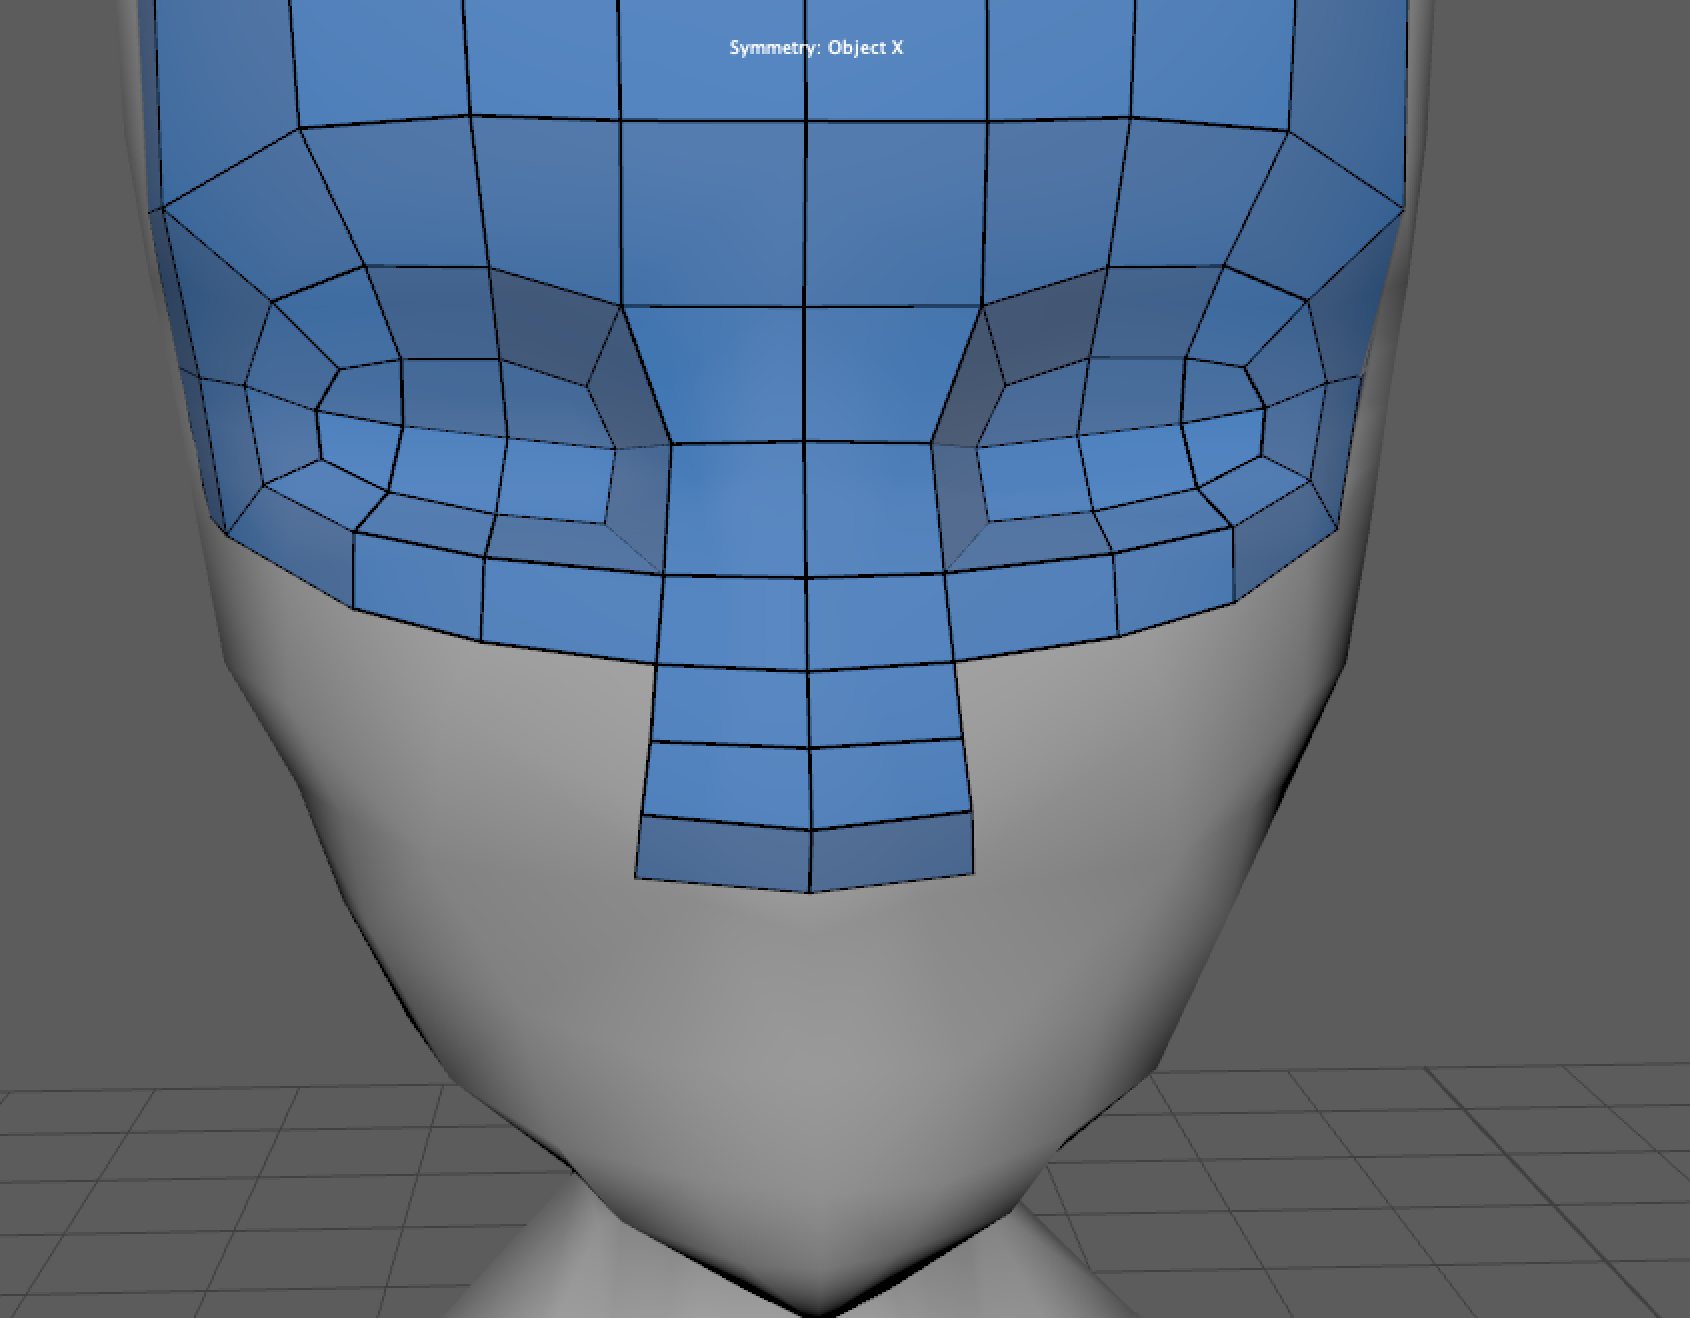
Now that we have the nose area filled in, let’s move a bit further down and start working on the mouth. For this, we are going to repeat a similar process that we followed for the eyes/eye sockets. First, let’s create a ring of quads roughly around the mouth region.
Start by placing your initial points first and creating your first few quads.
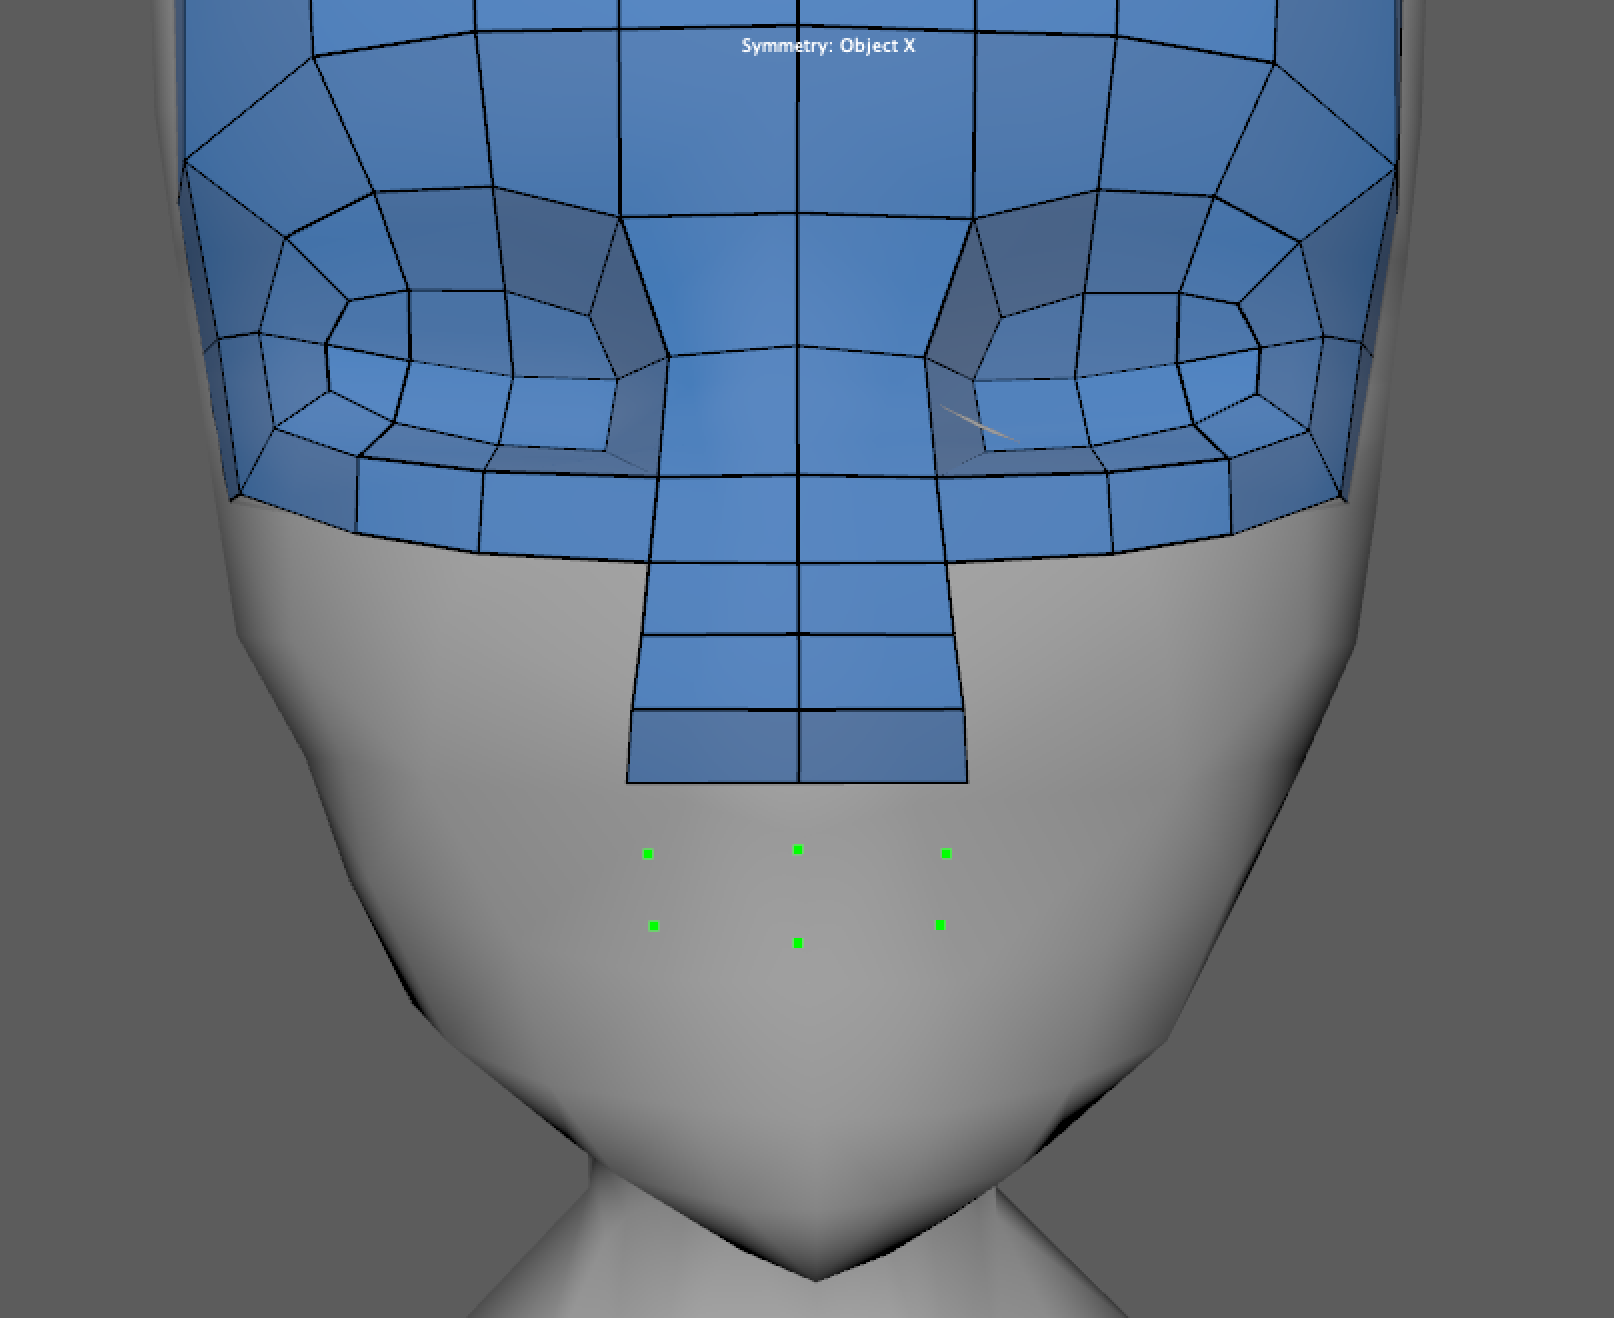
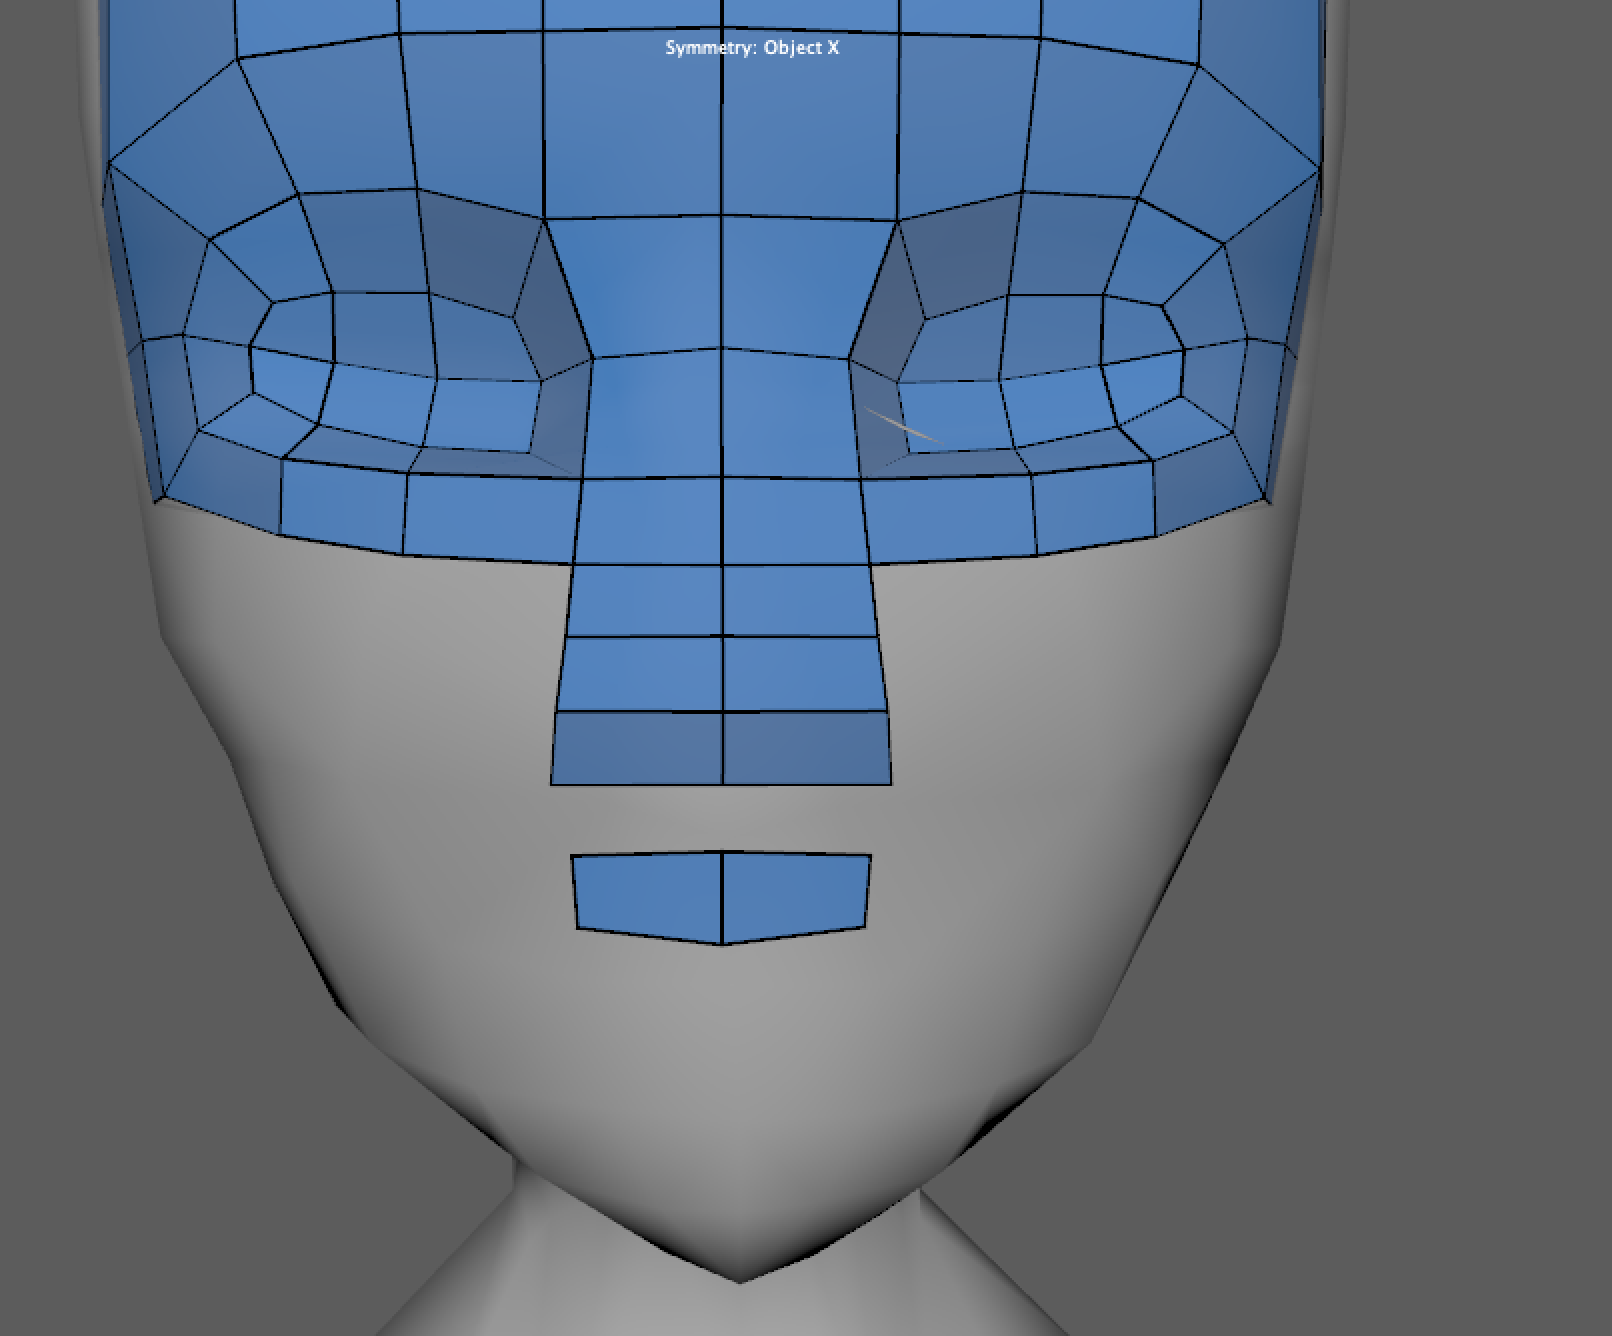
Then, extend those quads out and downward to create a ring of faces around the mouth.
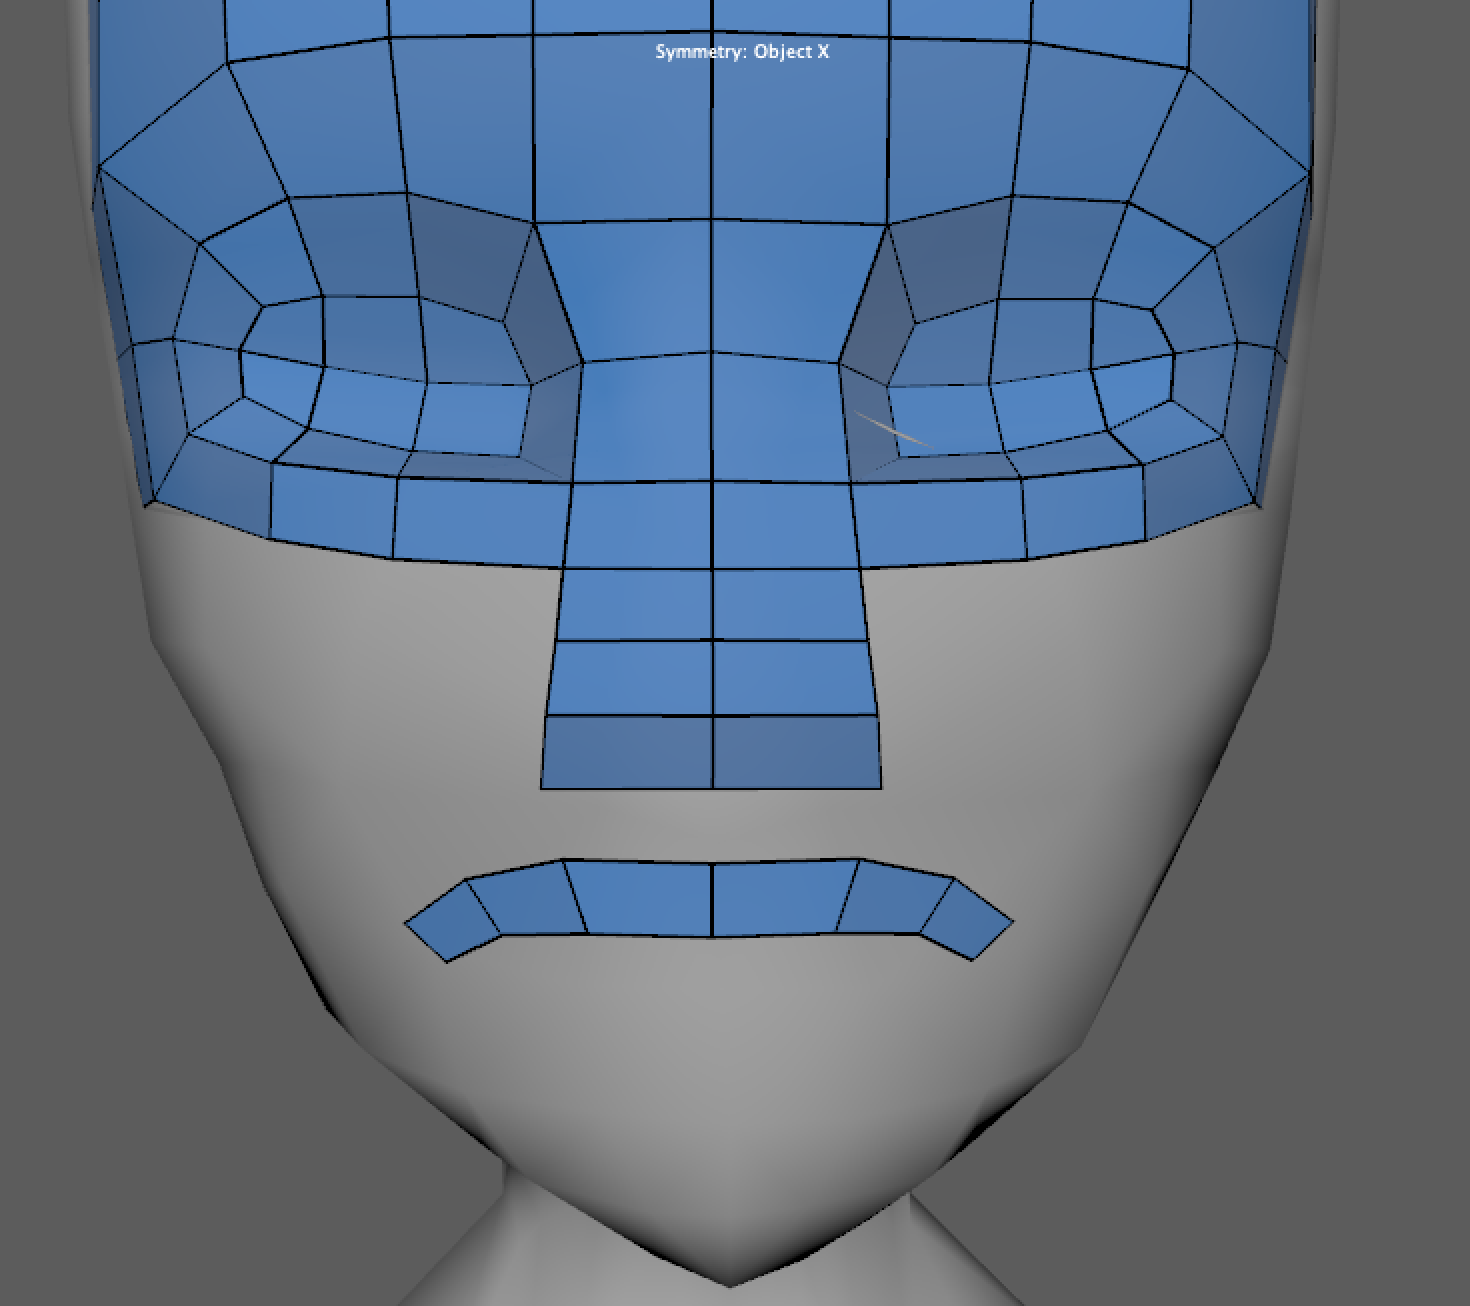
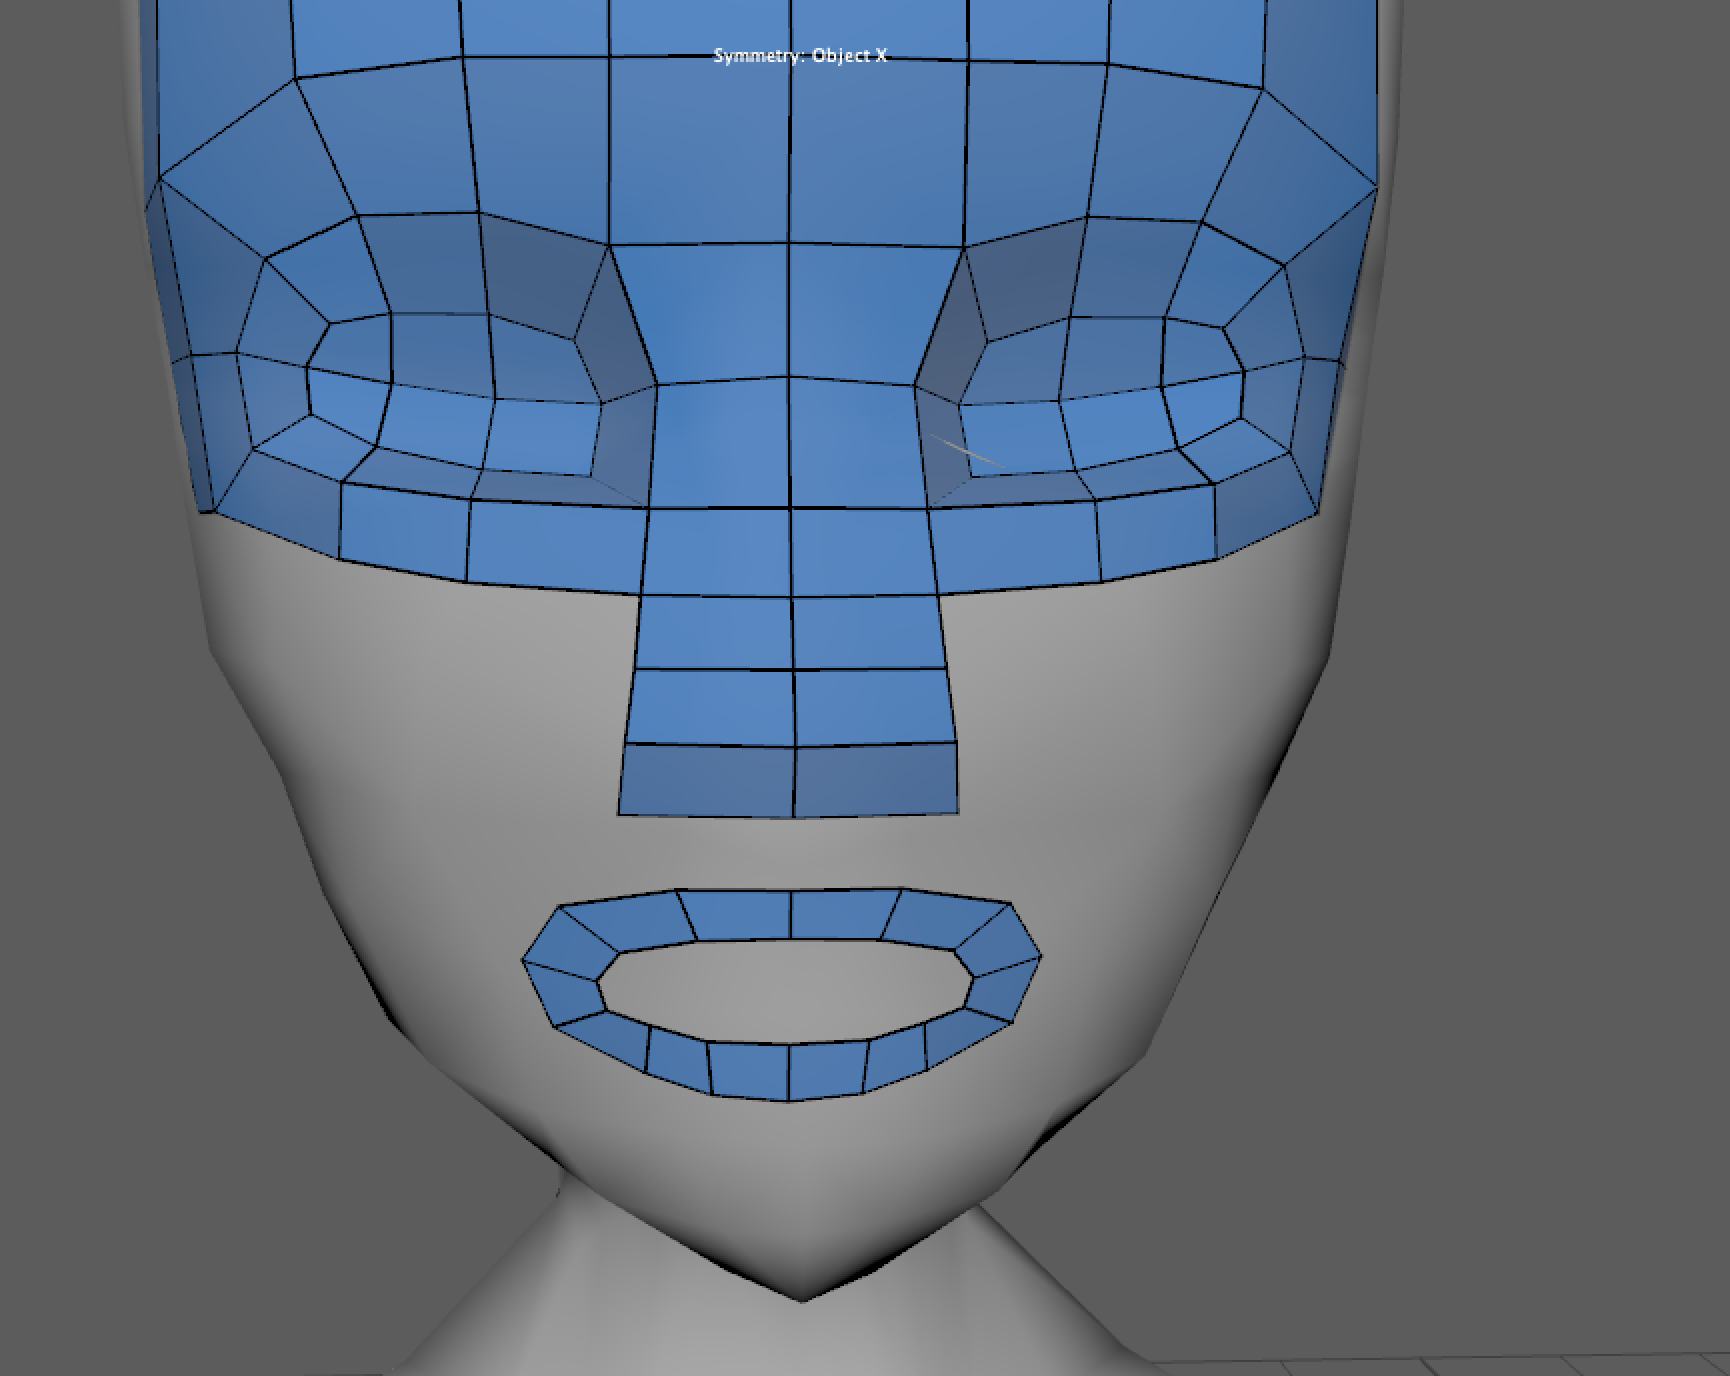
We are now going to fill in the mouth area we just created with more quads. This process is almost identical to what we did earlier to fill in the eyes.
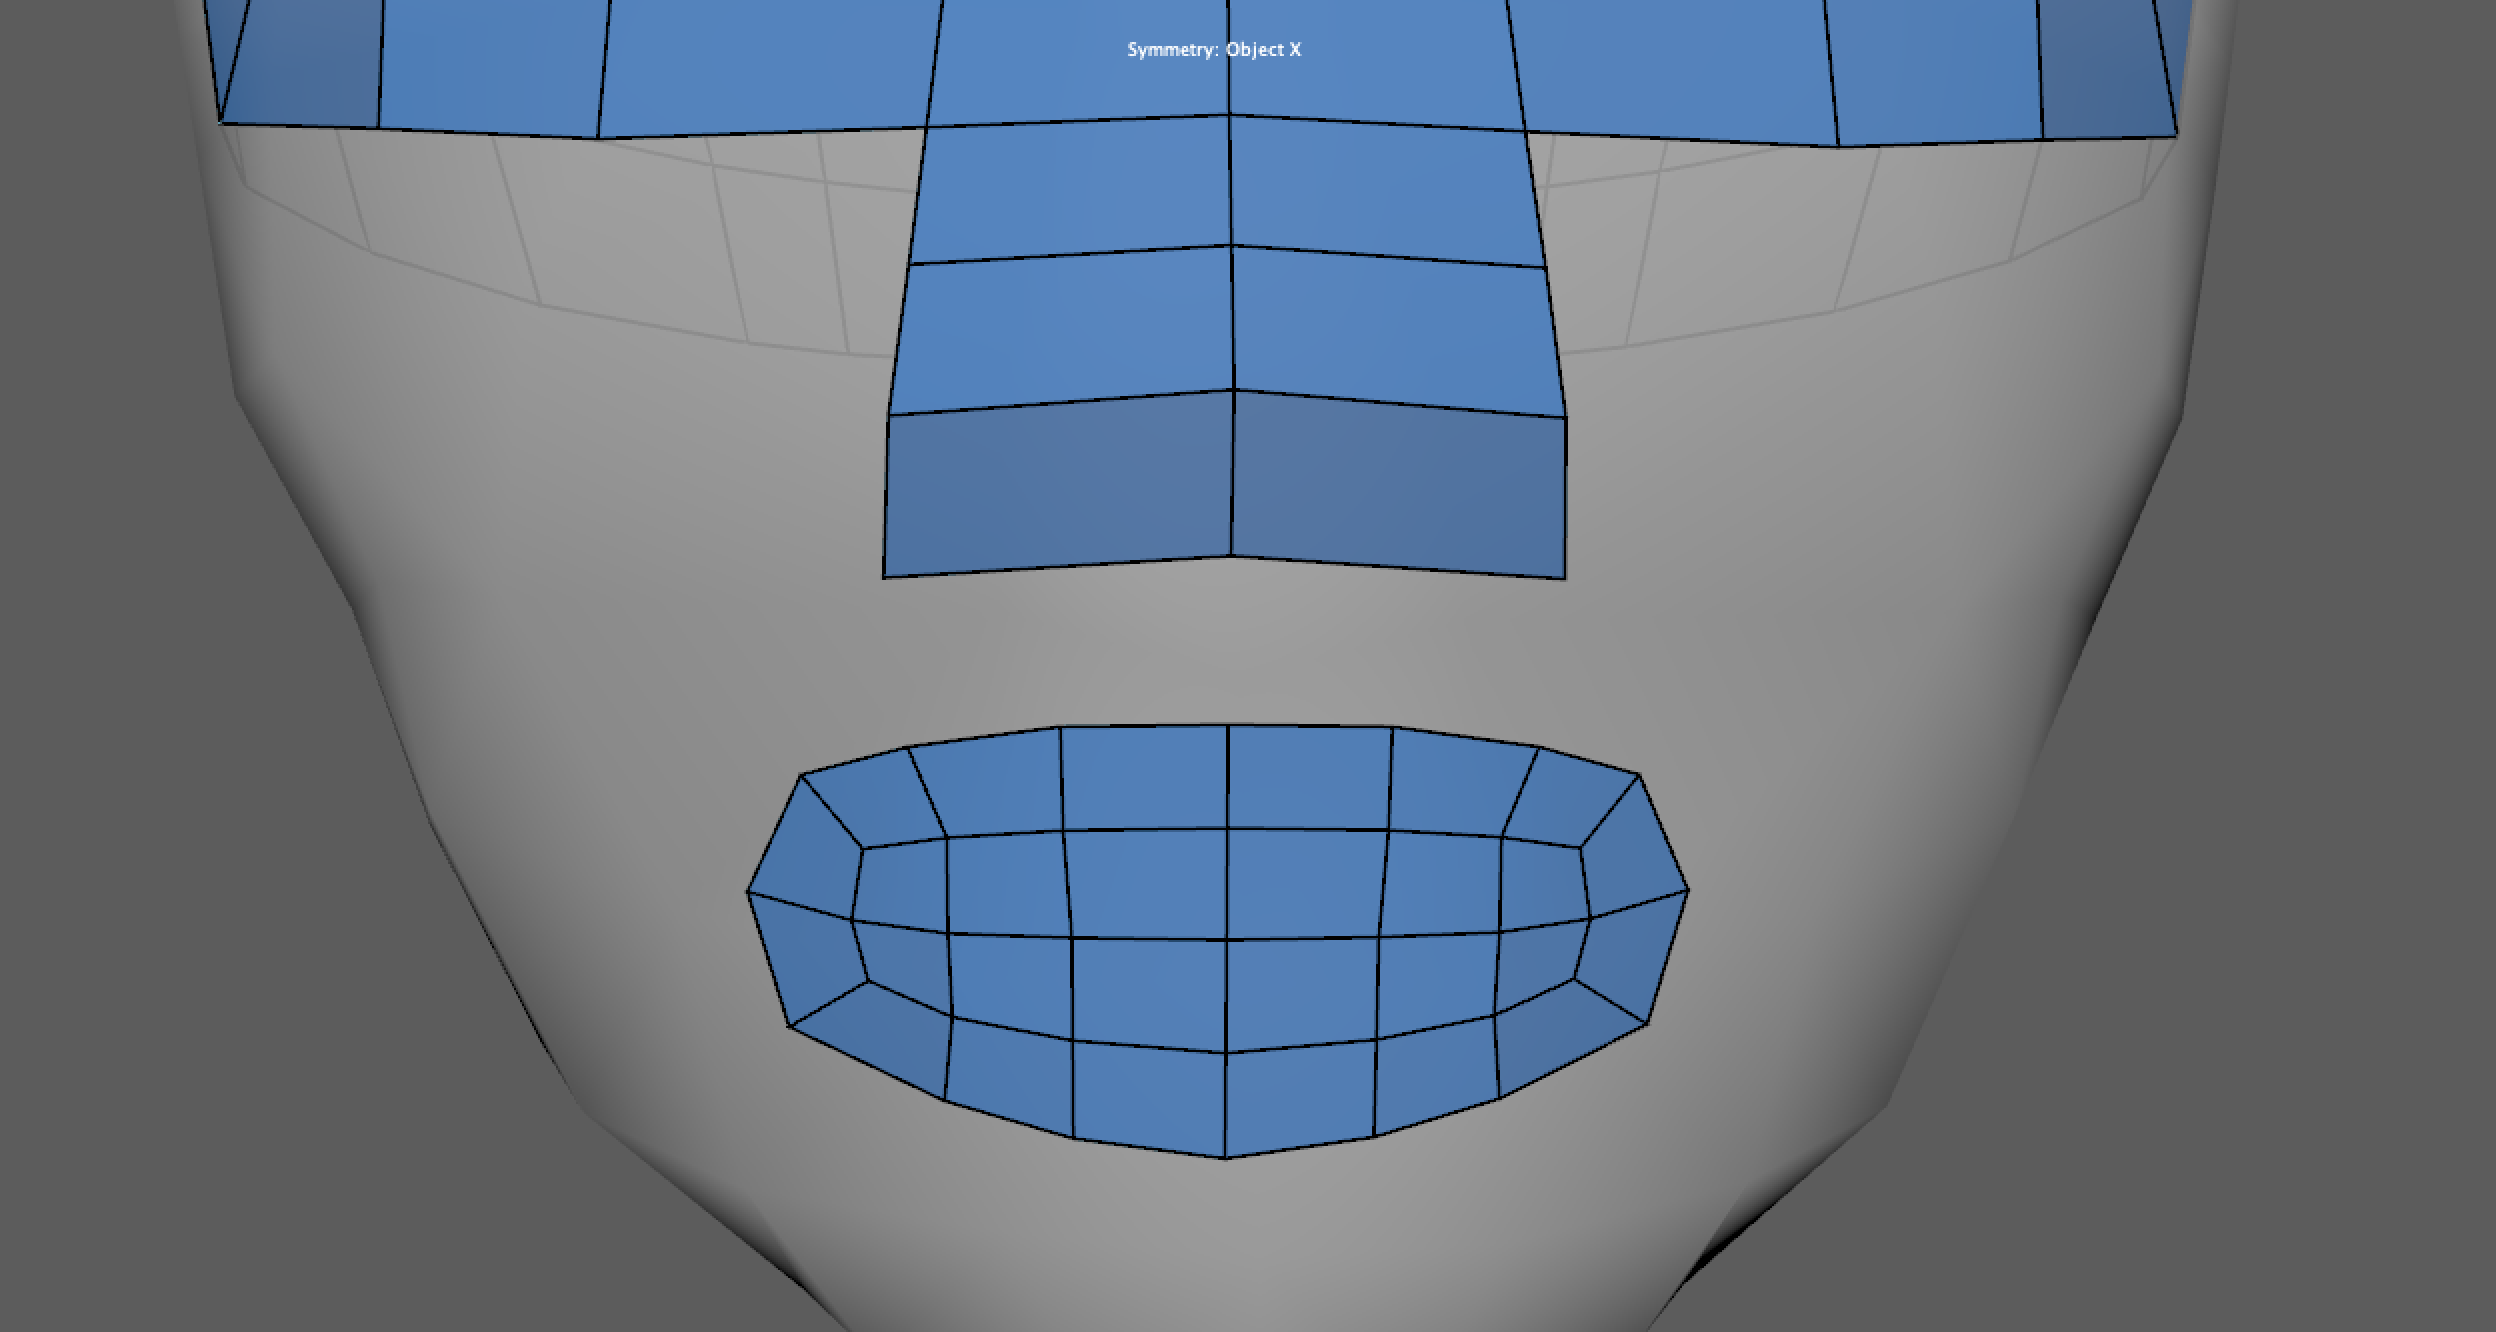
Now we are going to connect the nose and mouth area; in my case, I had to add some edges in the nose to make sure the mouth and nose could be connected.
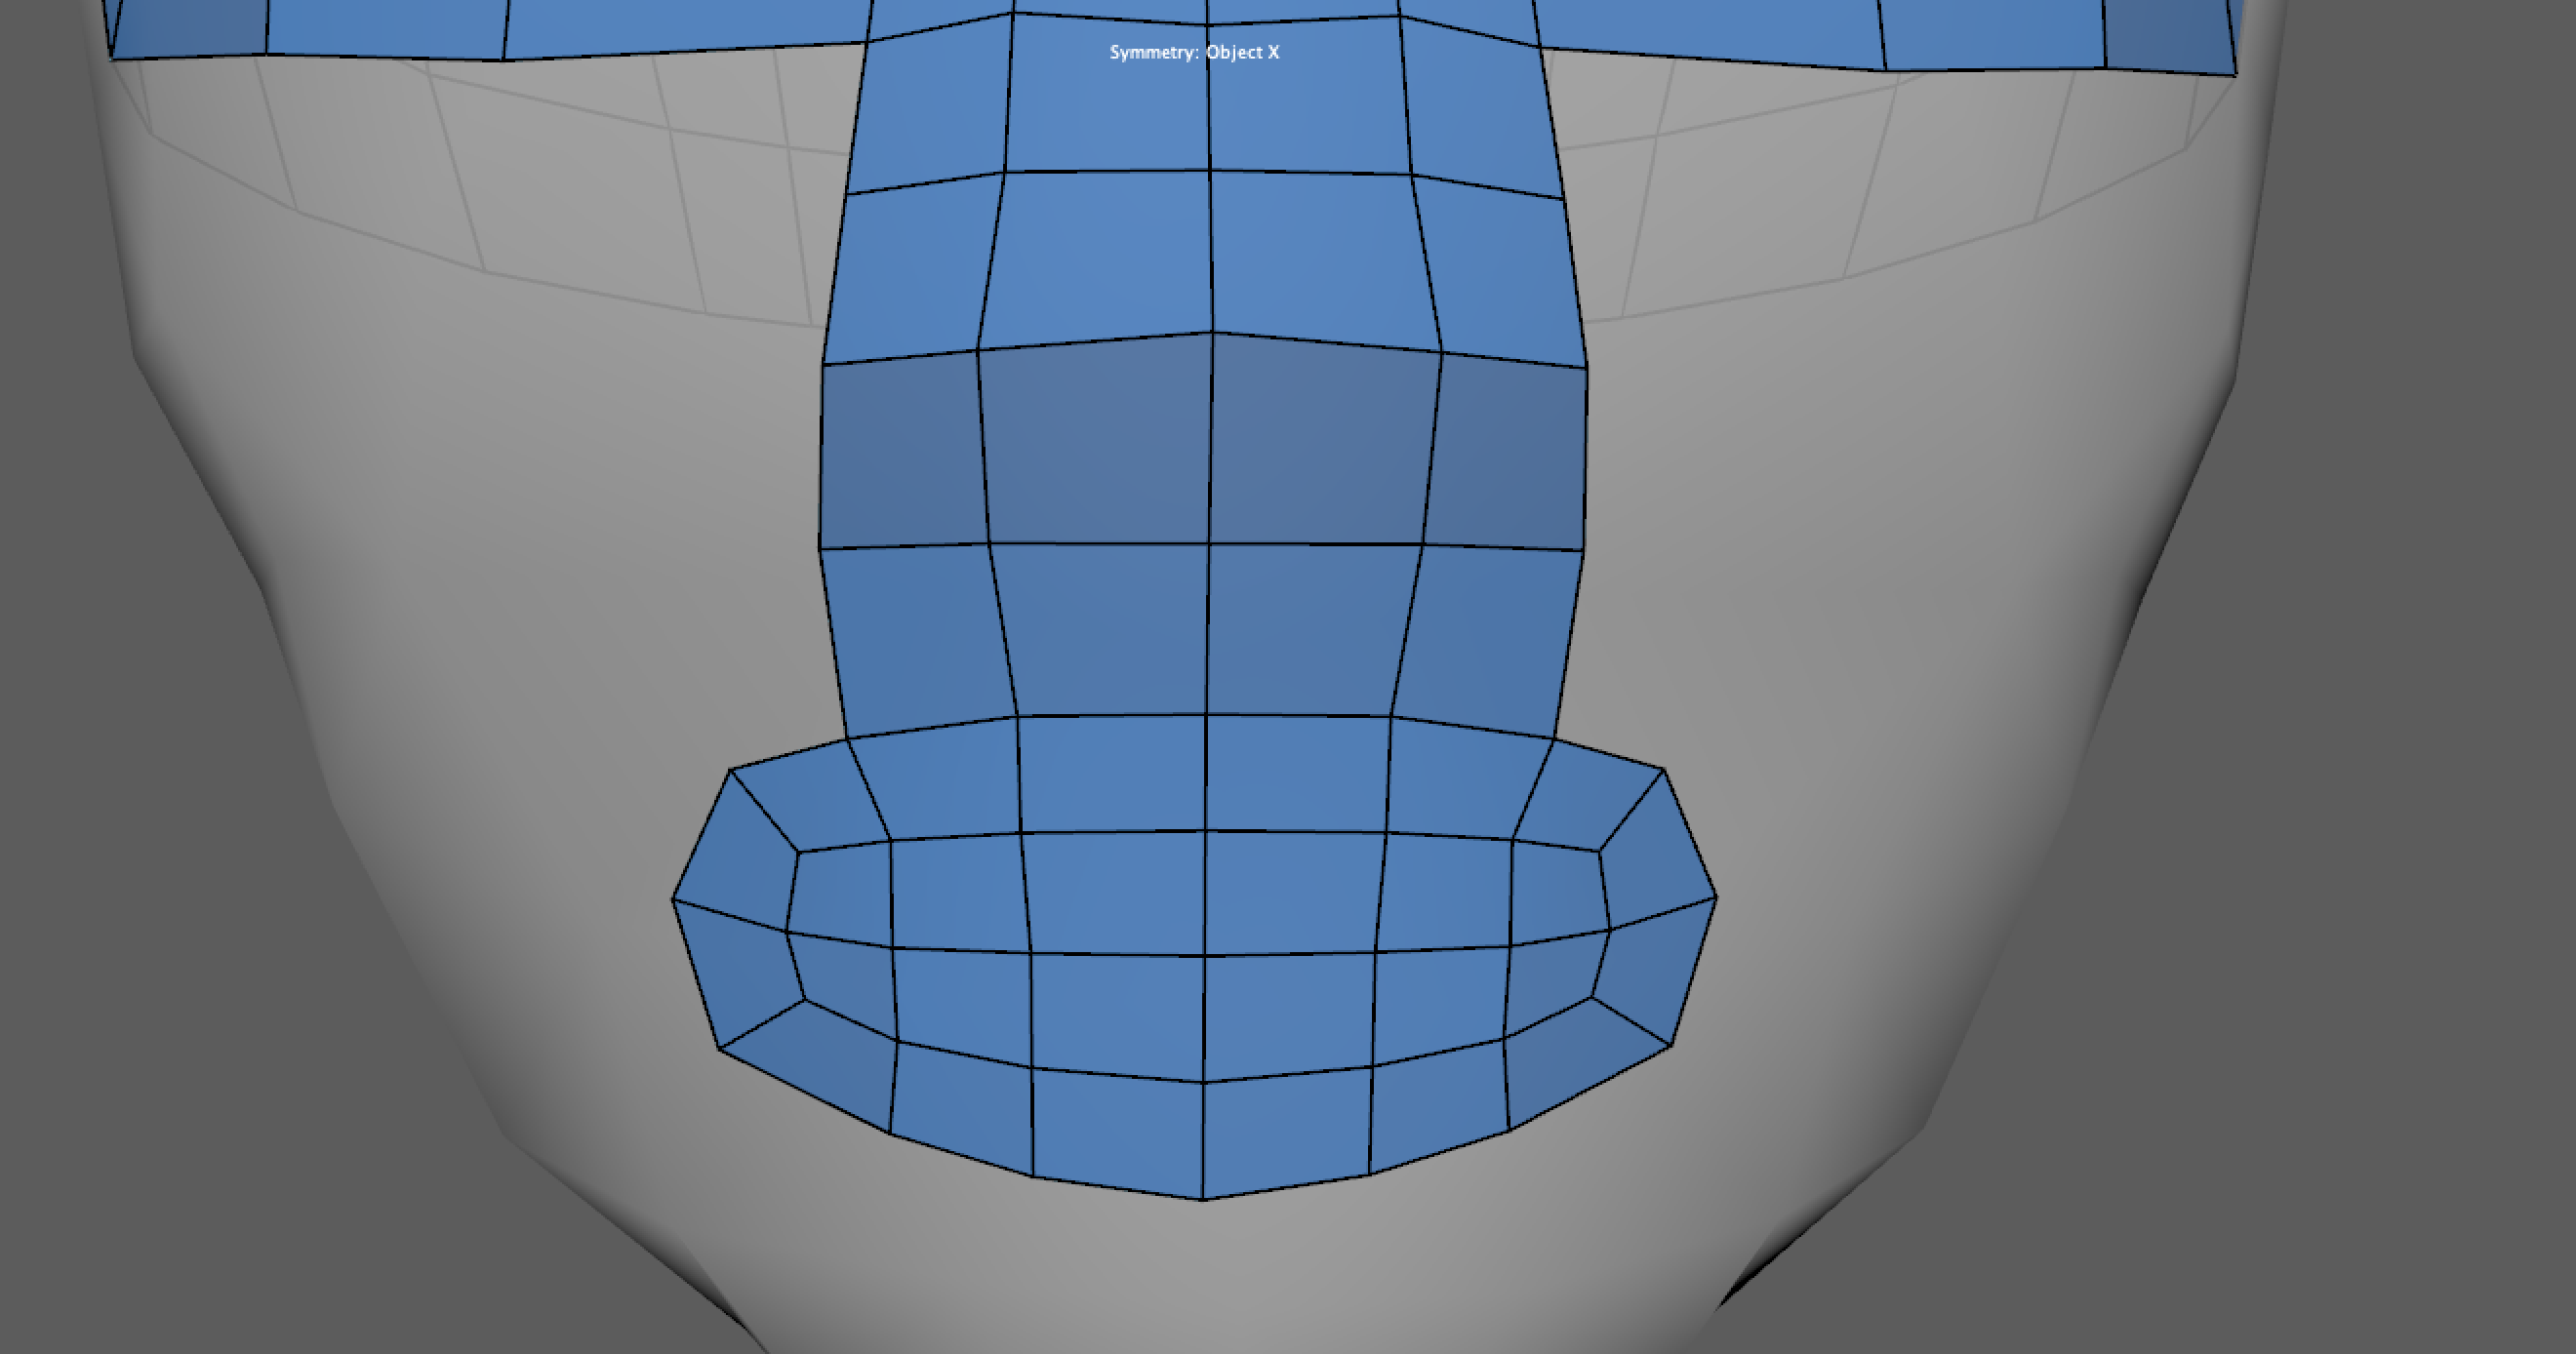
Now I’m going to build some quads on the side of the mouth so that we can eventually create a ring of faces going all the way back to the head.
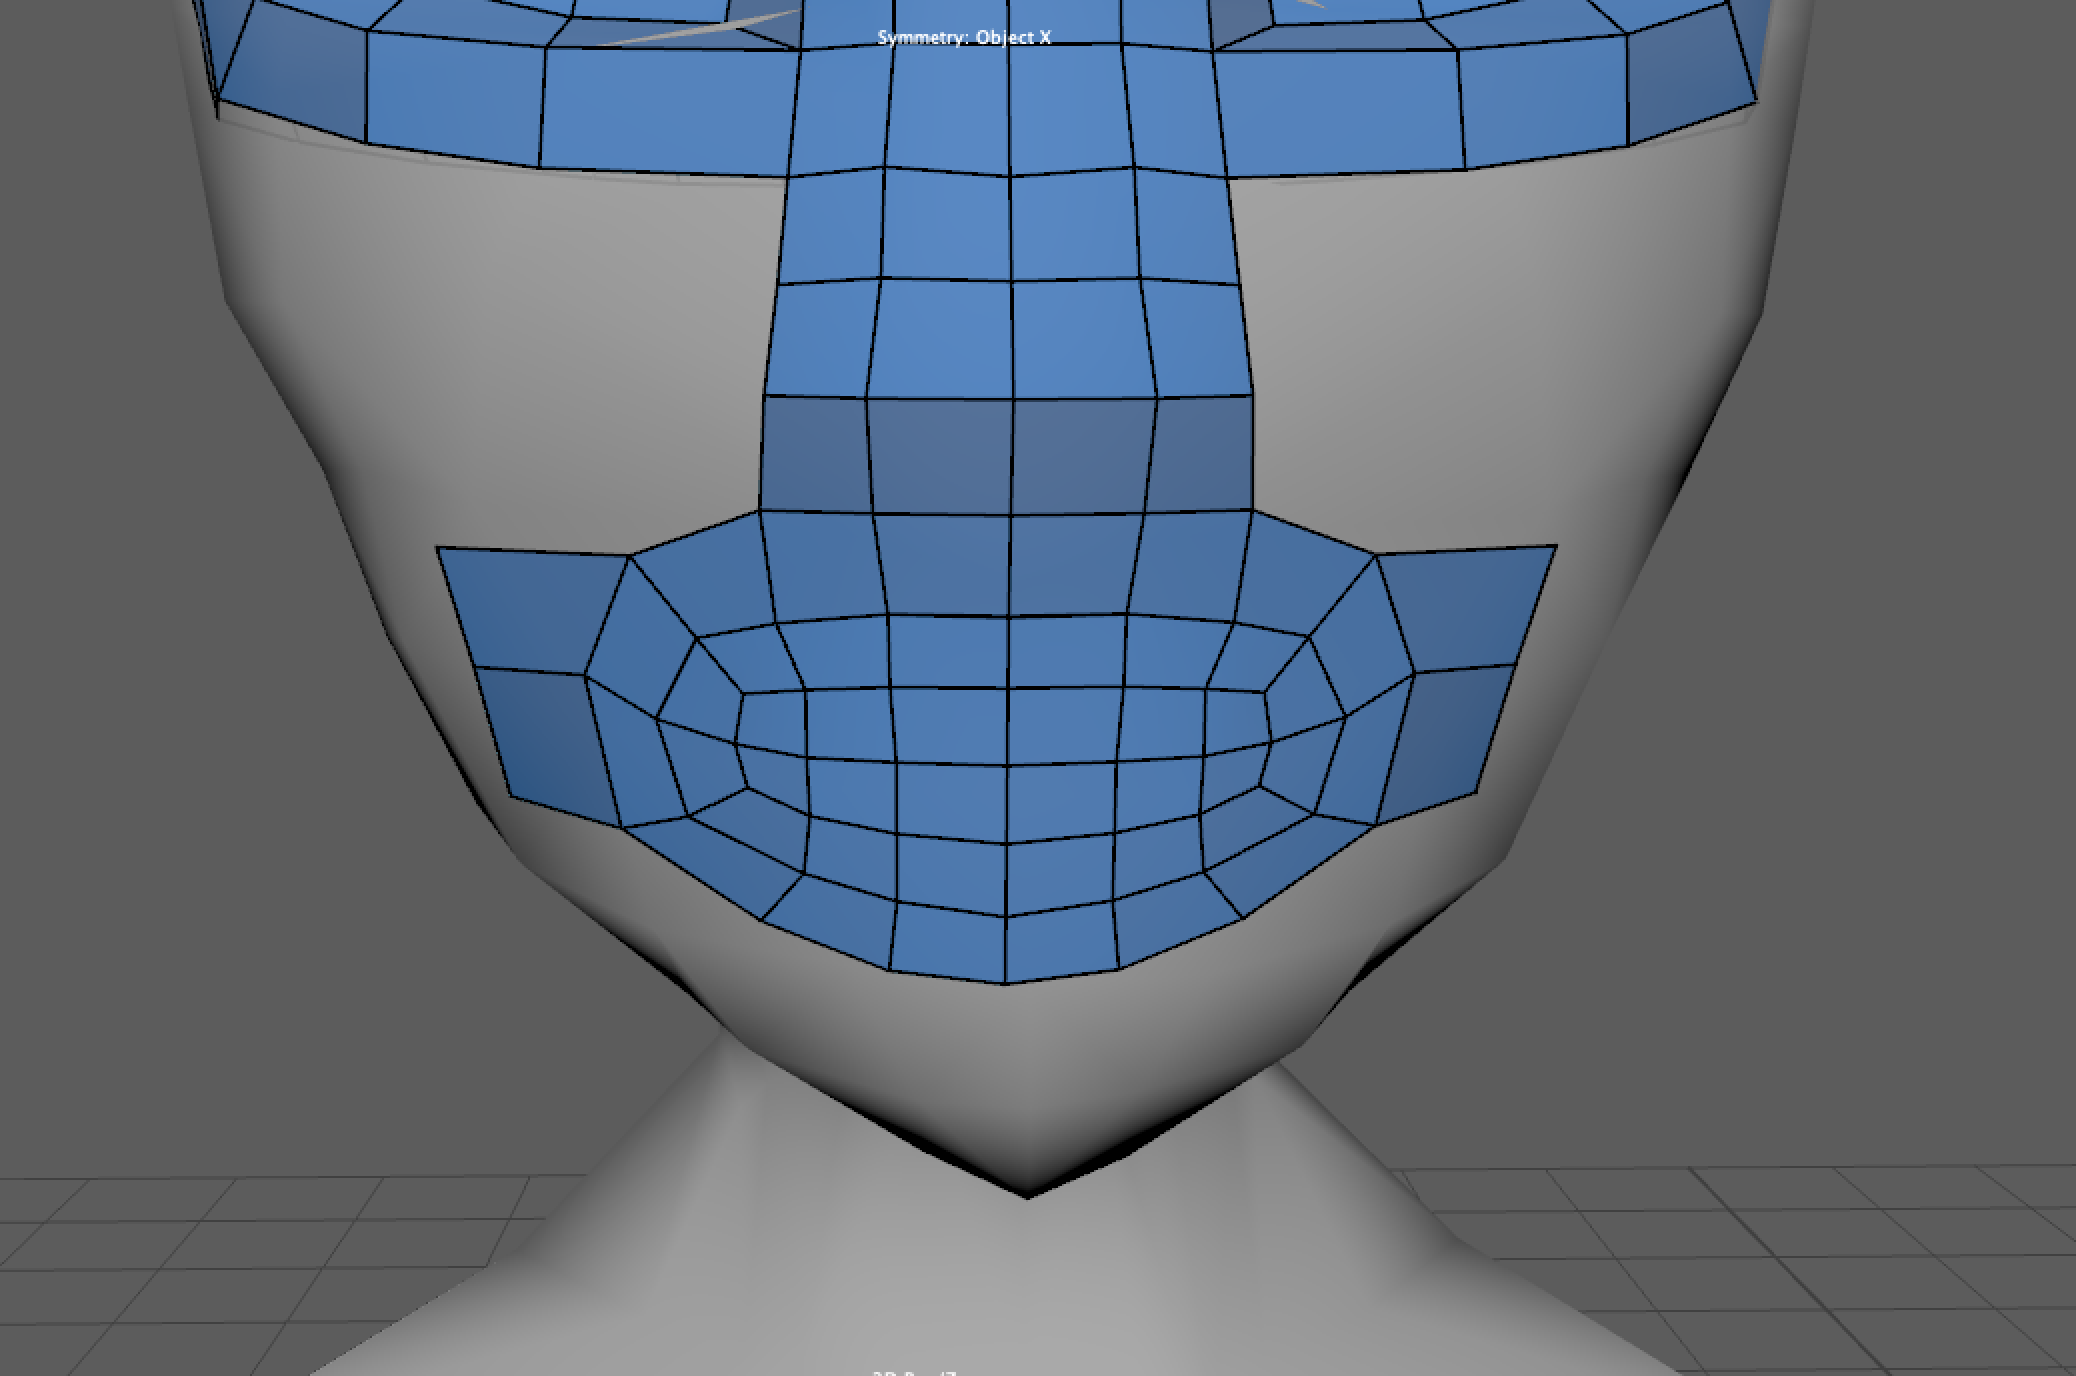
I’m also going to further connect the mouth to the nose so that we can start to develop the cheek area.
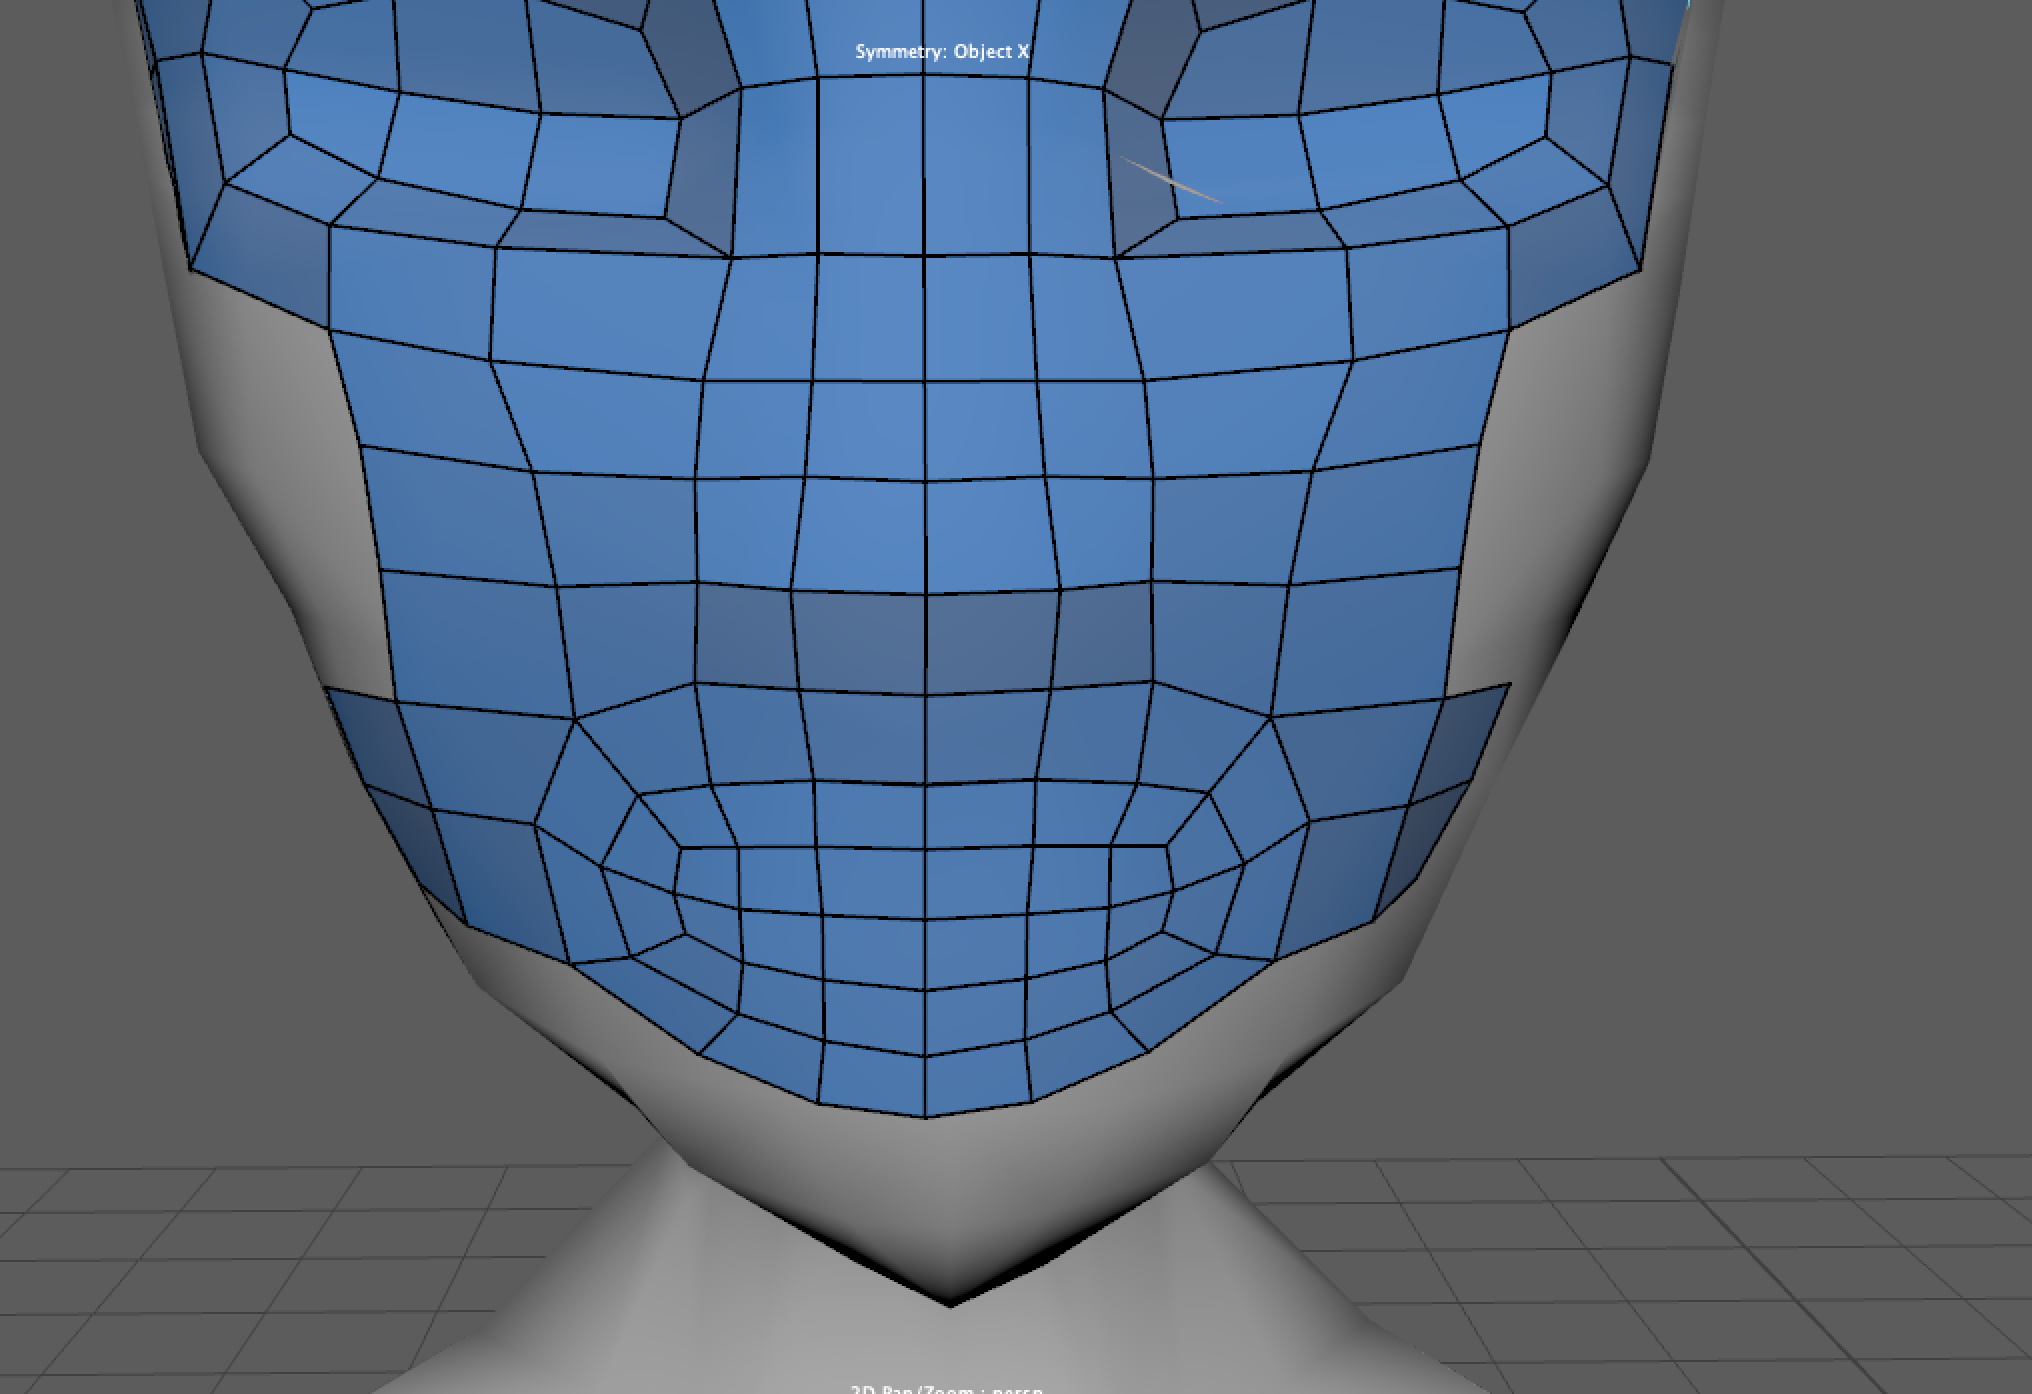
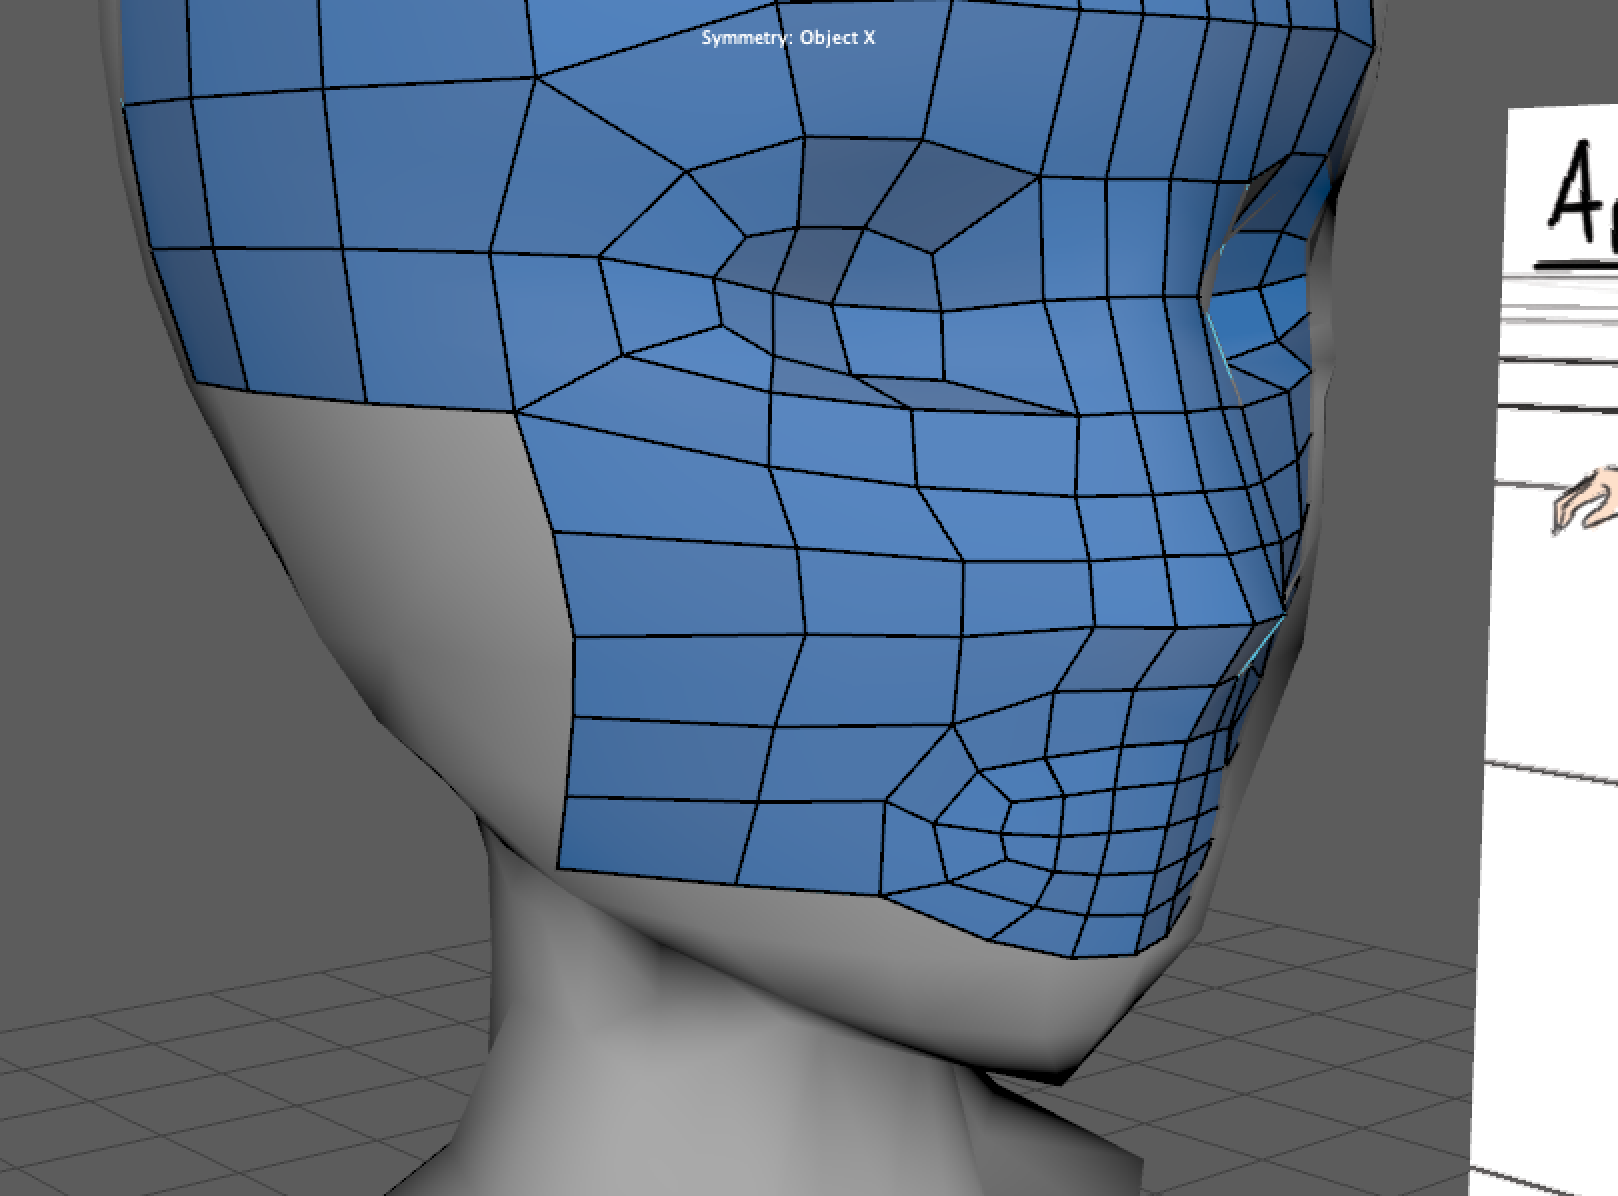
At this point, we are going to do a similar process that we did earlier in the top half of the head by creating an entire ring of quads that go from the side of the mouth and connect to the back of the head. I didn’t include many pictures of this since this process is identical to what we’ve done before, but at the end of this step my mesh looks something like this:
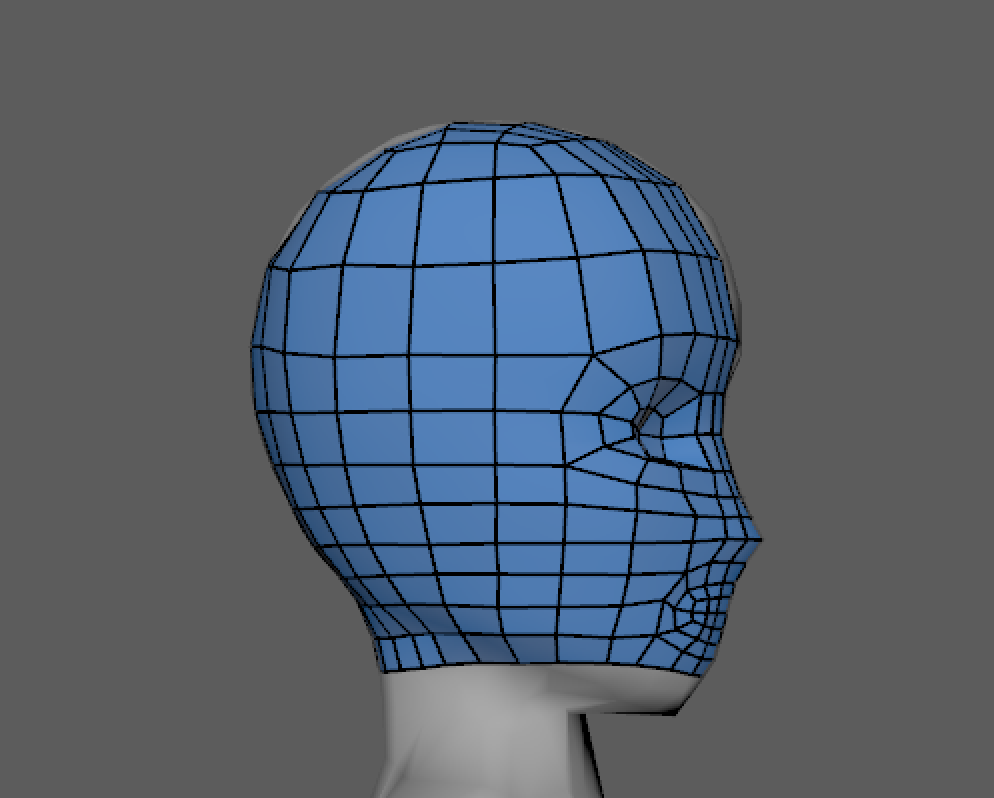
Now we want to start working on the chin and connecting it to the rest of the face. For me, this was easiest to do by first creating points towards the underside of the chin and connecting them to the sides of the face. It might look something like a strap under the chin.
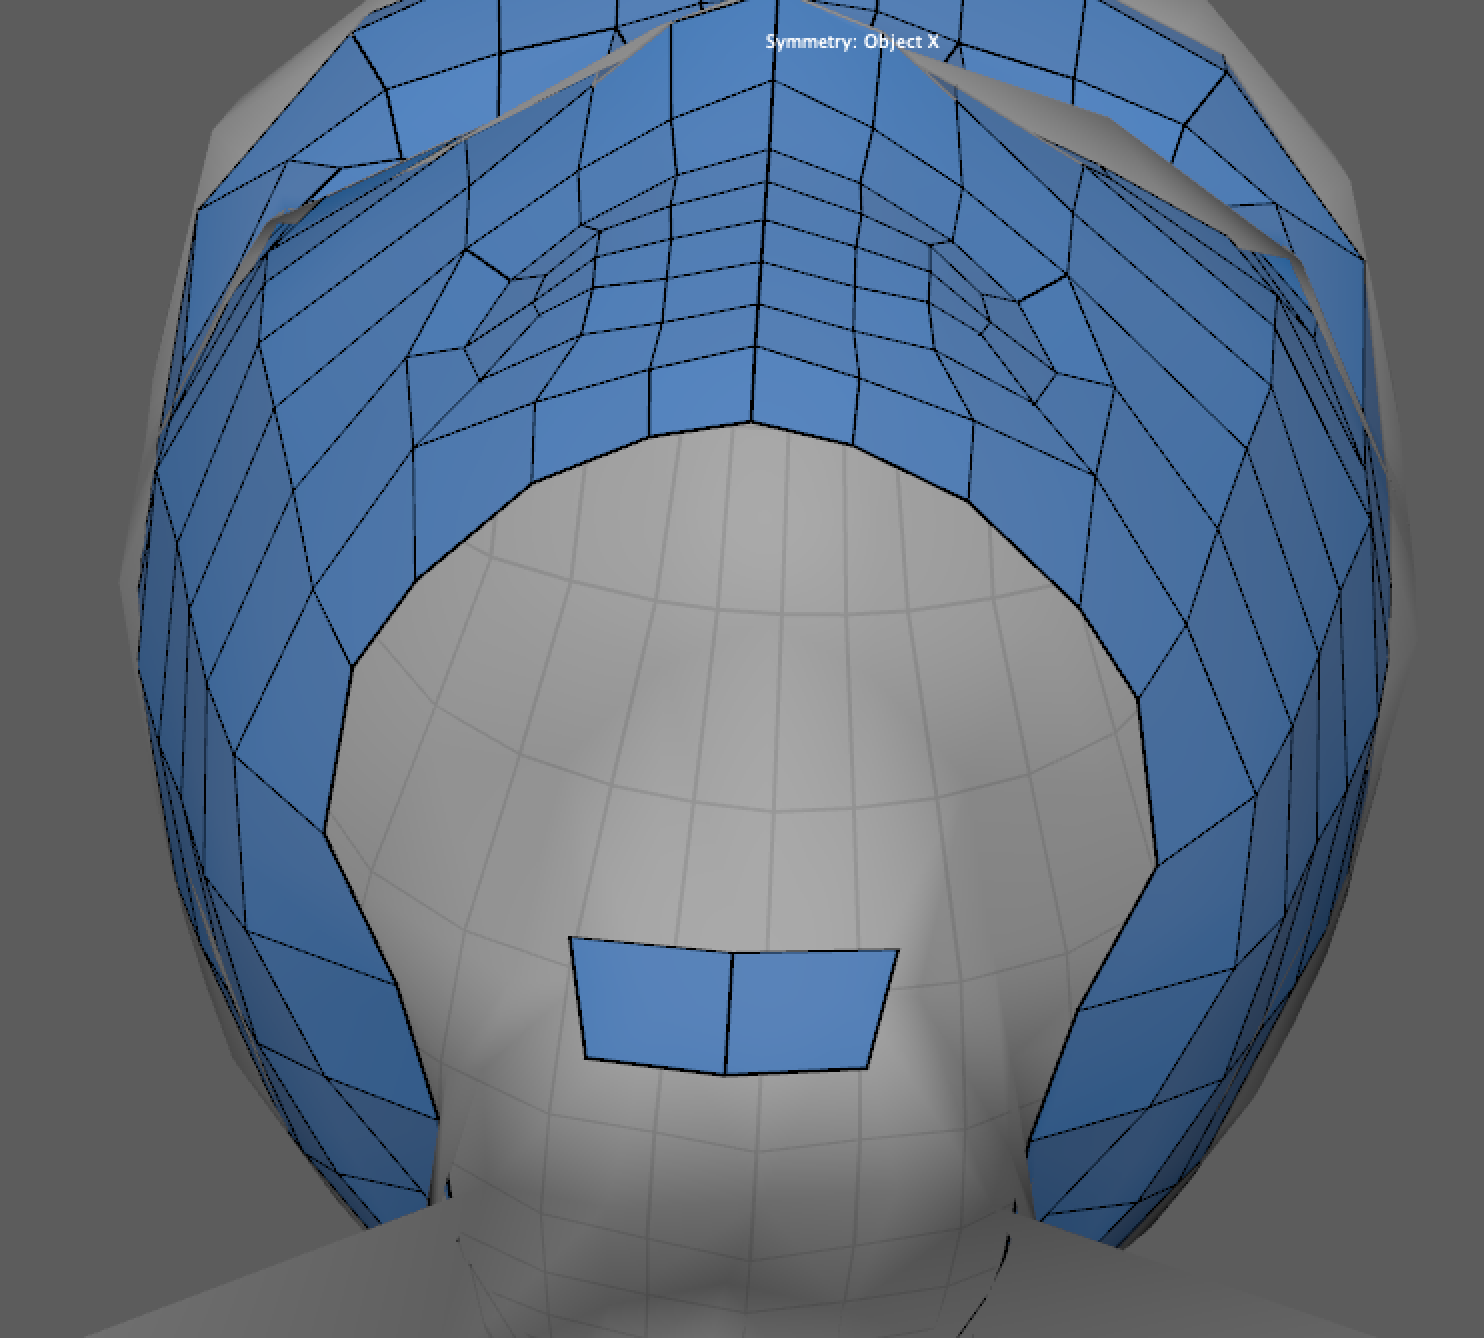
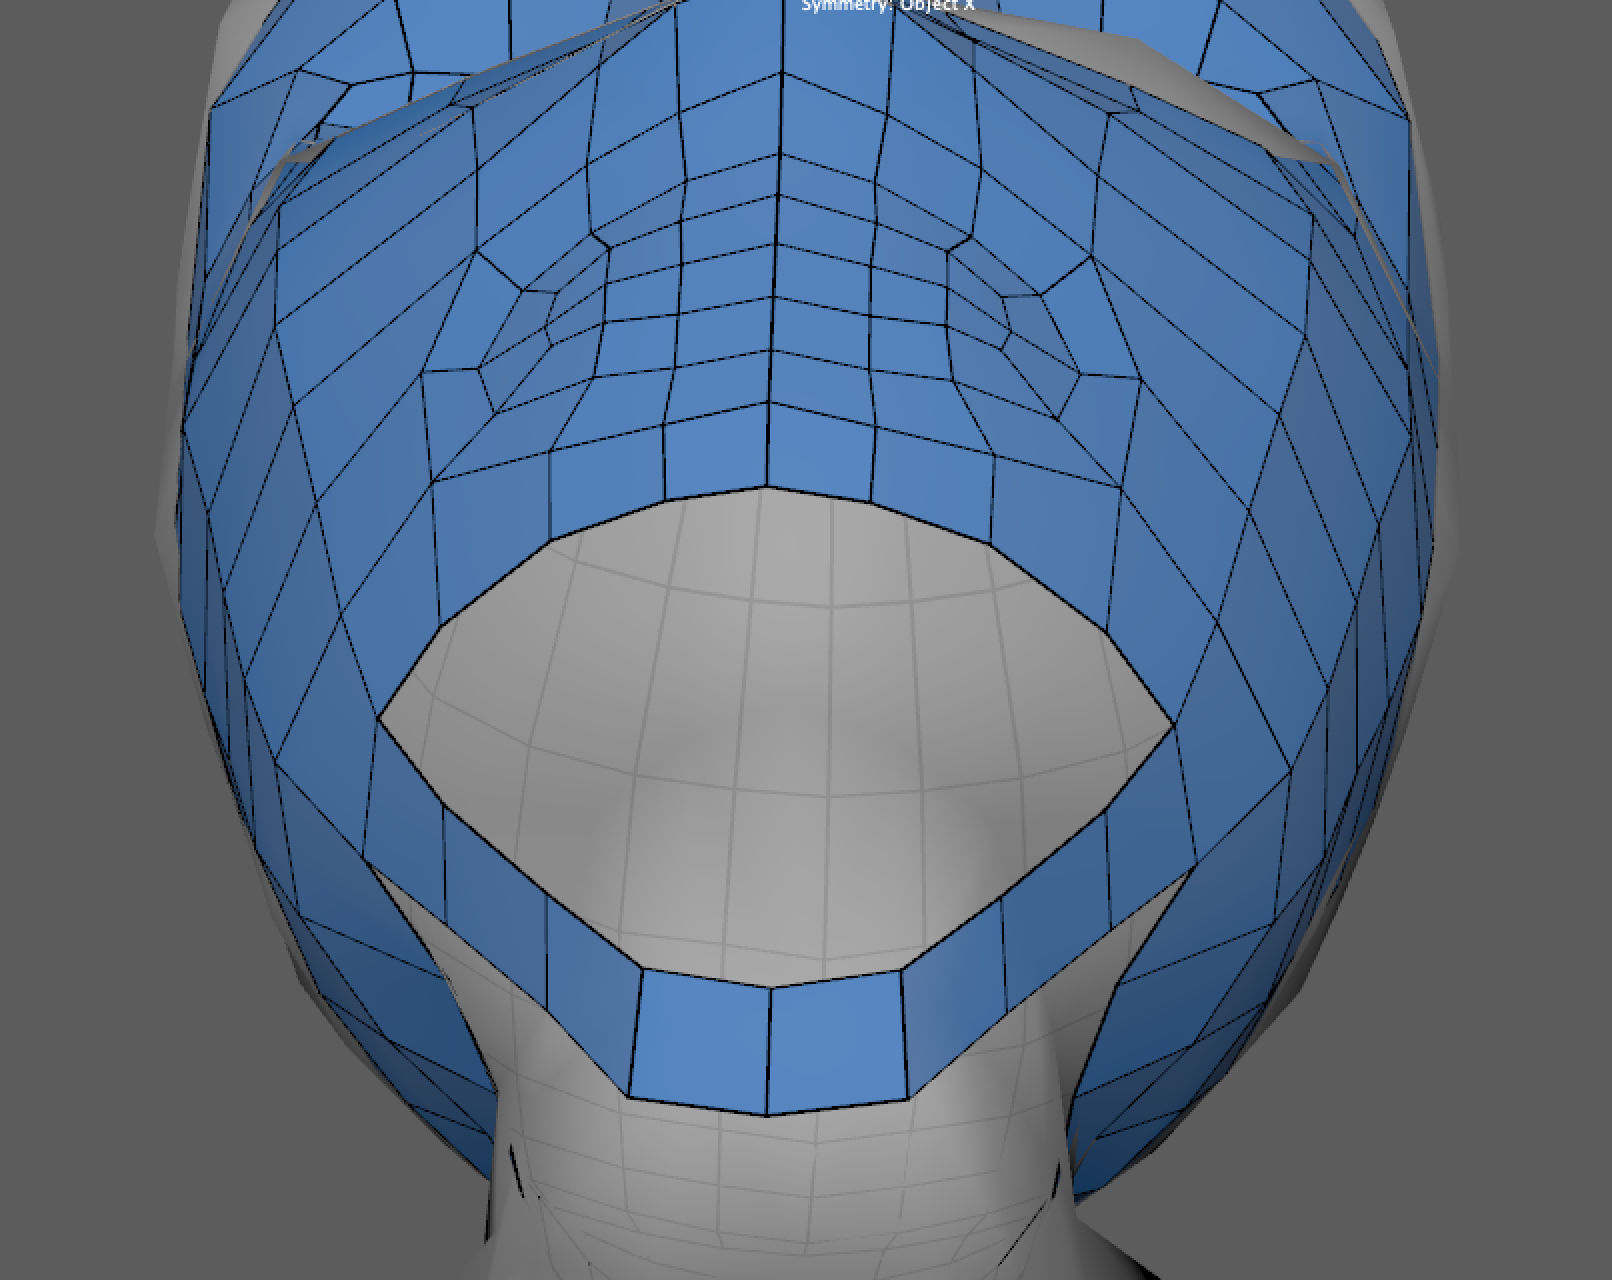
We can now connect this strap to the rest of the face.
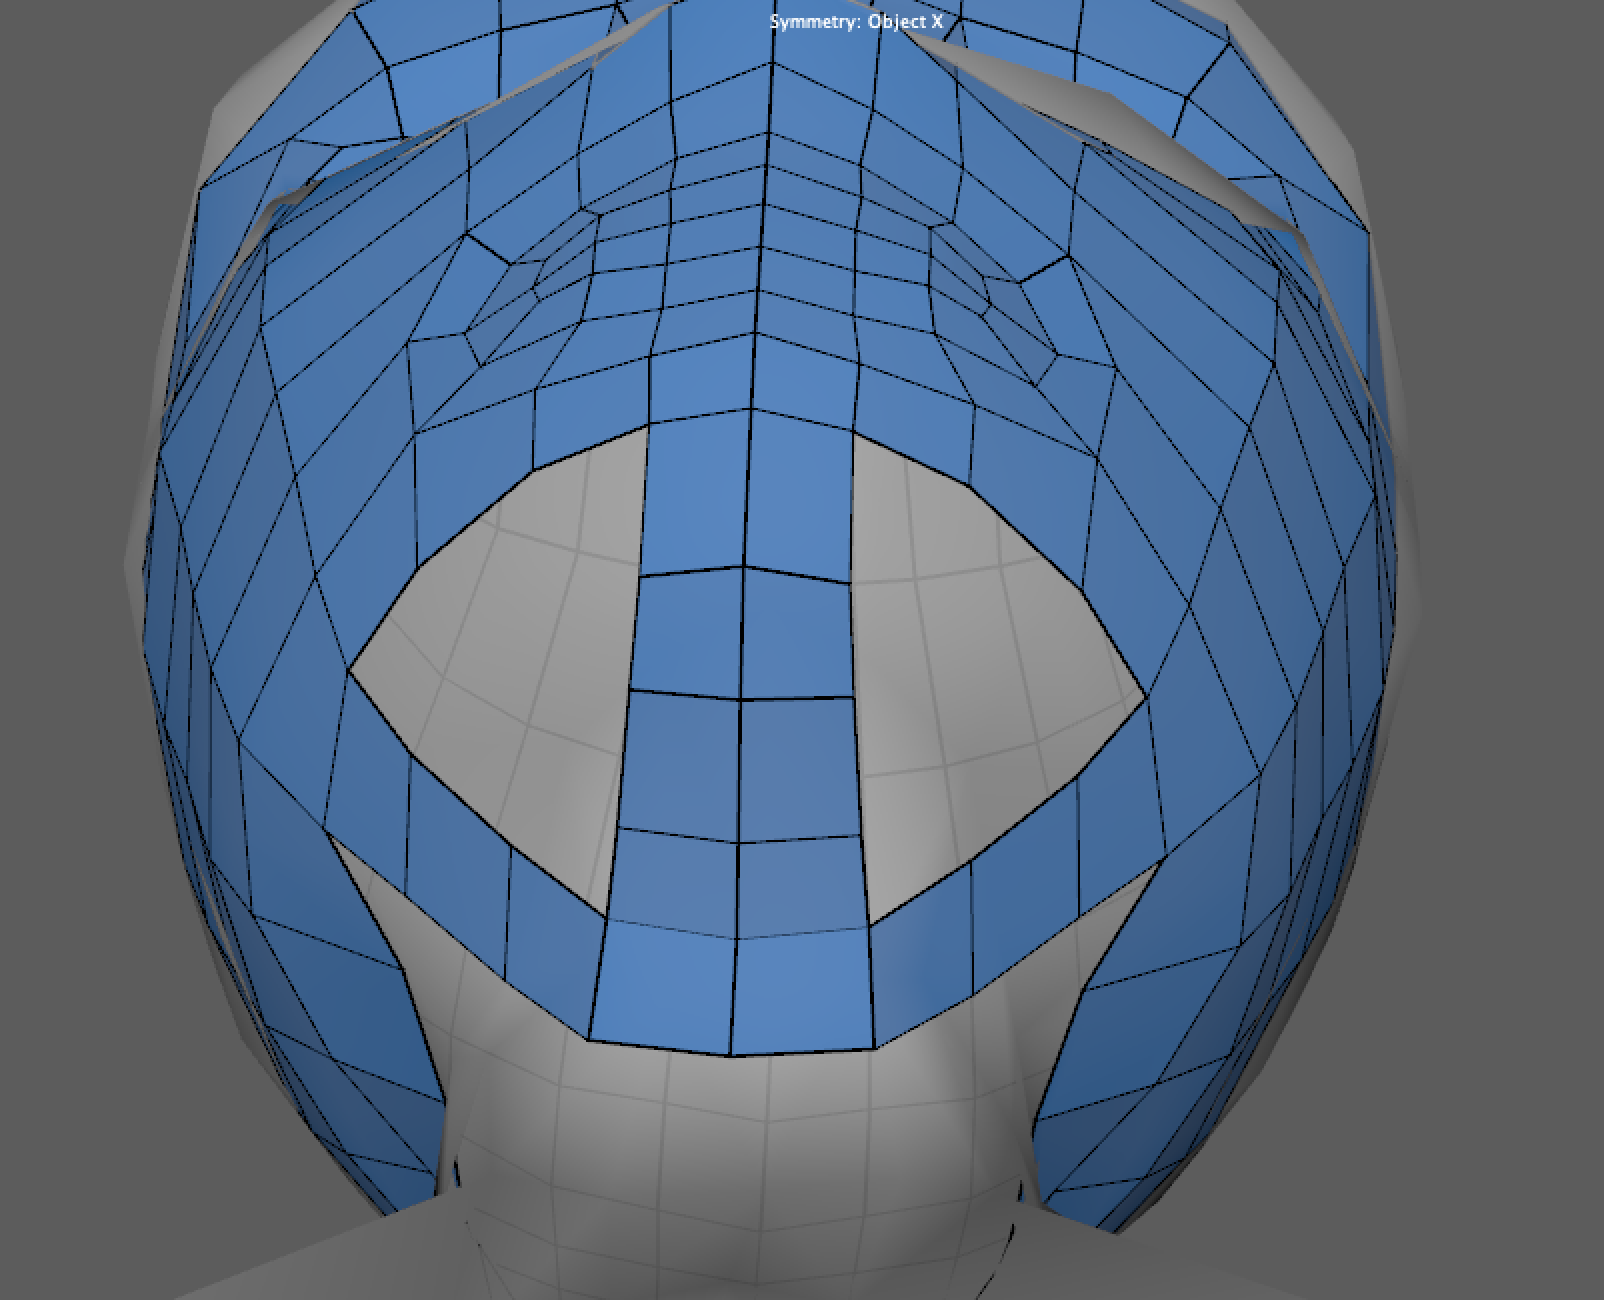
At this point, we can start filling in the gaps between the face and the chin.
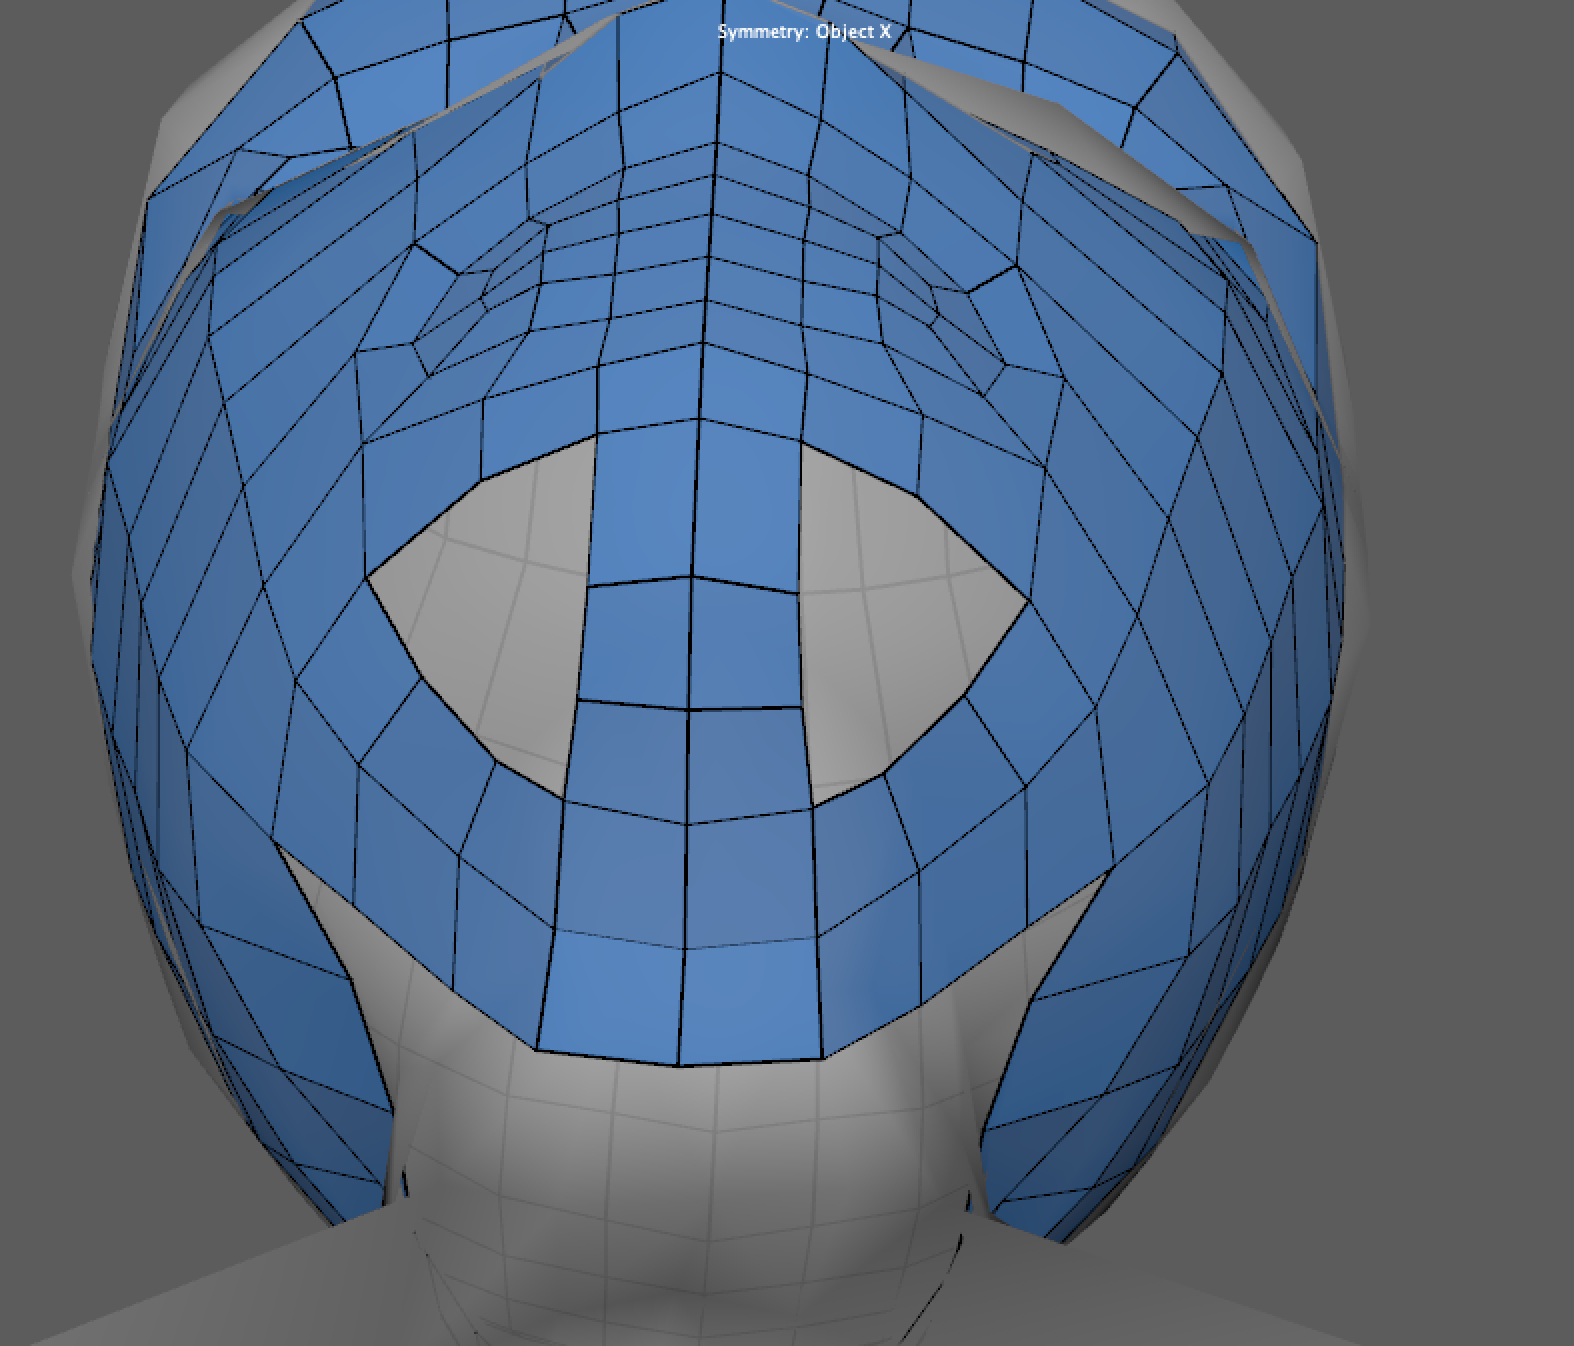
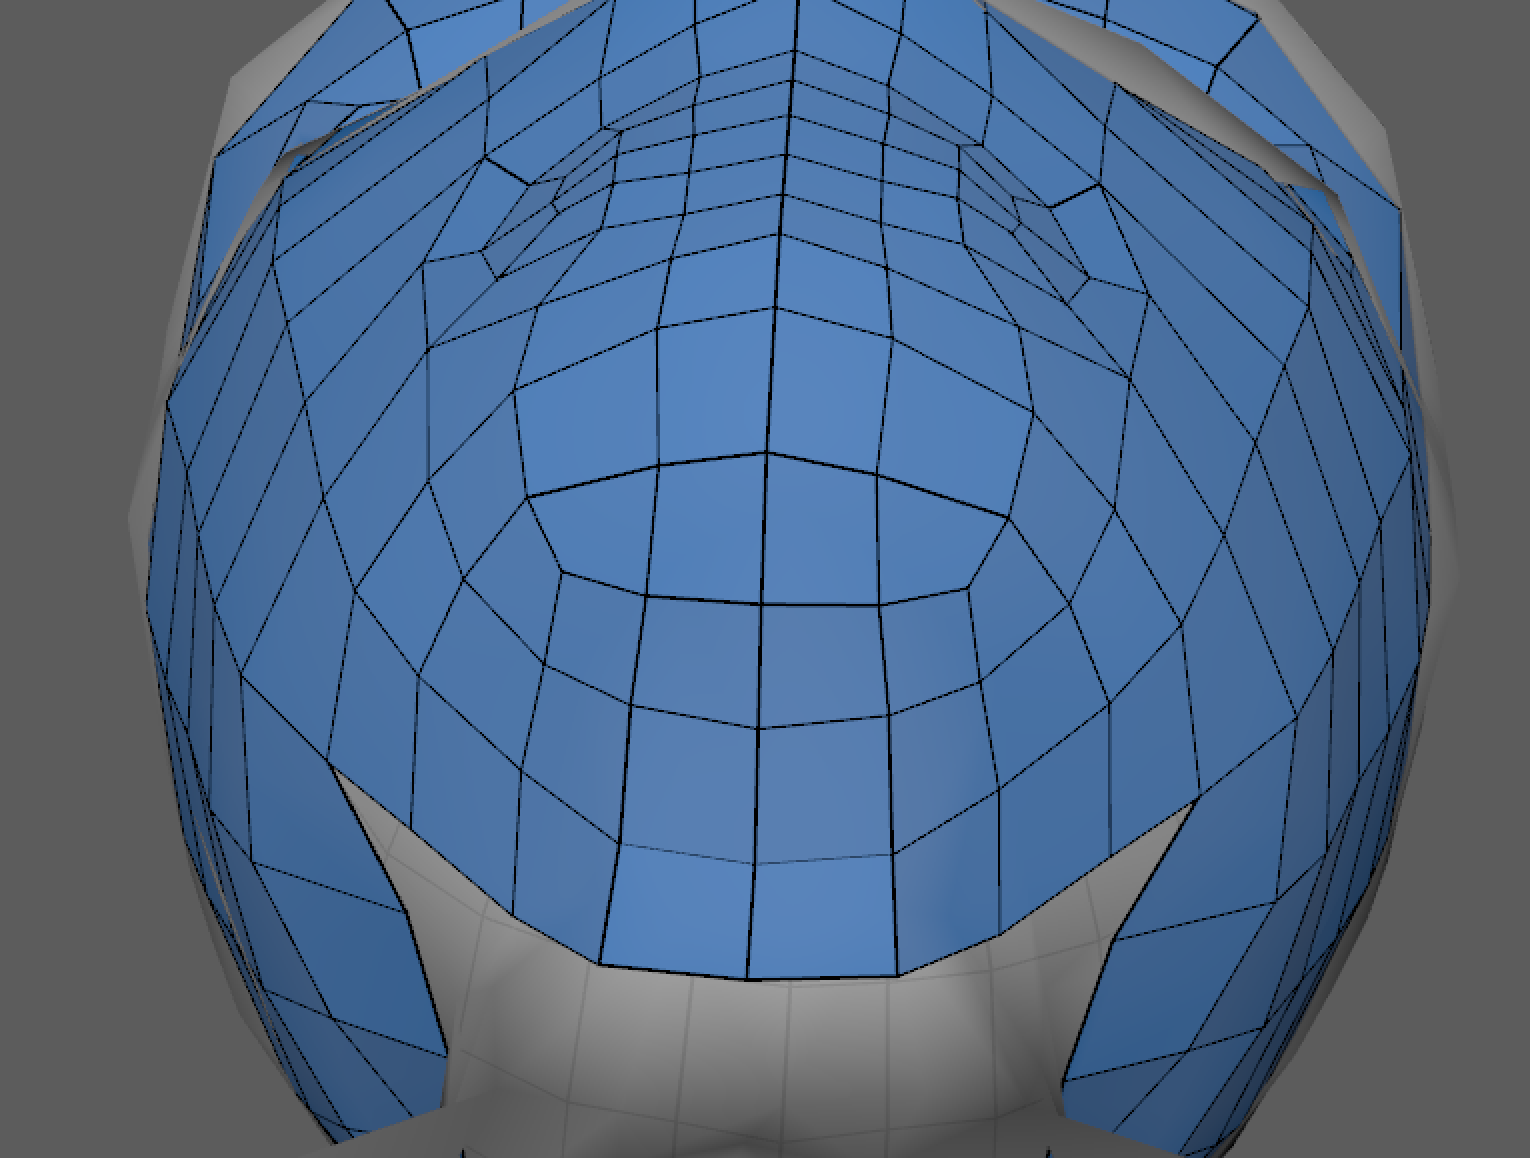
Now, we can simply extend more quads into the neck region and connect these rings to the back of the mesh.
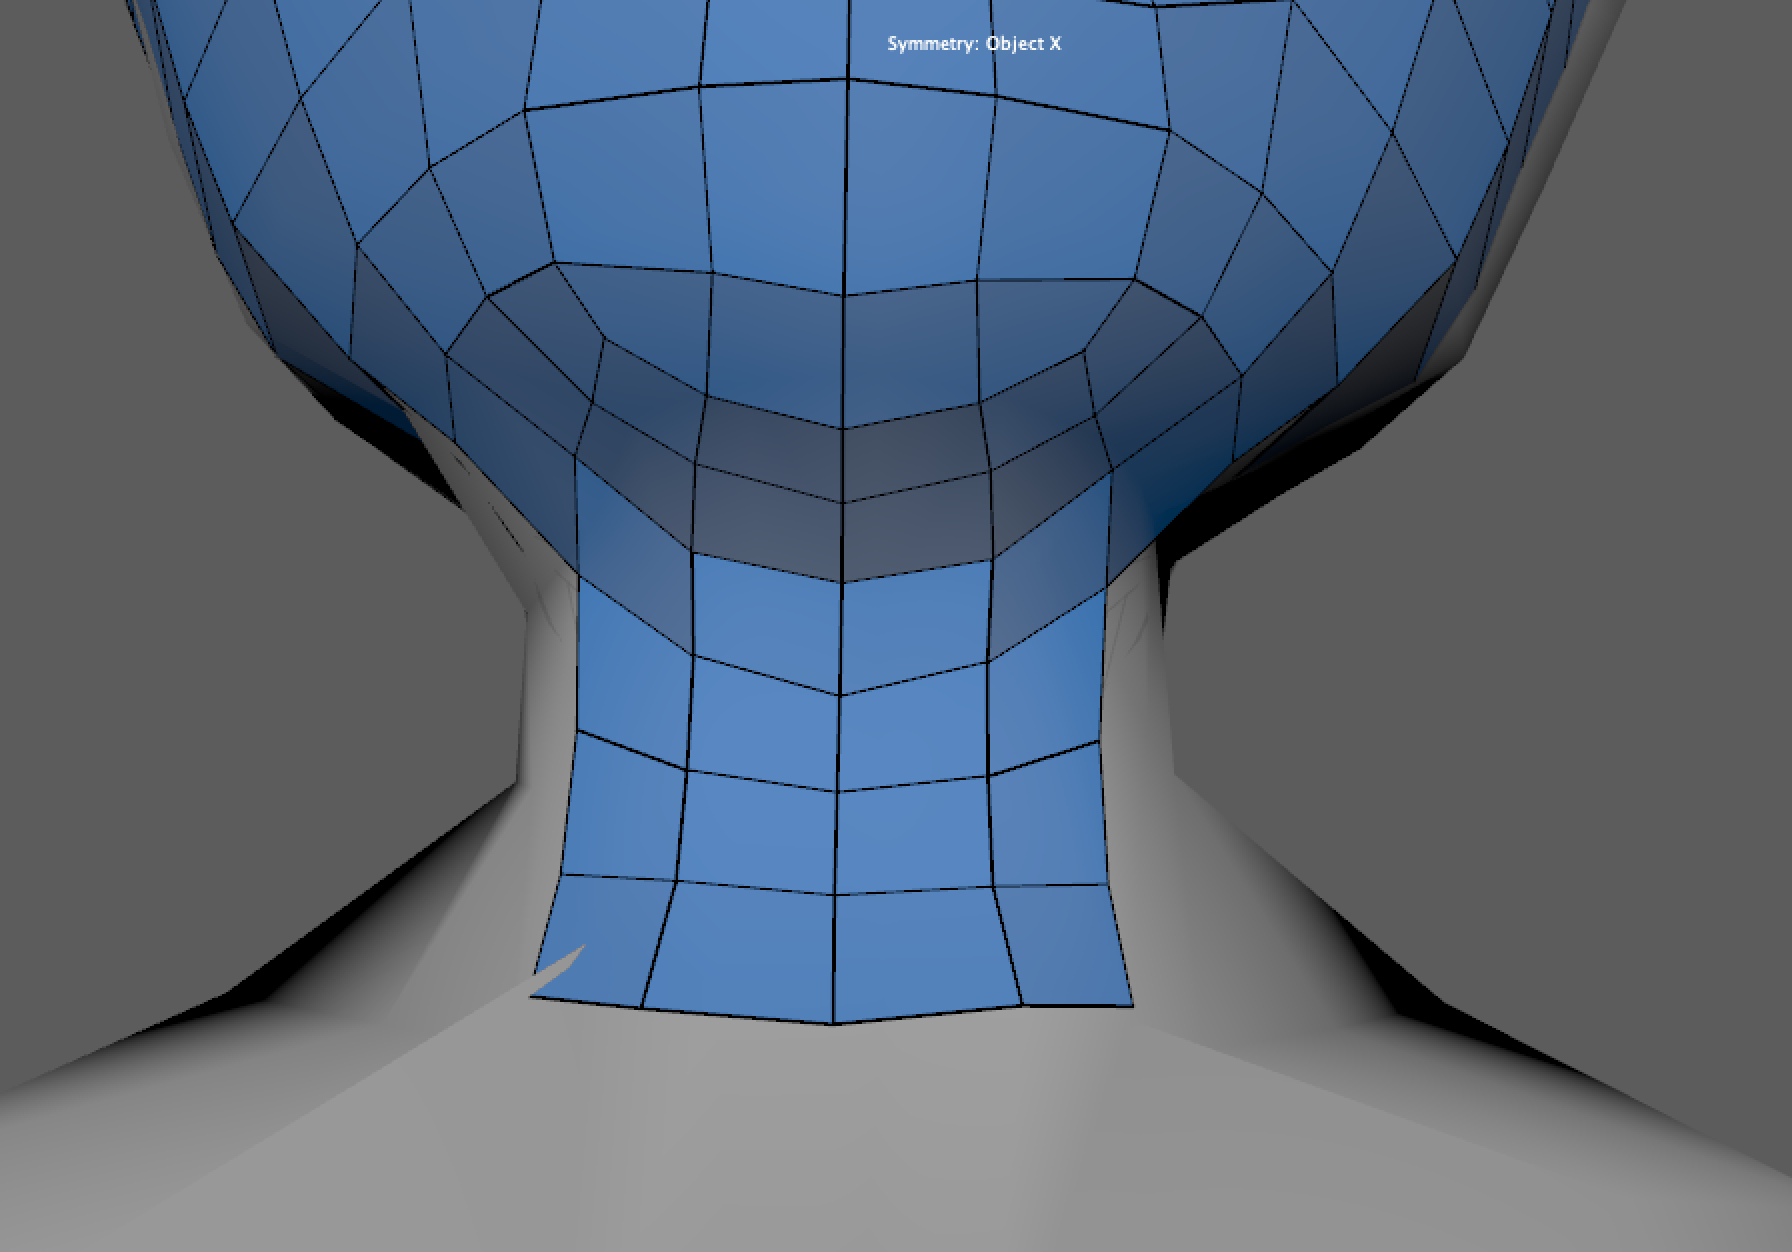
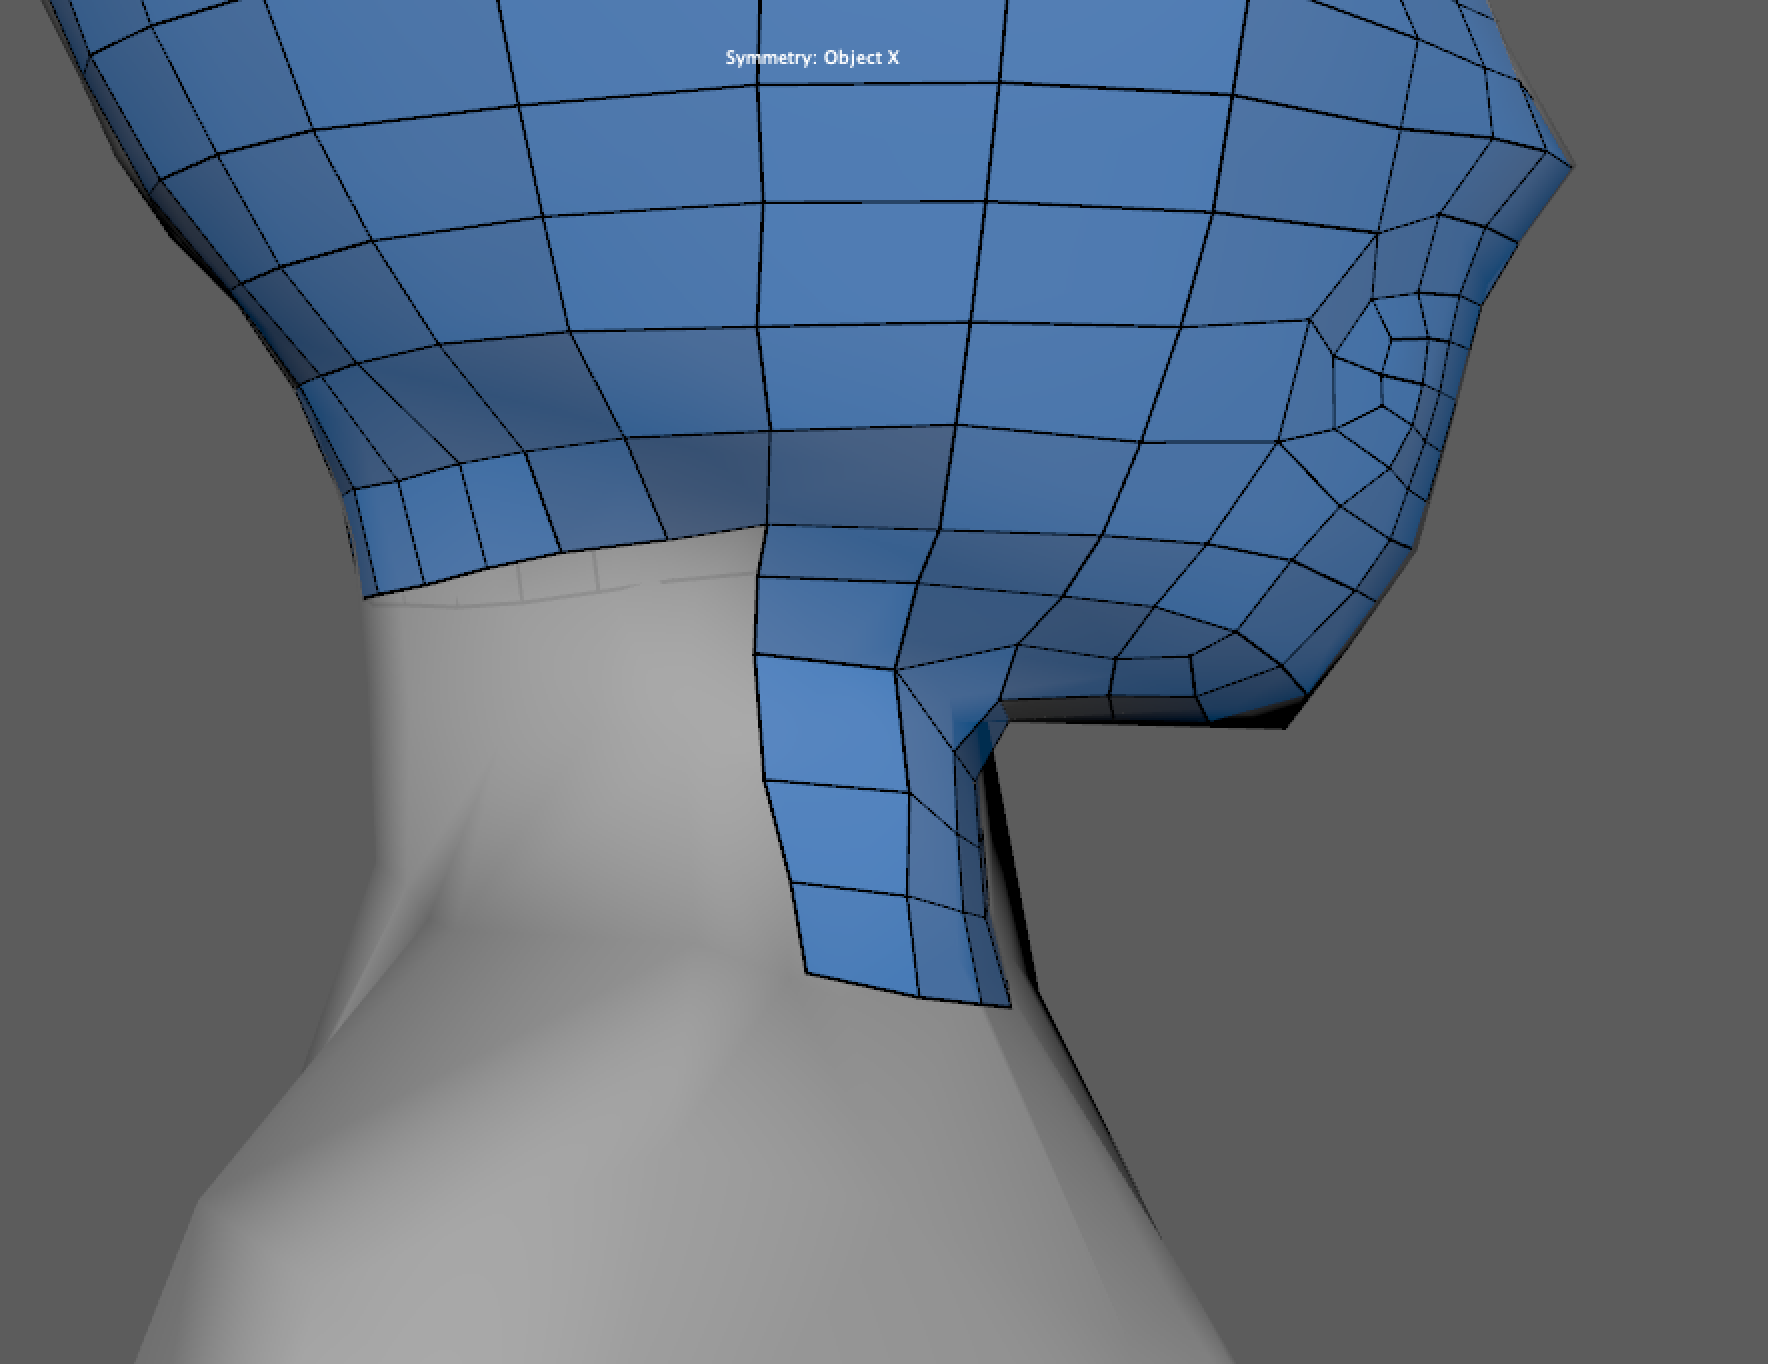
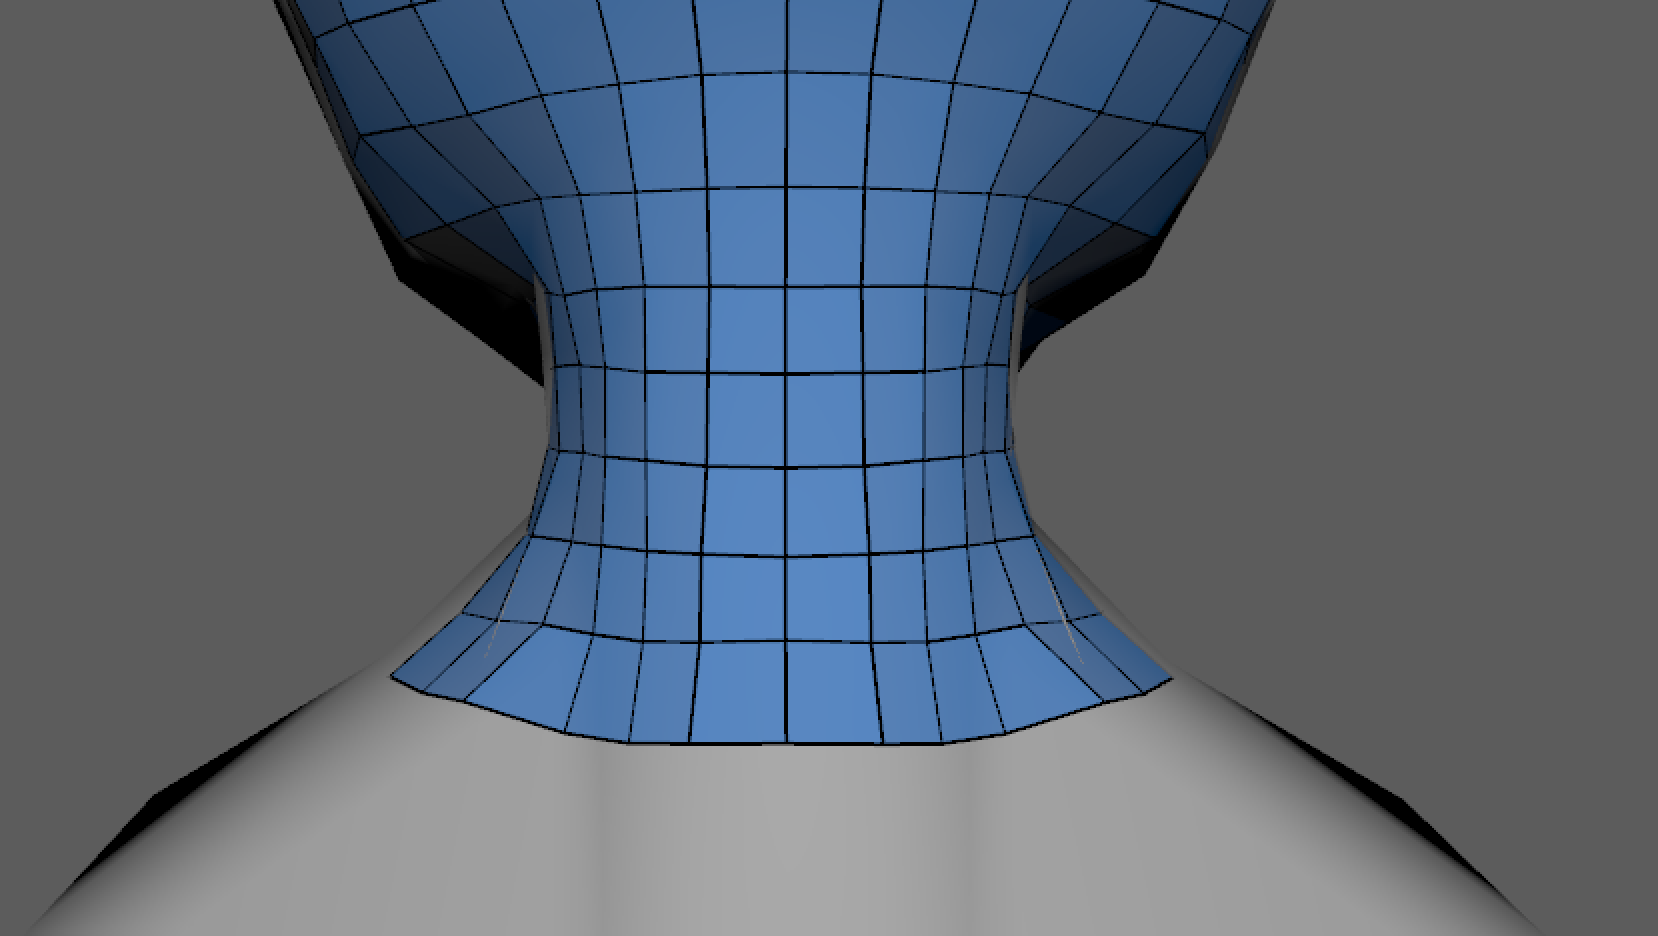
And with that, we should have a completed retopologized face mesh with good edge flow!
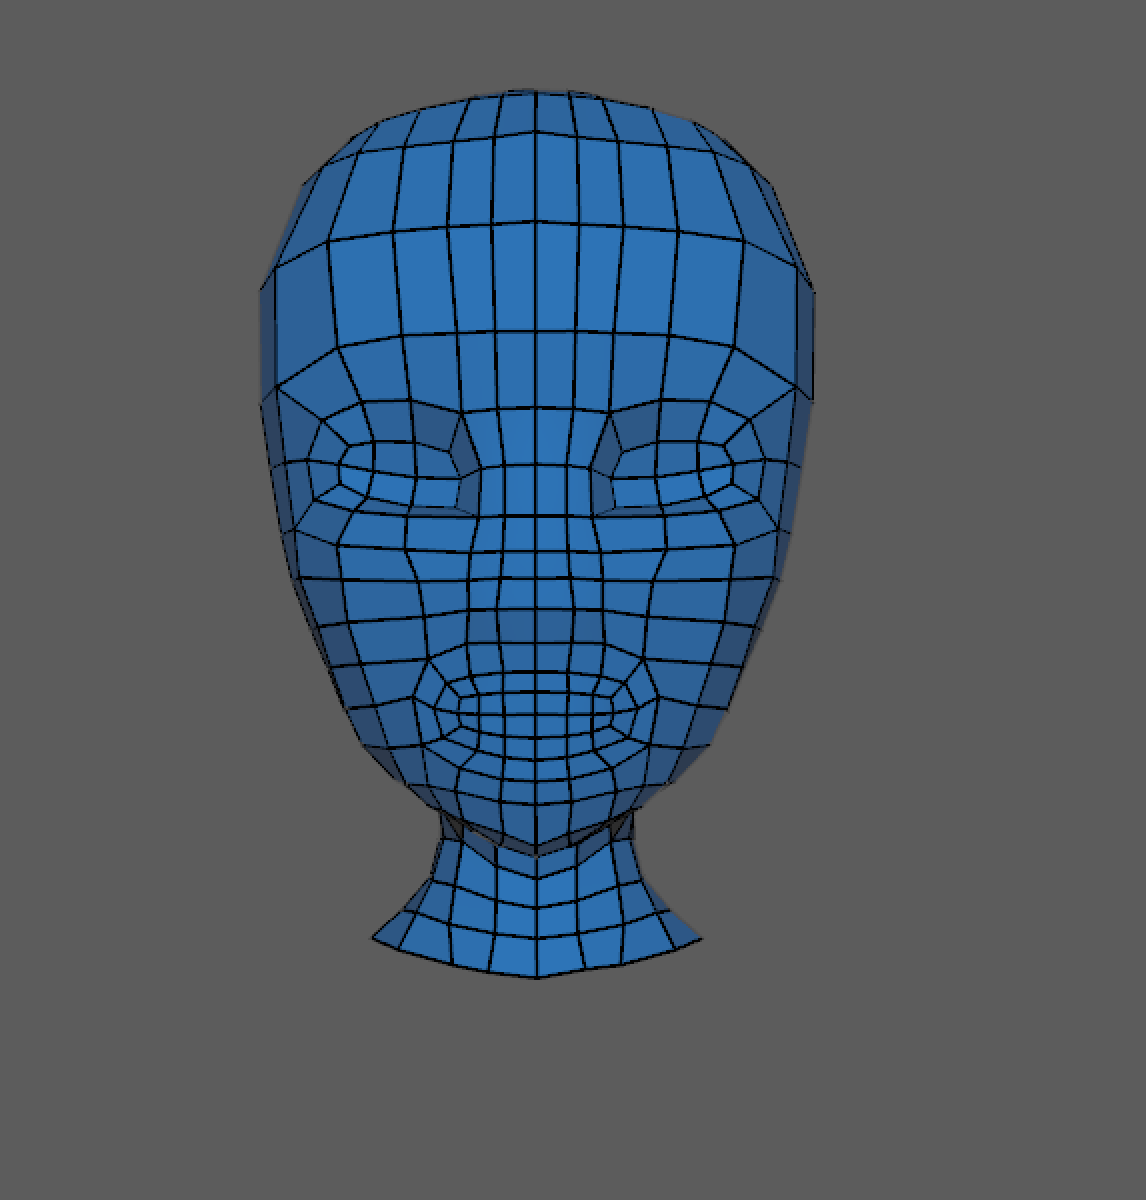
Our mesh should be completely symmetrical as well. If you see that your mesh is for some reason not symmetrical, you can delete one half of the mesh and mirror the other side to ensure symmetry.
At this point, I would take the time to also smooth out or “relax” your mesh to make sure that your quads are more evenly spaced out. If you turn on soft select while holding shift, you can smooth out your mesh even faster!
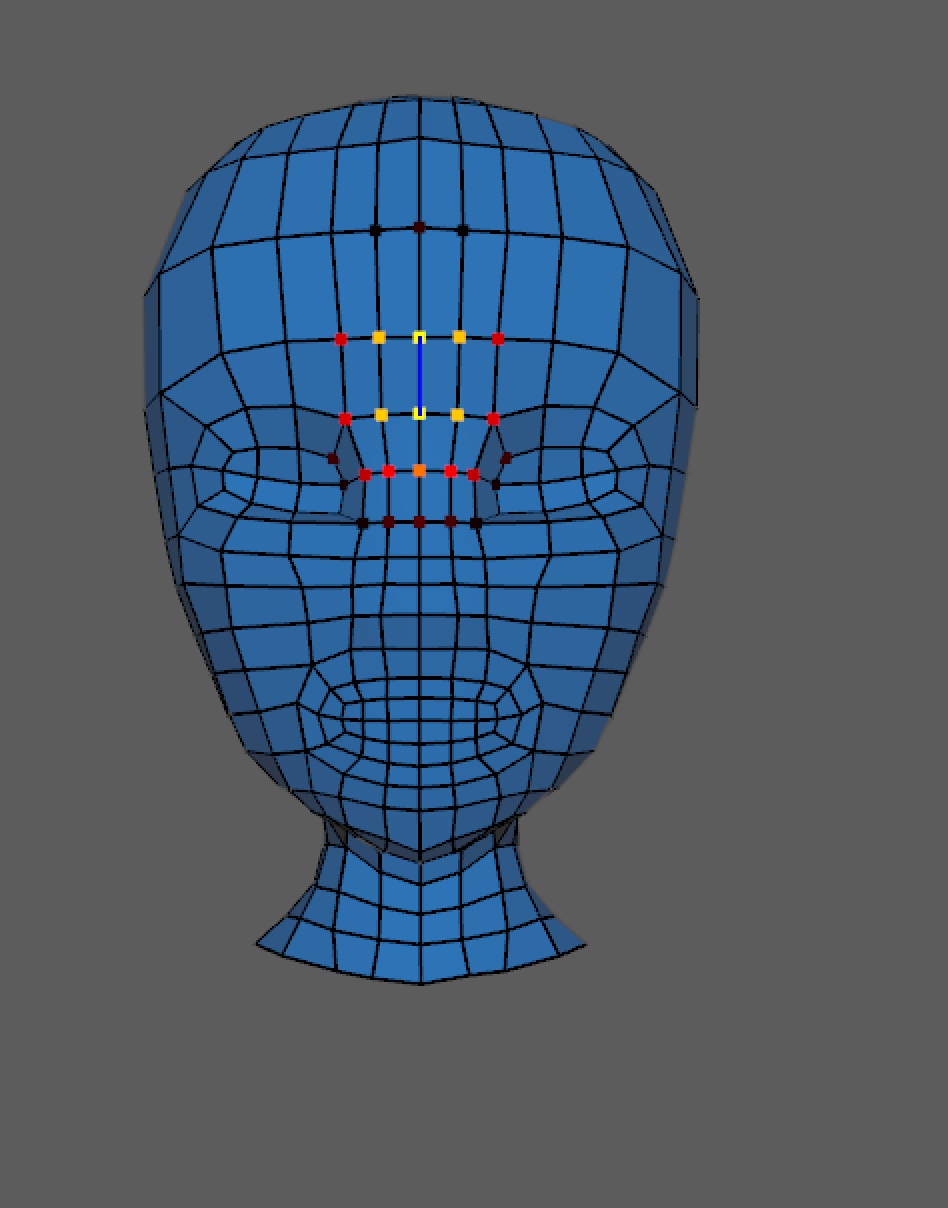
After all of these steps, your final mesh should have topology that looks somewhat similar to this, HOWEVER, do not be worried if your model is not exactly the same as mine. Remember that the point of this lab is not to recreate the character I’m making but rather to apply this workflow to create the character you need.
ADDING IN DETAILS
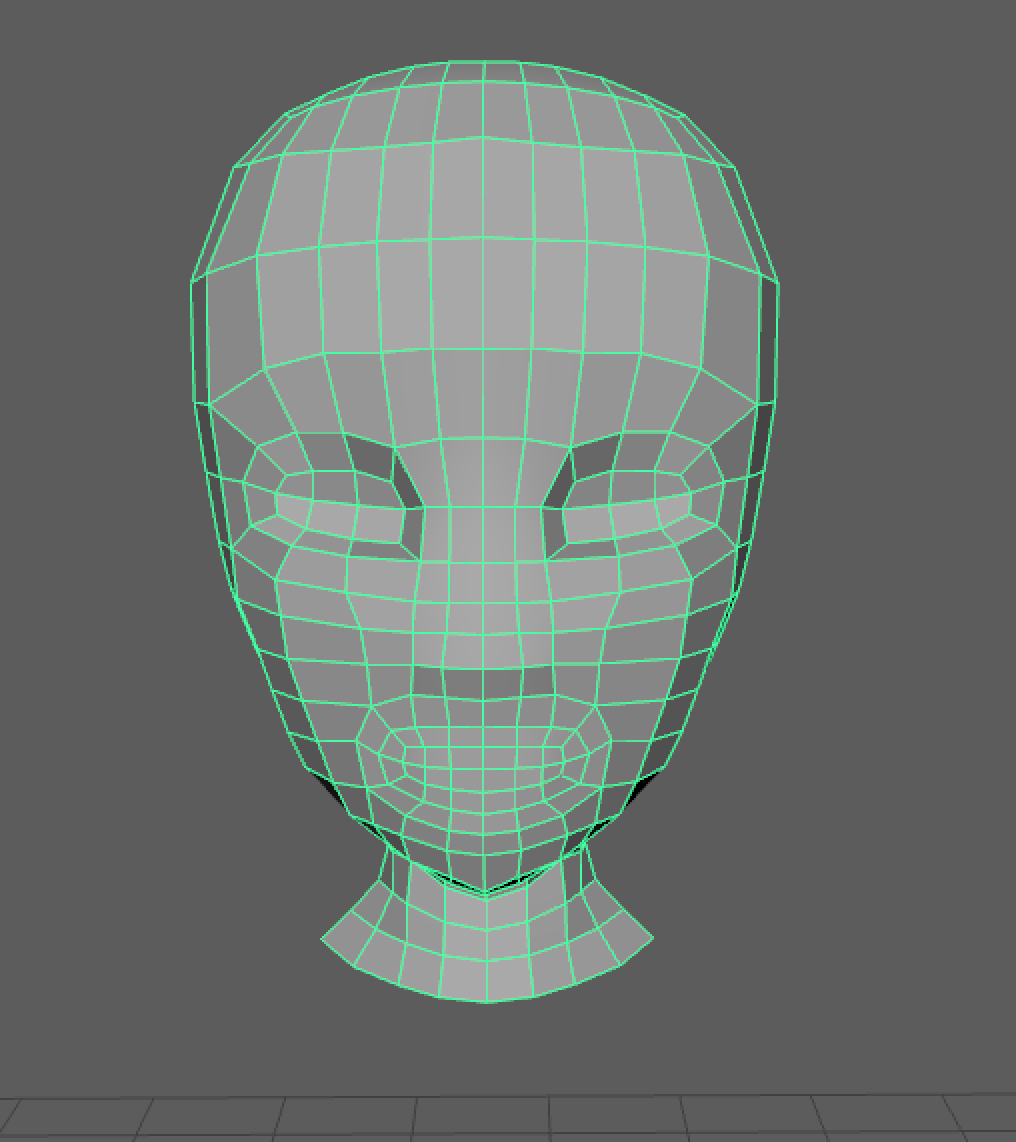
After all of these steps we do have a mesh with the topology that we want, however the actual mesh itself might not look like what we want. At this point, my mesh looks a lot closer to a weird blob than it looks like April.

That is why we are going to spend some time adding the details that we want for our characters. A majority of this happens with the use of extrusions and the sculpting tools so this shouldn’t be anything new. However keep in mind that at this point, individual artistic preference will be the strongest factor of what you do. Therefore the steps that I wrote and the images I included are more vague than what I included for the previous section, and you might find that you’ll be doing different steps than me to get the character that you want (which is perfectly fine!)
The first detail I’m going to add is the ears: I’m going to select faces on the side of the head and extrude them outward.

Then I’m going to extrude in a few times to get the indent of the ear. Once again, feel free to do something similar or different than me.

Next, I’m going to extrude near the ear region to actually get the eye socket indent. Select the ring of faces in the eye area and extrude inwards a few times. I also scaled and moved these faces a bit to get the exact eye shape that I wanted.
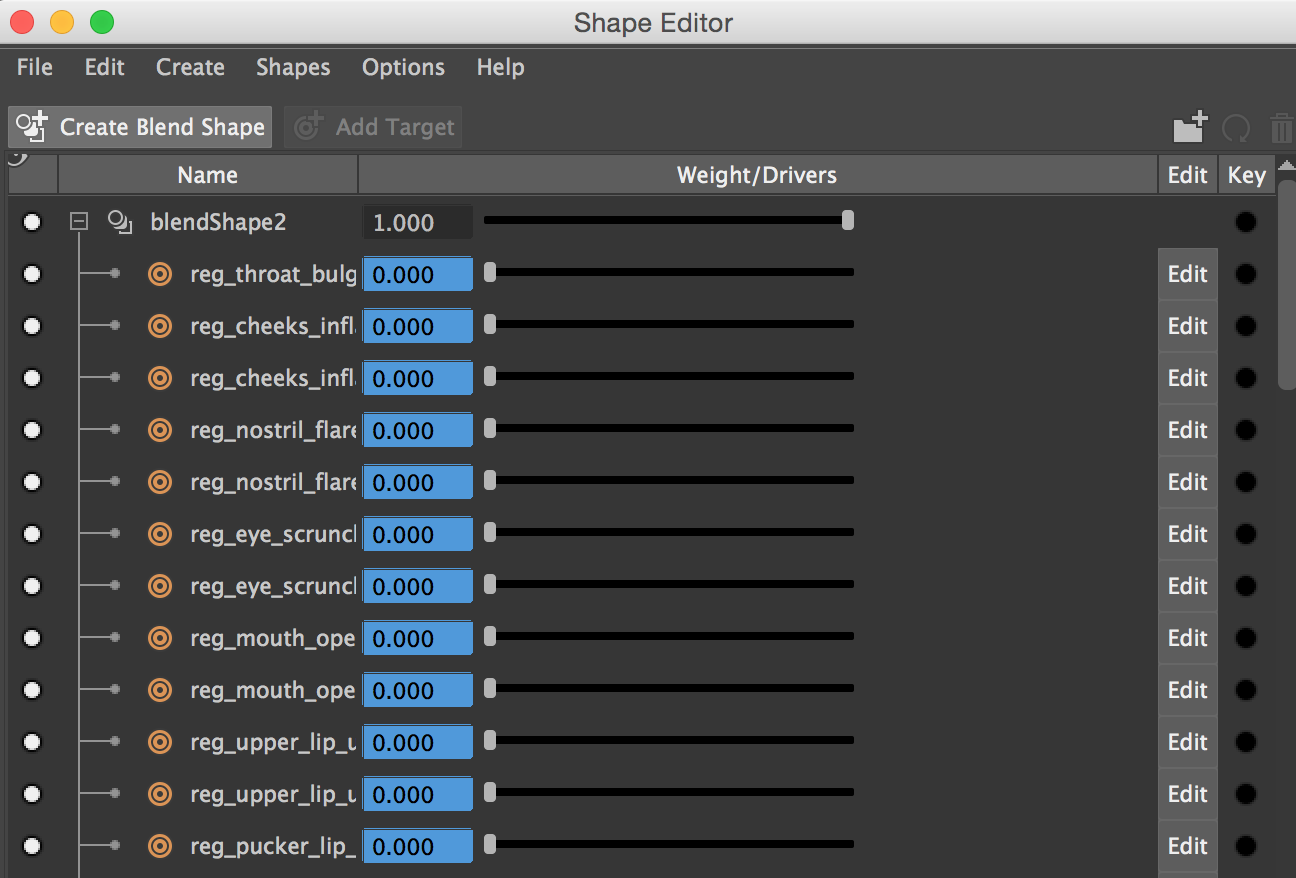
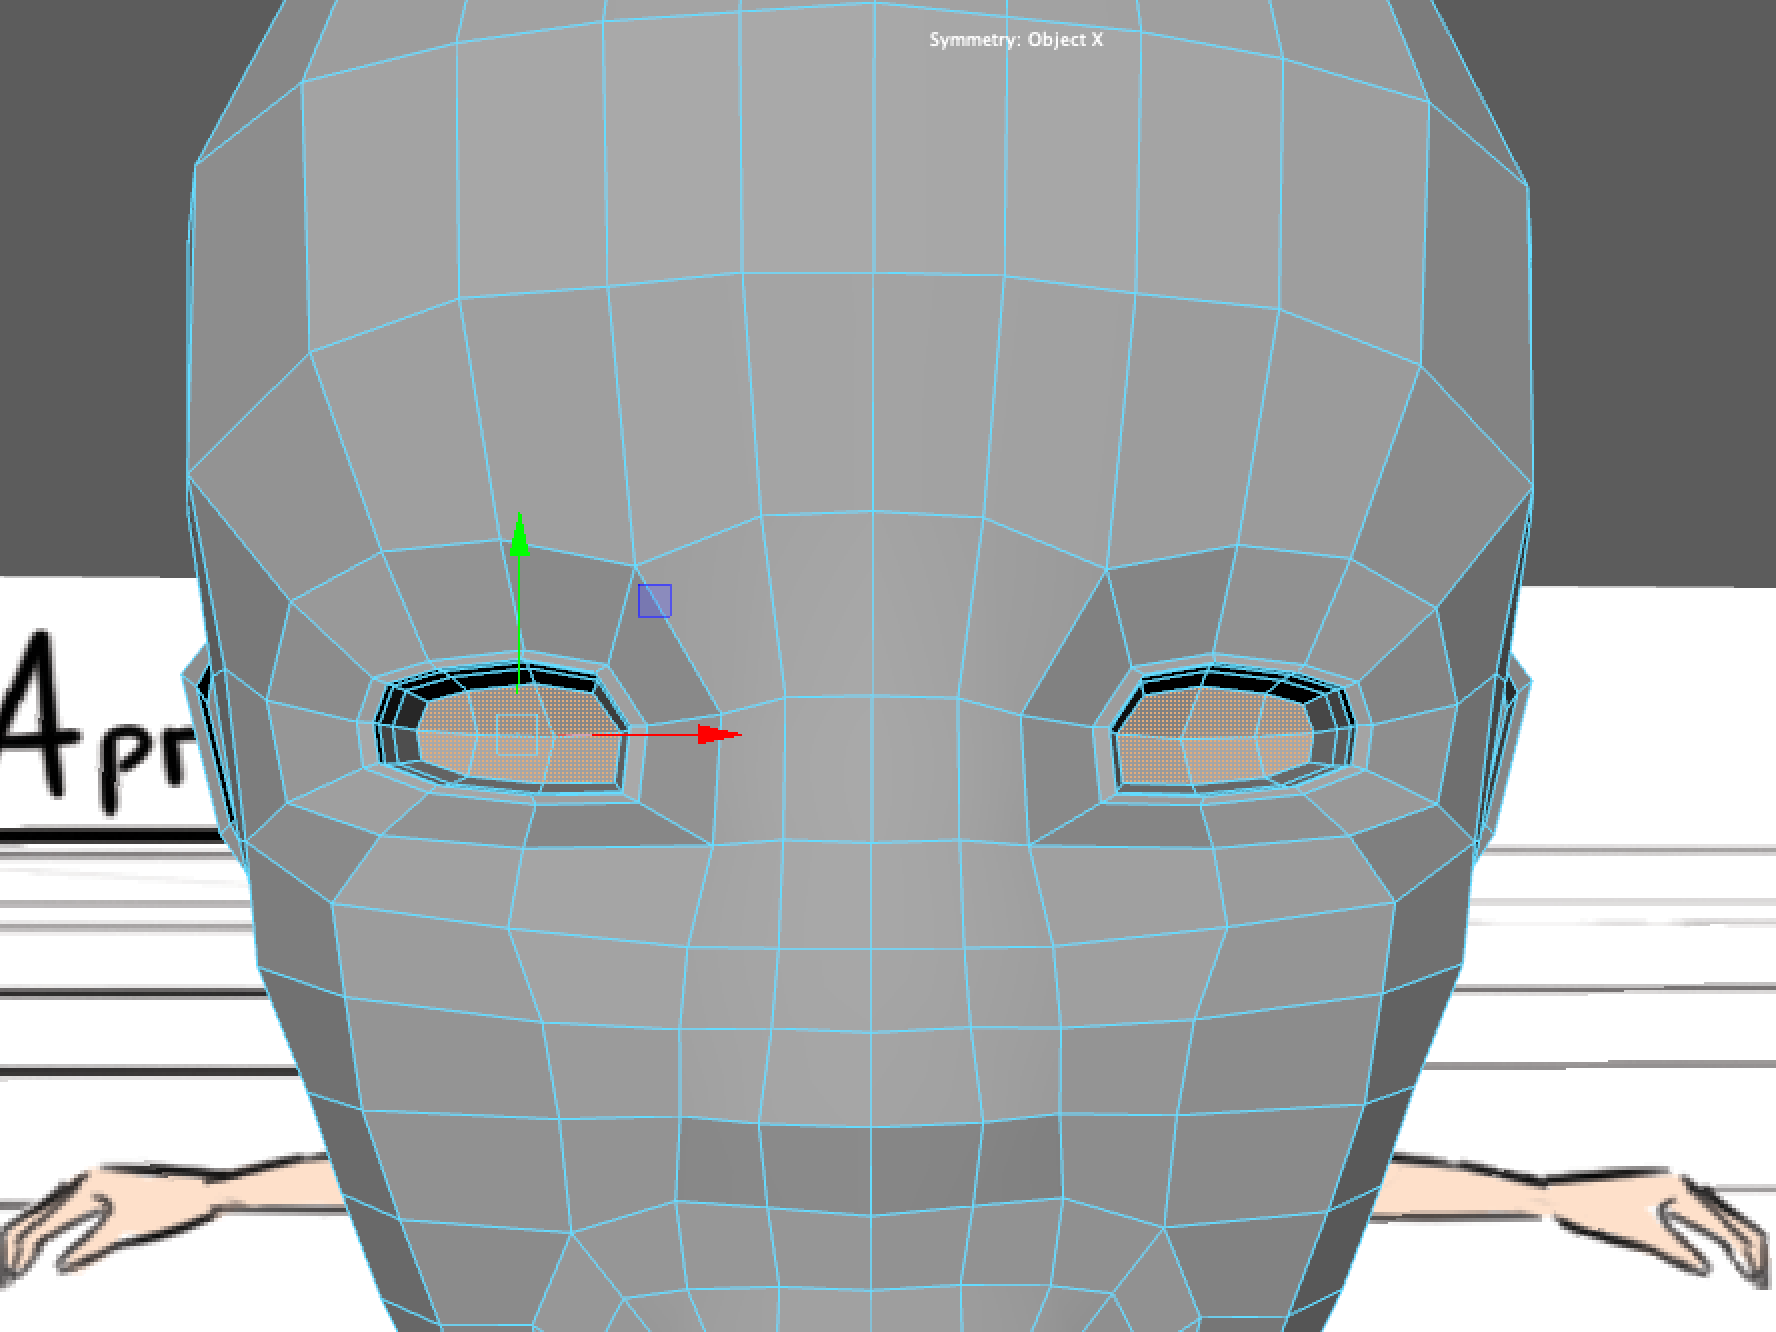
Now, I’m going to use soft select and the move tool to bring out the upper and lower eyelid area. This adds a bit of detail to April’s eyes and will make eye blendshapes easier in the future stages of the pipeline.
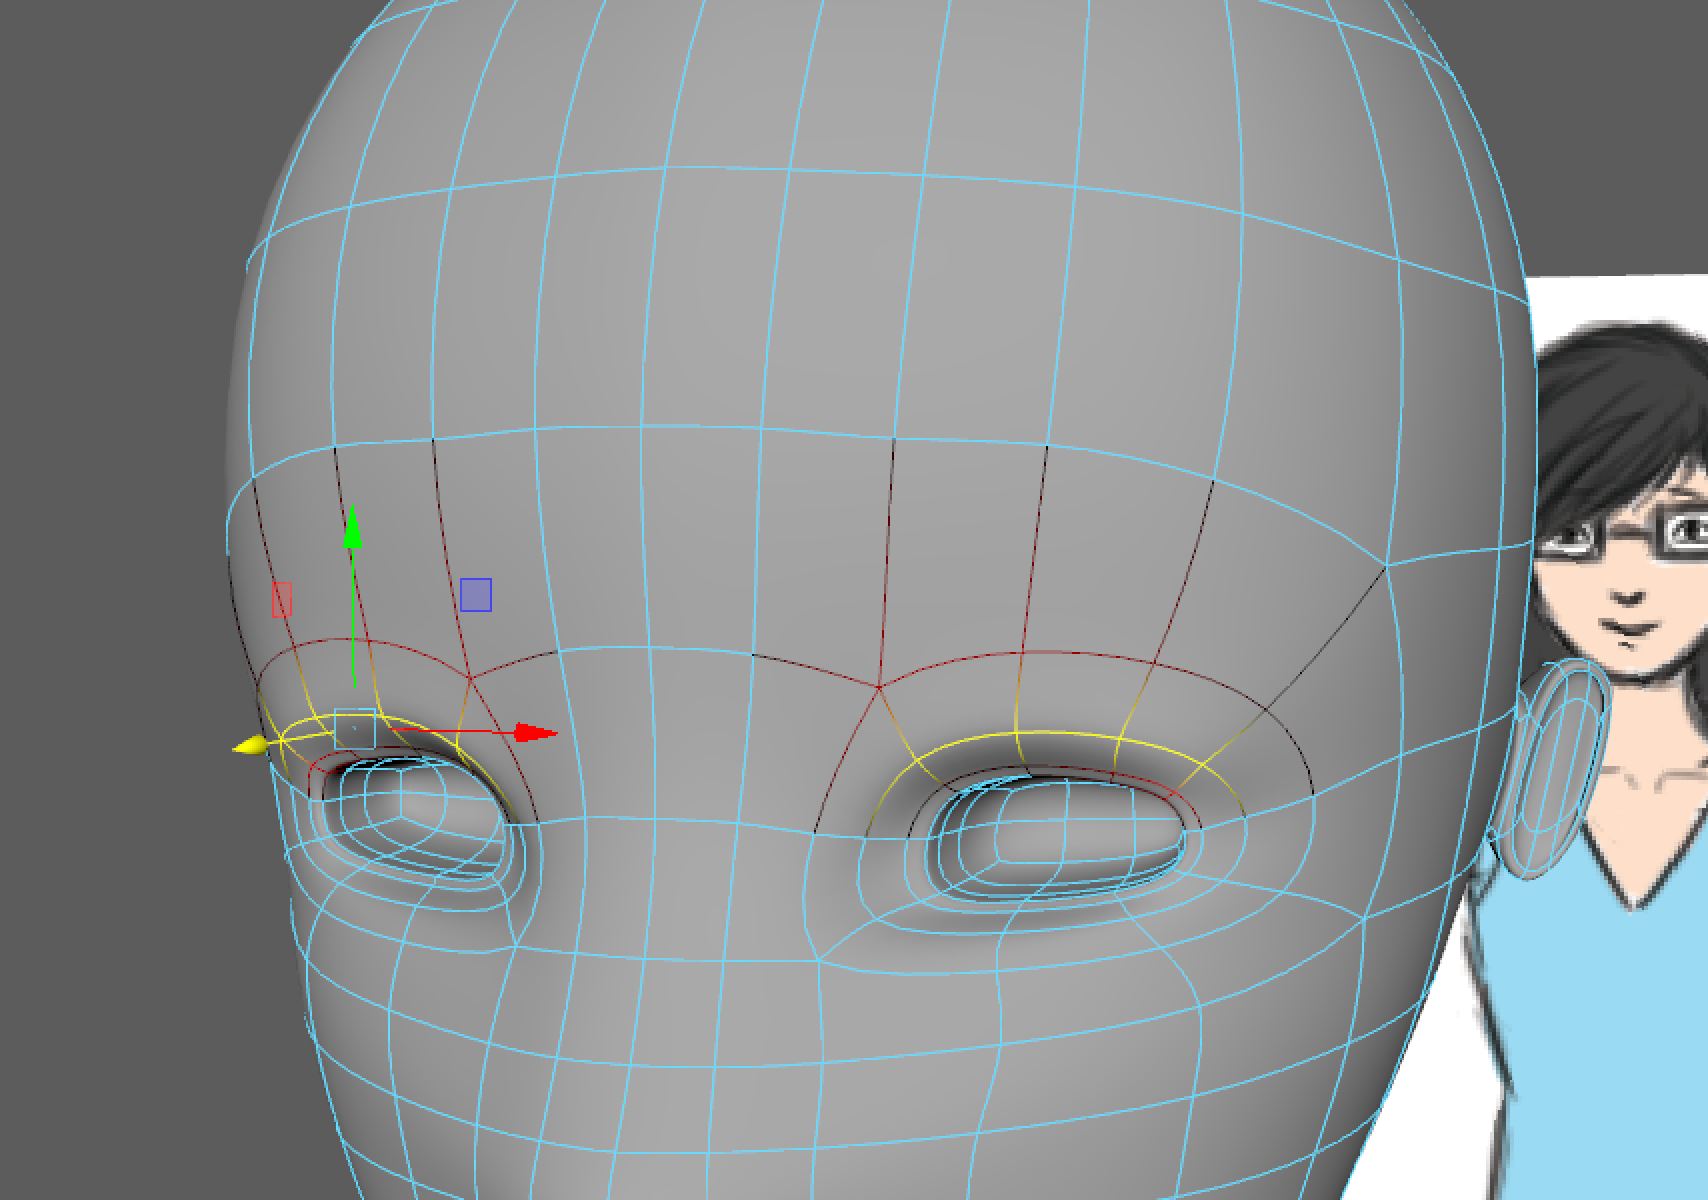
My mesh looks something like this at this point.

Now, I am going to repeat that same process for April’s mouth. Simply select the ring of faces in the mouth area and extrude them inwards.

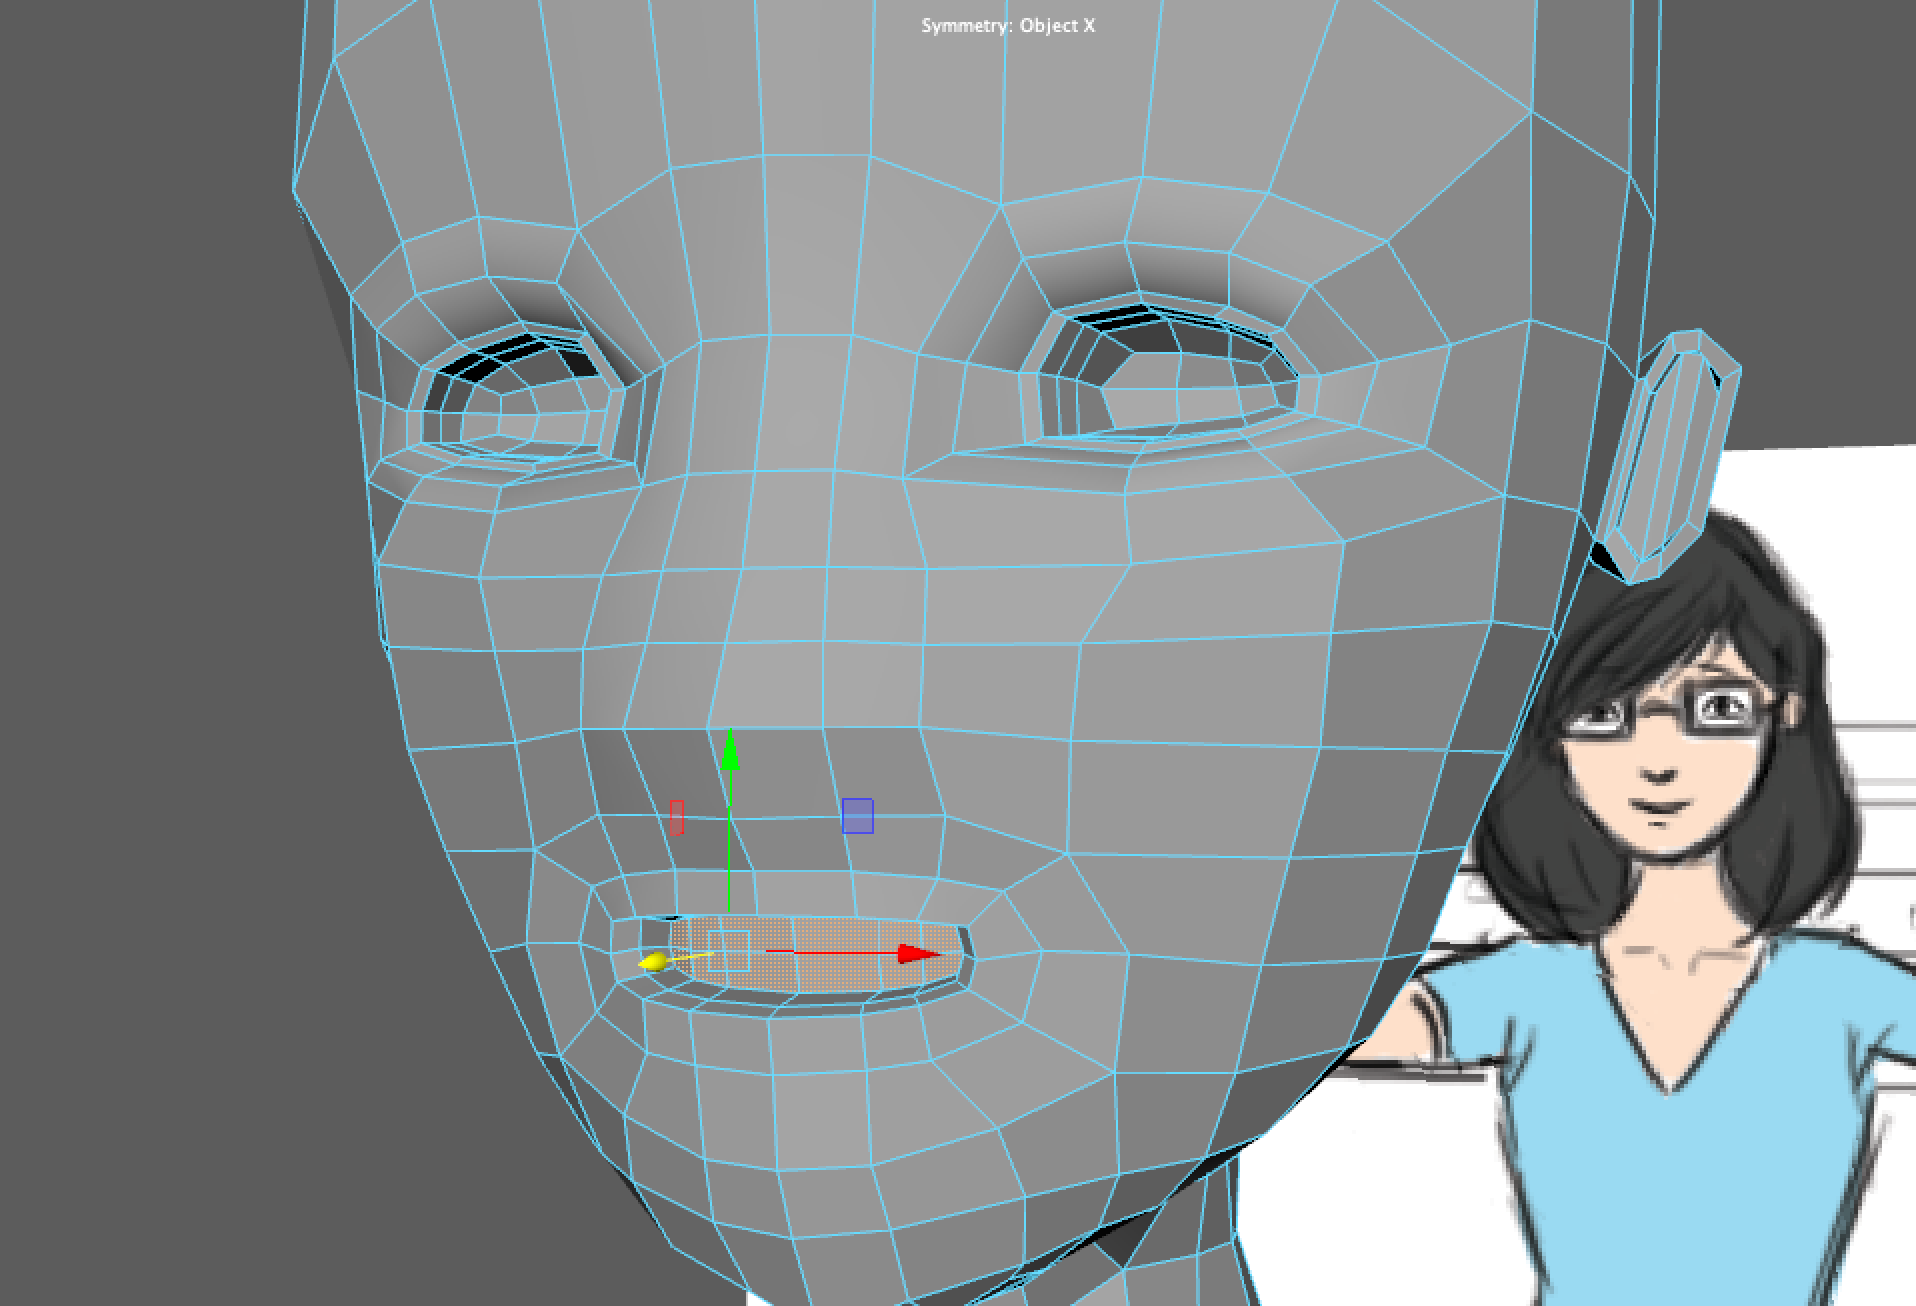
One technical thing that is important to remember is to extrude the mouth area far back into the skull of the character. The reason for this is that if your character were to have more complex mouth blendshapes for emoting or even speaking, it’s necessary to have a deeper indent in the mouth. This is called the “mouth bag” of the character (an unfortunate name I know), and it’s an important detail to remember when making human characters.

Next, I am going to use the move tool to adjust the vertices around April’s mouth so that I can give them some more detail and don’t look as flat.

This took me some time to get a result that I was happy with but after some adjustments my model looks like this:

Finally, I am going to work on the nose: at the moment, it is a bit flat and undetailed so I’m going to start by adjusting the vertices in that area to better emphasize the nose bridge.

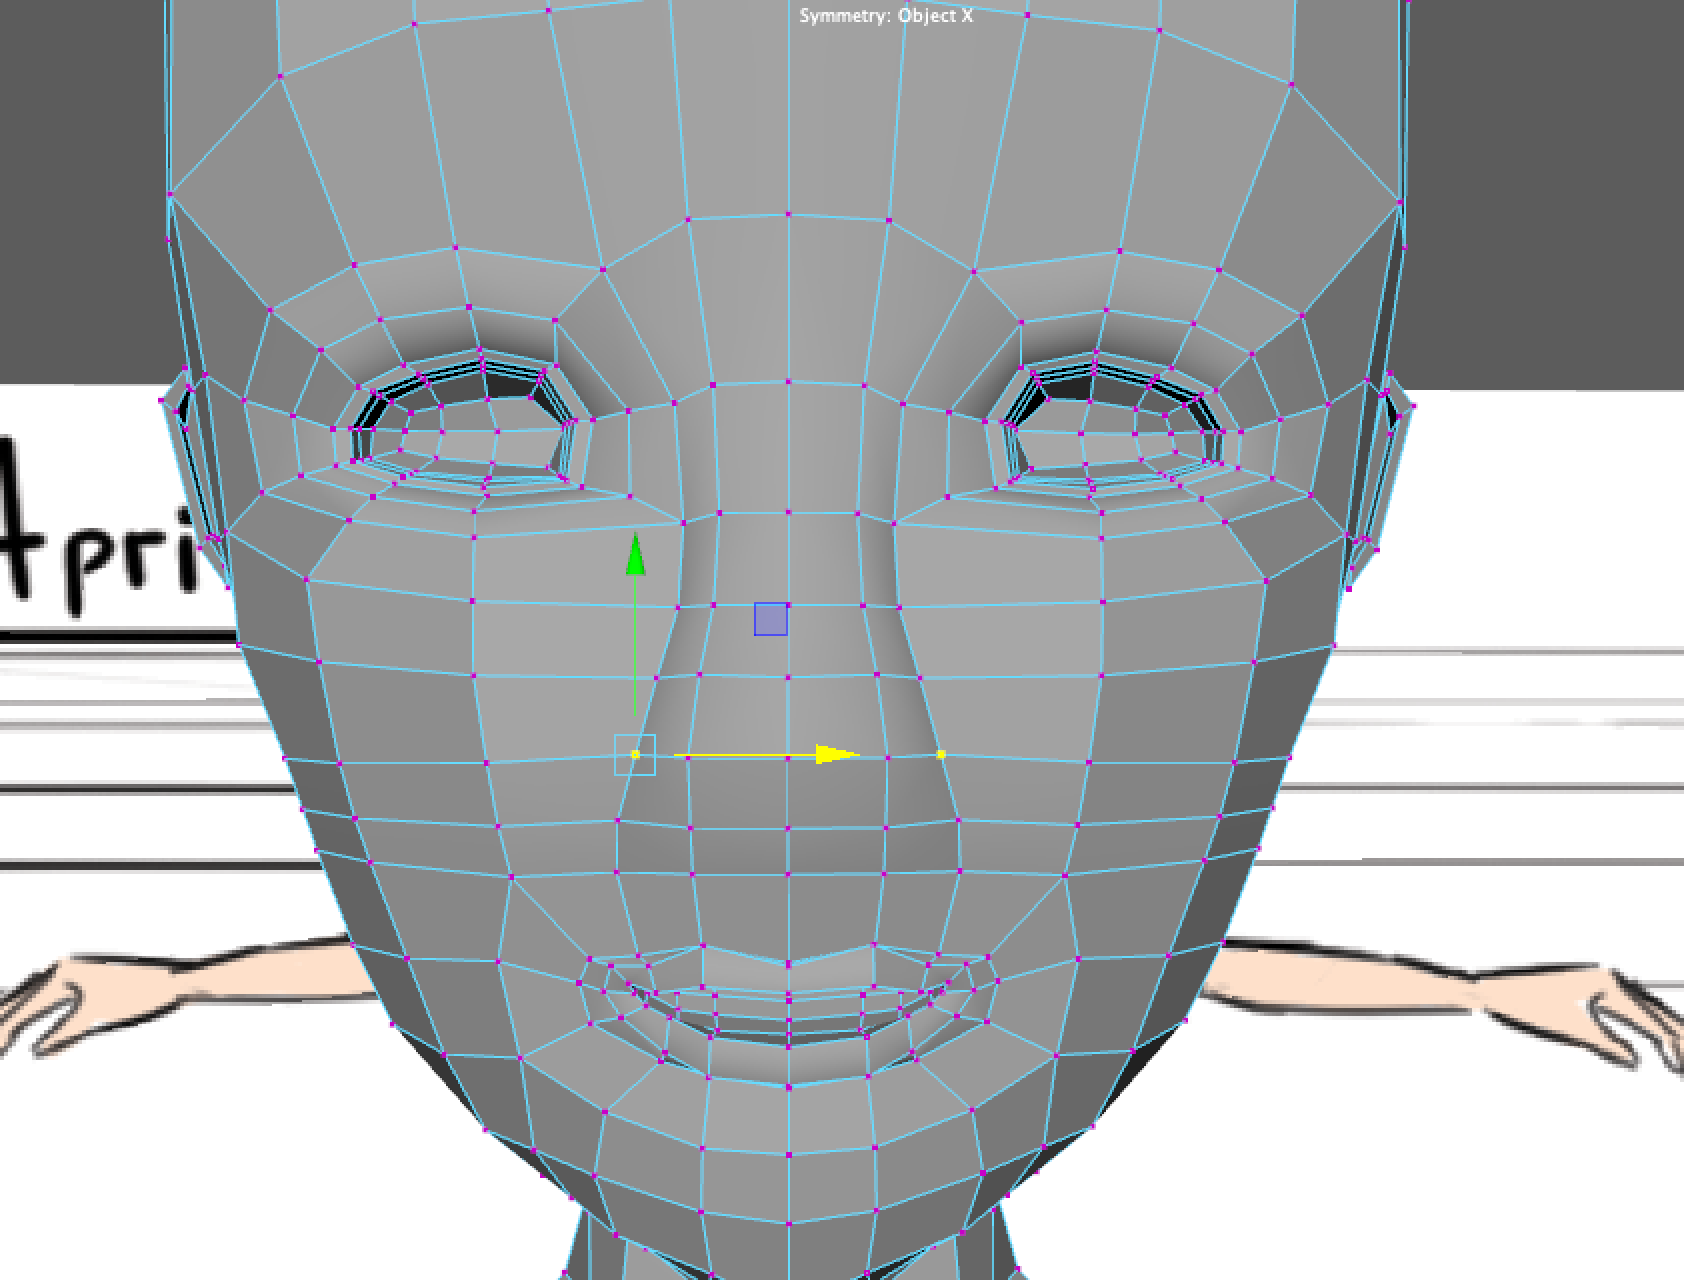
After some adjusting, April’s nose looks something like this:
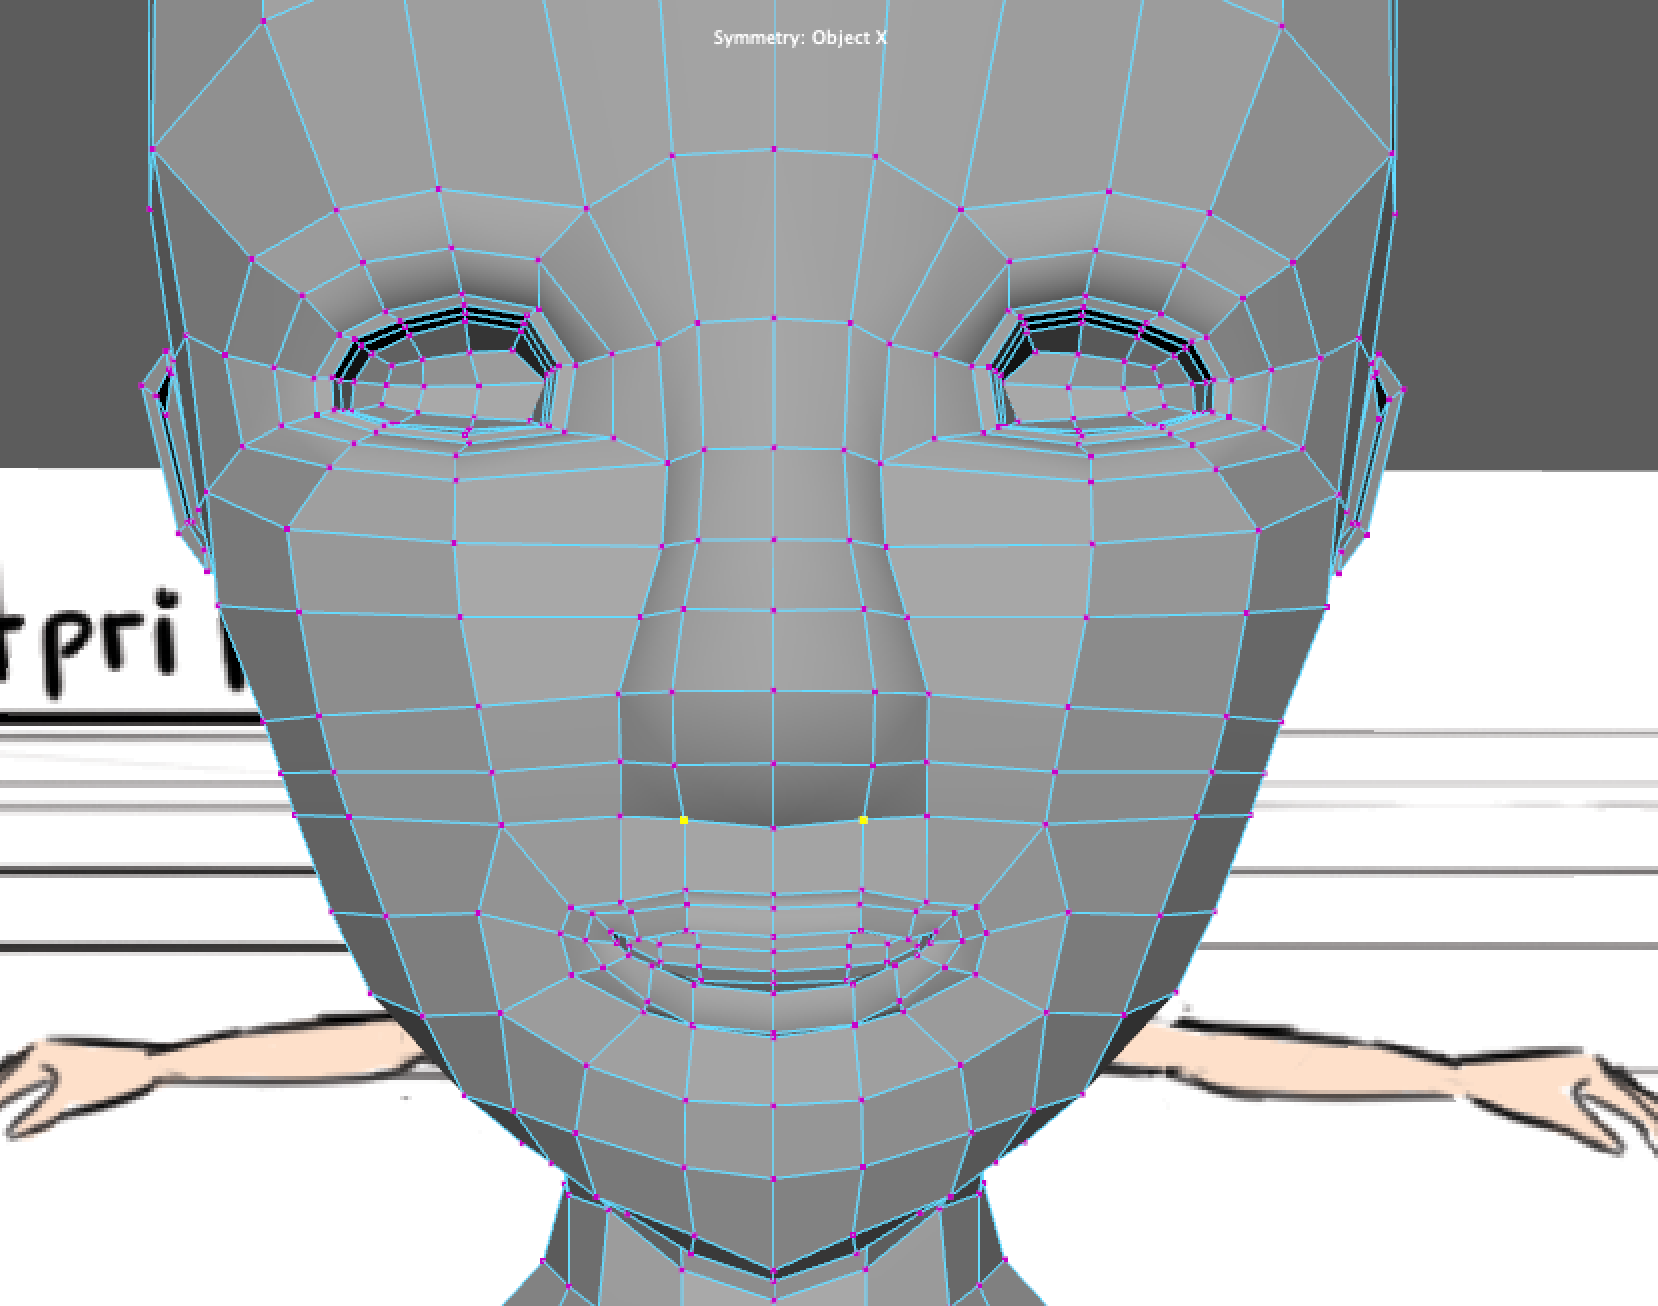
Now, I’m going to extrude some of the faces inwards so that we can get the nostril’s shape.
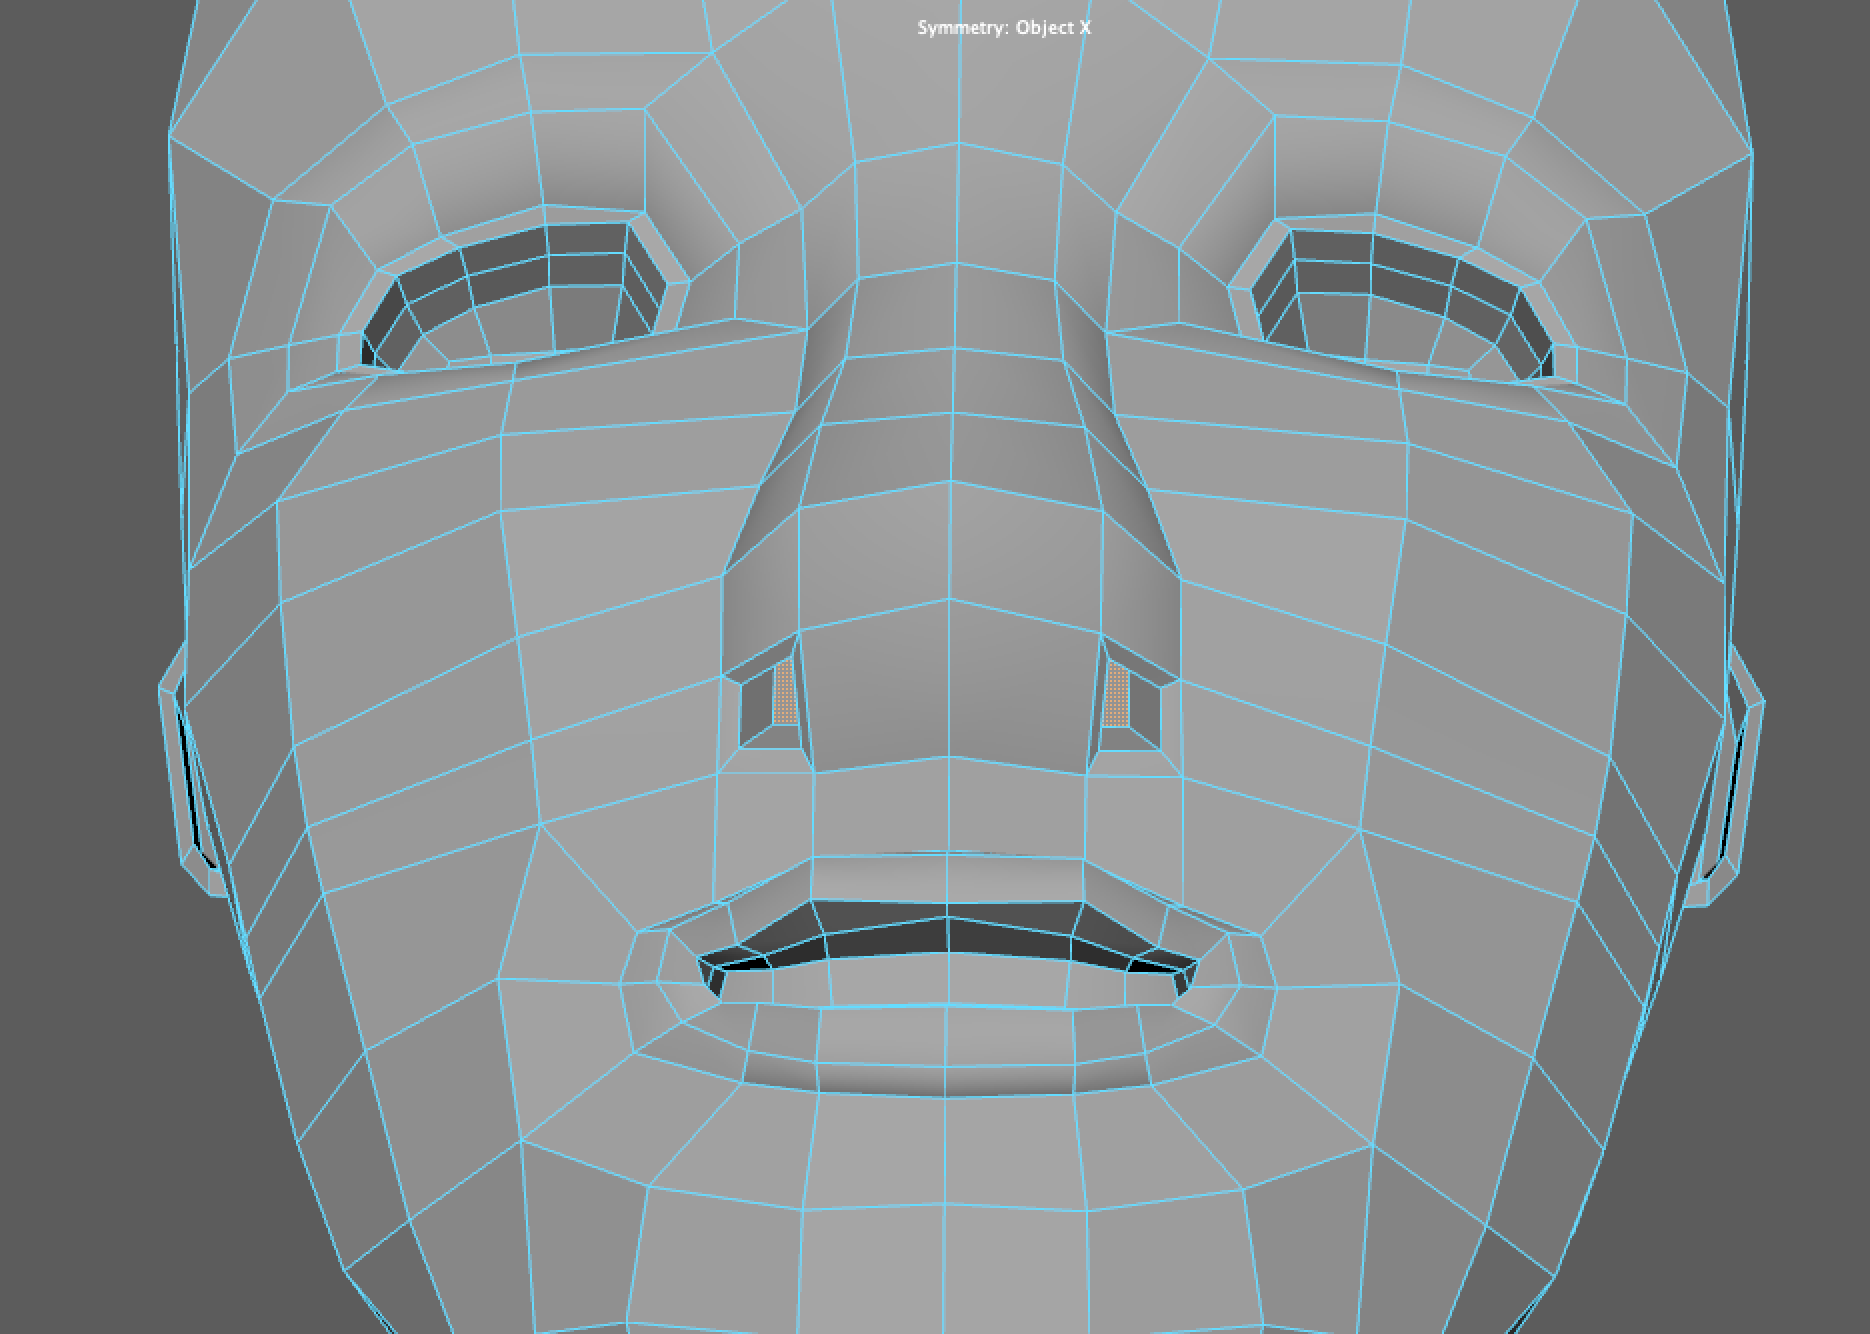
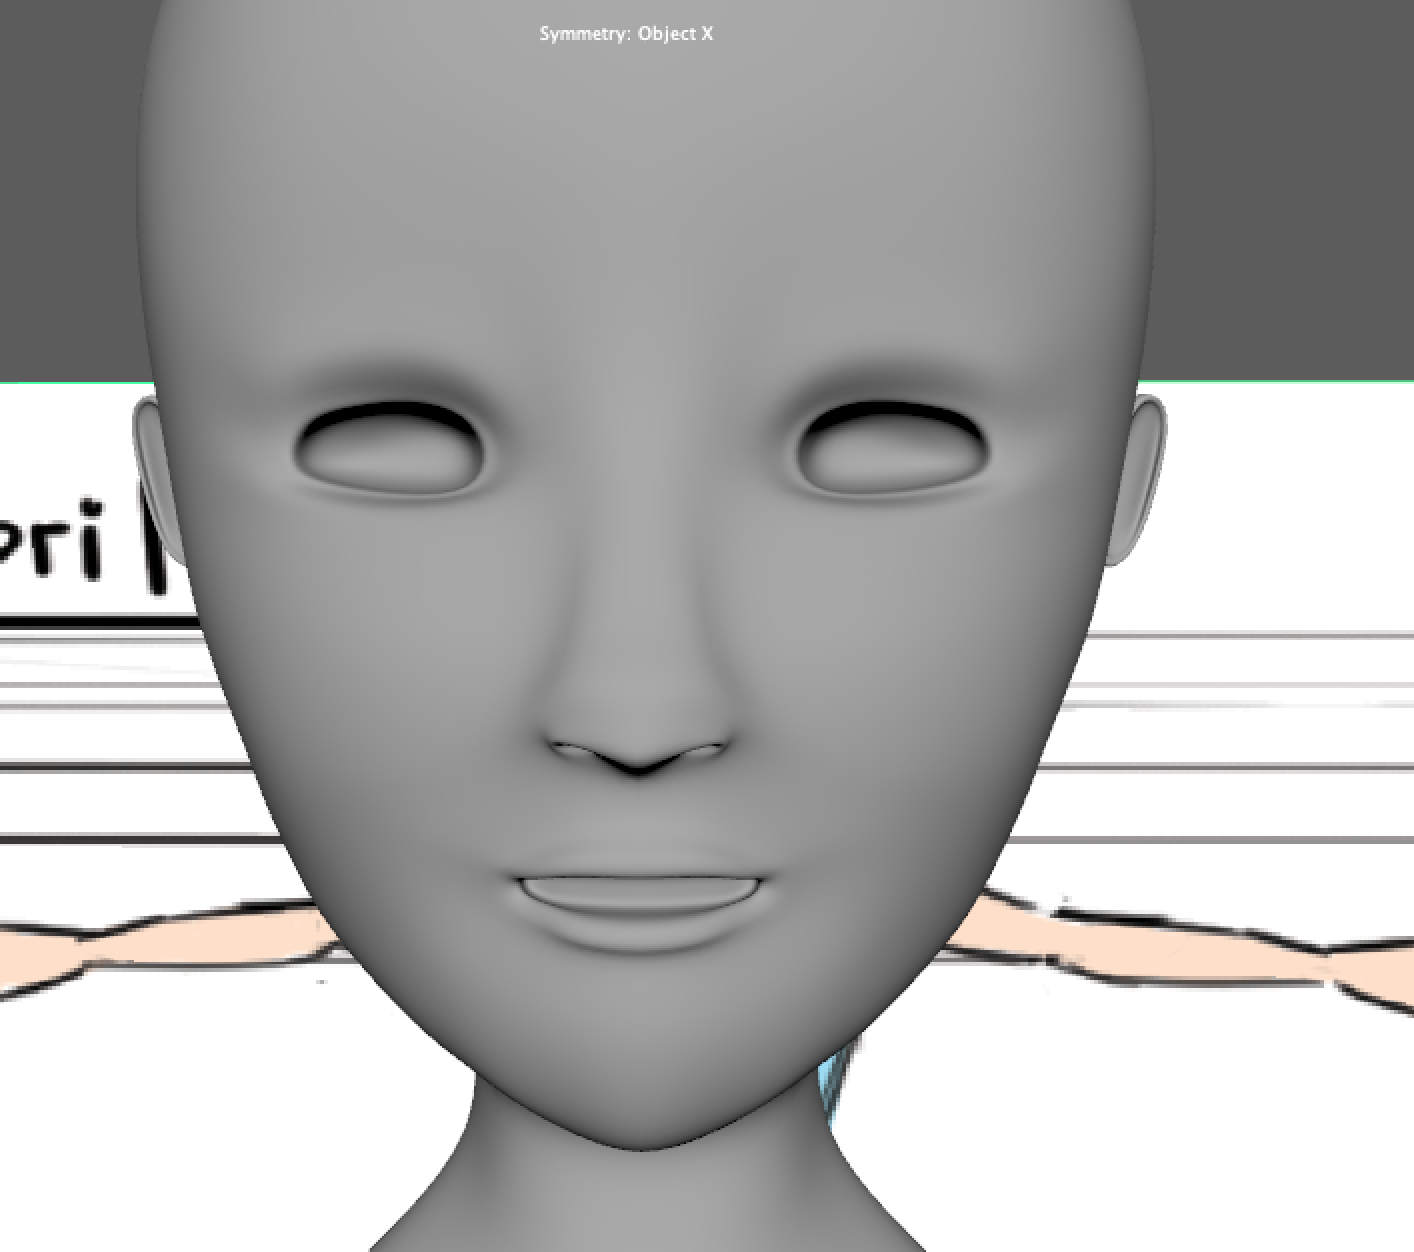
At this point, I spent some time sculpting and adjusting my model to look more like April and get a result that I was happy with. I probably spent more time than is advised for the lab since you have more work ahead of you, however, it is up to you at this point, how much more work you want to put into getting the details of the face right. For now, we can move onto the next section of the lab which is creating the body of the mesh.
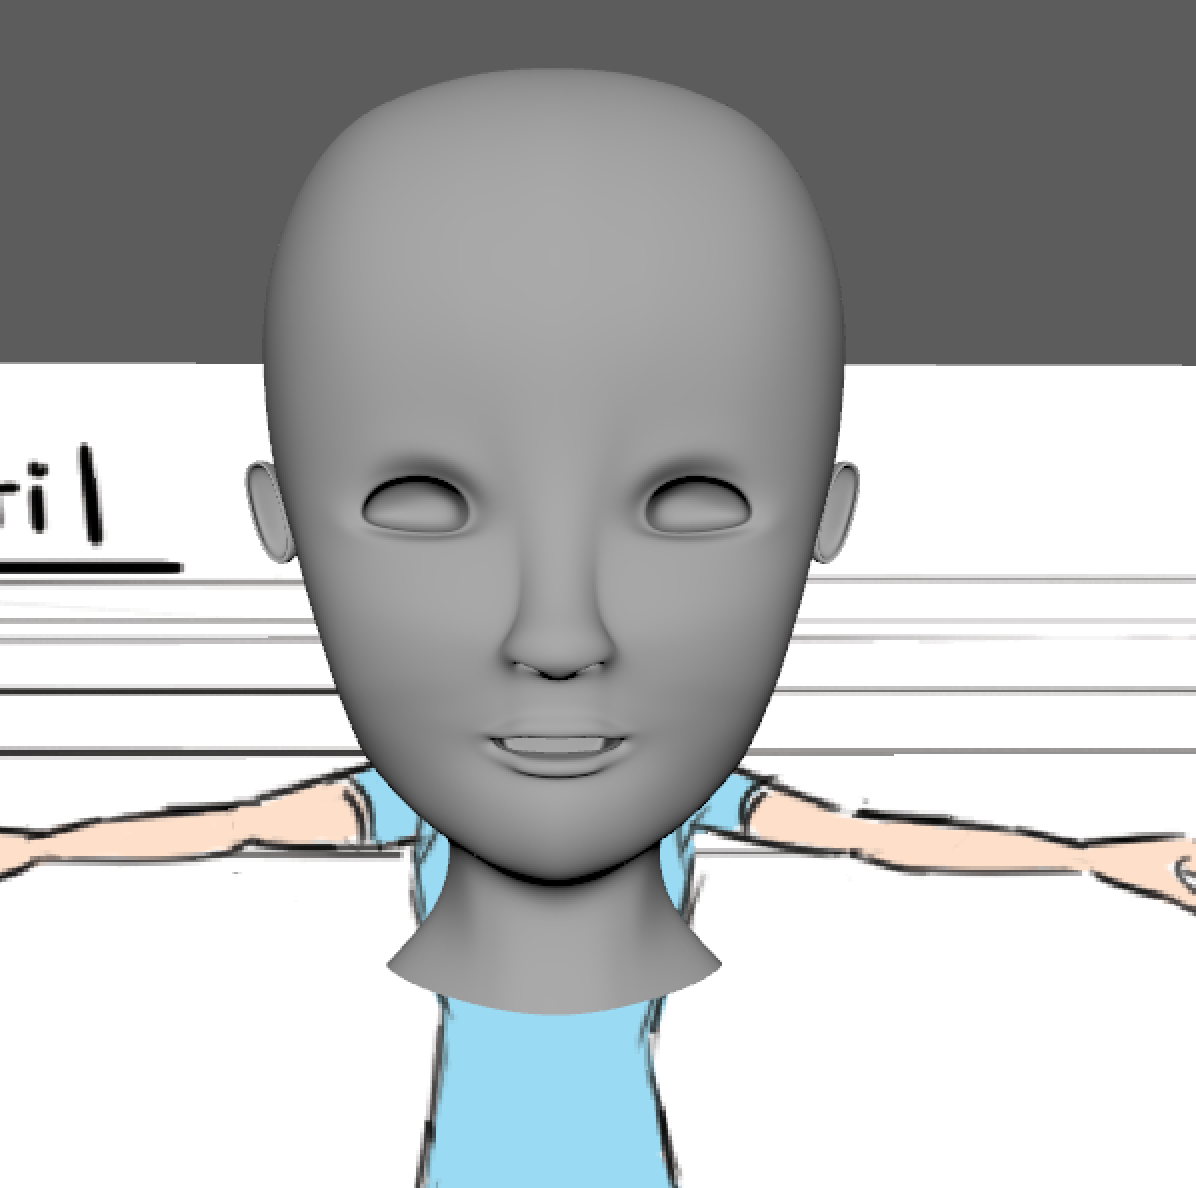
CREATING THE TORSO
While the head is the most complex component of a human character model, that doesn’t mean that it’s time to skimp on the body. Good topology still applies, so let’s take a look at what it means to create a human body mesh that can be used for animation.
As mentioned before, industry practice generally follows a similar workflow we used for the head except for the entire character model—sculpting everything first then retopologizing in Maya. However, being able to model an organic character from the ground up is still a really useful skill and can give you a lot more insight into how good topology is created. There’s a million different workflows that someone could use to produce a model, so don’t feel like you have to use a single “correct” way.
For this section, instead of Quad Draw, we’ll be using the traditional box- and contour-modeling techniques taught in the basic labs, but going over a lot of tools that’ll make you a stronger character modeller.
Remember: when organic modeling in Maya it’s best to start as low poly as possible, and only add edge loops when needed to define important details. This is very similar to how painting or drawing works — we start with the contours and shapes, and fill in detail as we refine different sections.
As long as we have a low poly mesh that has good topology (and quads), we can easily use the Subdivide tool to make a higher poly version of the mesh. There is a Reduce tool, but it doesn’t work as nicely. It’s way easier to add detail later than it is to take it away once the model has become too complex.
With all that in mind, let’s start with a cube.
Let’s scale the cube to be roughly the height of the torso up to the armpit area. Then, let’s add two edge loops. In the Tool Settings for the Insert Edge Loop tool, we can change the settings to Multiple Edge Loops and Use Equal Multiplier, setting the “Number of edge loops” to 2. We’ll end with something like the rectangular prism below, and we can adjust the shape of the cube like so:
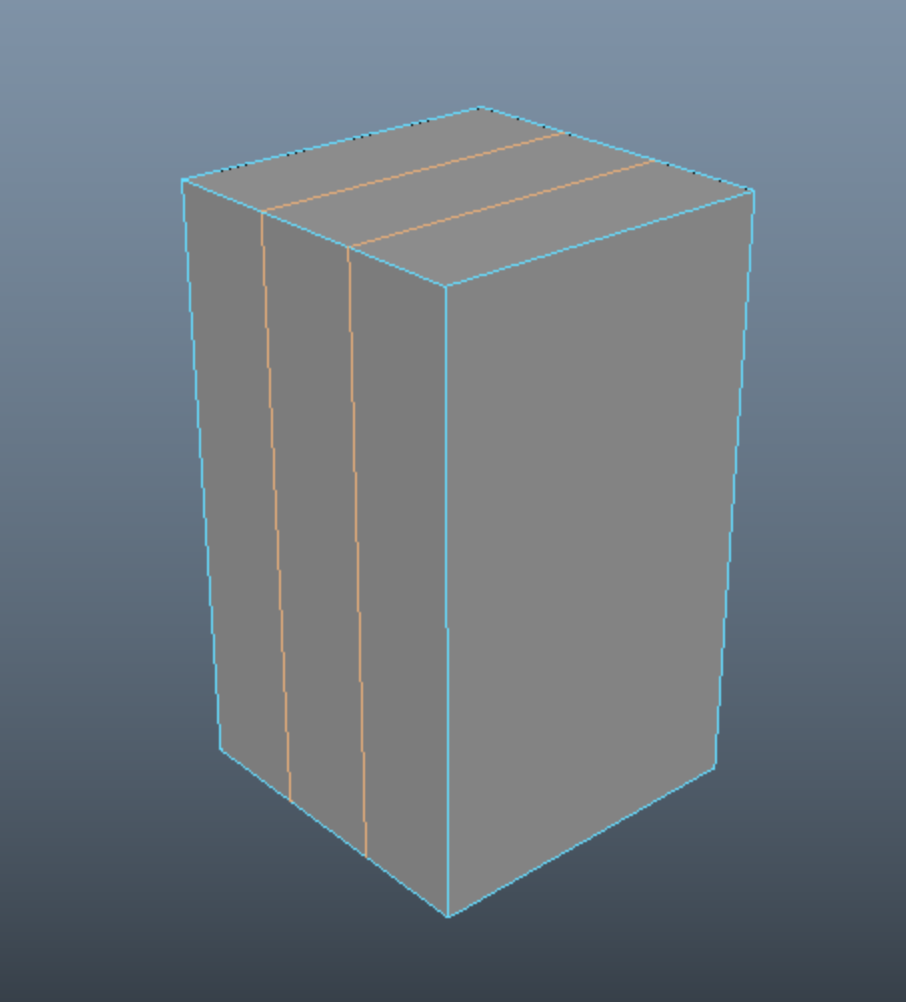
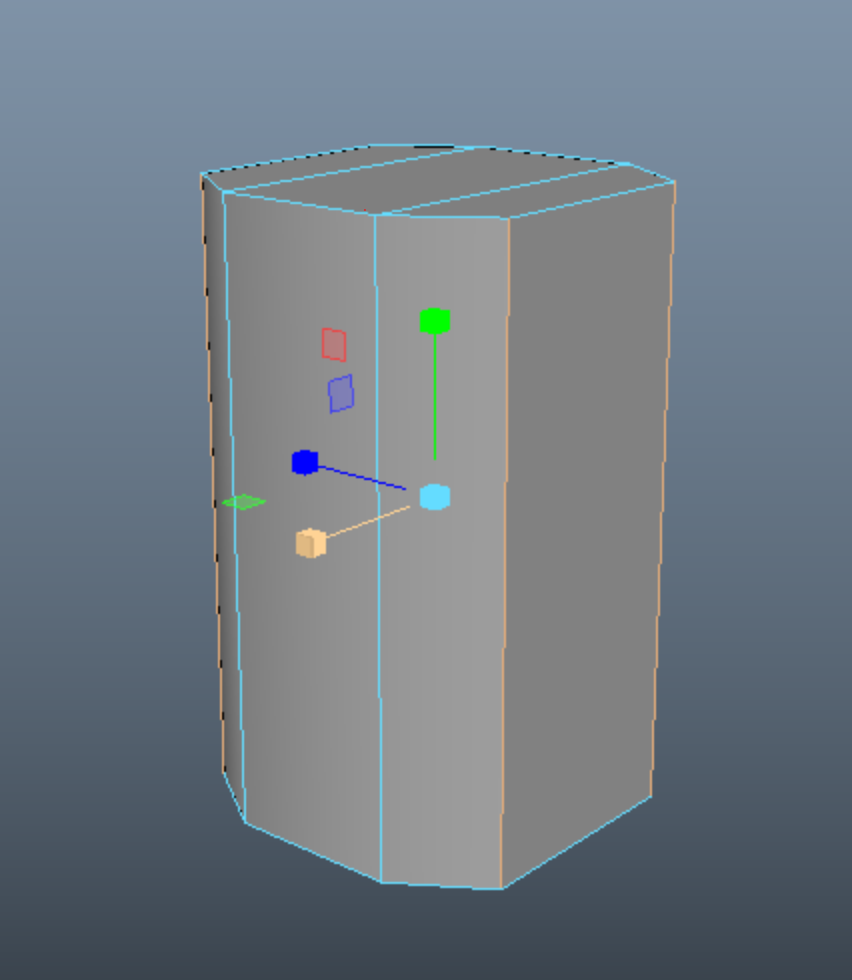
This allows us to create a torso that will be slightly less box-y, since we’ve curved the front of the torso. At this point, I also deleted the top and bottom faces of the torso, to make it easier to select the top and bottom edge loops. As a refresher, double clicking on an edge will select the edge loop that it is a part of.
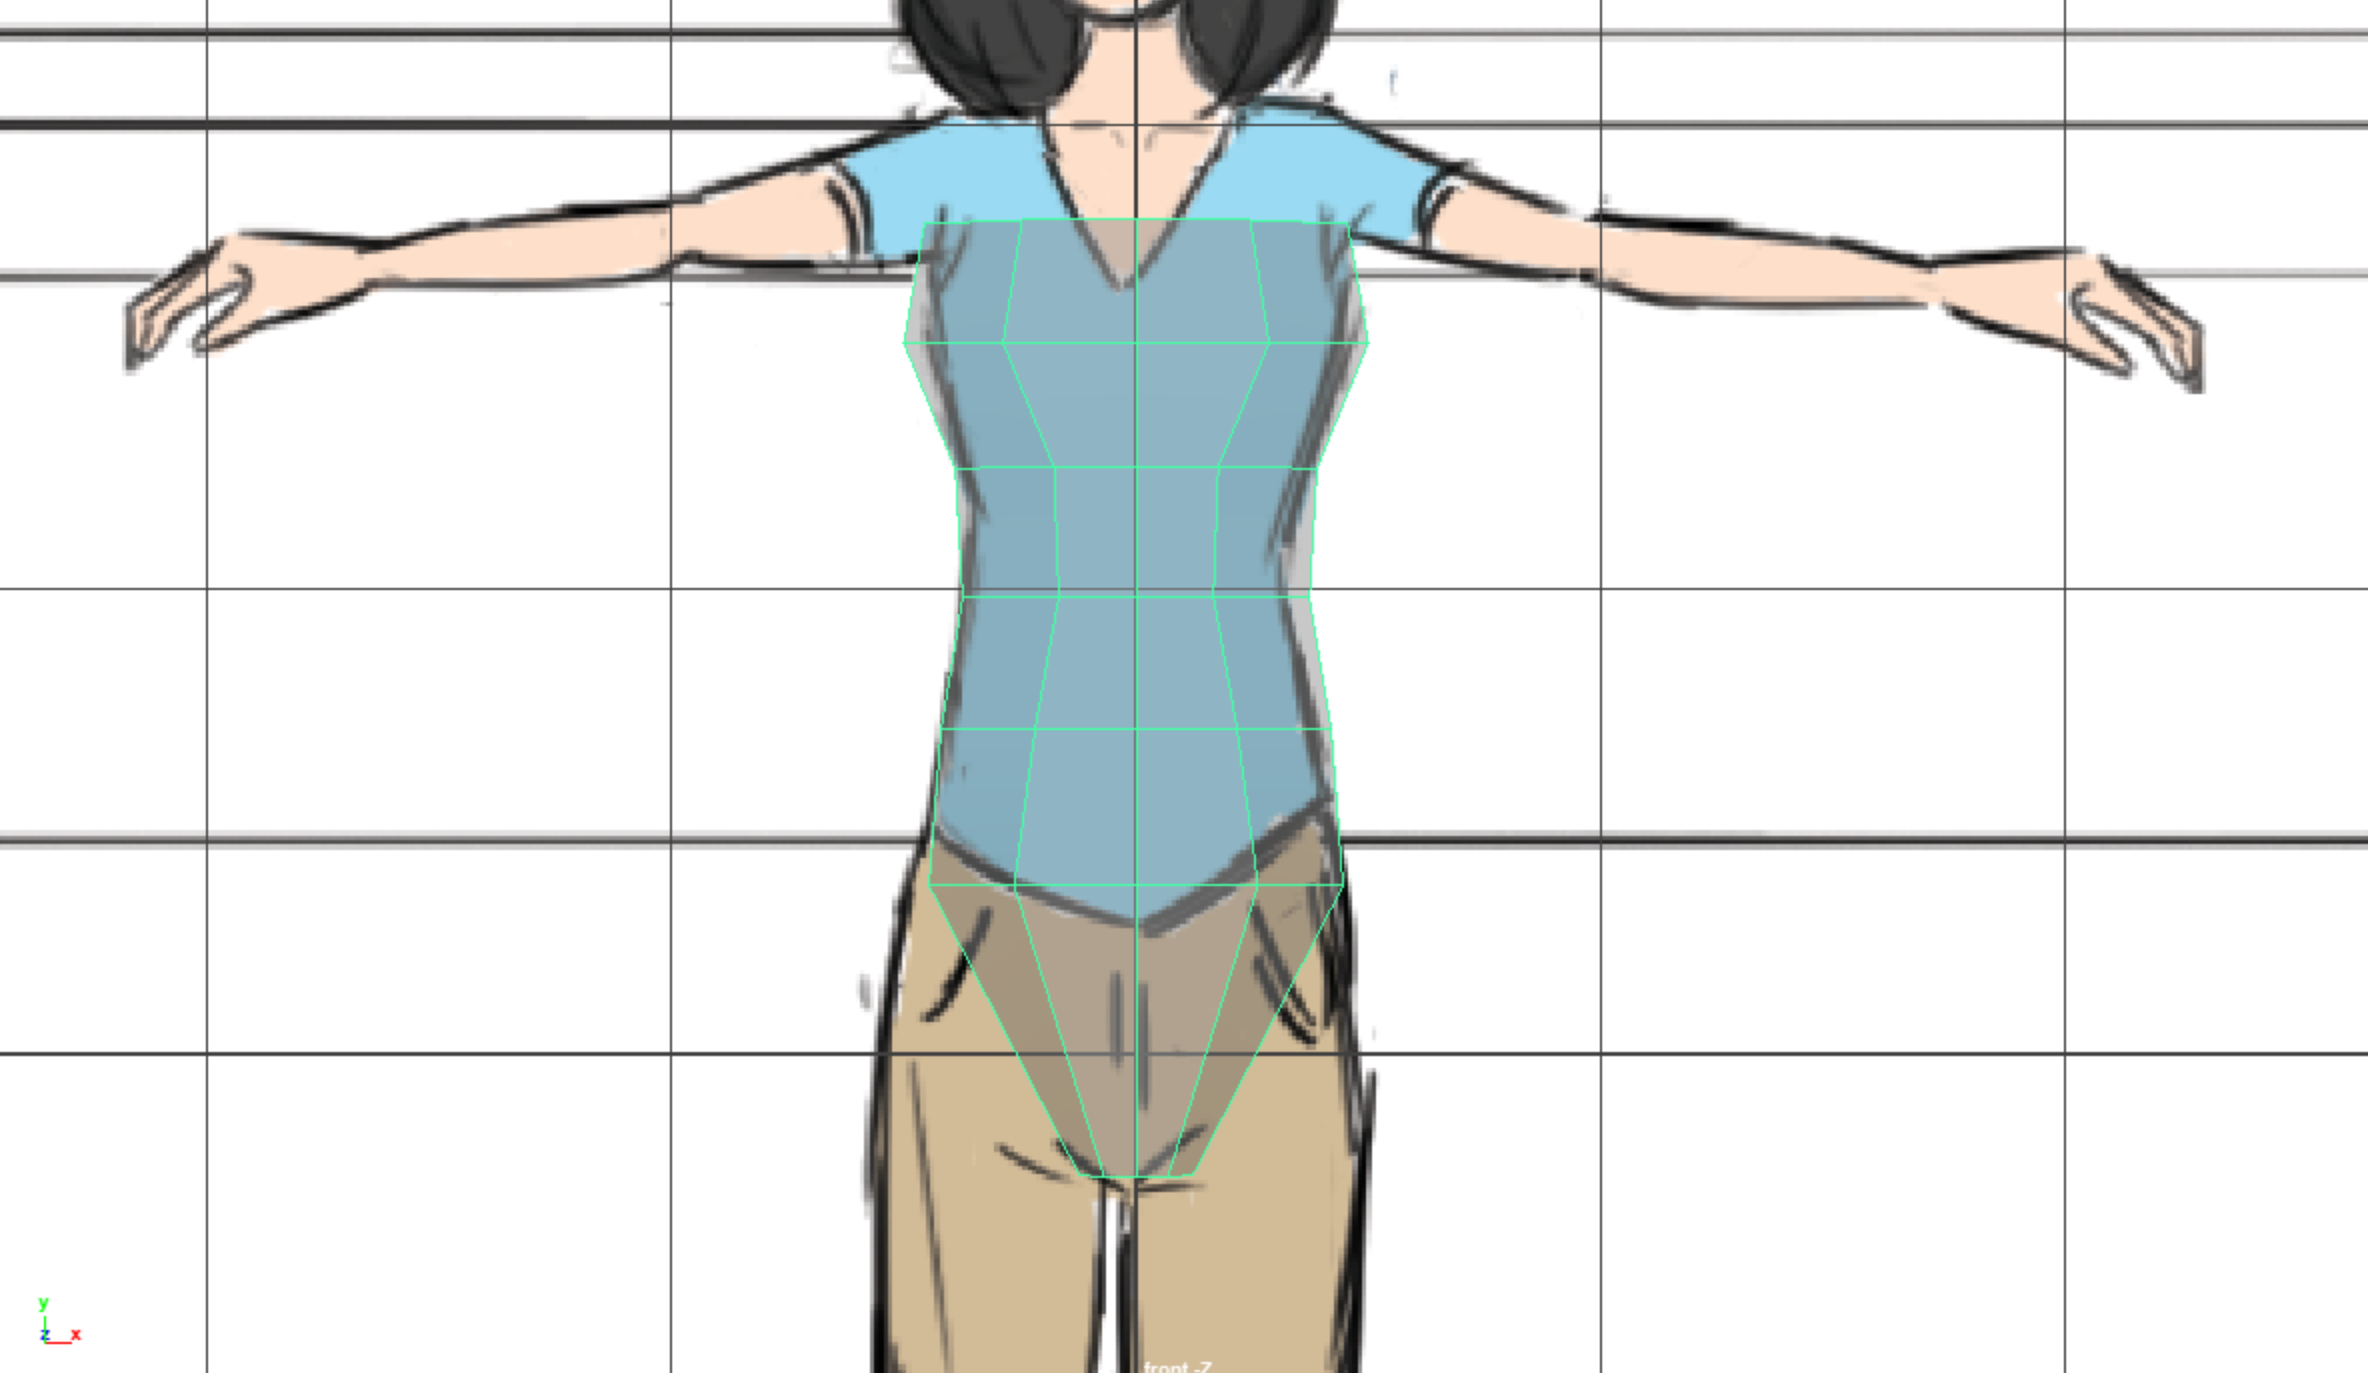
Next, let’s switch back to the front orthographic view and start adding and scaling edge loops to match the shape of the torso. Note how I placed the edge loops in a fairly even distribution, roughly defining the curve of the torso.
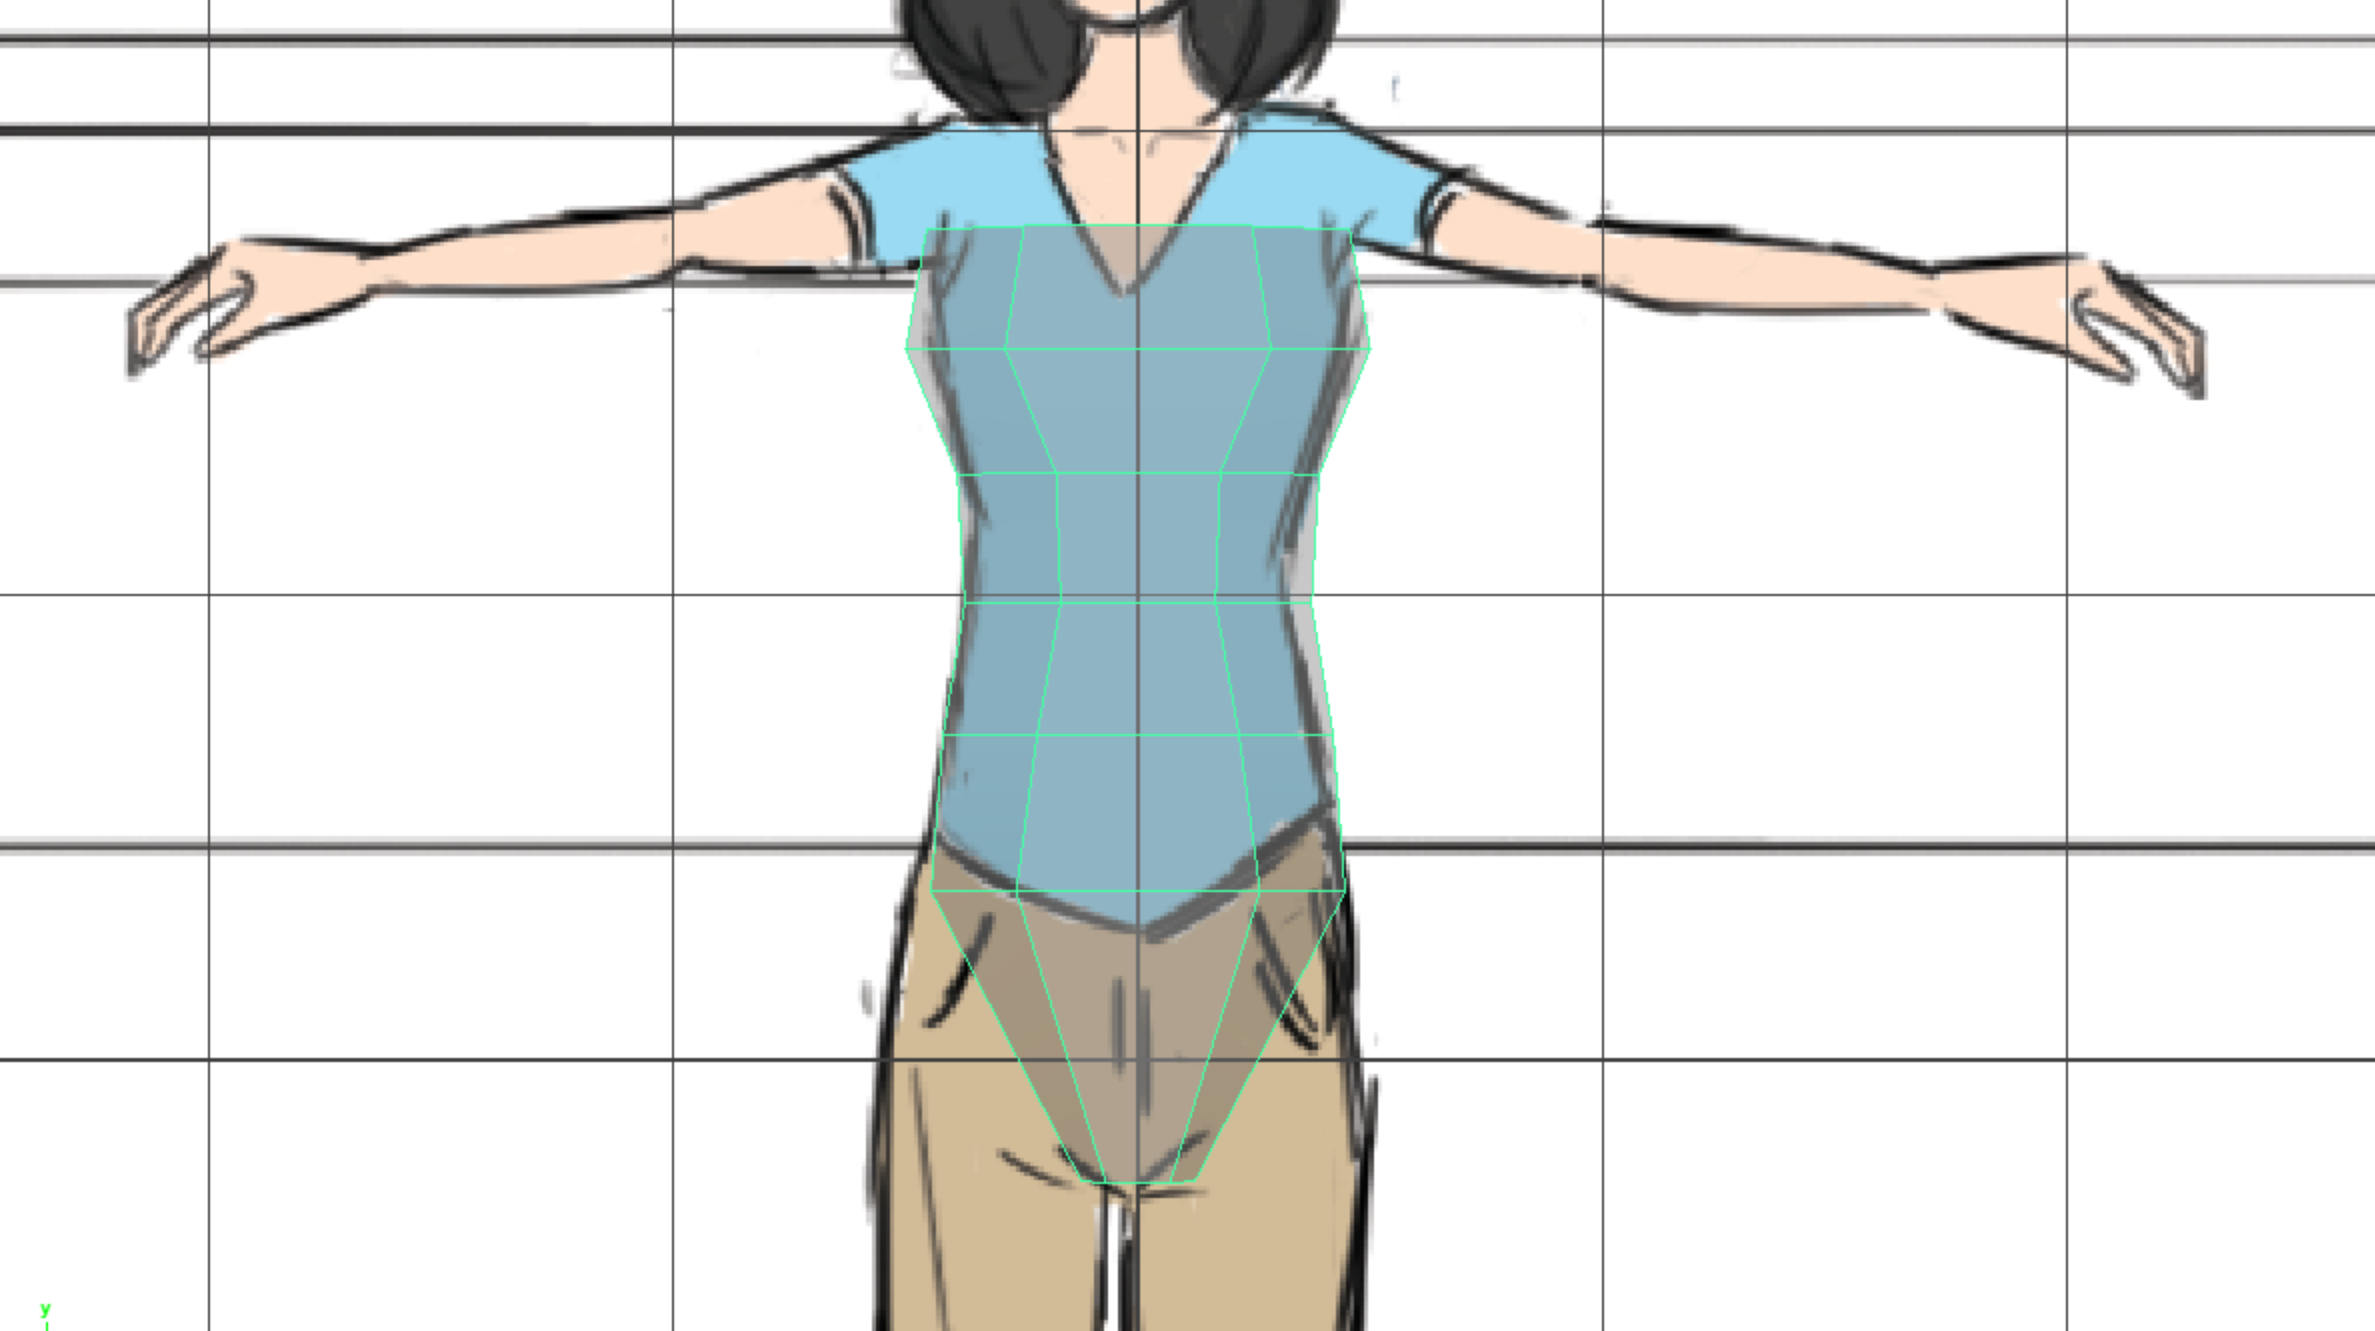
Since this model is meant to be symmetrical, let’s add an edge loop down the middle. You can add an edge loop exactly in the middle of two edge loops by using the same Insert Edge Loop settings as above, but setting the “Number of edge loops” to 1 instead of 2.
This will later allow Maya to allow us to make edits across the axis of symmetry, and it’ll be easy to delete half the mesh and mirror it since we have this center edge loop.
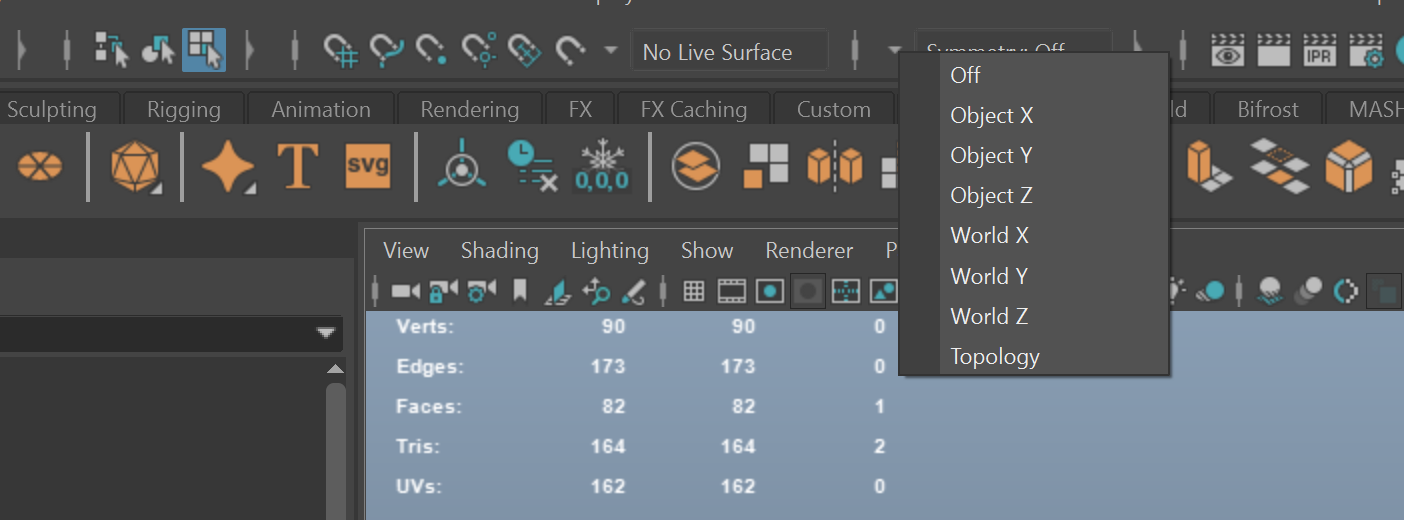
From this point on, make sure that the changes you’re making to the mesh are symmetrical. One easy way to ensure this is changing the symmetry to Object X in the Symmetry dropdown menu. One thing to keep in mind is that this Symmetry mode becomes increasingly inaccurate the more detailed your mesh becomes, so make sure to check that it’s actually working symmetrically each time you use it.
Next, let’s switch to the side orthographic view. Of course, it’s going to look box-y from this view, since we only scaled to match the shape of the torso from the front.
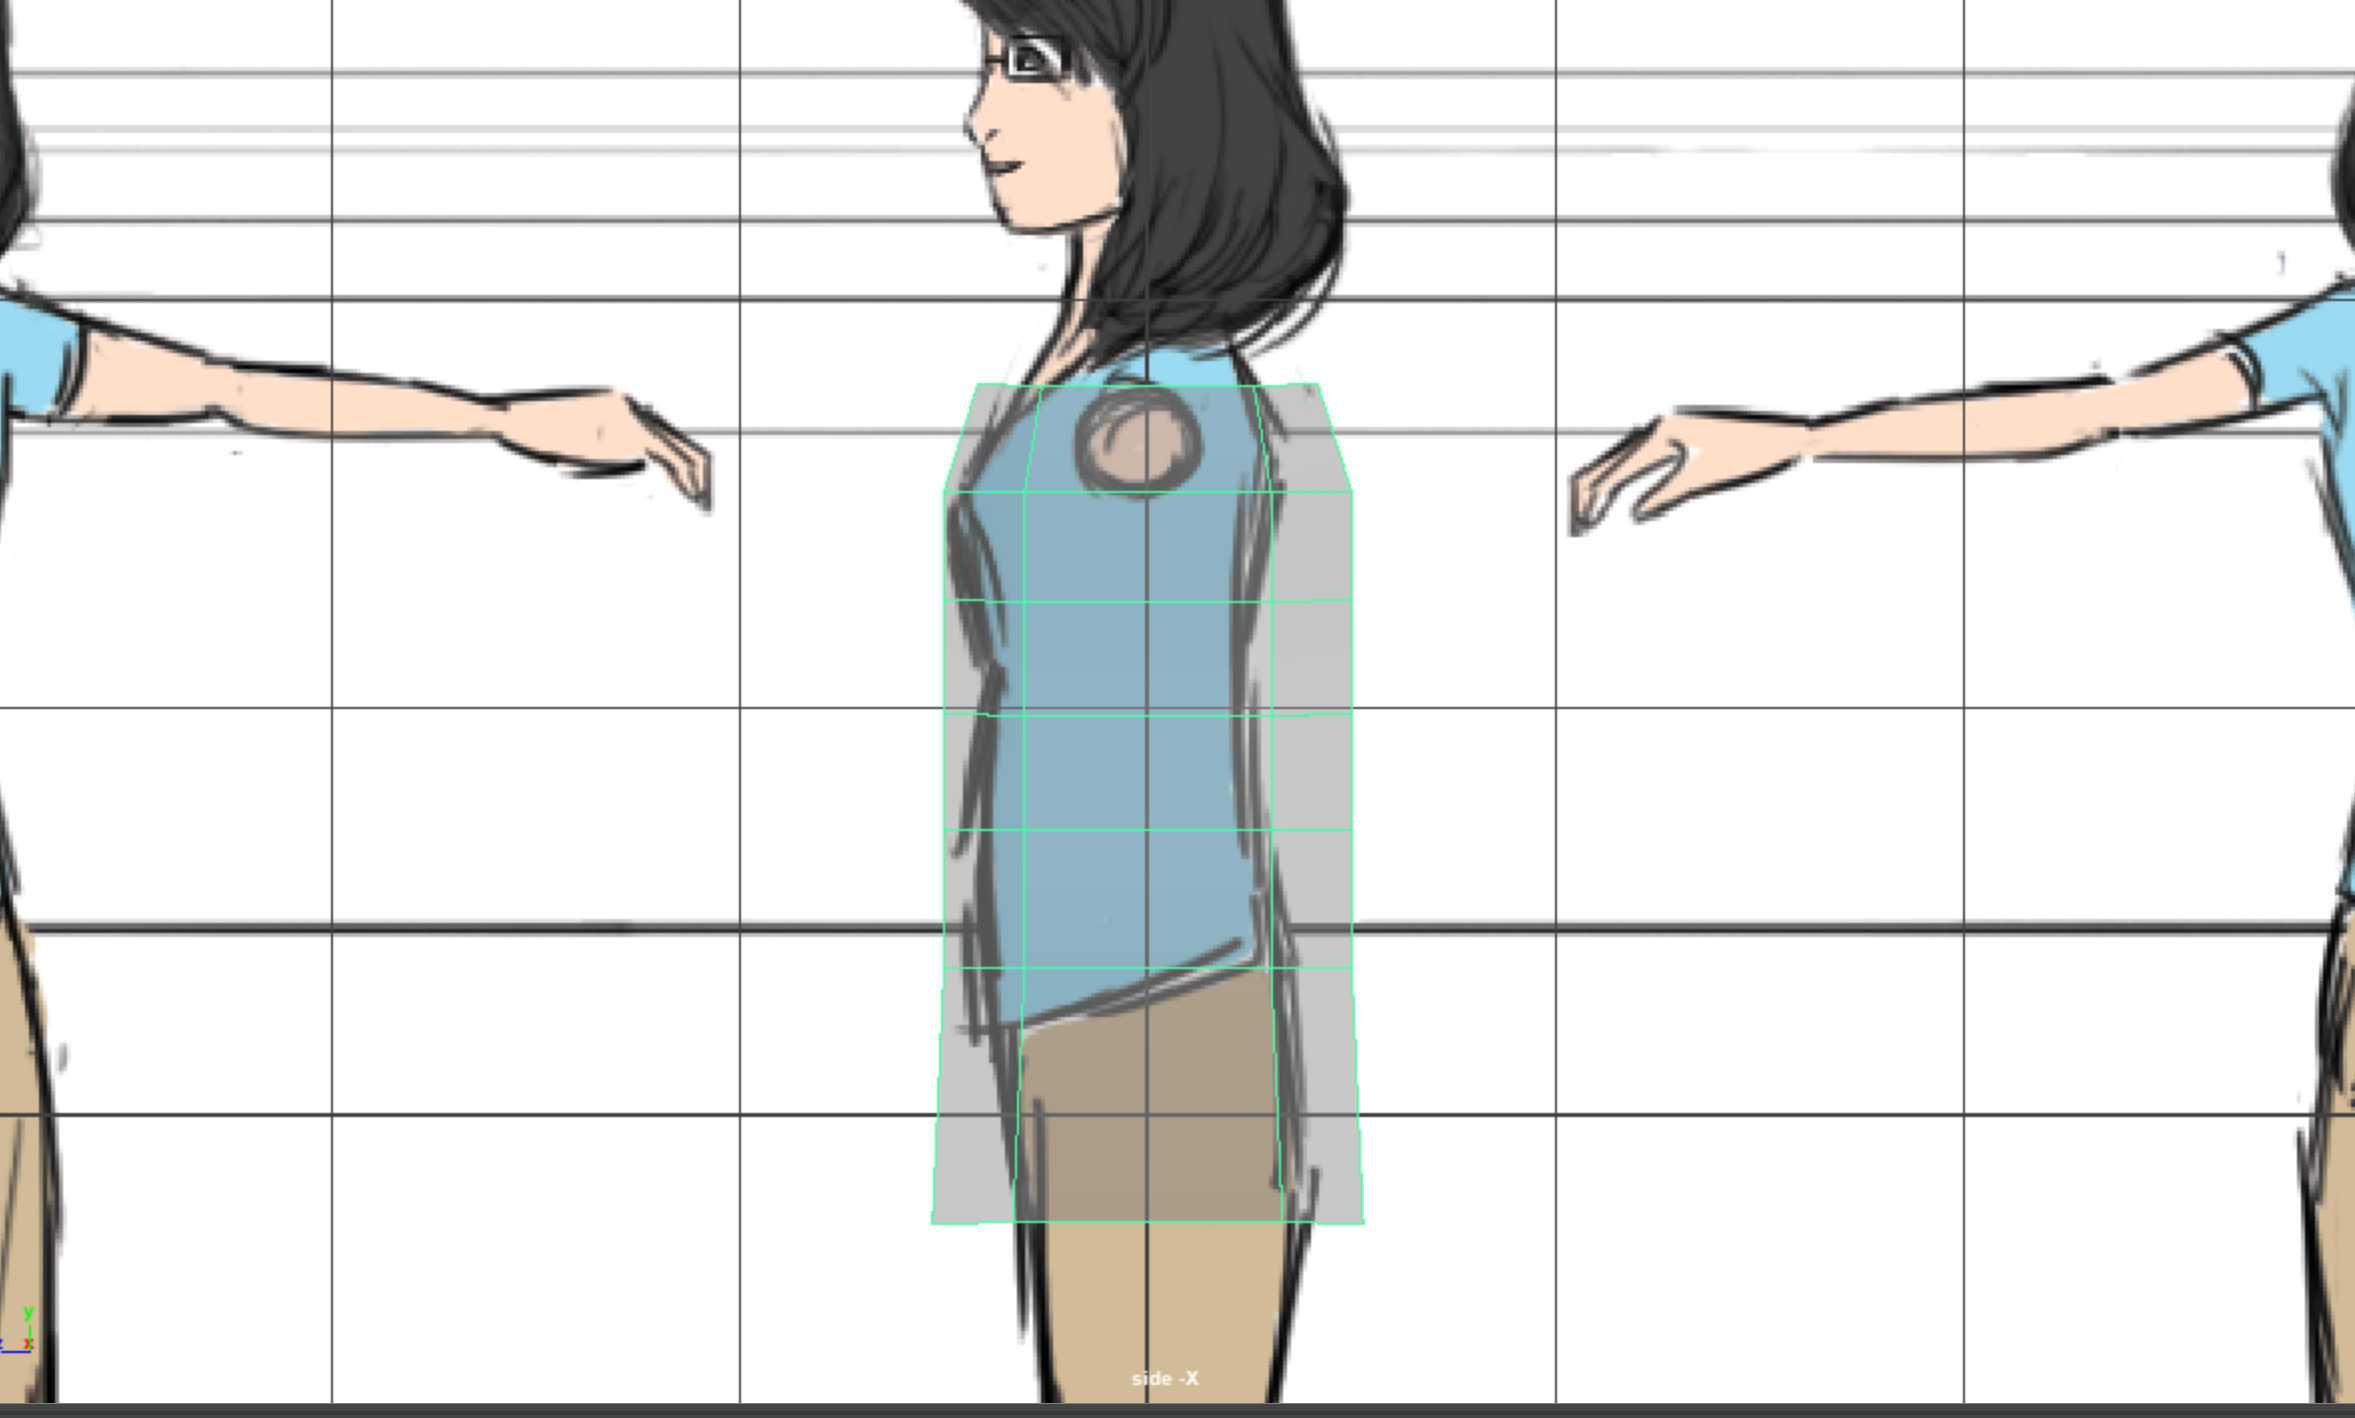
Next, we’ll scale edge loops to match the side view of the torso.
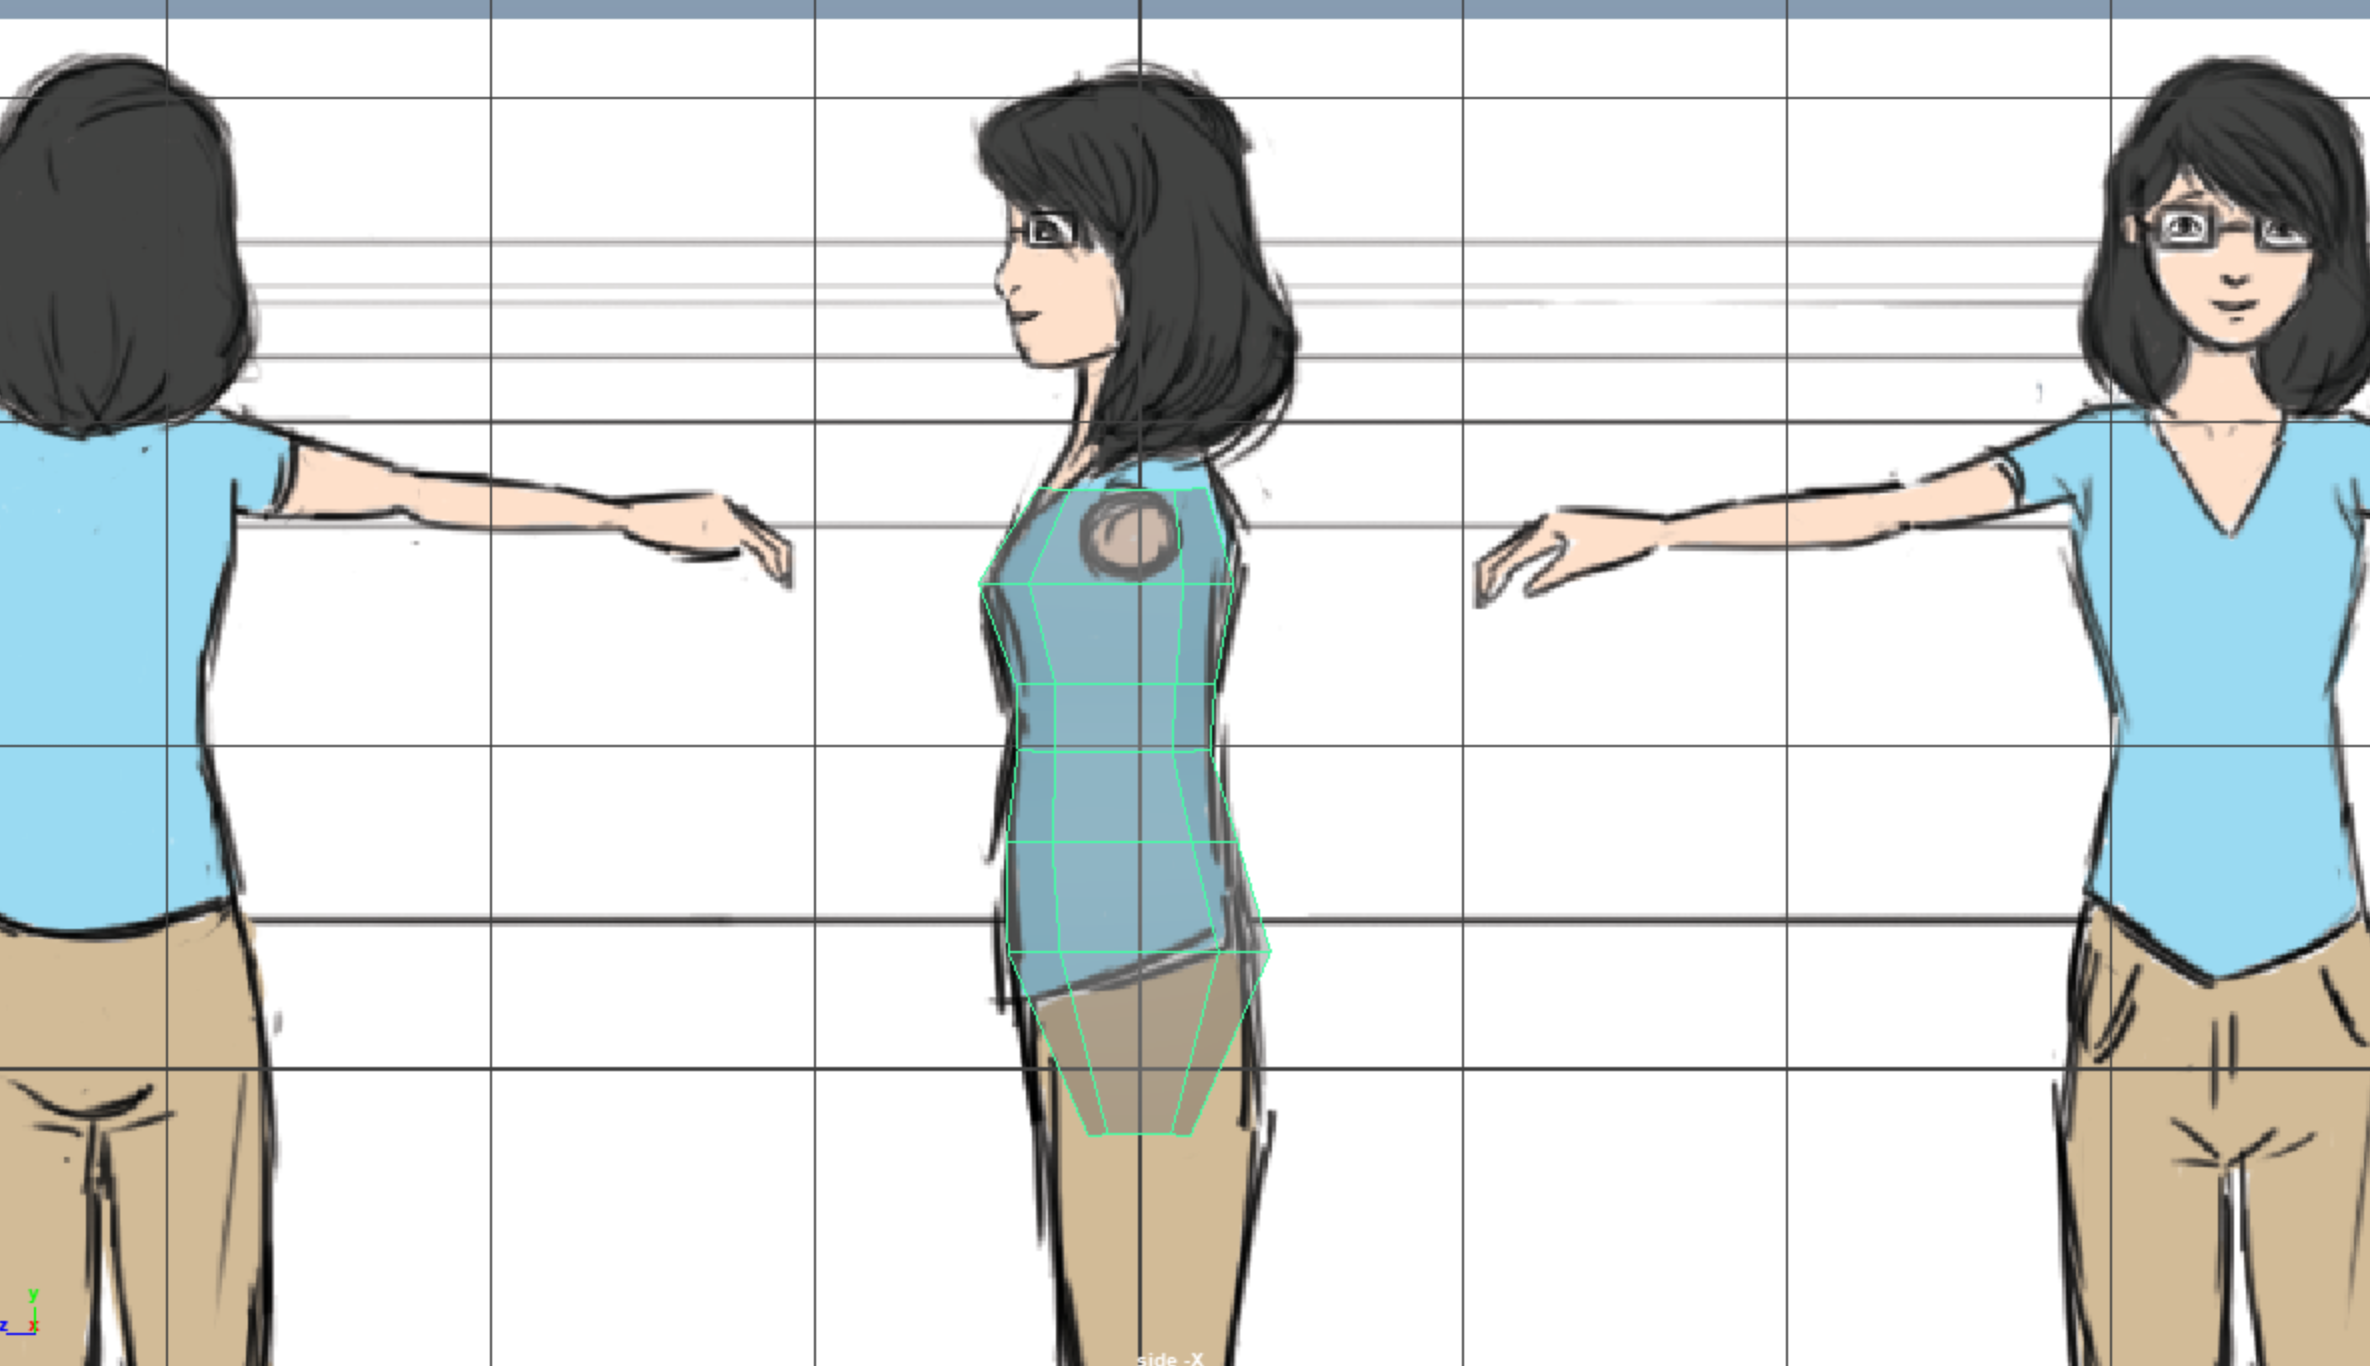
Let’s start thinking about where the legs are going to attach. Looking at anatomy references, we know that actually stick out of the “sides” of the torso, just below your hips. Let’s delete the faces there in order to make room for hips.
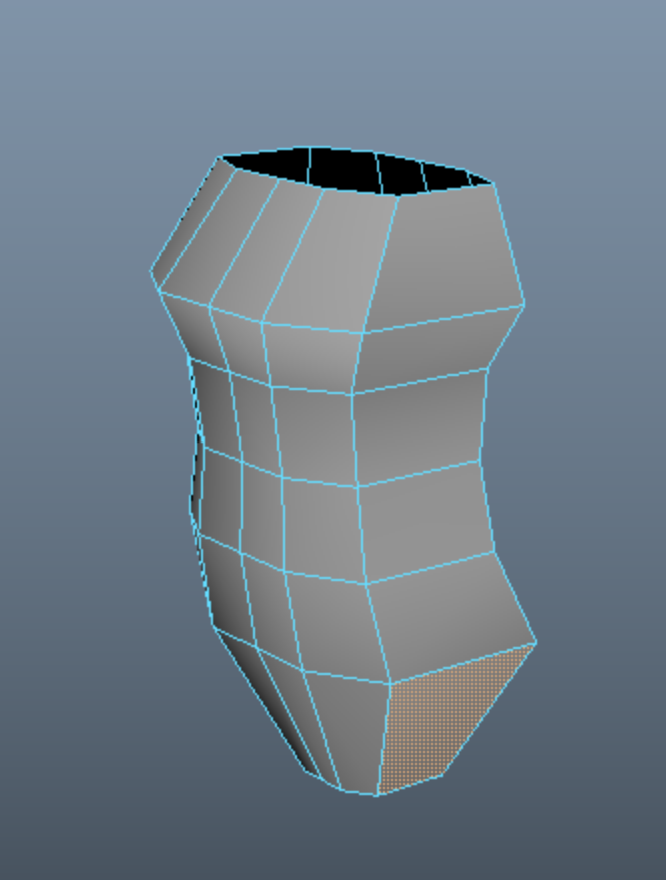
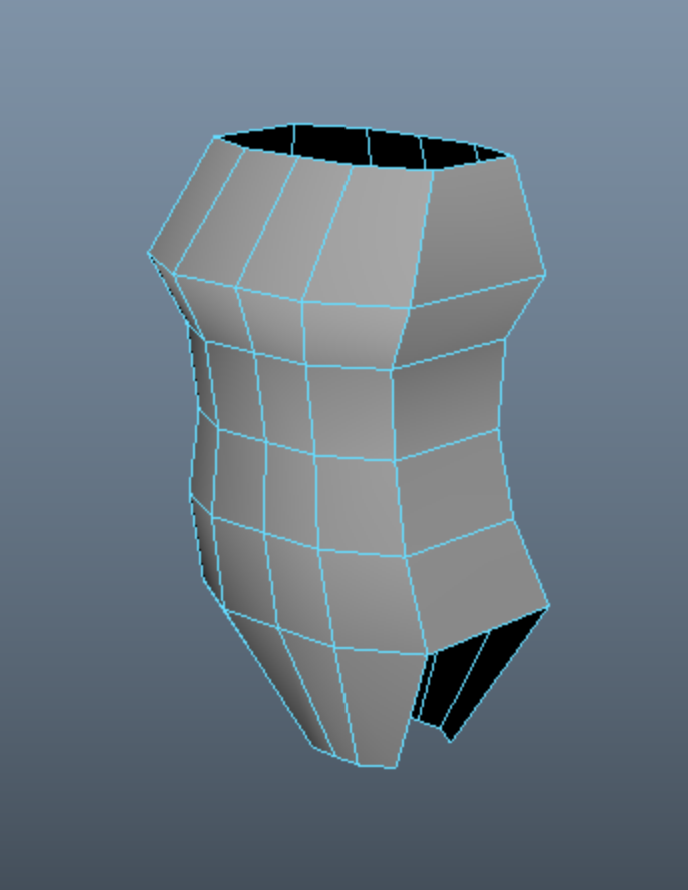
Next, we need to actually connect the bottom of the torso. Let’s select the edges across this bottom area like so:
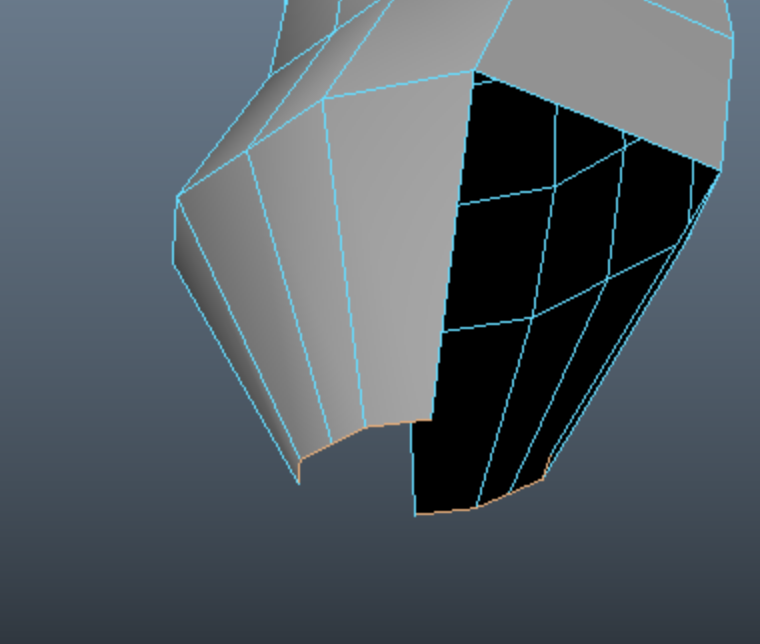
Append to polygon won’t quite work here, since the edges aren’t all adjacent to one another. Instead , let’s use the Bridge tool to connect them.
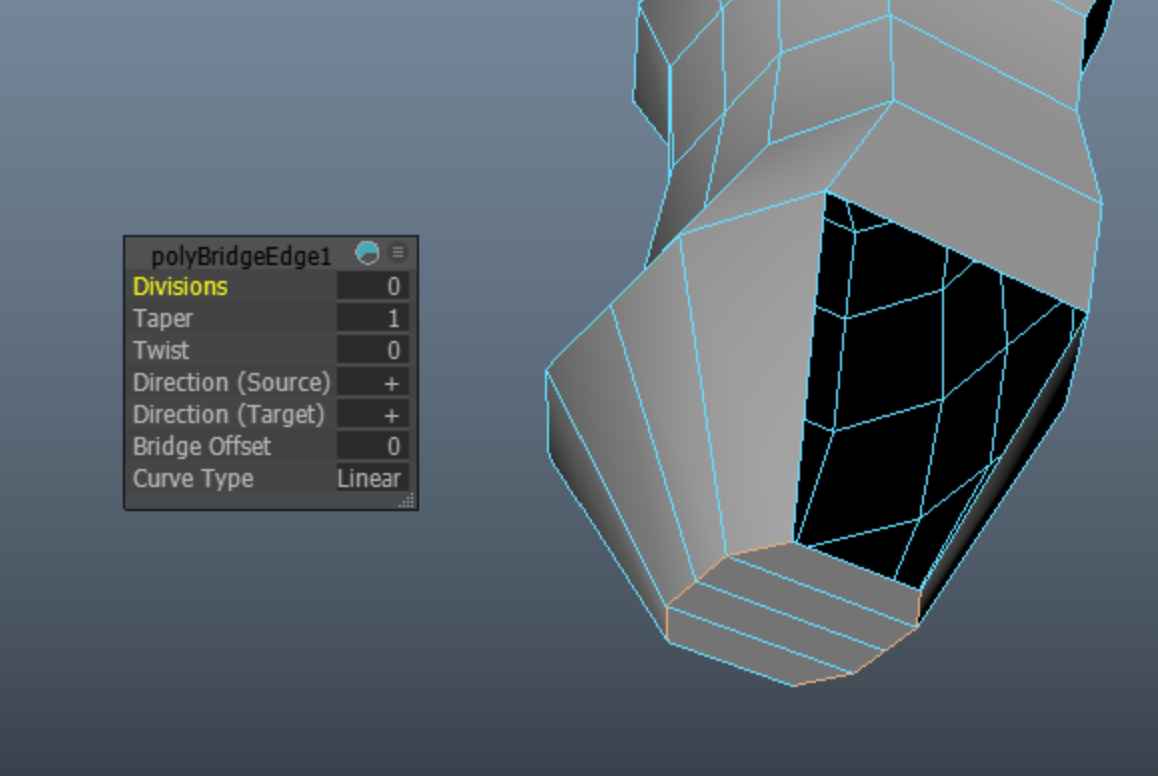
I then adjusted the edges to round out the bottom. Think as if you’re creating a leotard, and you’re creating the loop that goes between the legs and connects on the other side.
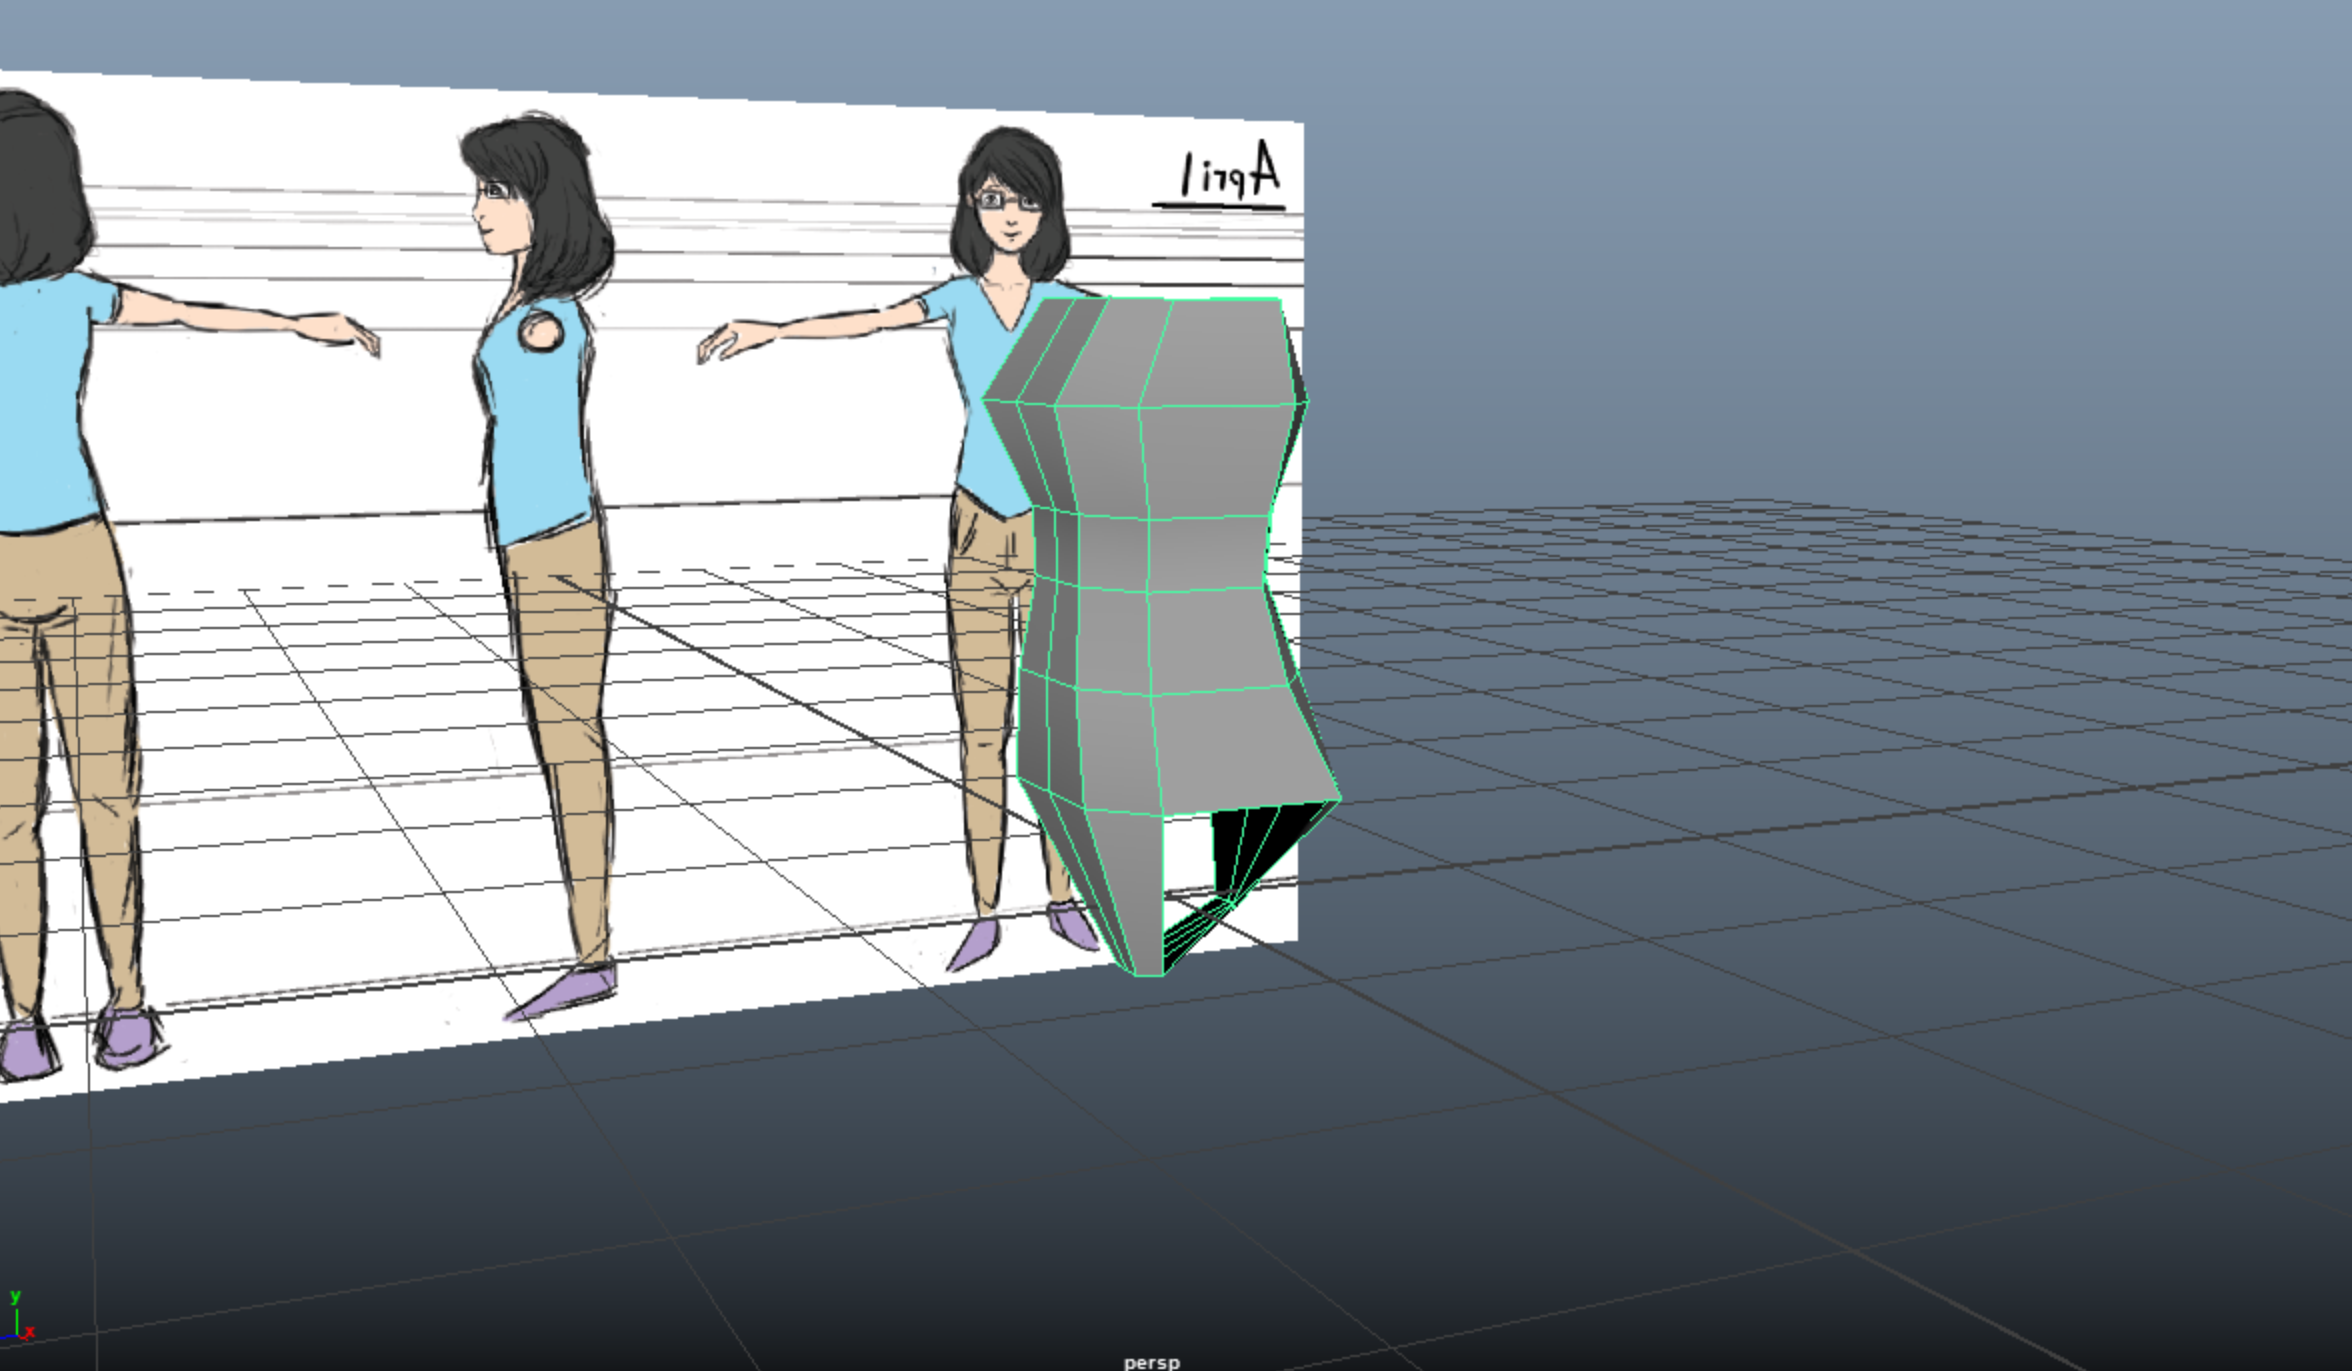
Looking pretty good!
Next, let’s create the neck area. To do this, I selected the top-most edge loop and extruded it upwards, shrinking and rotating it slightly as I went.
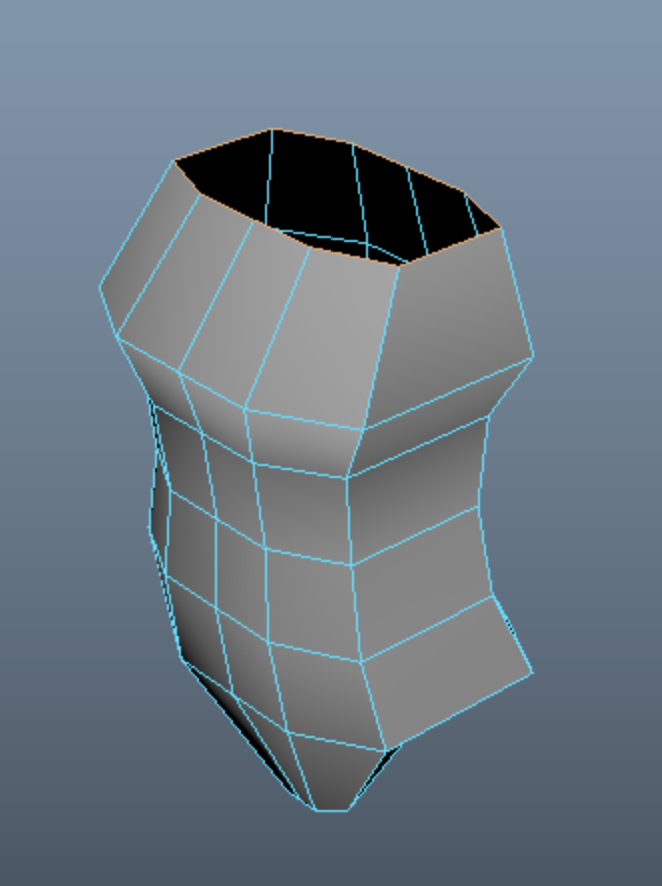
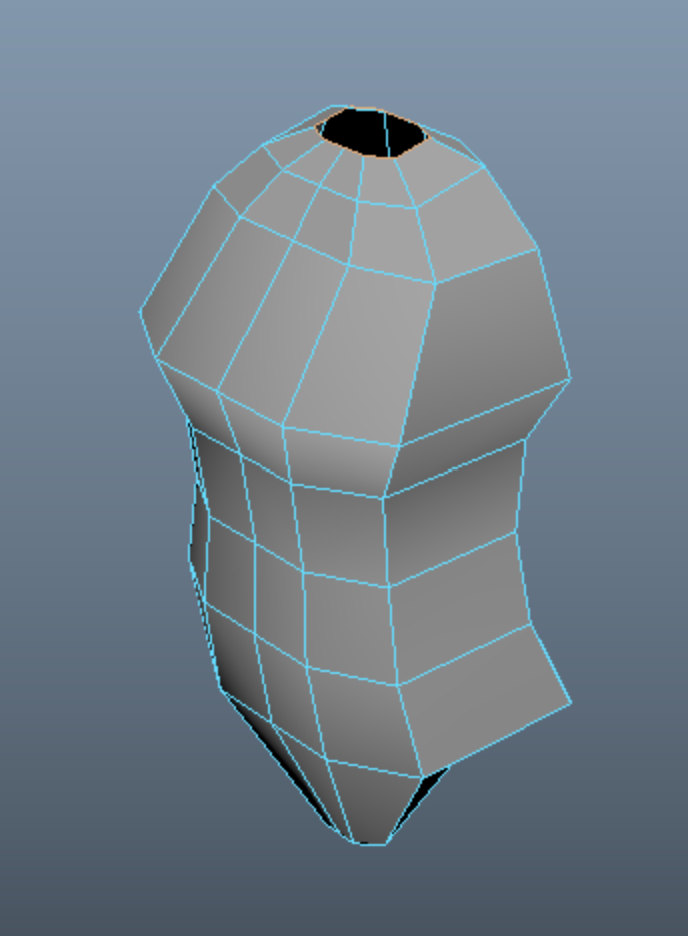
However, at this stage, the neck hole is pretty rectangular, since the torso itself is rectangular. We can use the Circularize tool to make this look more like a hole where our neck can attach.

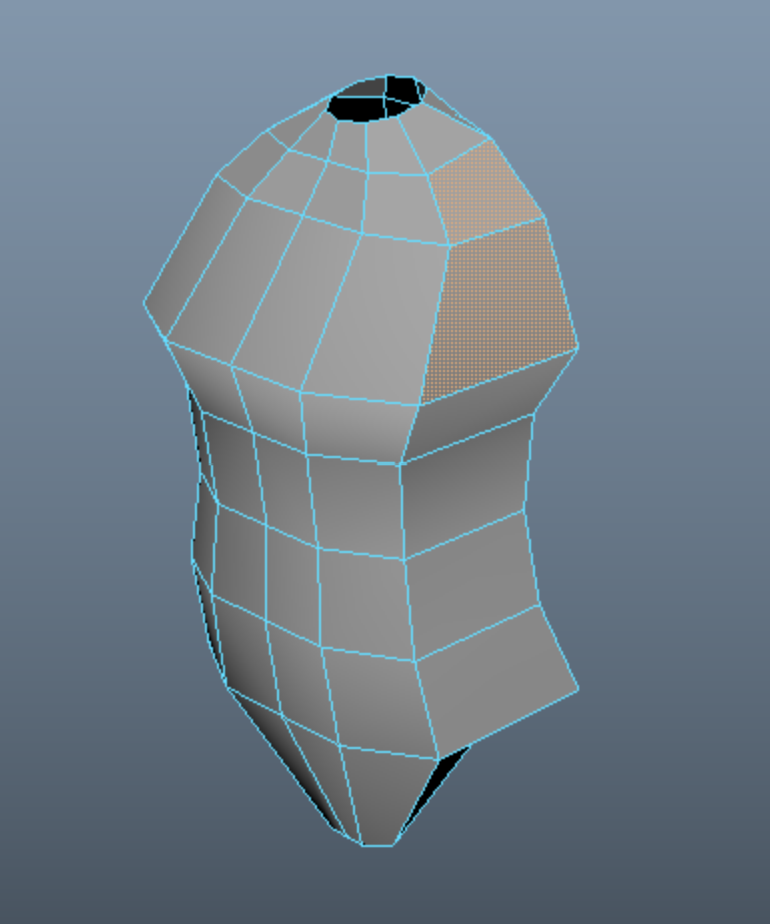
It’s time to start thinking about where the holes for the arms should go. Actually, there’s a pretty logical place, but let’s think about what we want the connecting object to look like. Since we’re going to be box modeling this arm and then stitching it on, the number of vertices on the object we’re attaching has to match the number of vertices of the hole we’re sewing on to. Right now, creating a hole here would create 6 vertices, which is a slightly funky number. Let’s add an edge loop (one on each side of the model, of course) so that we have 8 vertices around this region.
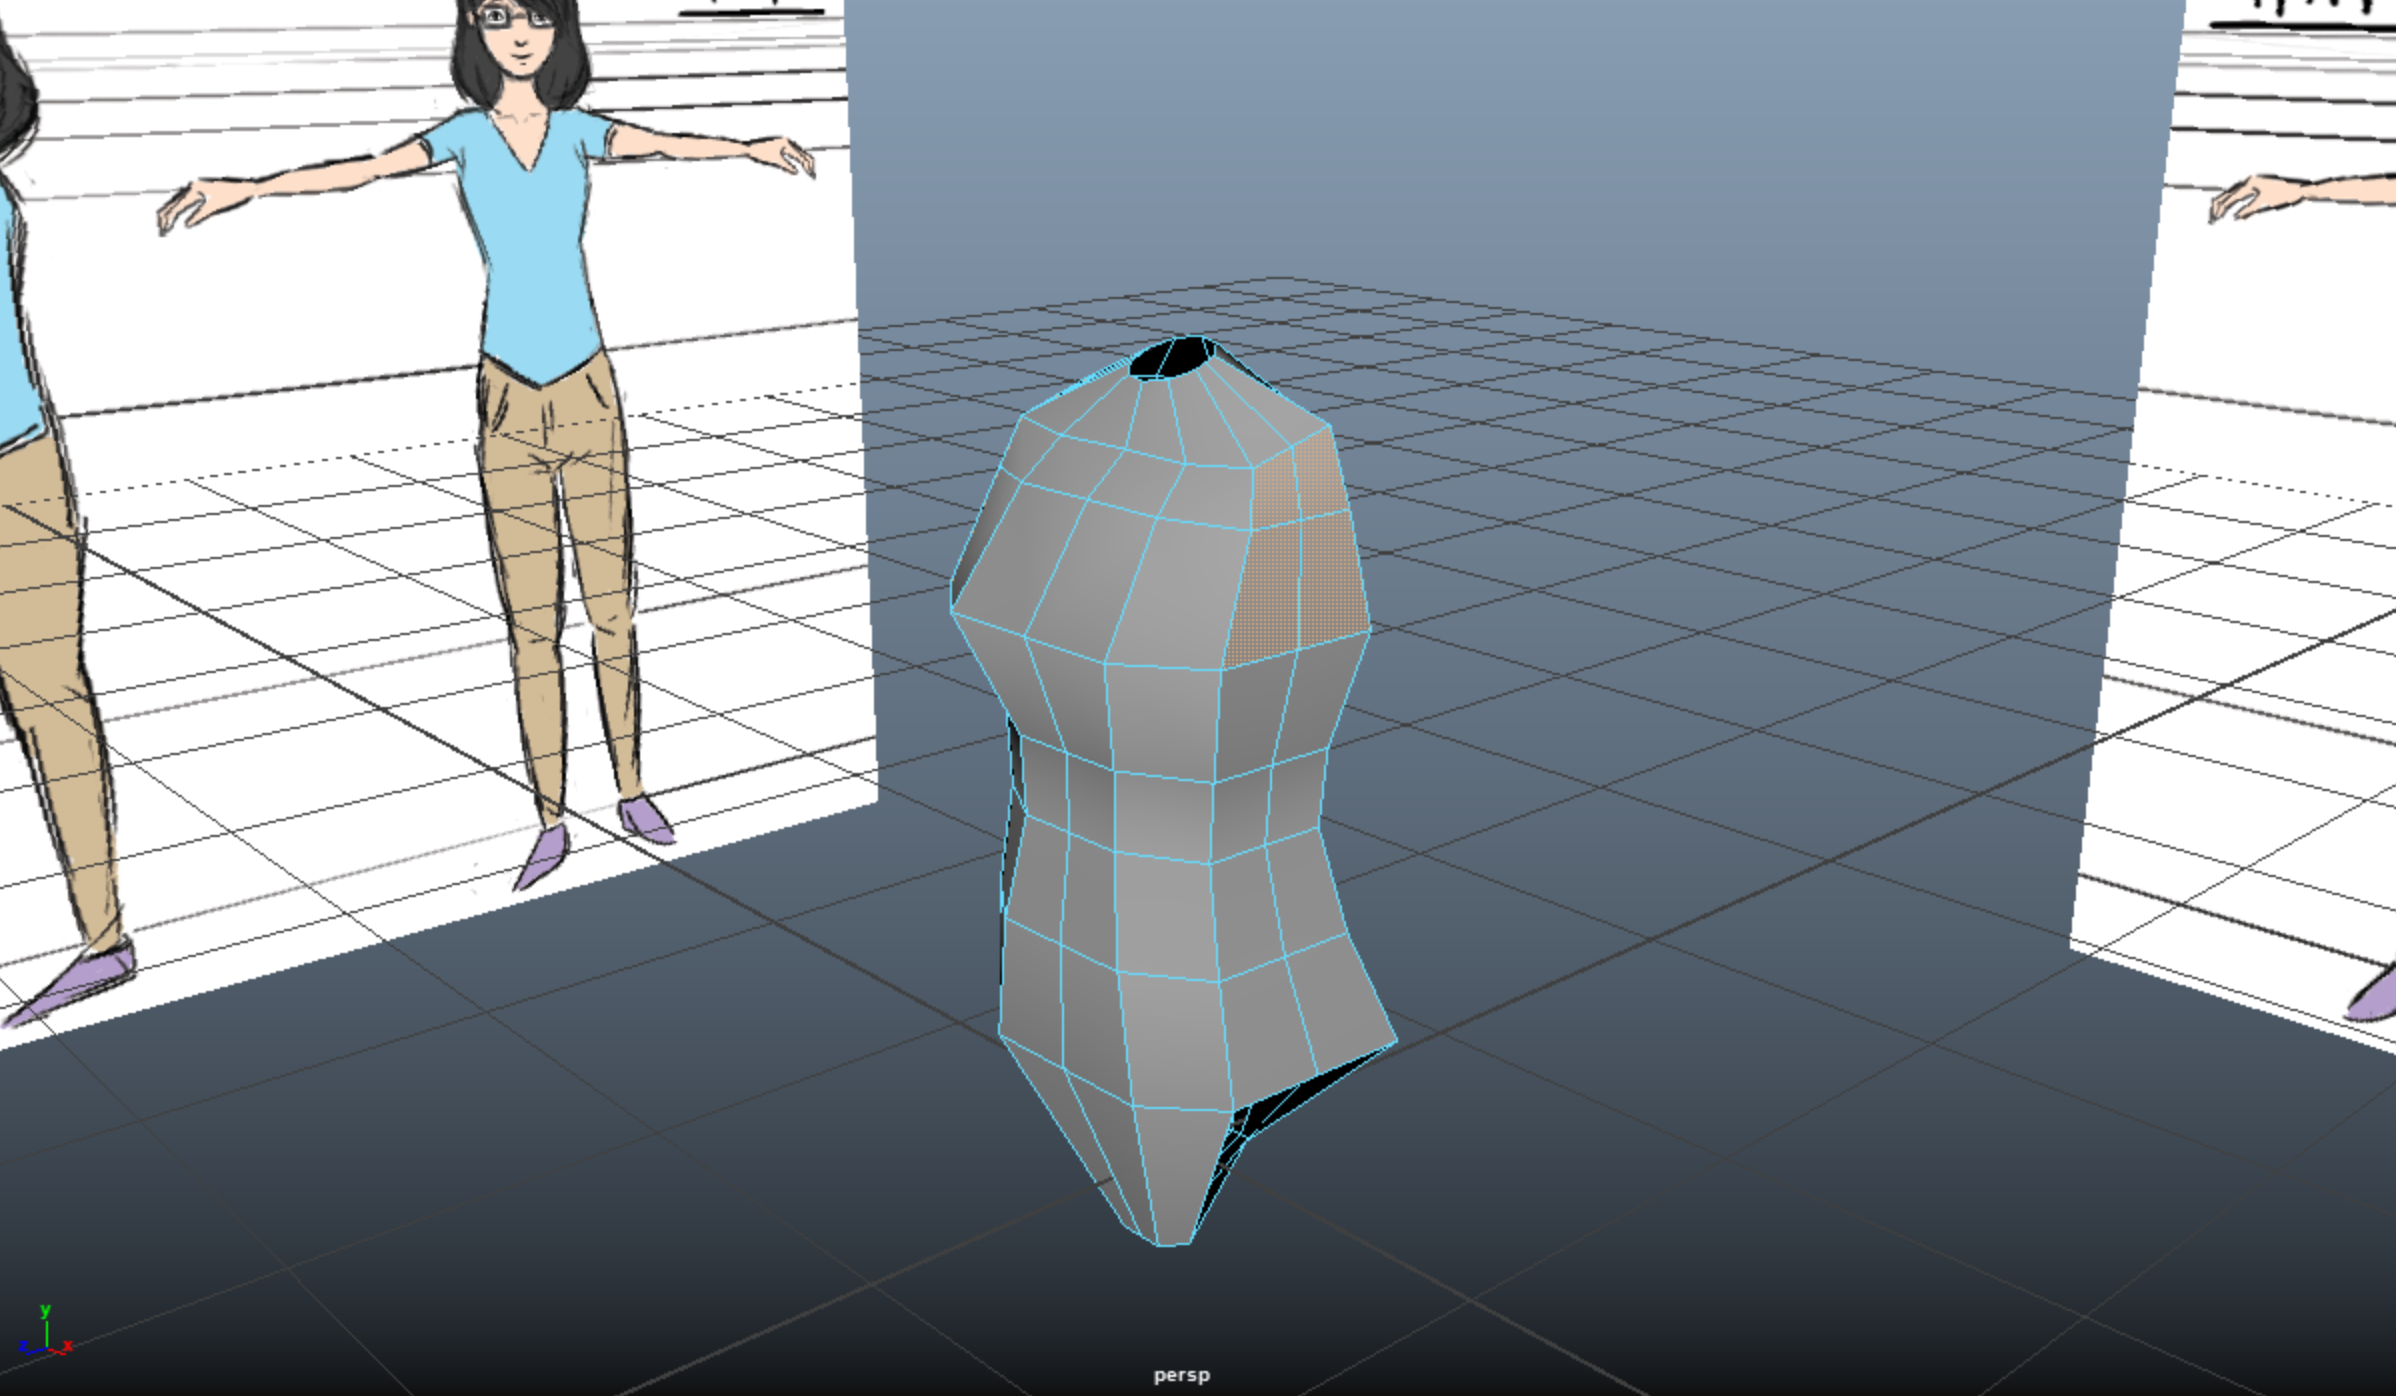
Now, we can delete those four faces and circularize the new arm holes.
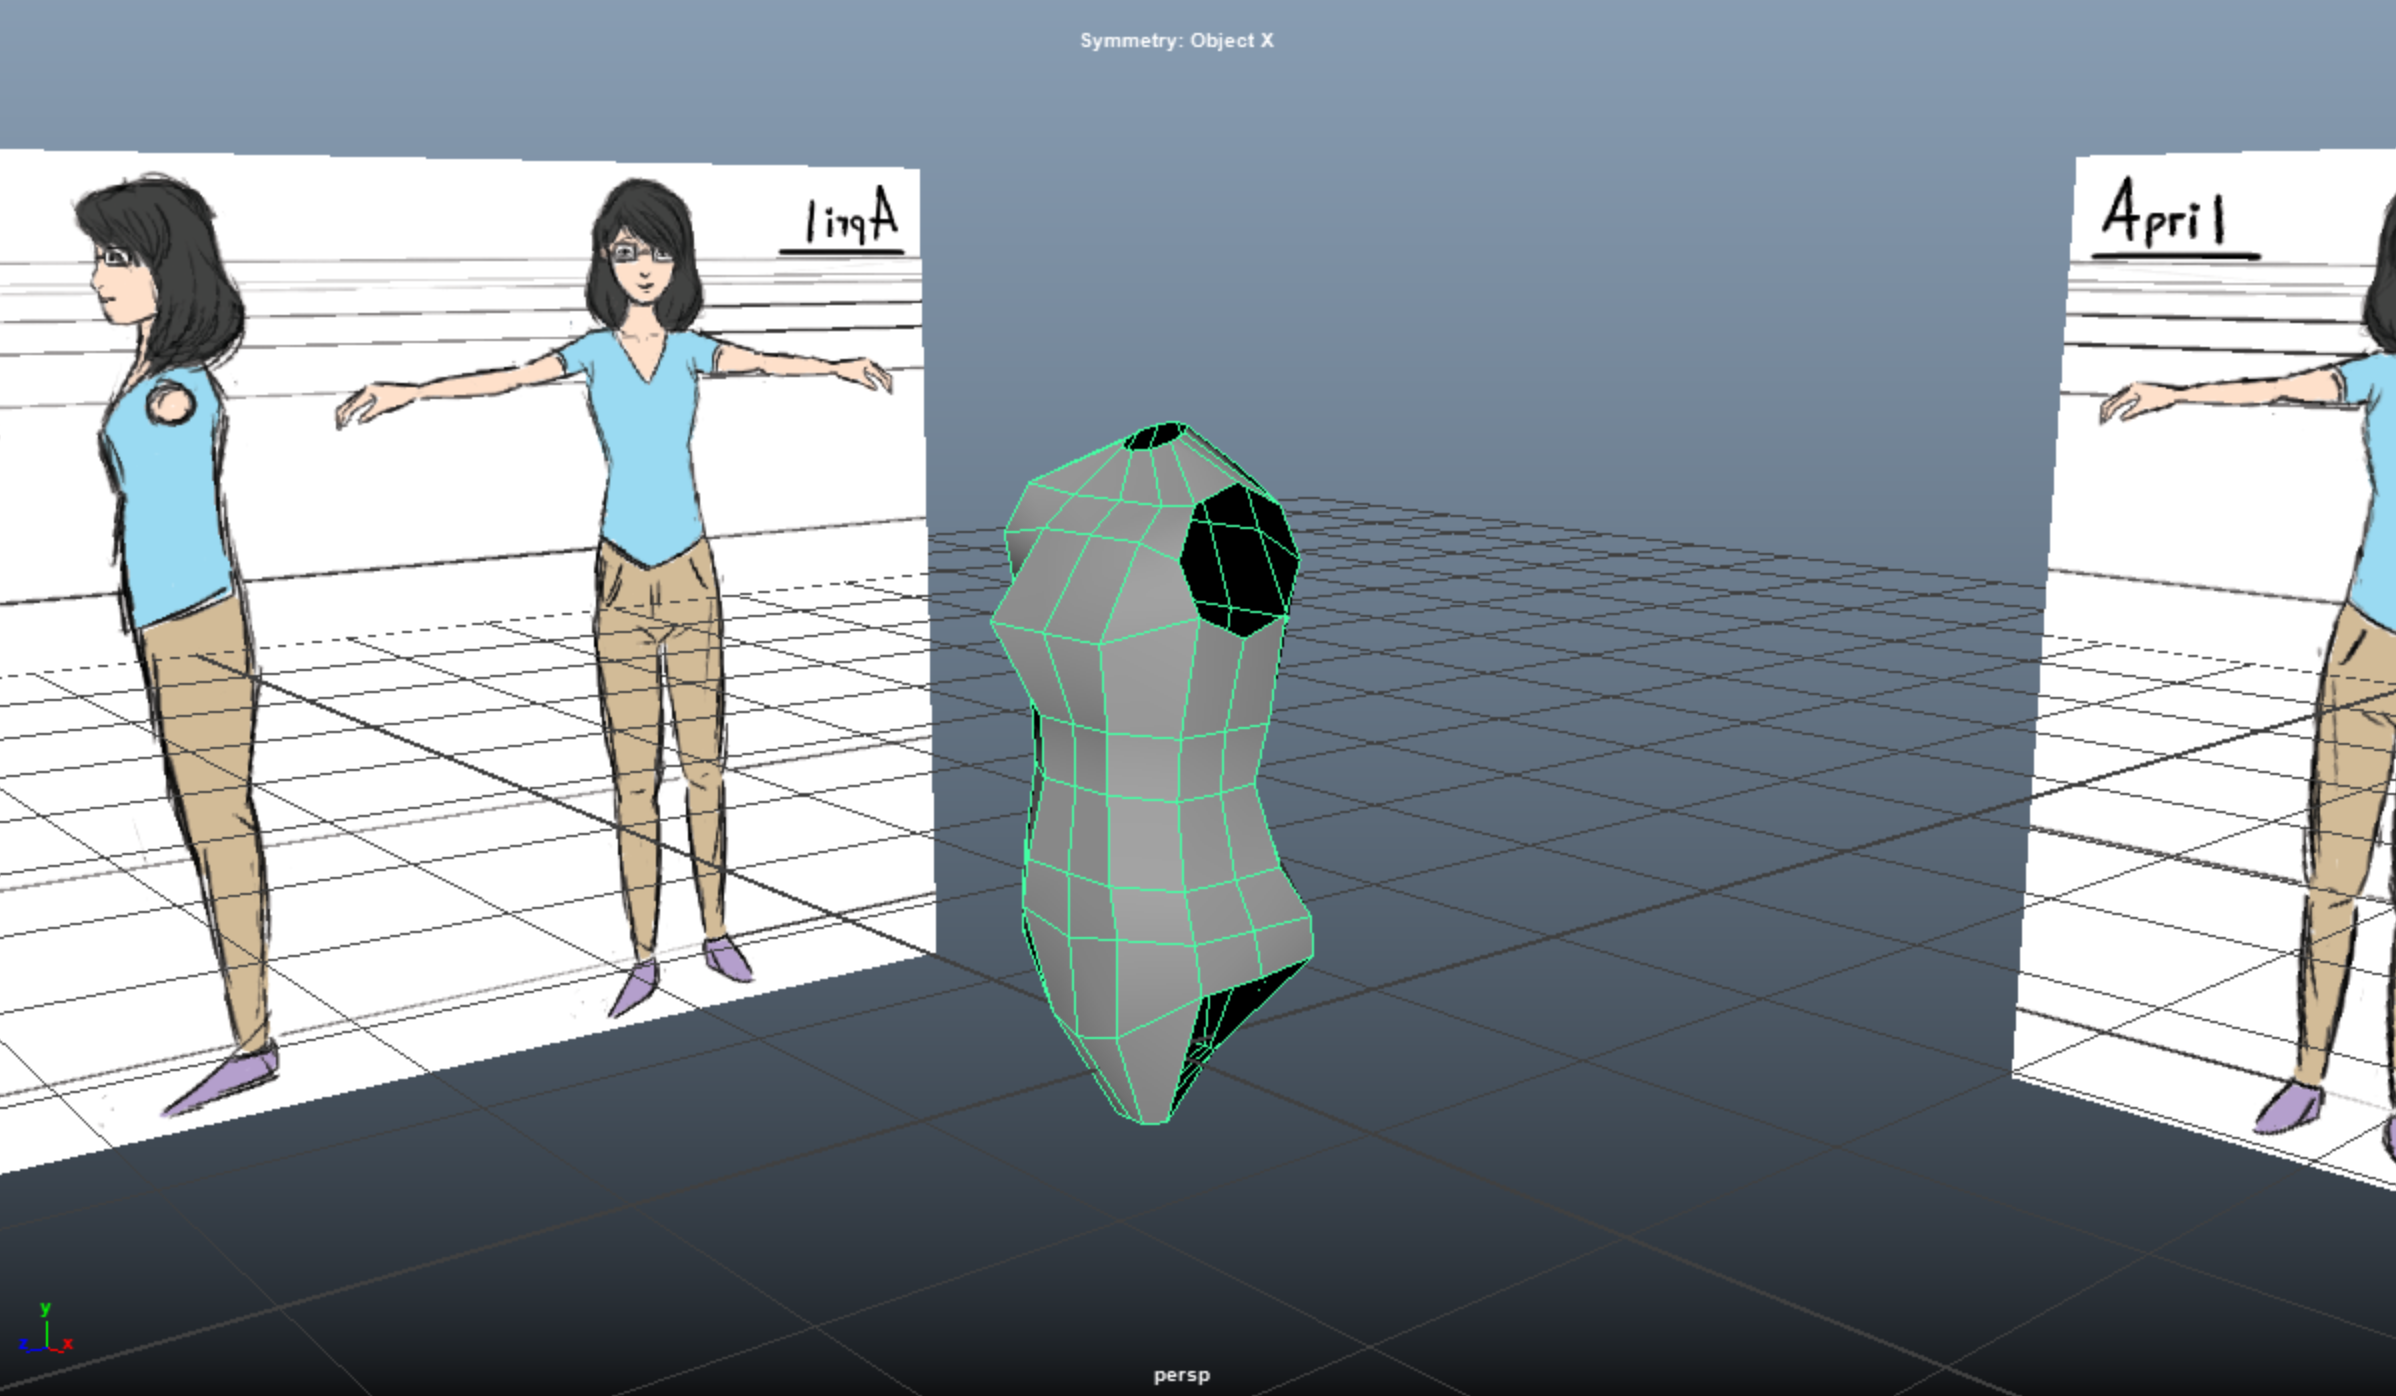
That’s it for our torso for now! It’s pretty low poly at the moment, but it has the general shape that we want and it’ll allow us to easily attach the arms, legs, and neck later on.
CREATING THE ARMS AND HANDS
Thanks to symmetry, we really only need to create one arm / hand, then mirror it across the mesh. If you need a refresher on that workflow, check out the fox lab from basic UCBUGG.
Since we decided in the previous section that our arm would have 8 vertices along the side that we’re stitching, let’s start with a poly cylinder with 8 subdivision axes and 0 subdivision caps. We can rotate and position this cylinder next to an arm hole.
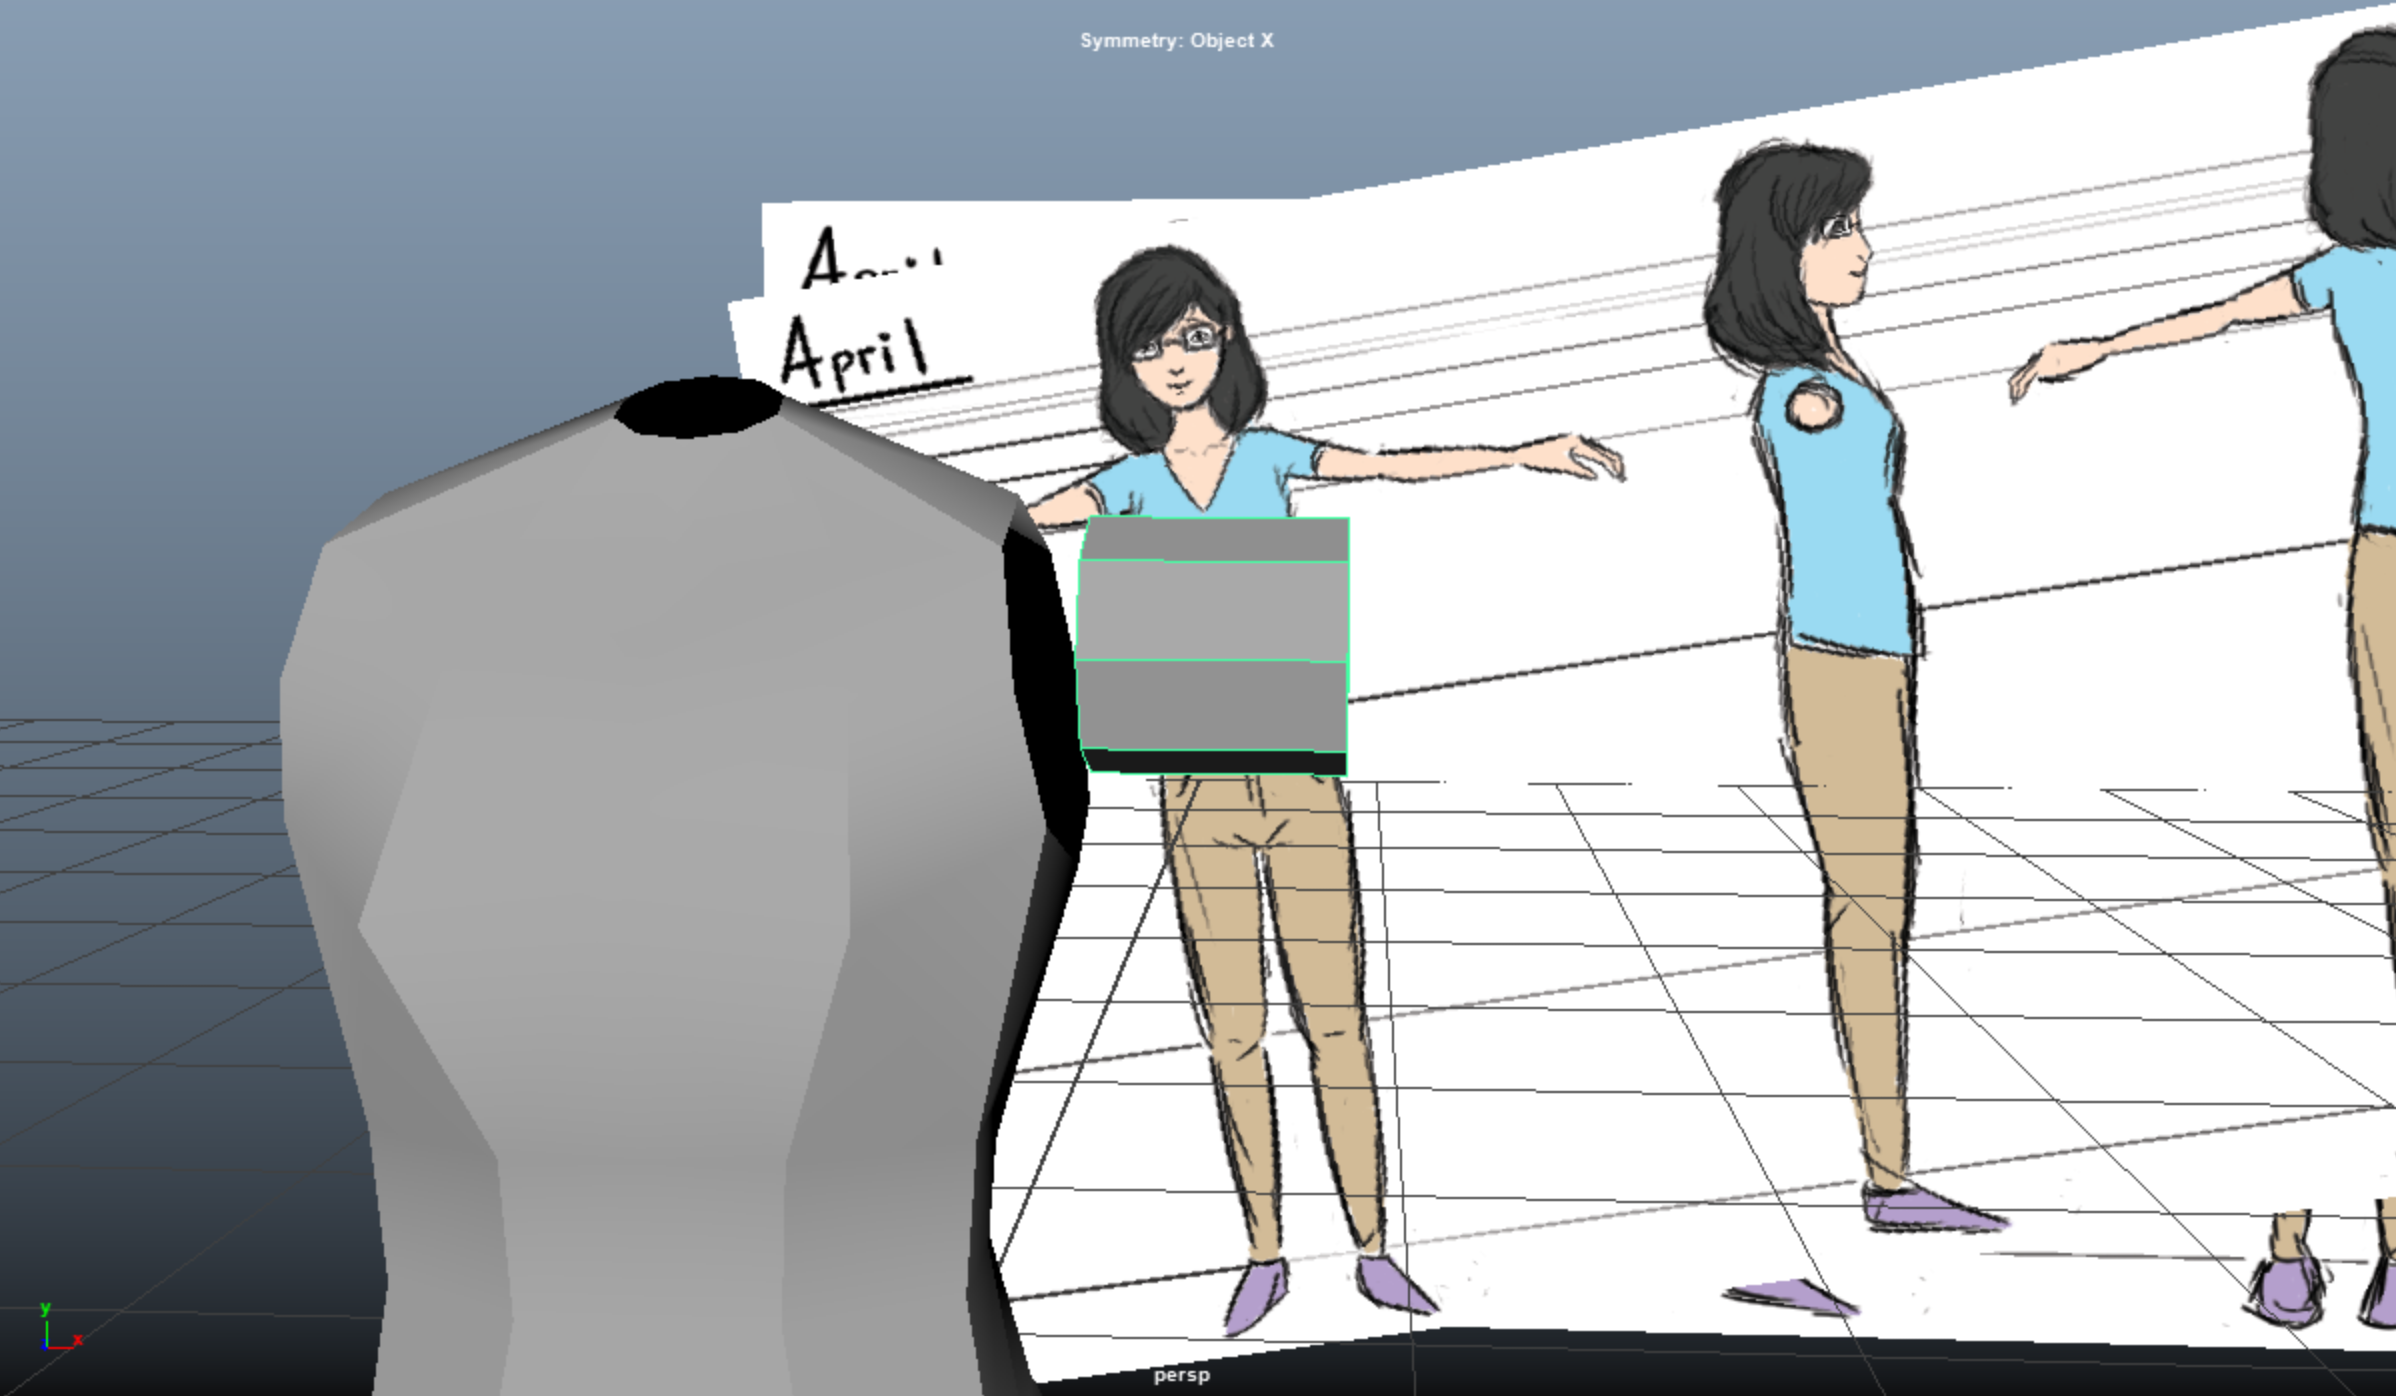
Next, we’re going to extrude out this cylinder all the way to the wrist while following the reference images. Make sure to switch between orthographic views to make sure that you’re getting the shape accurate to your reference material.
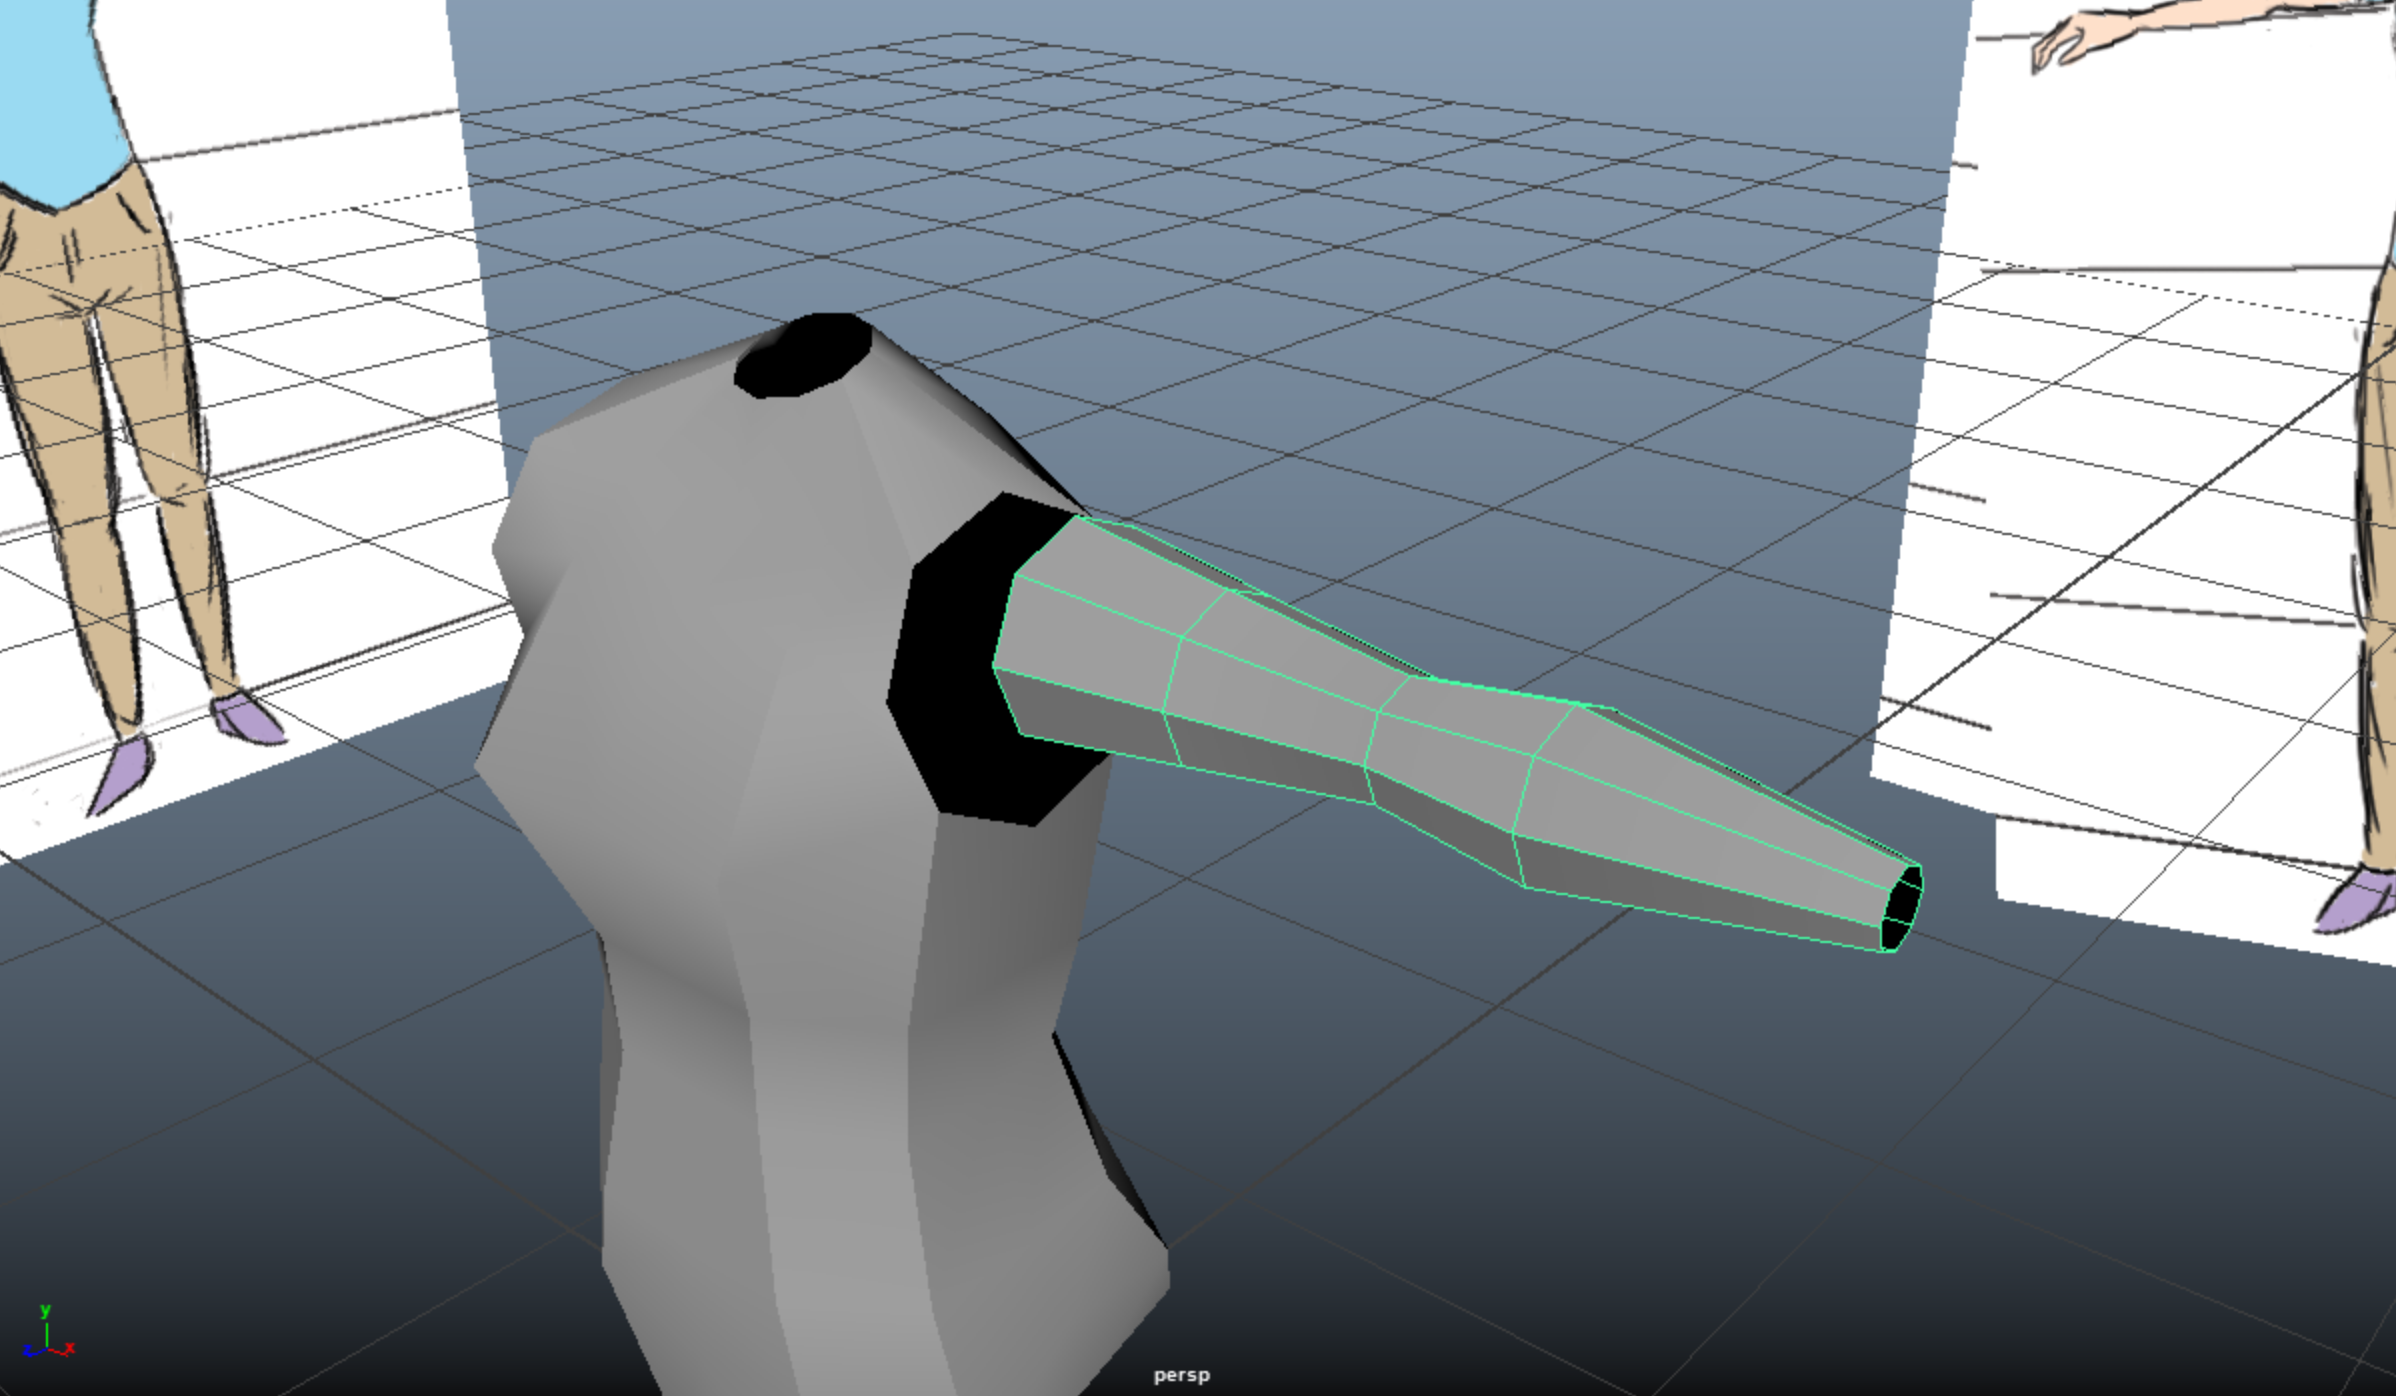
Next, let’s add some edge loops around areas that we anticipate will need to bend. You can also rotate these edge loops and move around vertices to get an elbow area that feels more physically accurate.
Once we’re done with this low poly arm, let’s move on to the hand.
Hands are really tricky. Honestly, the hand I’m about to show you is perhaps not the Most Amazingly Humanly Accurate hand in the world, but let’s just make sure it has proper topology so that you can later make it into a nicer hand.
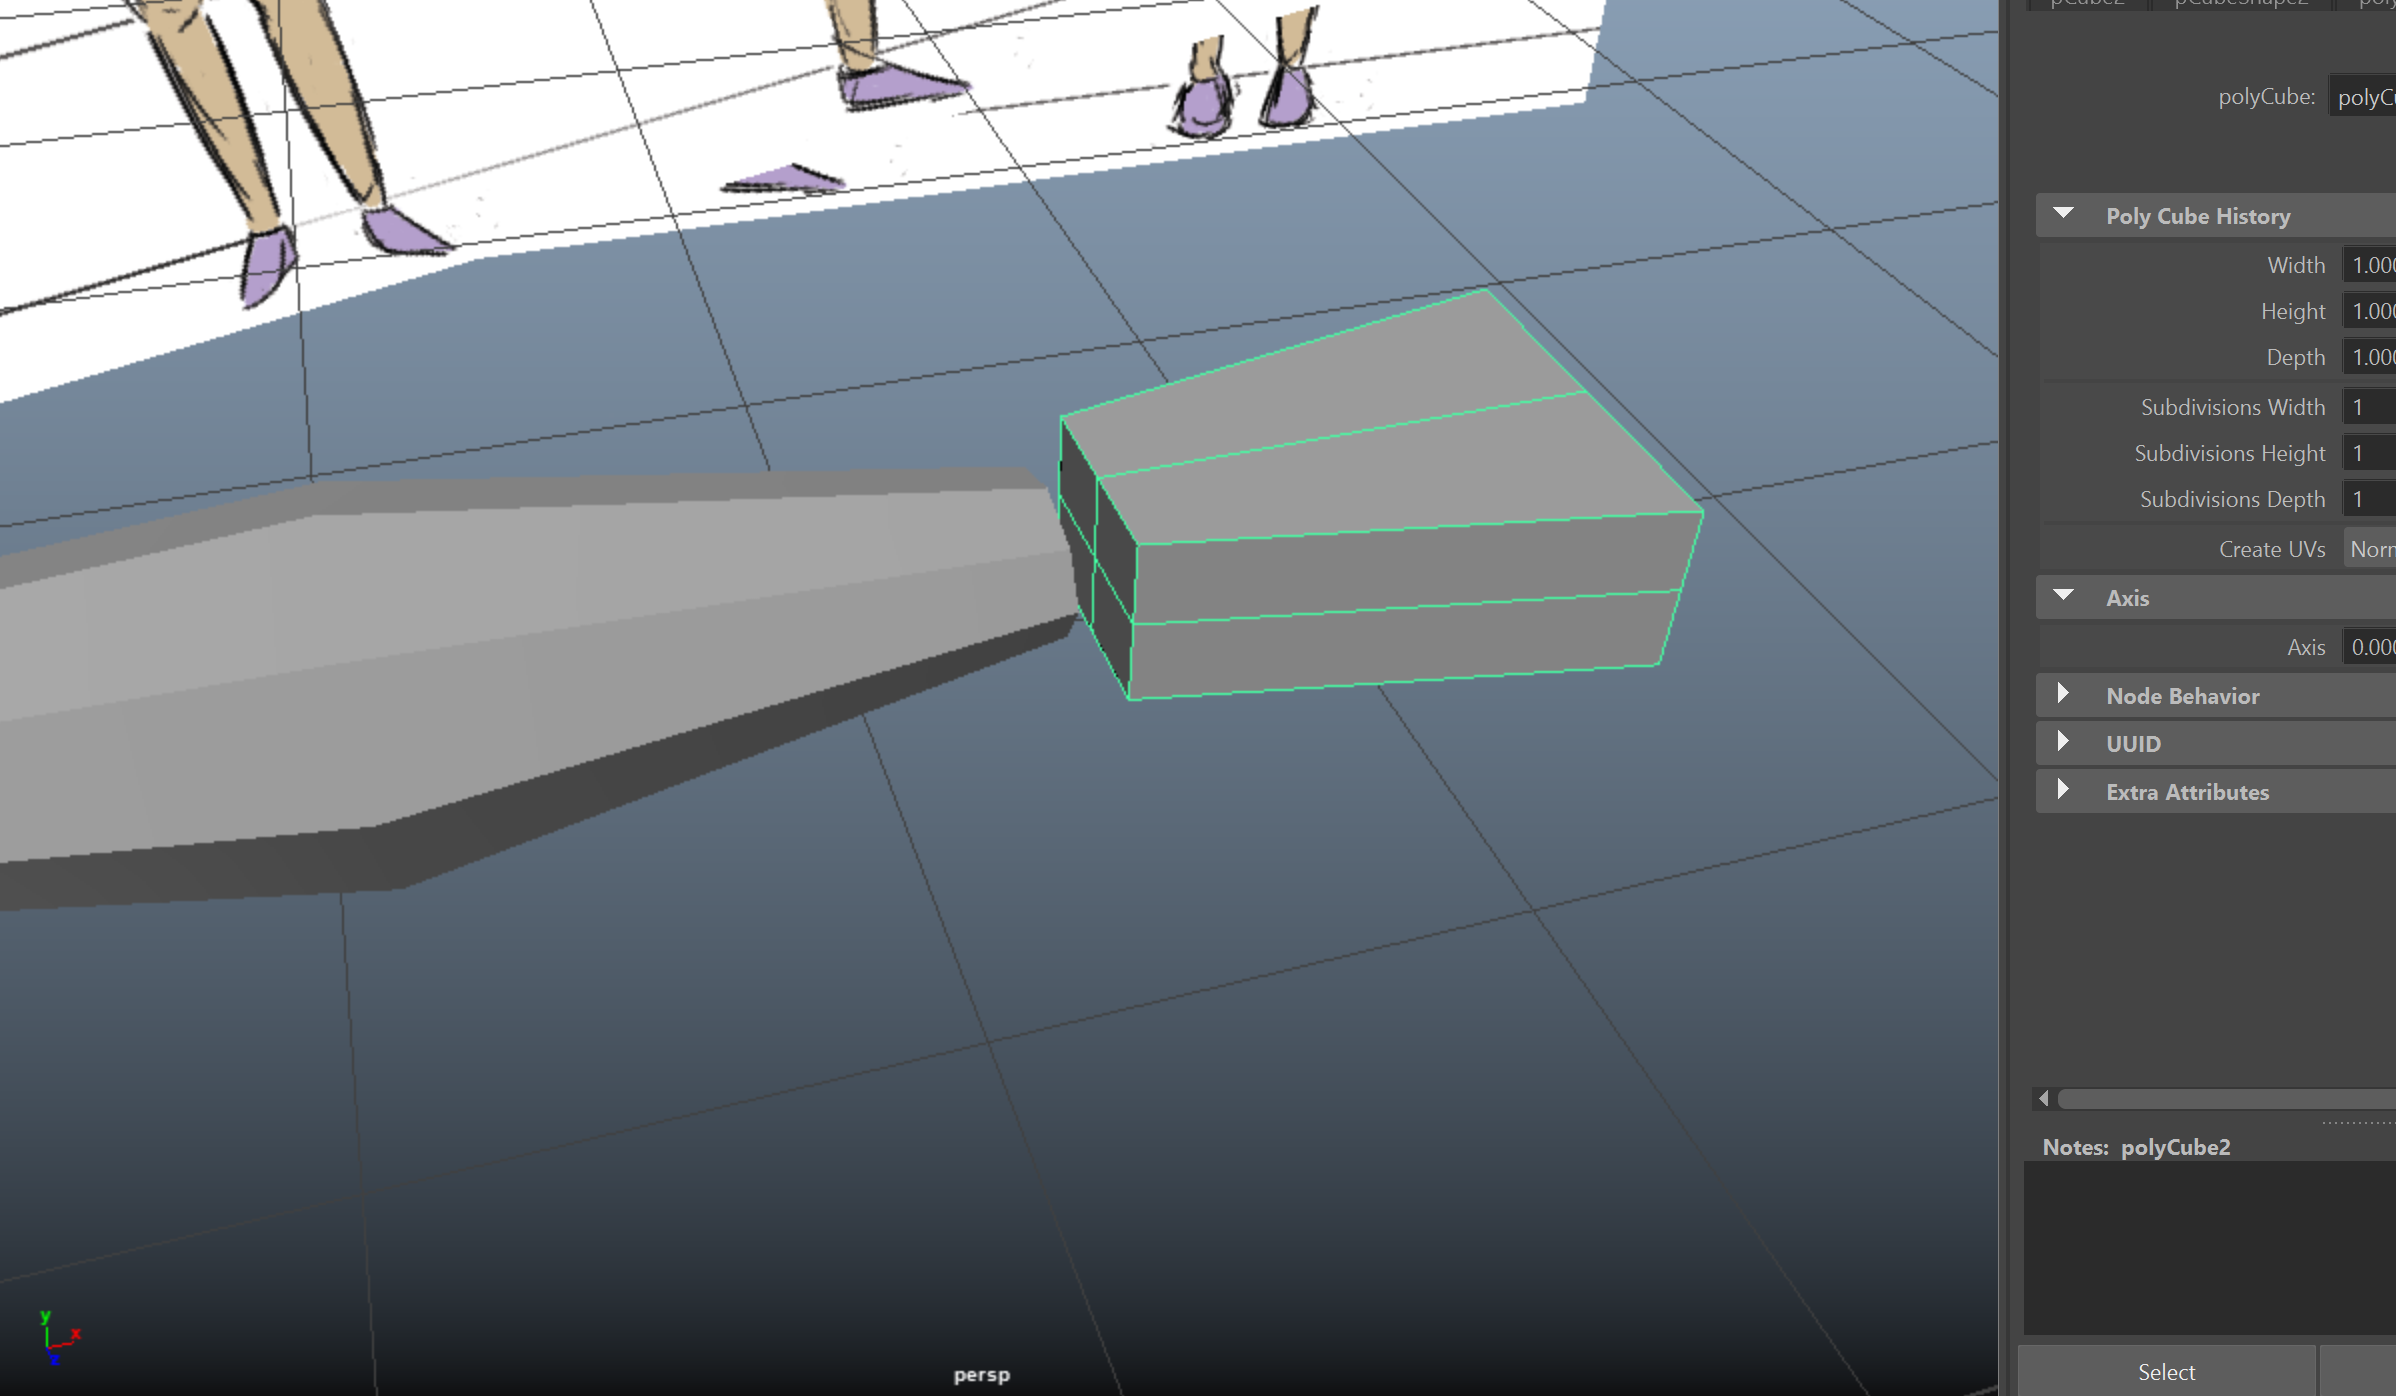
First, let’s start with a cube that we’ll subdivide and scale so that it’s a bit trapezoidal and so that the number of vertices at the end match the number of vertices we want to attach to. Make sure to position it in the right area so that you can reference the character sheets as you go.
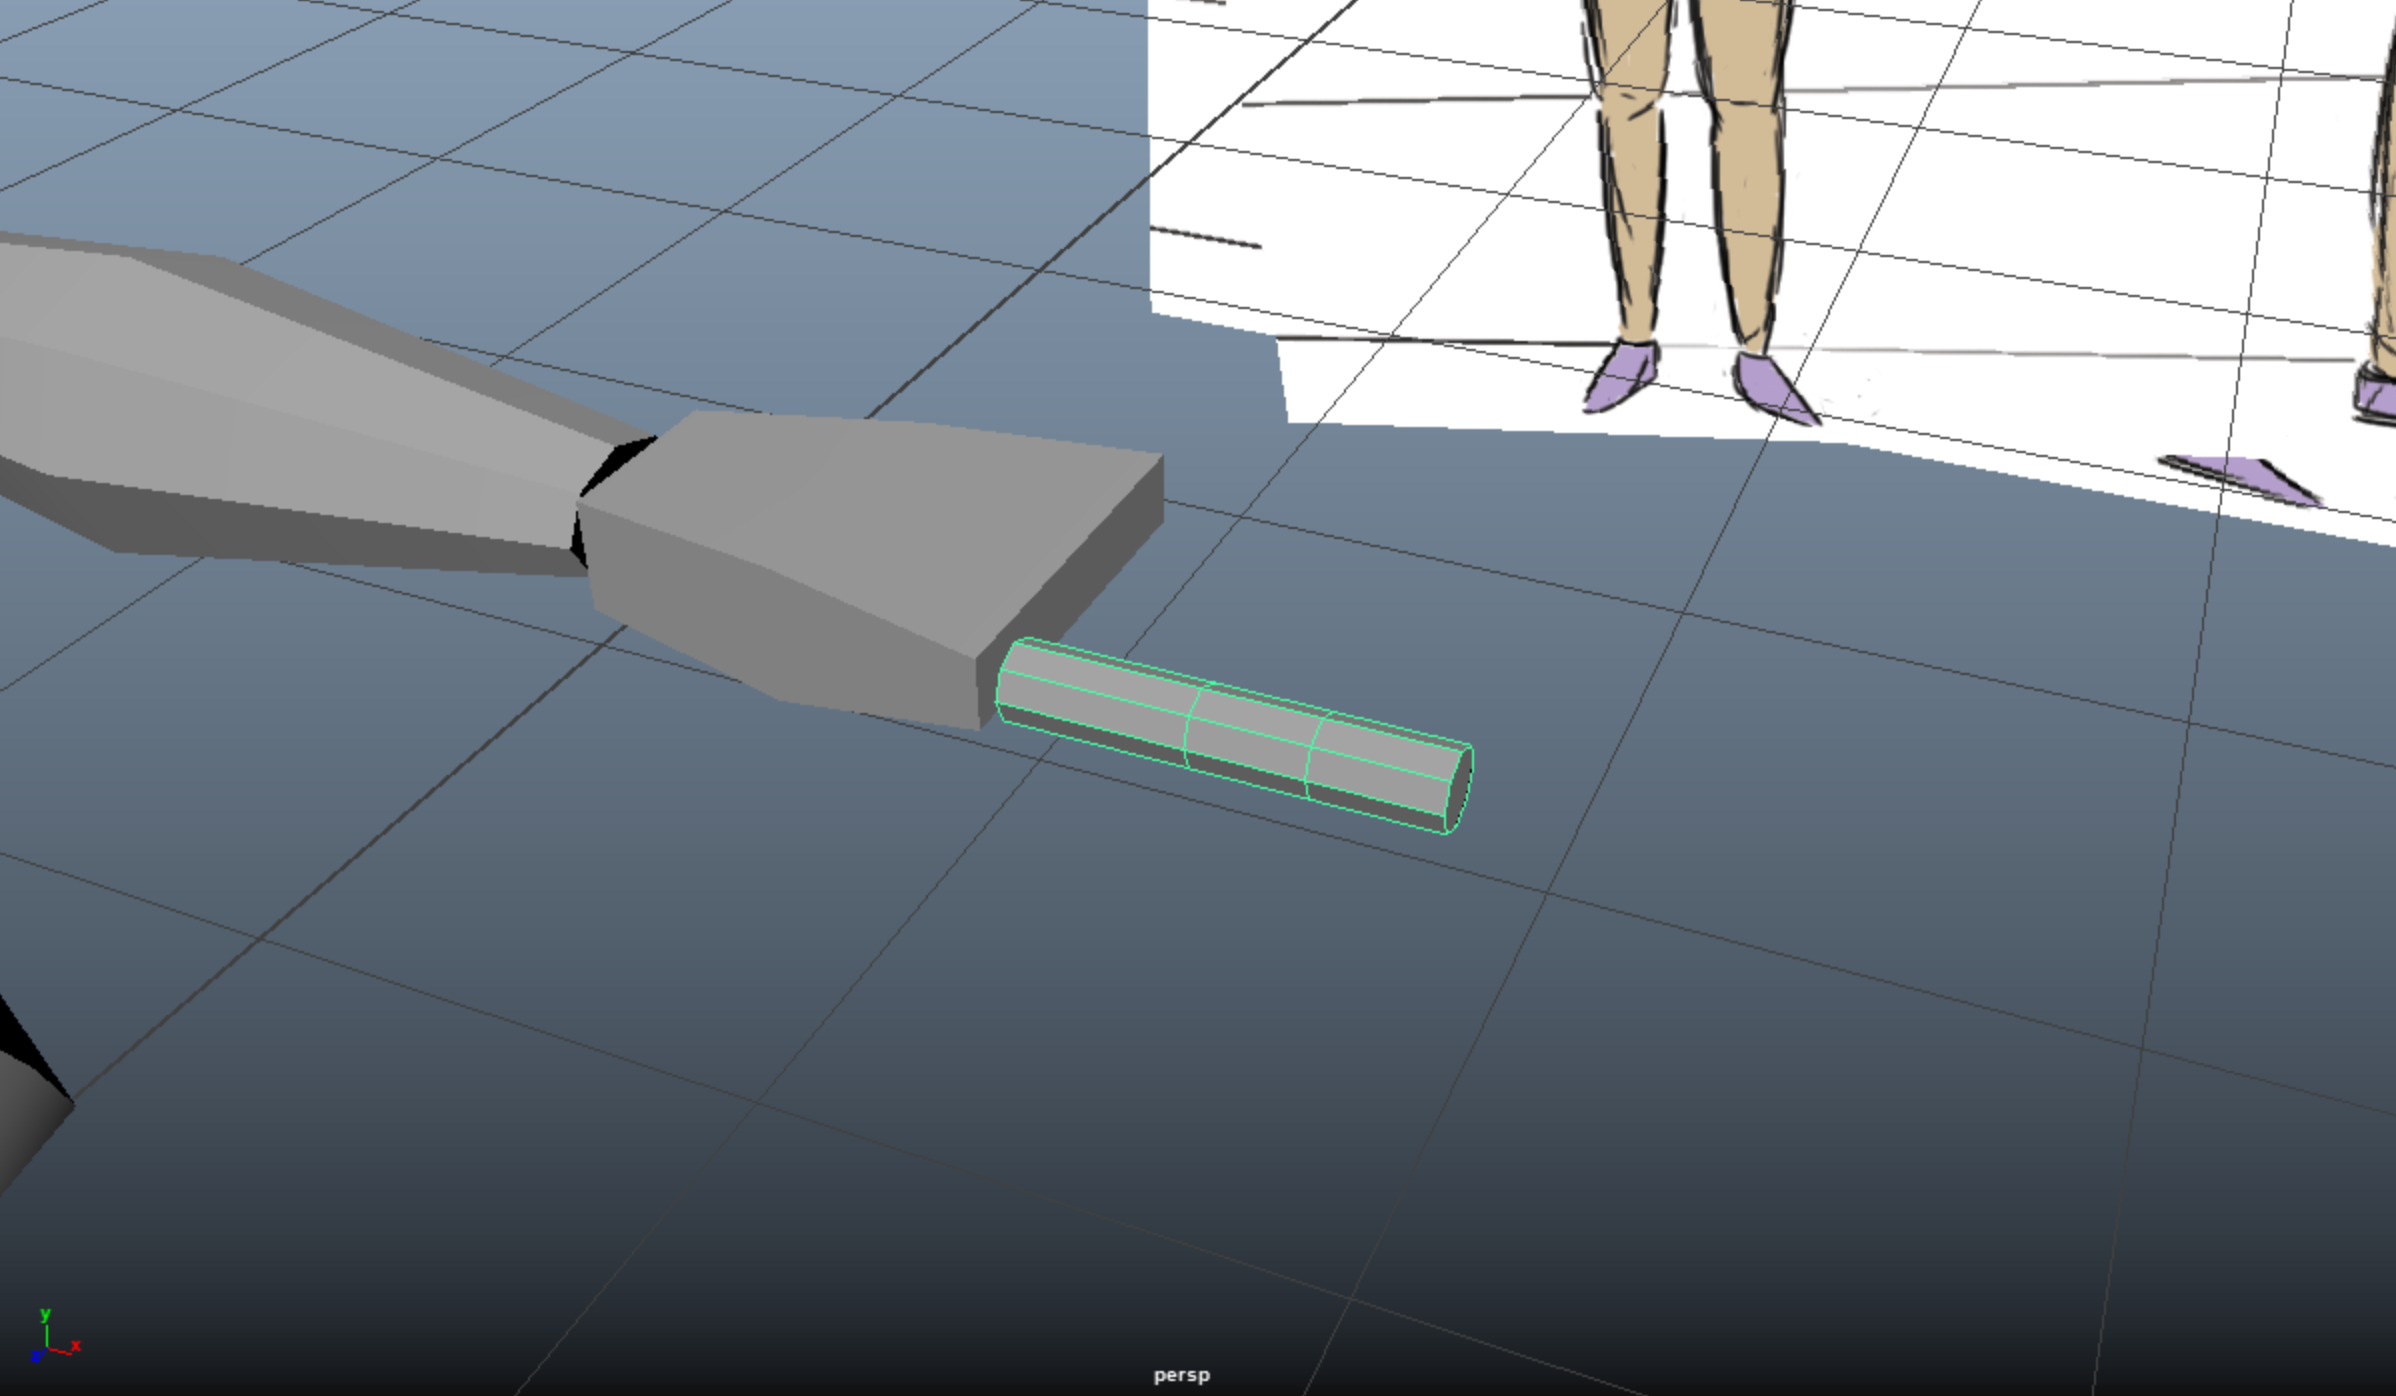
Next, let’s make some fingers. I created a cylinder with 8 sides, then moved and scaled it into the location of a finger. Think about the number of joints in a finger as you add edge loops, since each joint will need to be able to bend.
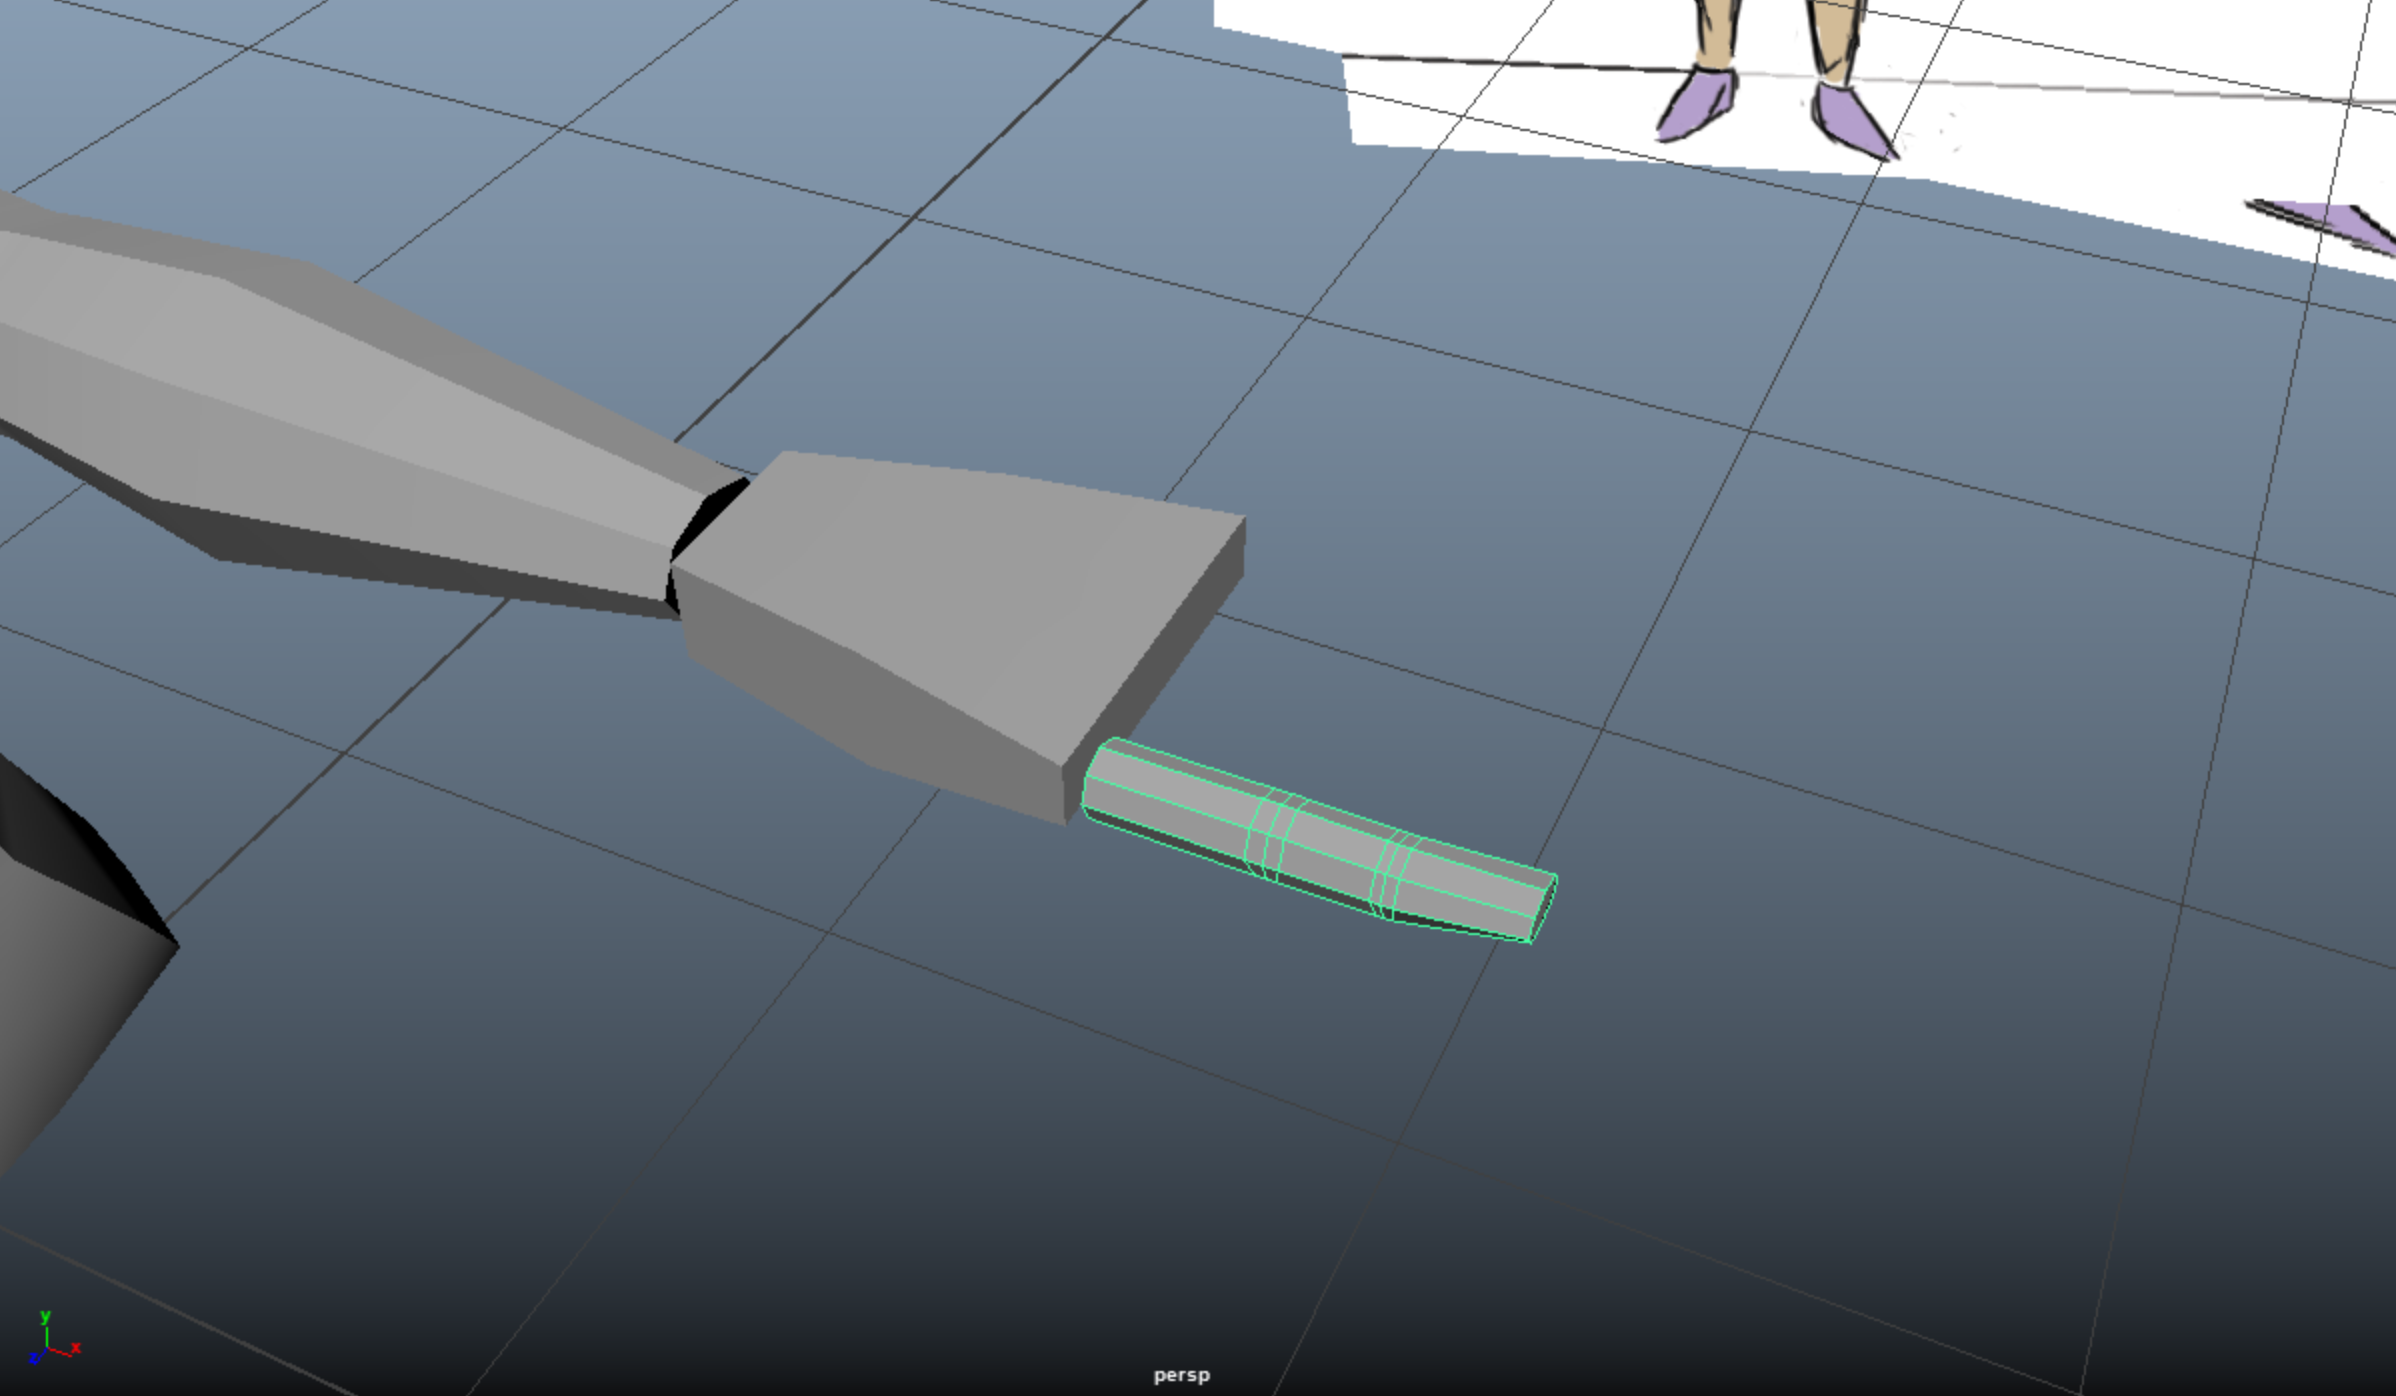
Let’s add some more edge loops around the joints and scale edges/faces to get this looking a bit more finger-esque.
Next, let’s duplicate this finger four more times, adjusting for each finger so that the size is correct. Look at a reference picture of a hand as you do this so that you can make sure the length of each finger and the placement of the joints is approximately correct.
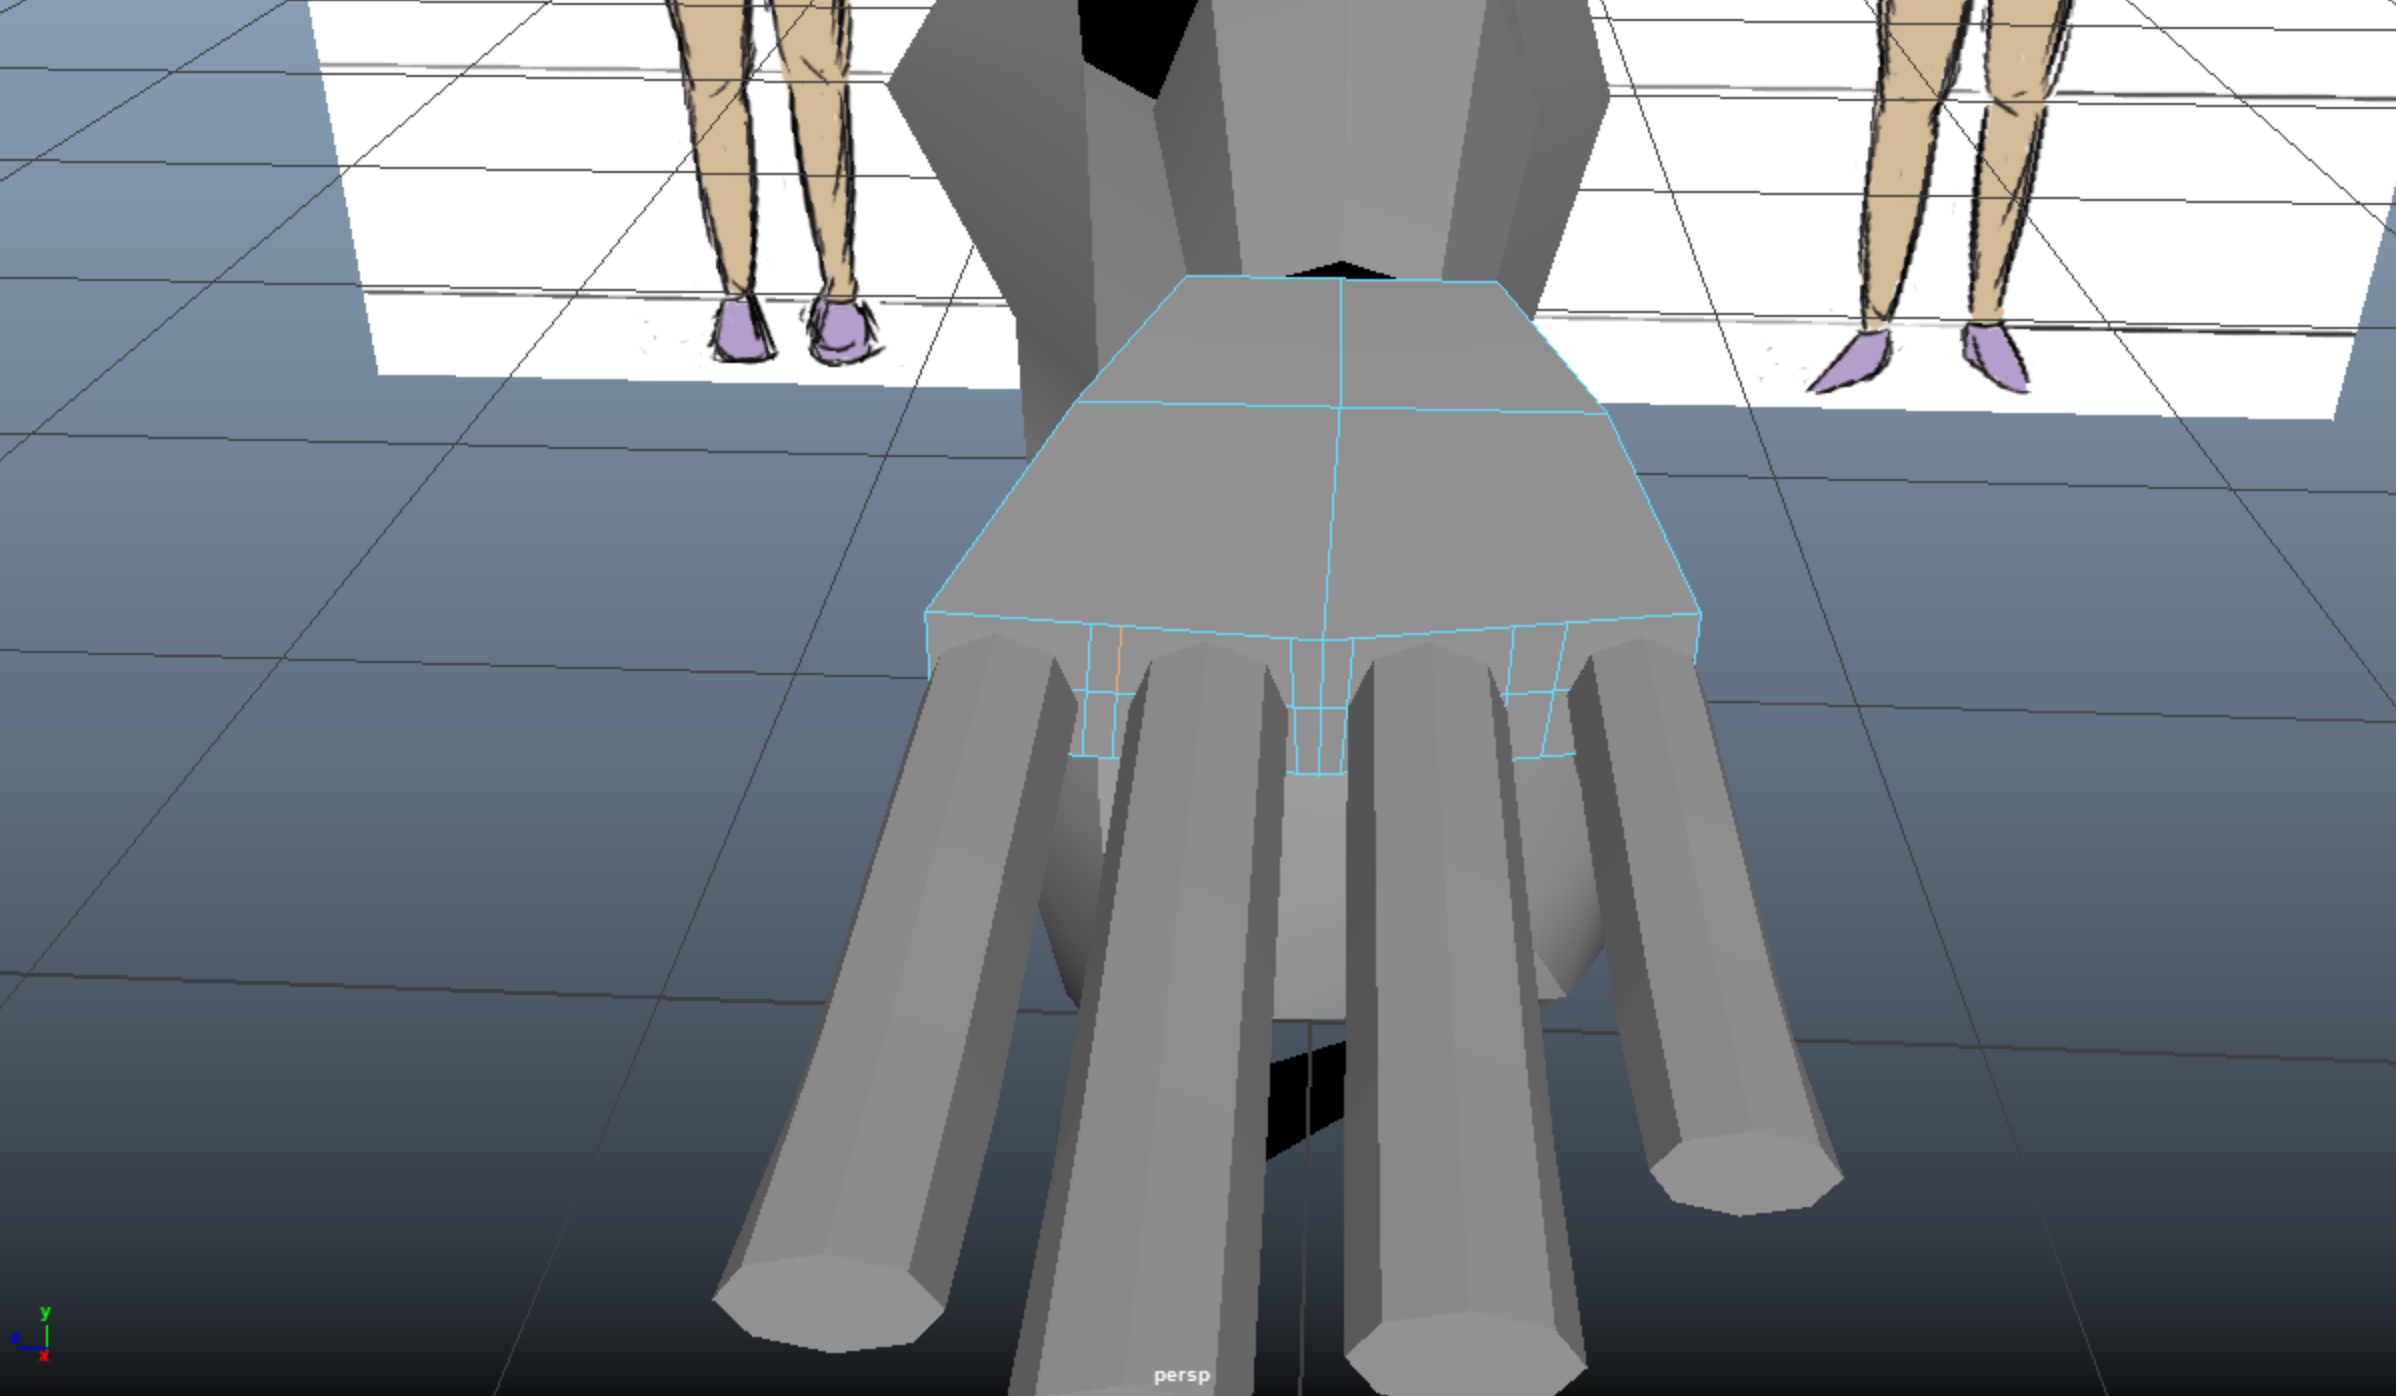
Alright, so you may have noticed: there’s nowhere to attach these fingers to on the palm base that we made earlier. In fact, the palm base is so low poly, that even if we used the lowest poly quad mesh possible to represent a finger (a rectangular prism), there’s no way we’d have enough vertices or enough holes to fit these four fingers onto the palm base. So what’s the solution here?
Let’s use the Multi-Cut tool to add some new edges. That’ll get us to the 8 vertices per hole. To do this, I added an edge loop around the entire height of the palm base, then cut new edges in for each finger.
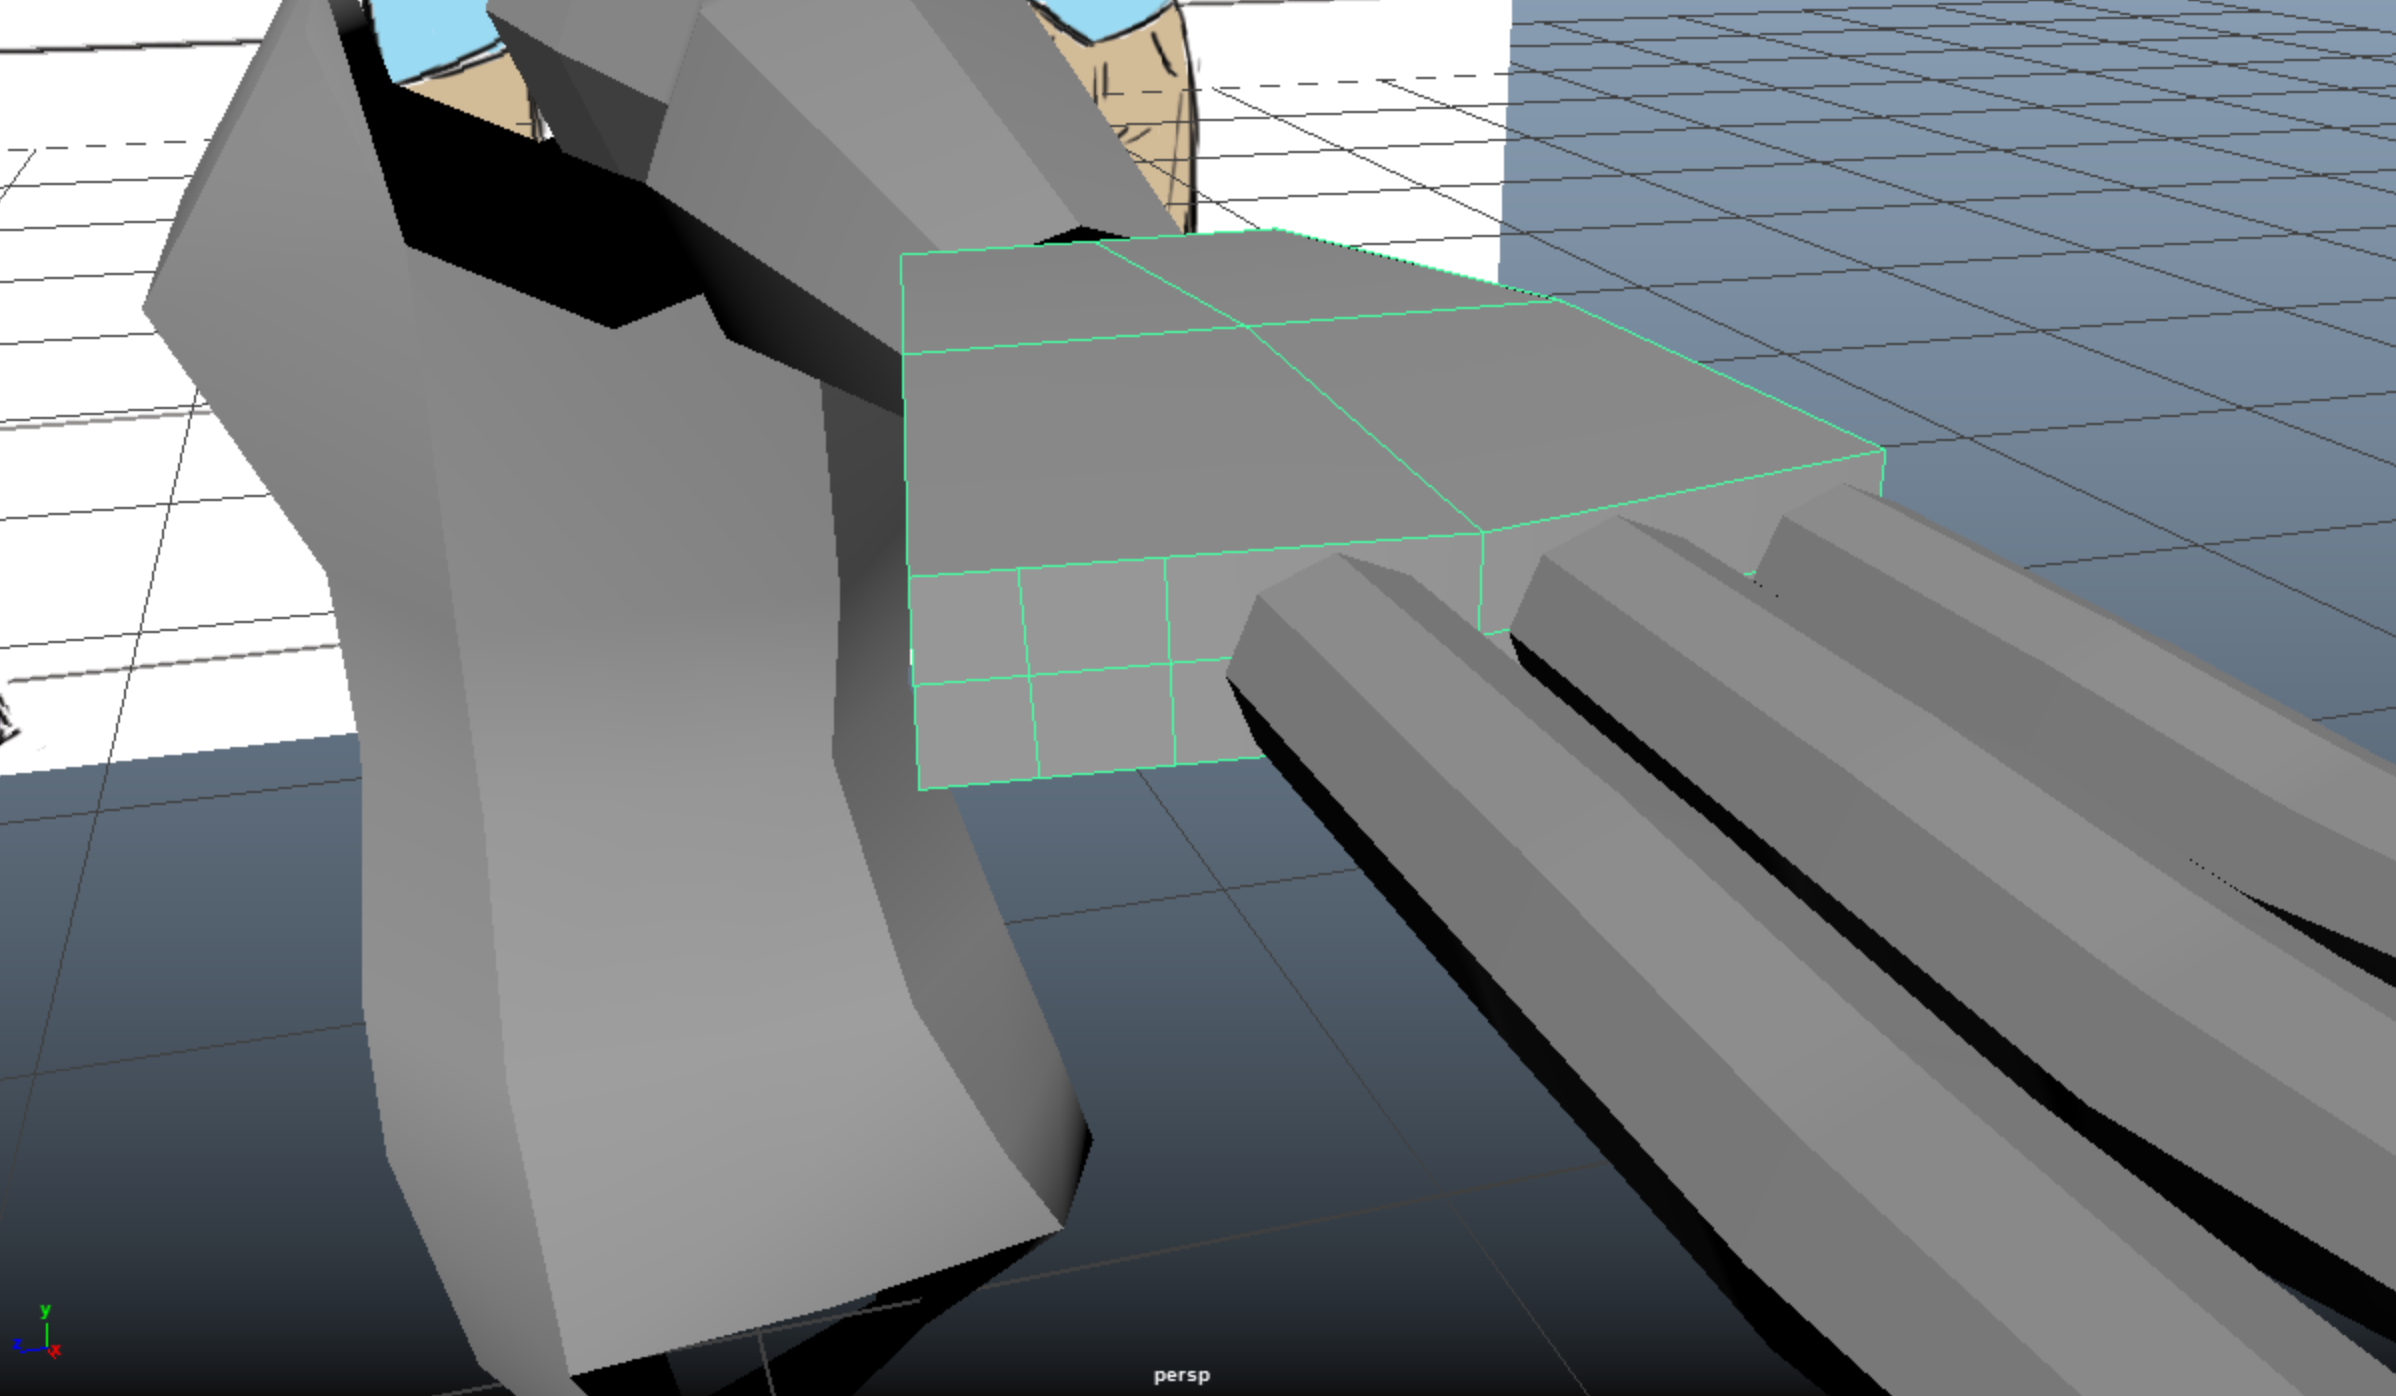
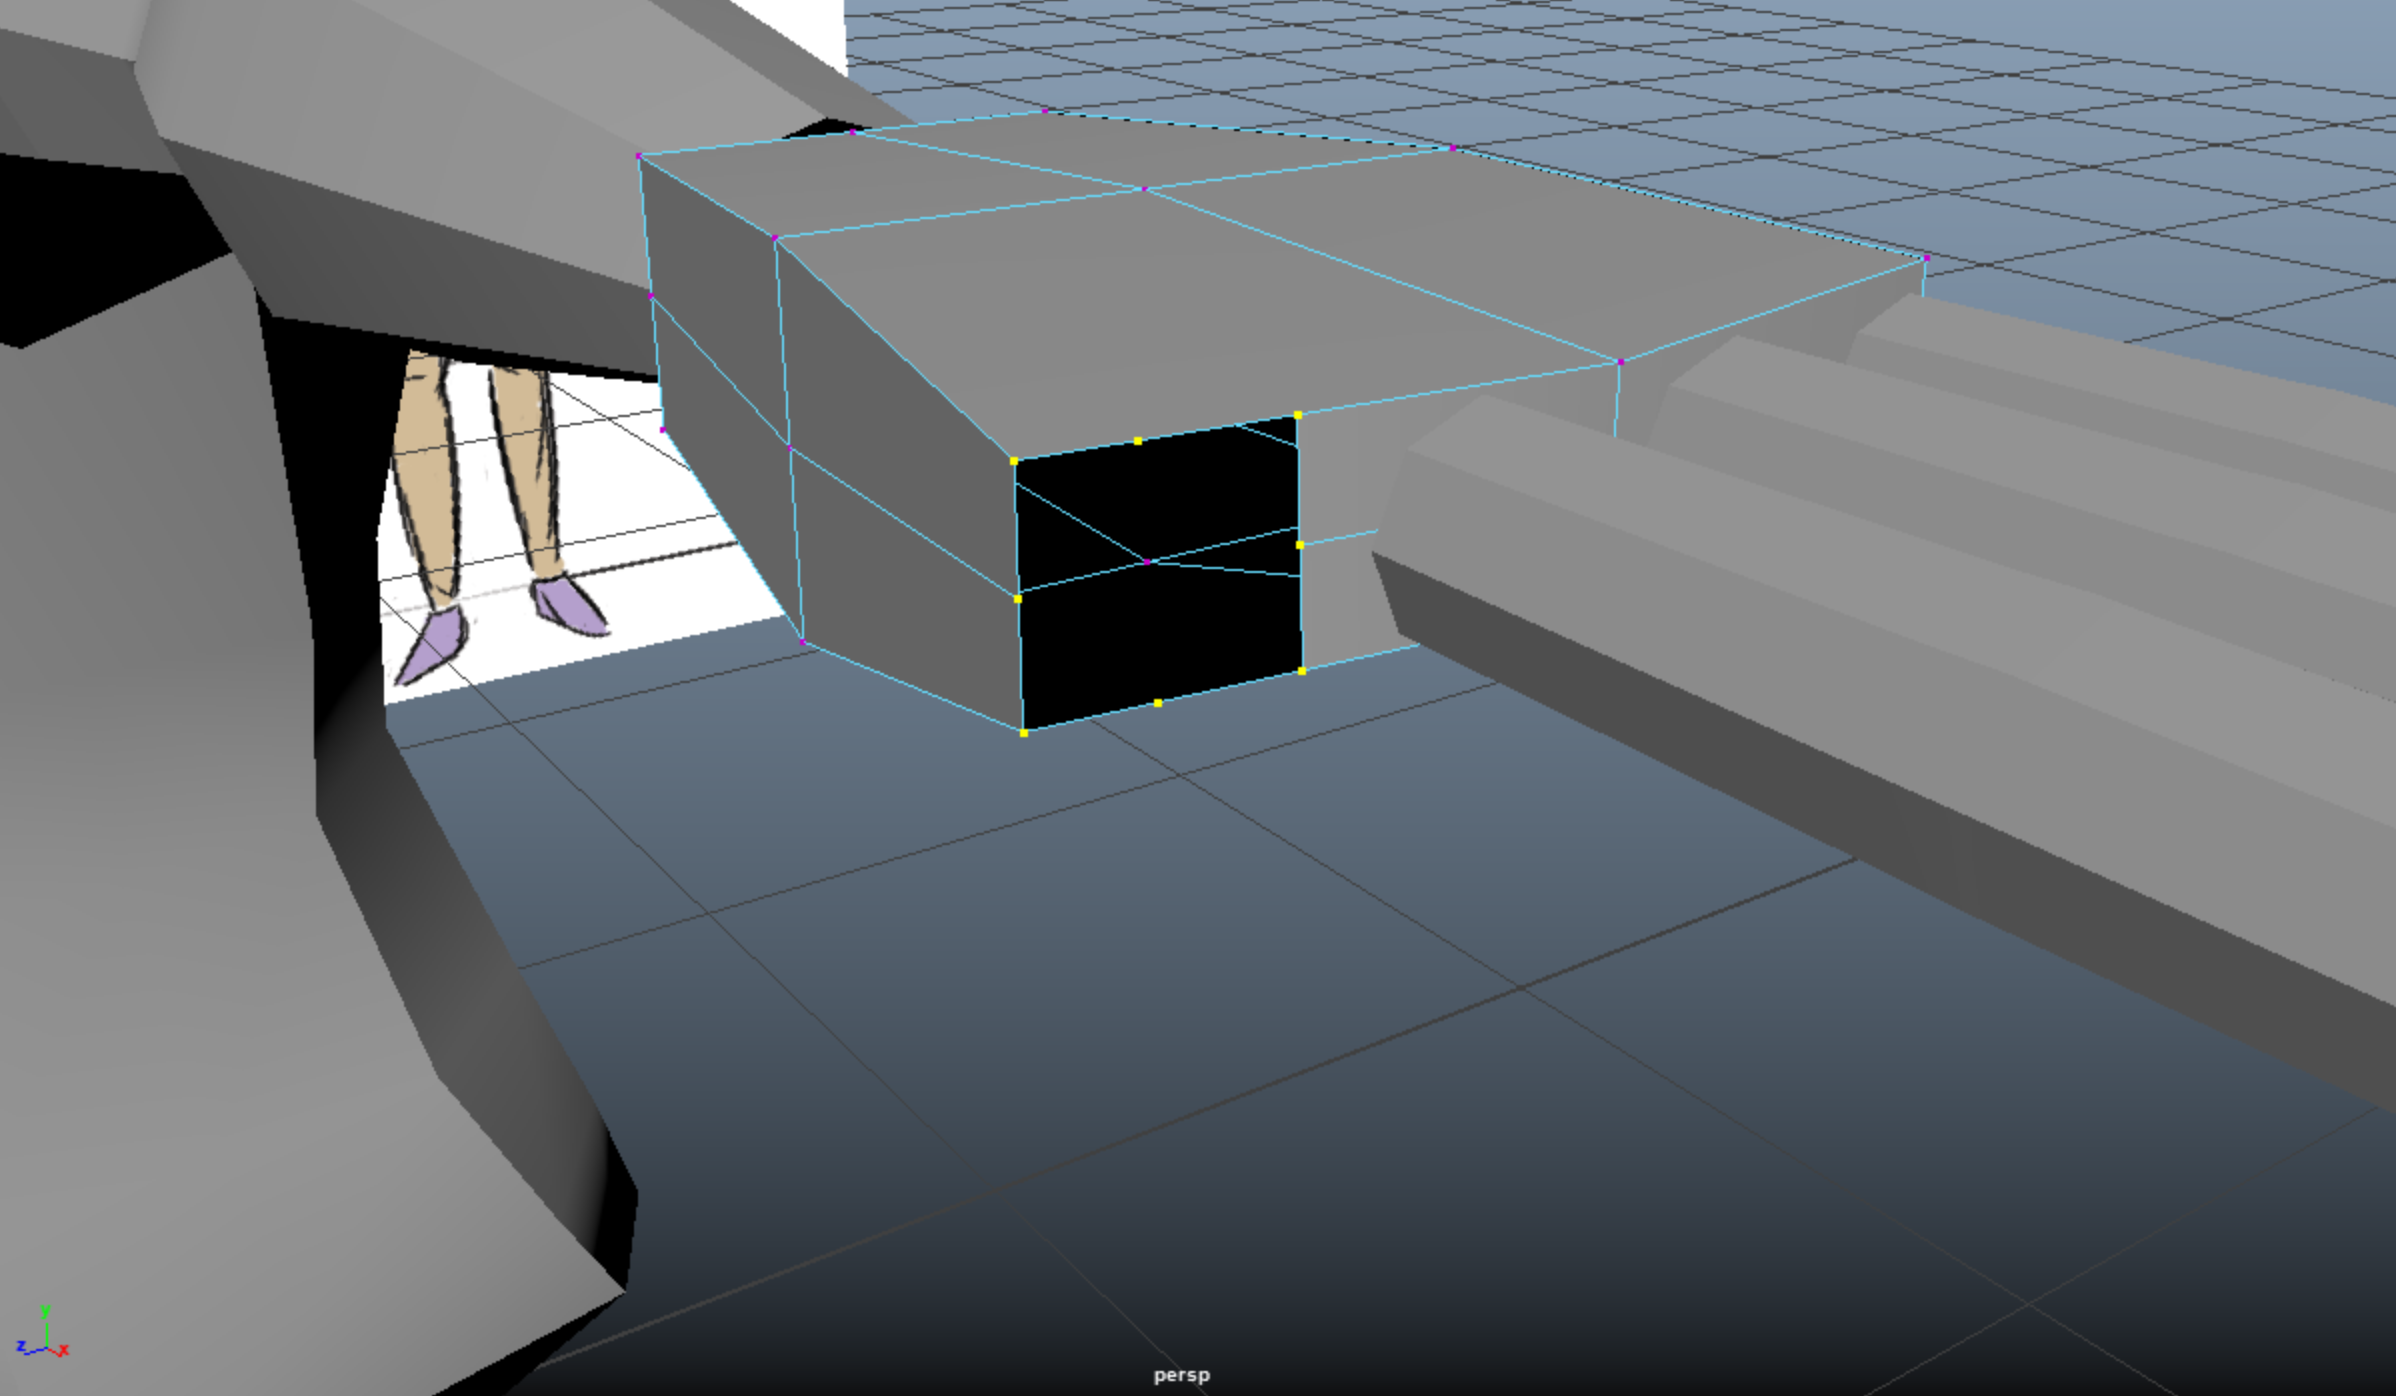
Now we’re ready to delete these four faces to stitch our index finger on. There’s lots of different ways to stitch two meshes together, but my preferred method is using the Combine tool to combine the meshes then using the Target Weld tool to stitch the two objects together. Make sure that when you’re using Target Weld it’s always to connect two holes together—if you try to stitch a vertex that isn’t on the border of a hole, you’ve created non-manifold geometry (the bane of all modellers).

The Target Weld tool allows us to snap vertices or edges onto each other, merging the first selected item with the second selected item. Test it out for a bit if you’re uncertain how to use it, but it can be really helpful for merging with more control than the Merge or Merge to Center tools.
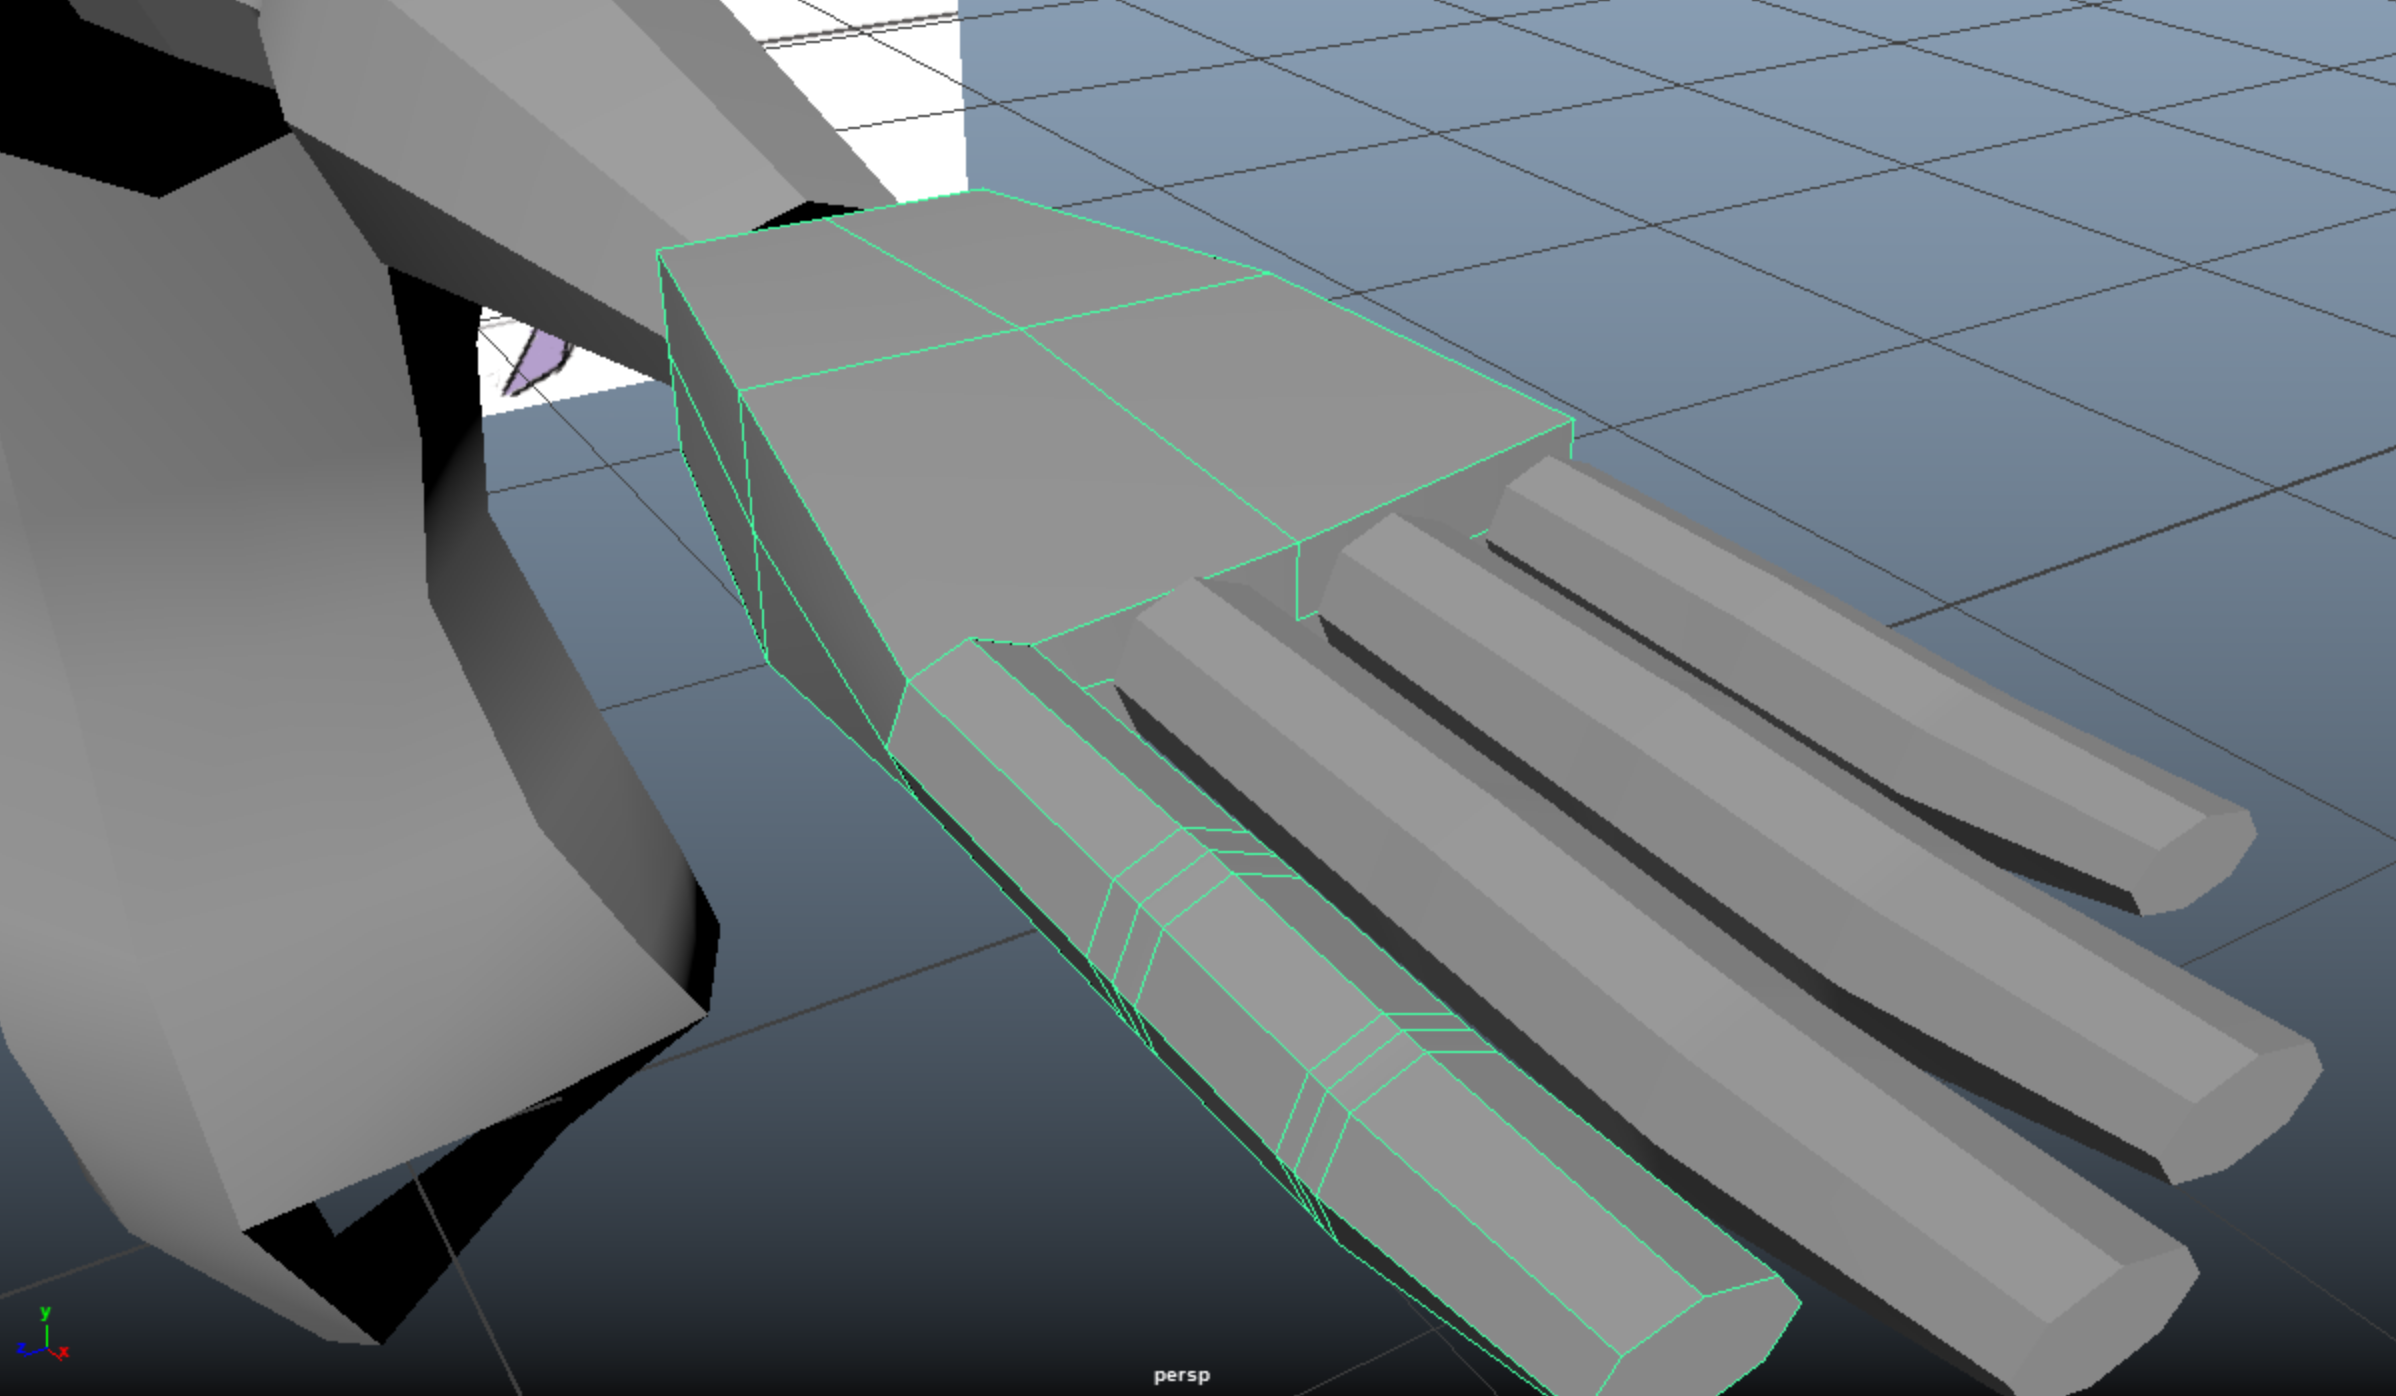
Let’s do this for all the fingers, now.
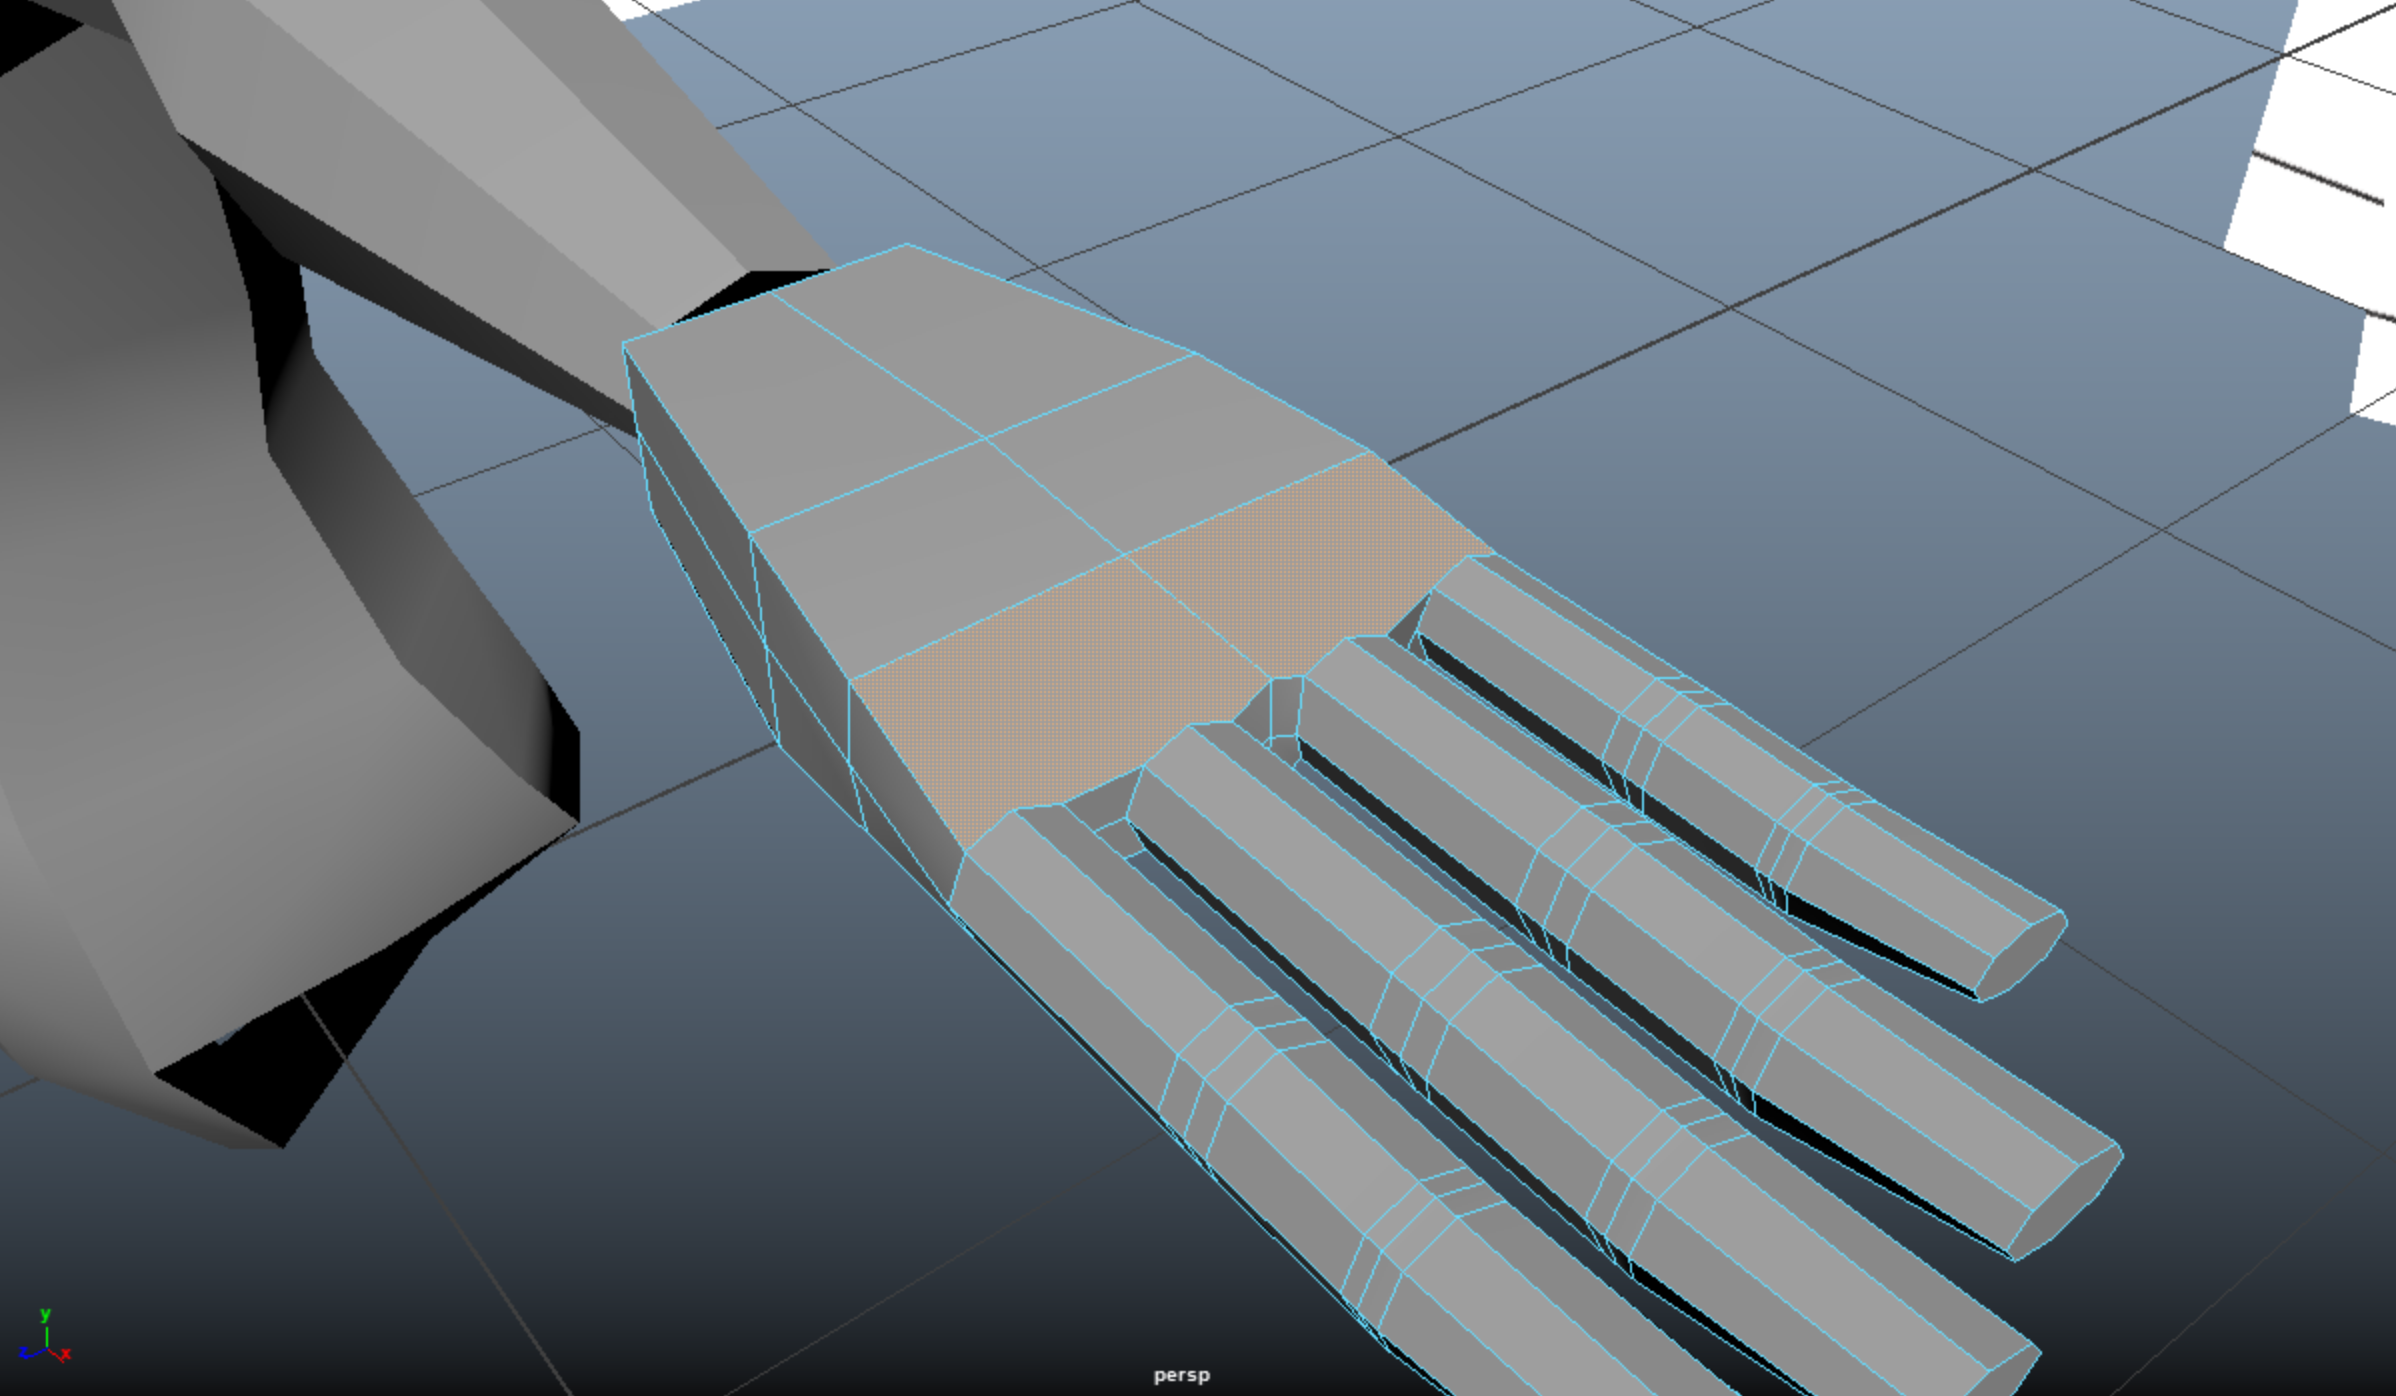
So great, we have all the fingers sewed on. However, in doing so, we’ve violated another rule—we now have all these faces with a crazy number of edges (way way way more than four)! There’s a number of different ways to resolve this, but what I did was I used the Multi-Cut tool to create quads like so:
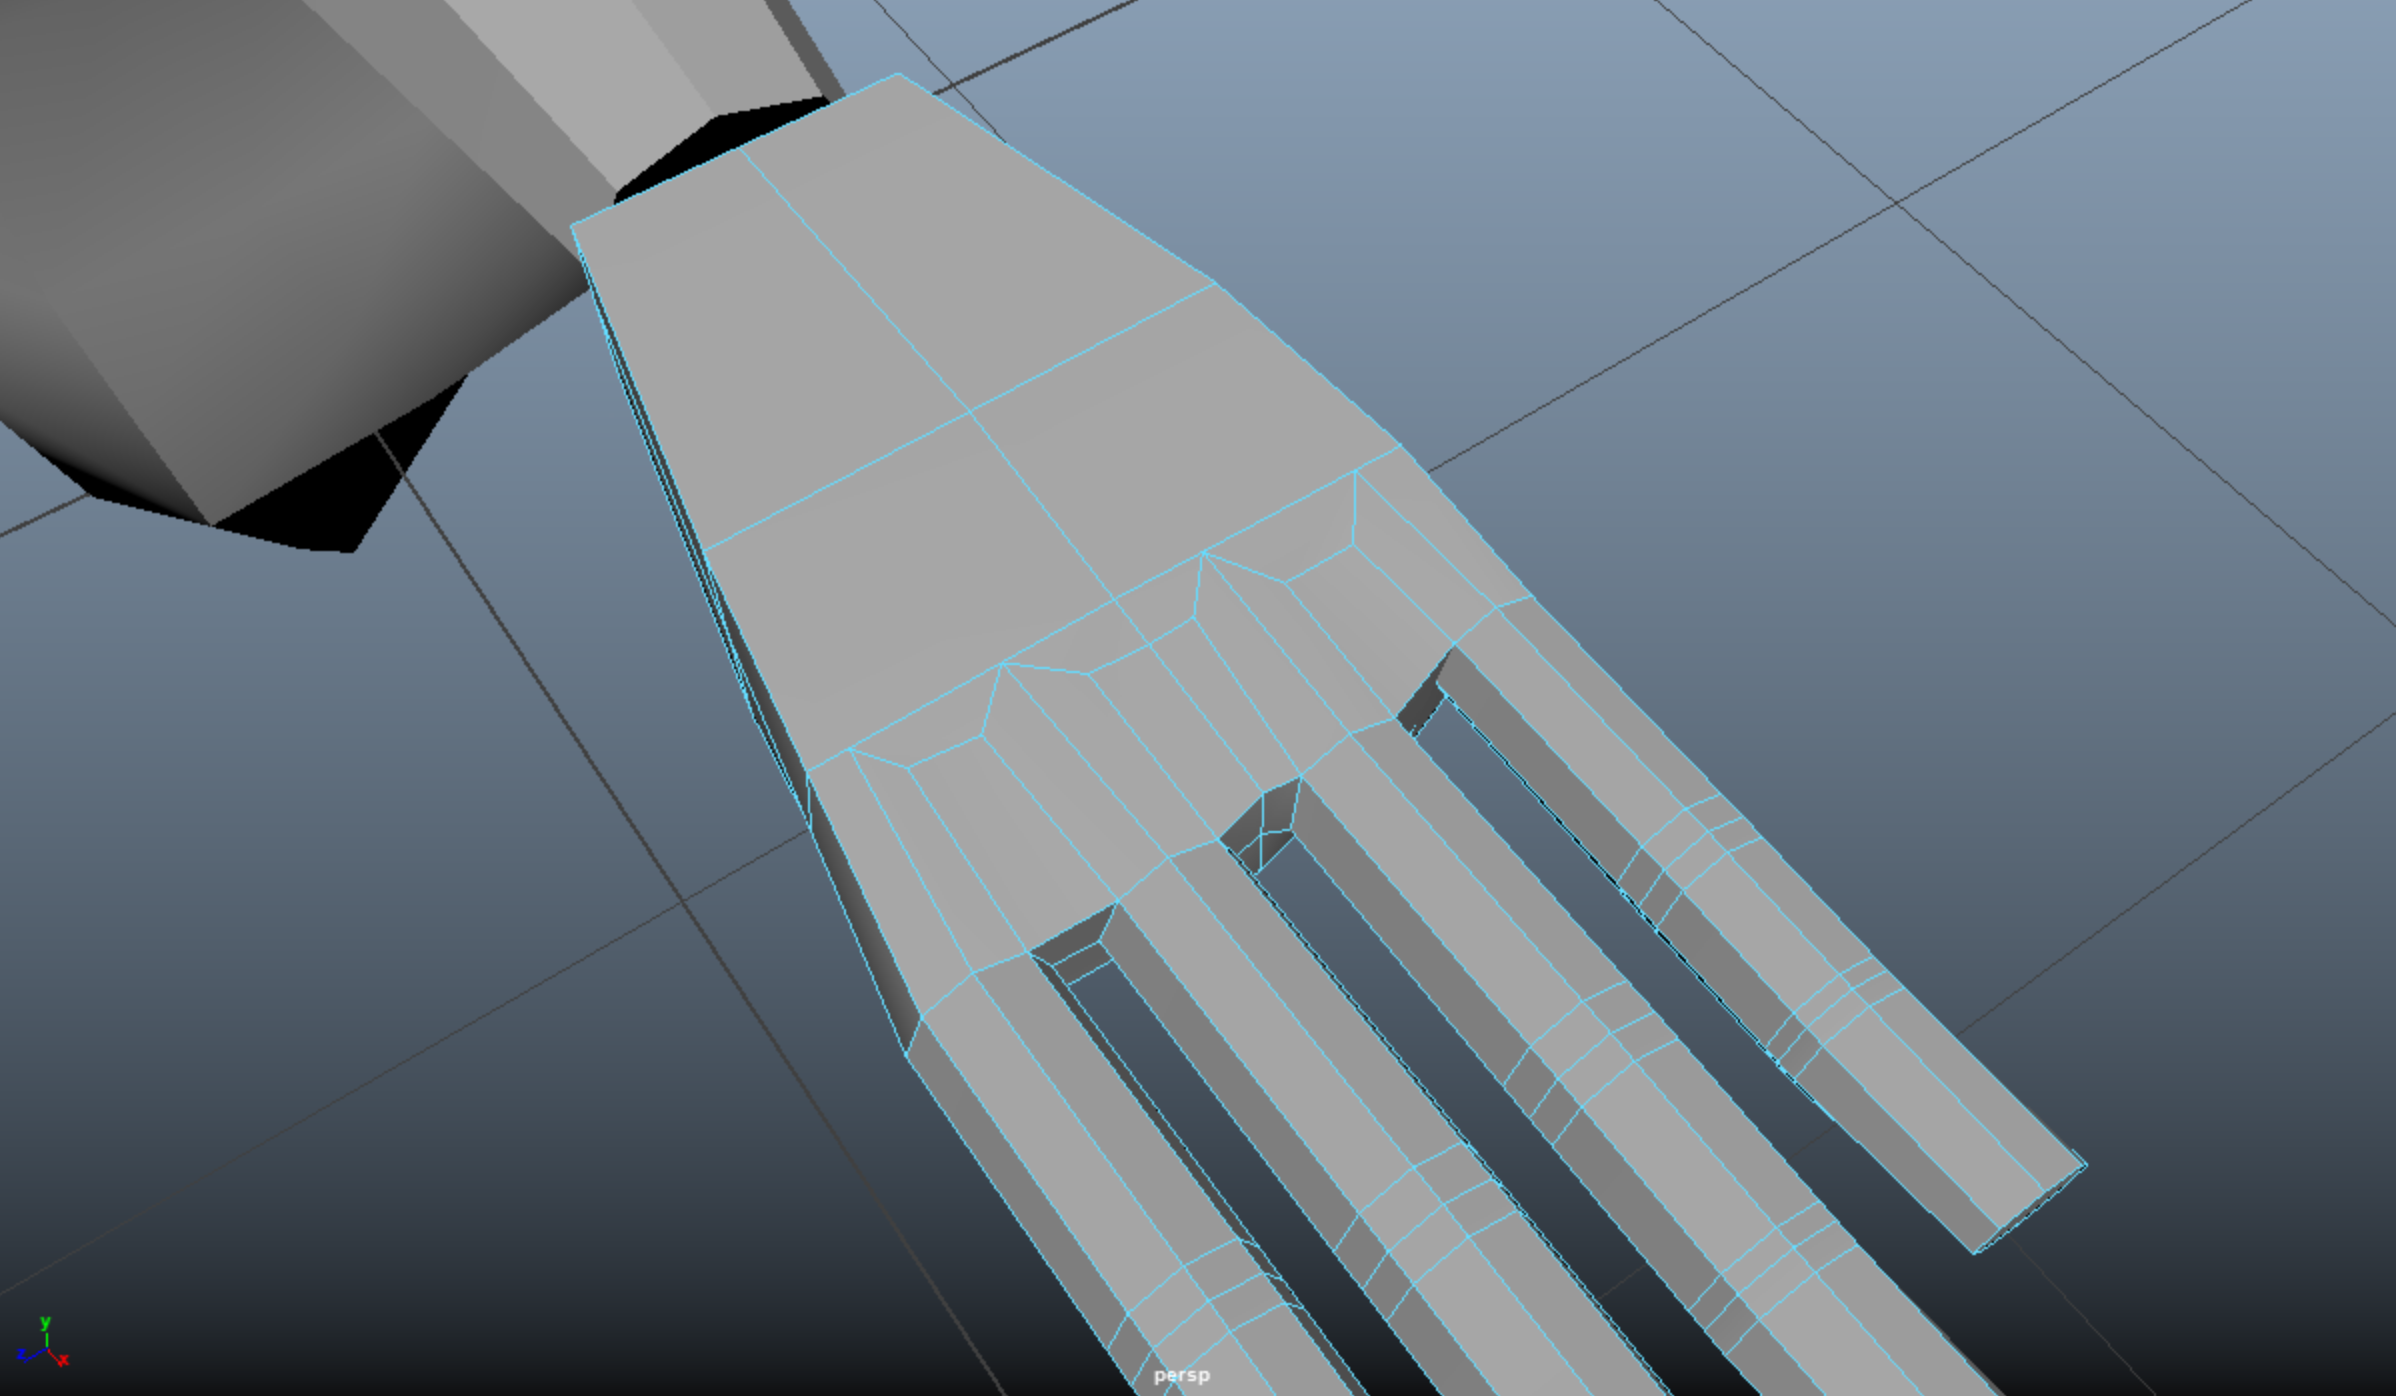
Remember to be really careful with using the Multi-Cut tool, since you can accidentally create vertices or edges that you didn’t intend to if you’re not cutting precisely where you want to.
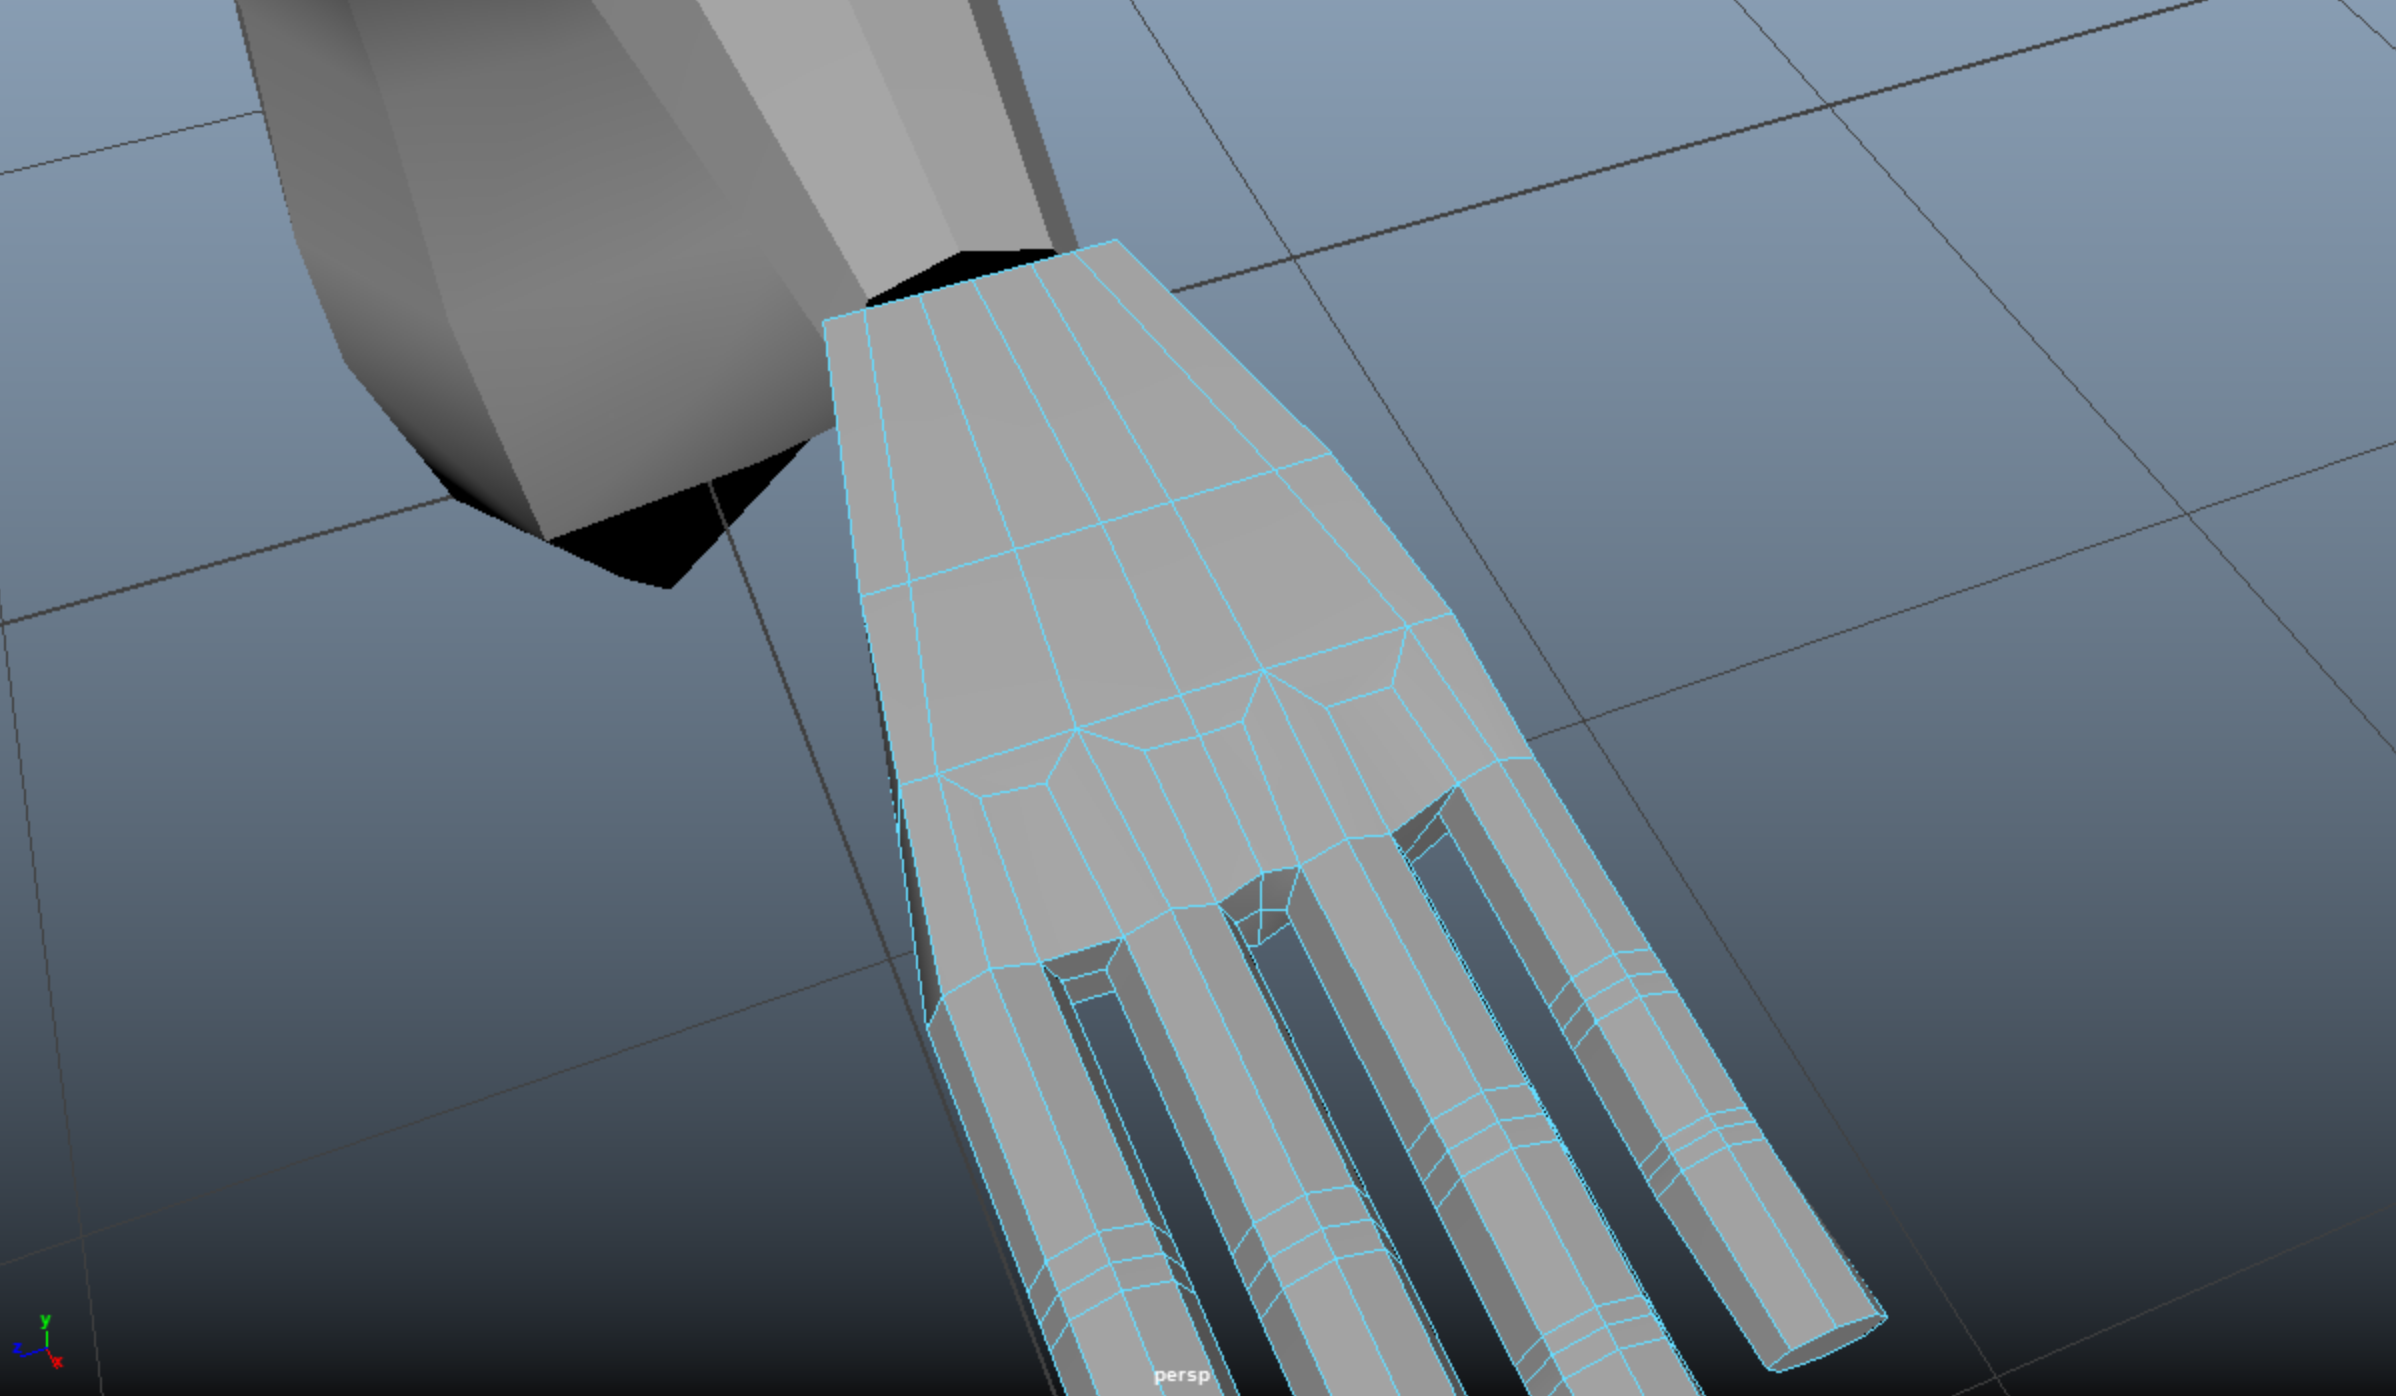
While this kind of funky topology is fine for an area like the knuckles, where a new component of the body begins without really needing to smoothly connect to the parts before it, we don’t want to continue this type of topology for the rest of the hand. I connected the new vertices all the way to the end of the hand with the Multi-Cut tool.
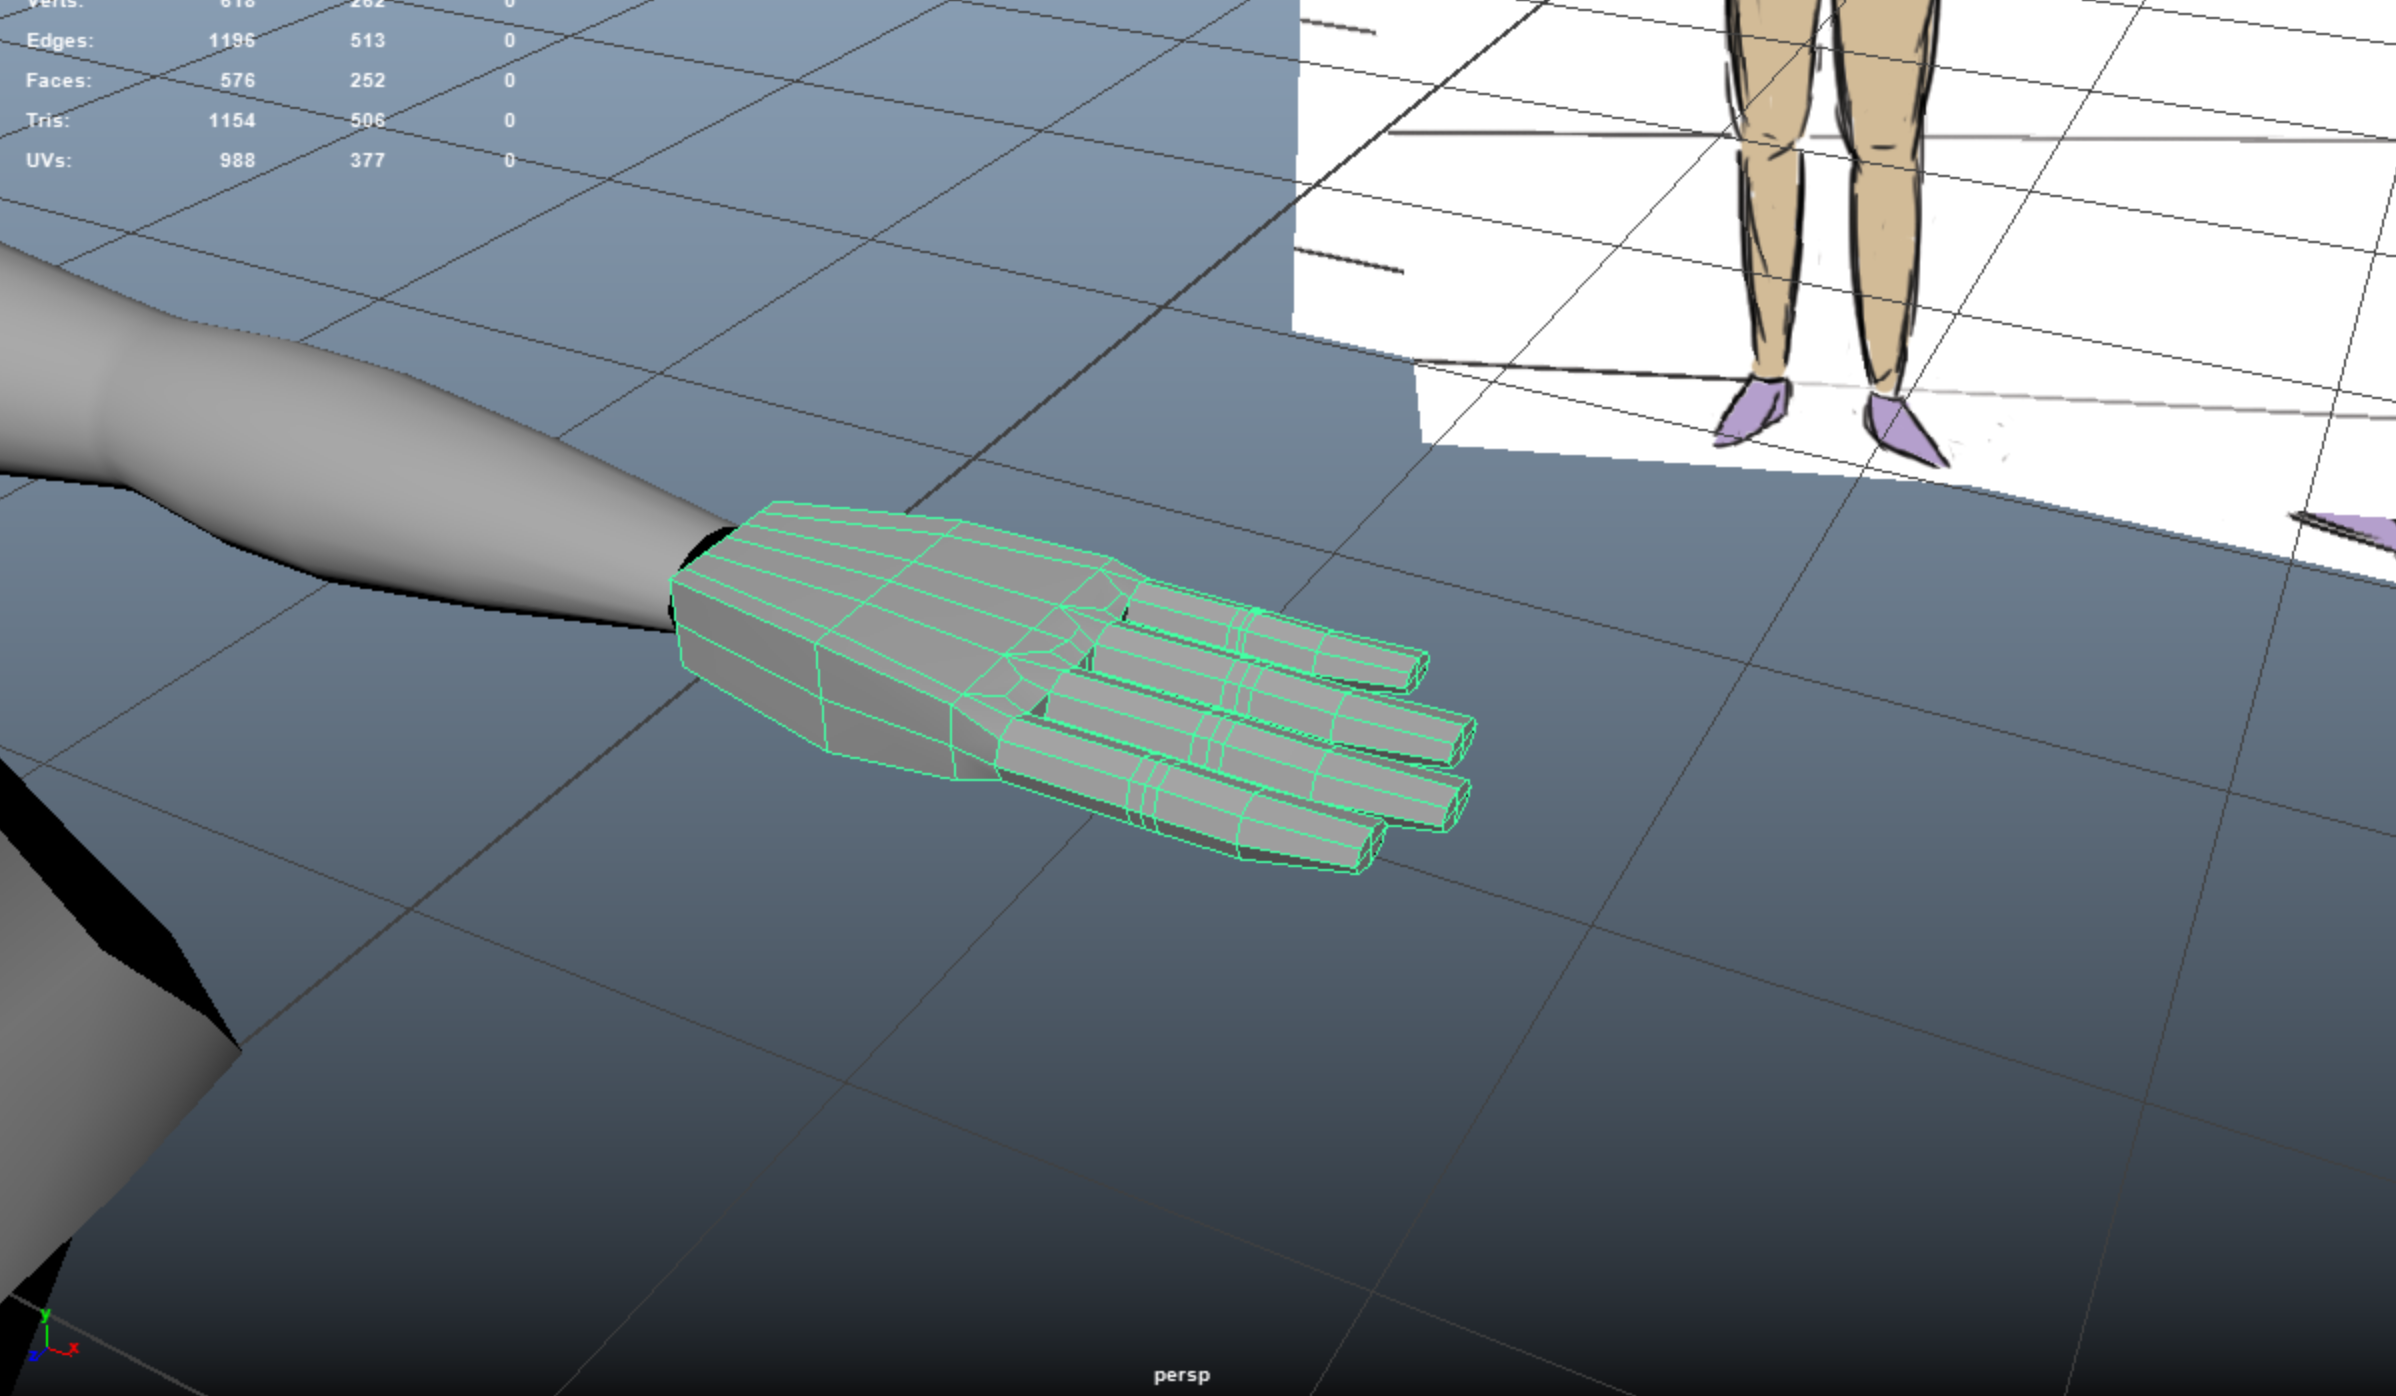
Do this for the bottom side of the hand too. Create new edges in the same pattern I showed above. Afterwards, we have a pretty decent looking hand.
We can extrude a face at the base of the palm to serve as our thumb. This is a pretty rough one, so make sure to adjust yours later on.
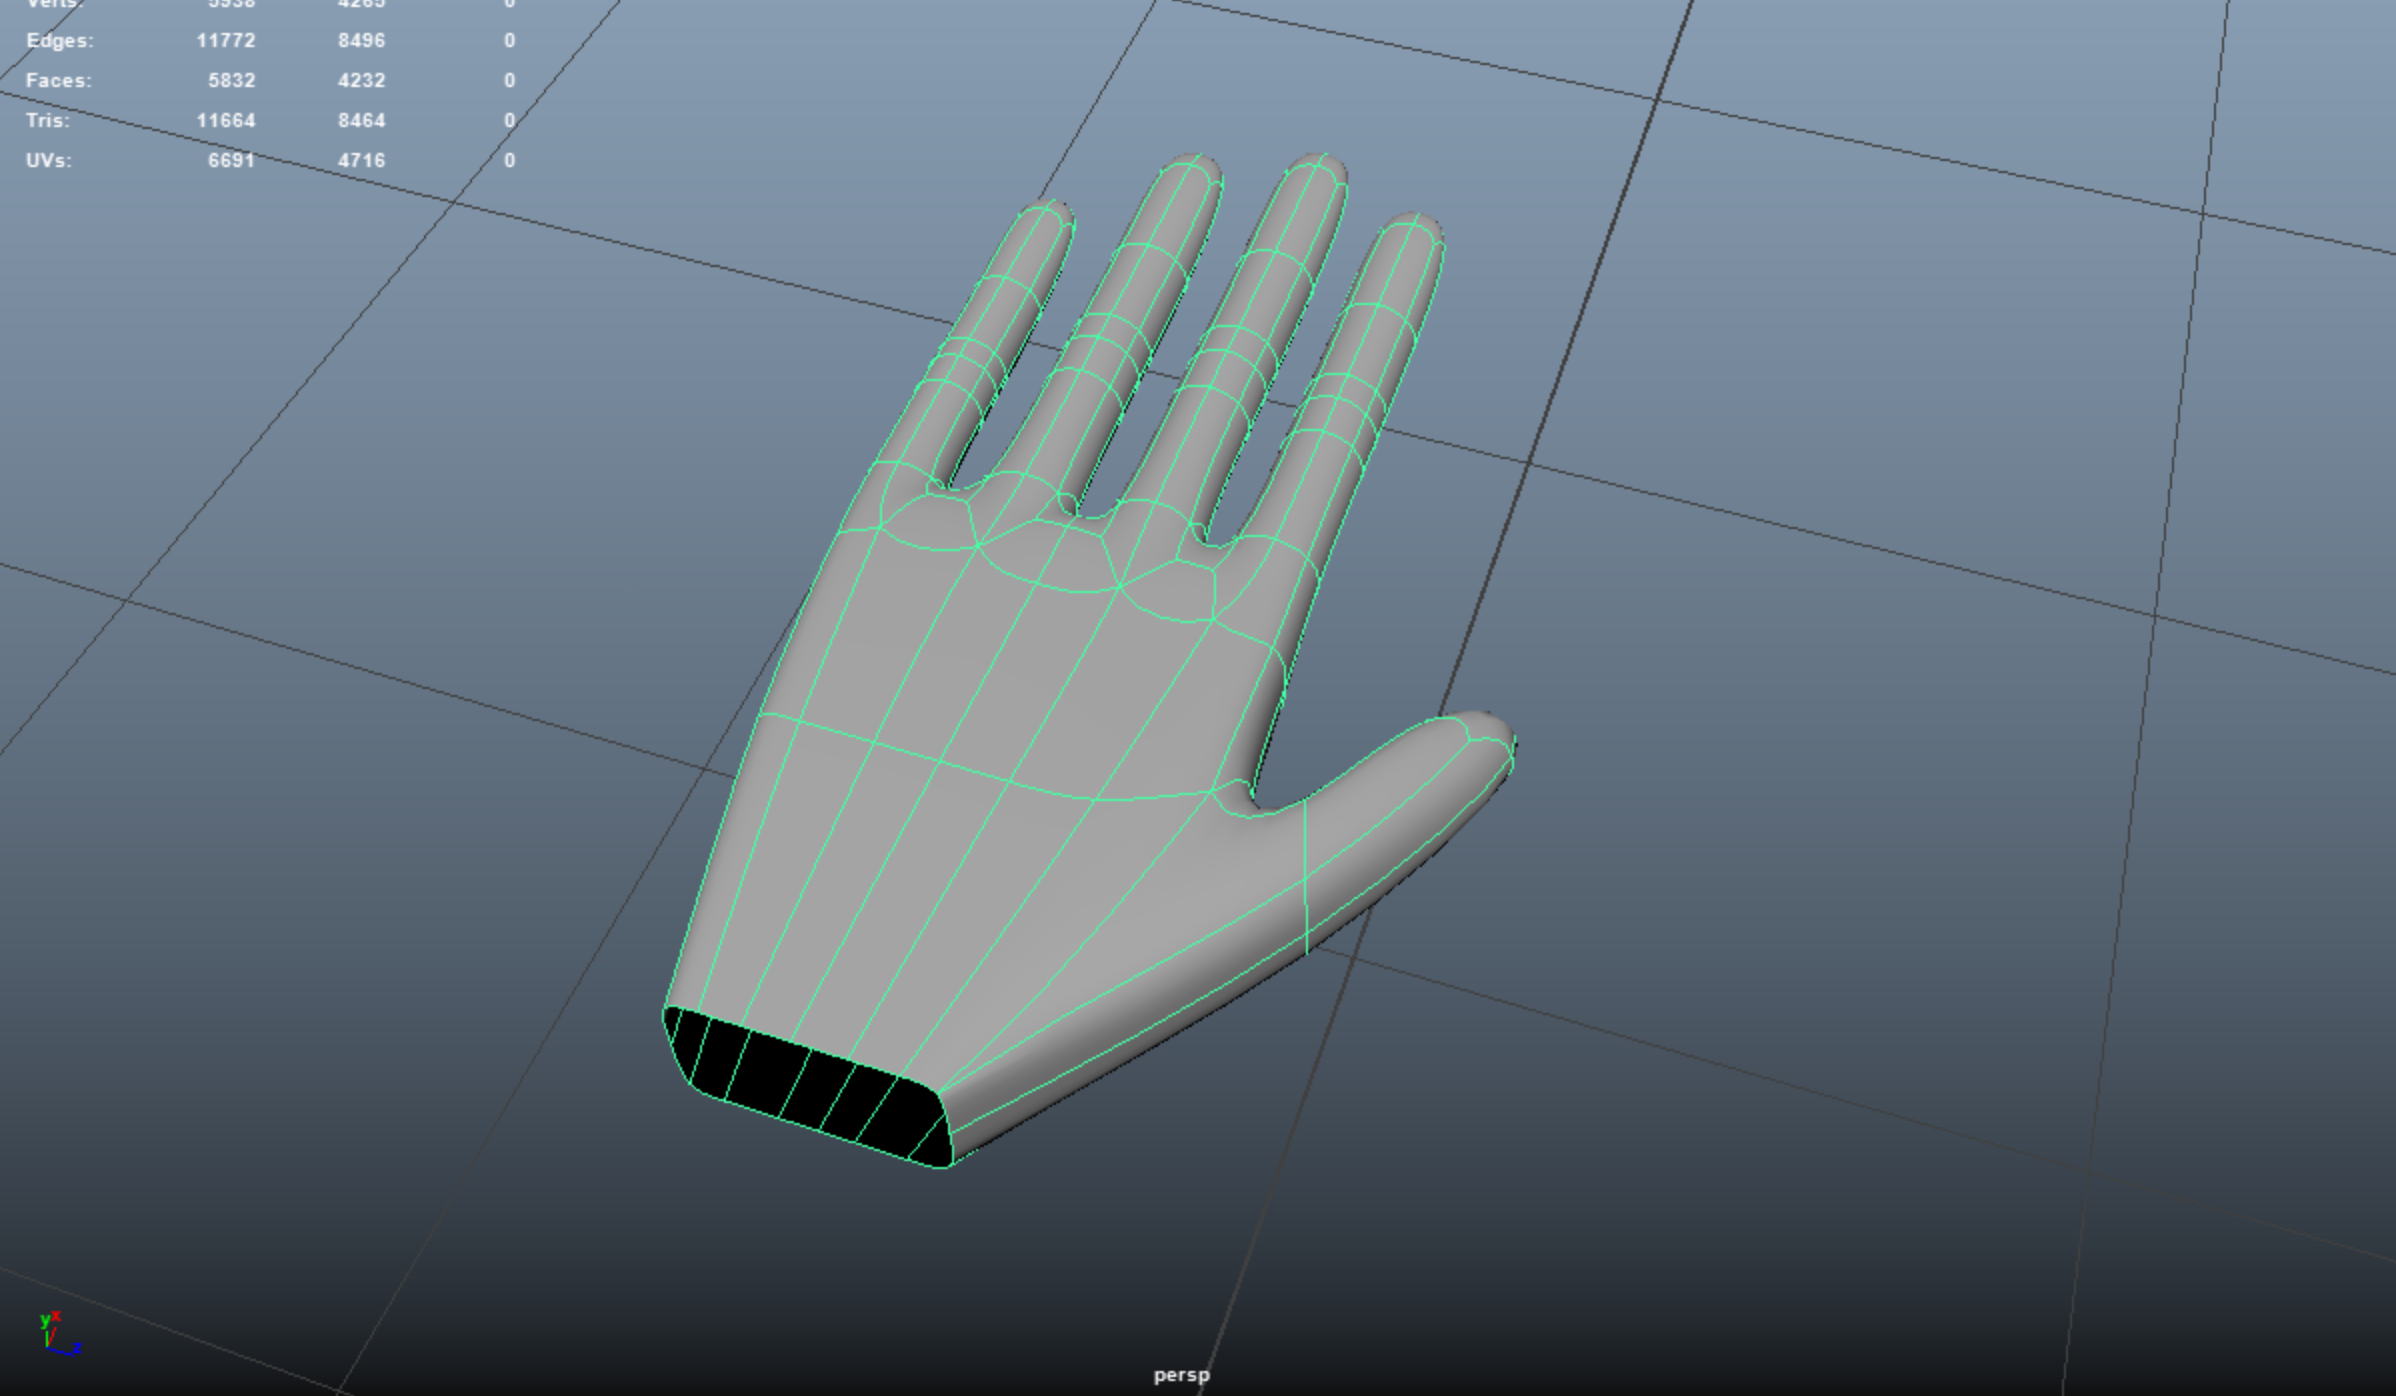
A new problem has arisen! Even after doing our topology-fixing multi-cutting, we still ended up with more than 8 vertices on the loop that we meant to stitch onto the arm. Luckily, I ended up with 16 vertices where I wanted to stitch the hand on. The hole on my arm has 8 vertices, which is exactly half the number of vertices as the hand. That means that we can use the Subdivide tool and end up with the correct number of vertices. Since the arm was meant to match the torso, we will also need to Subdivide the torso when we stitch the arms on.
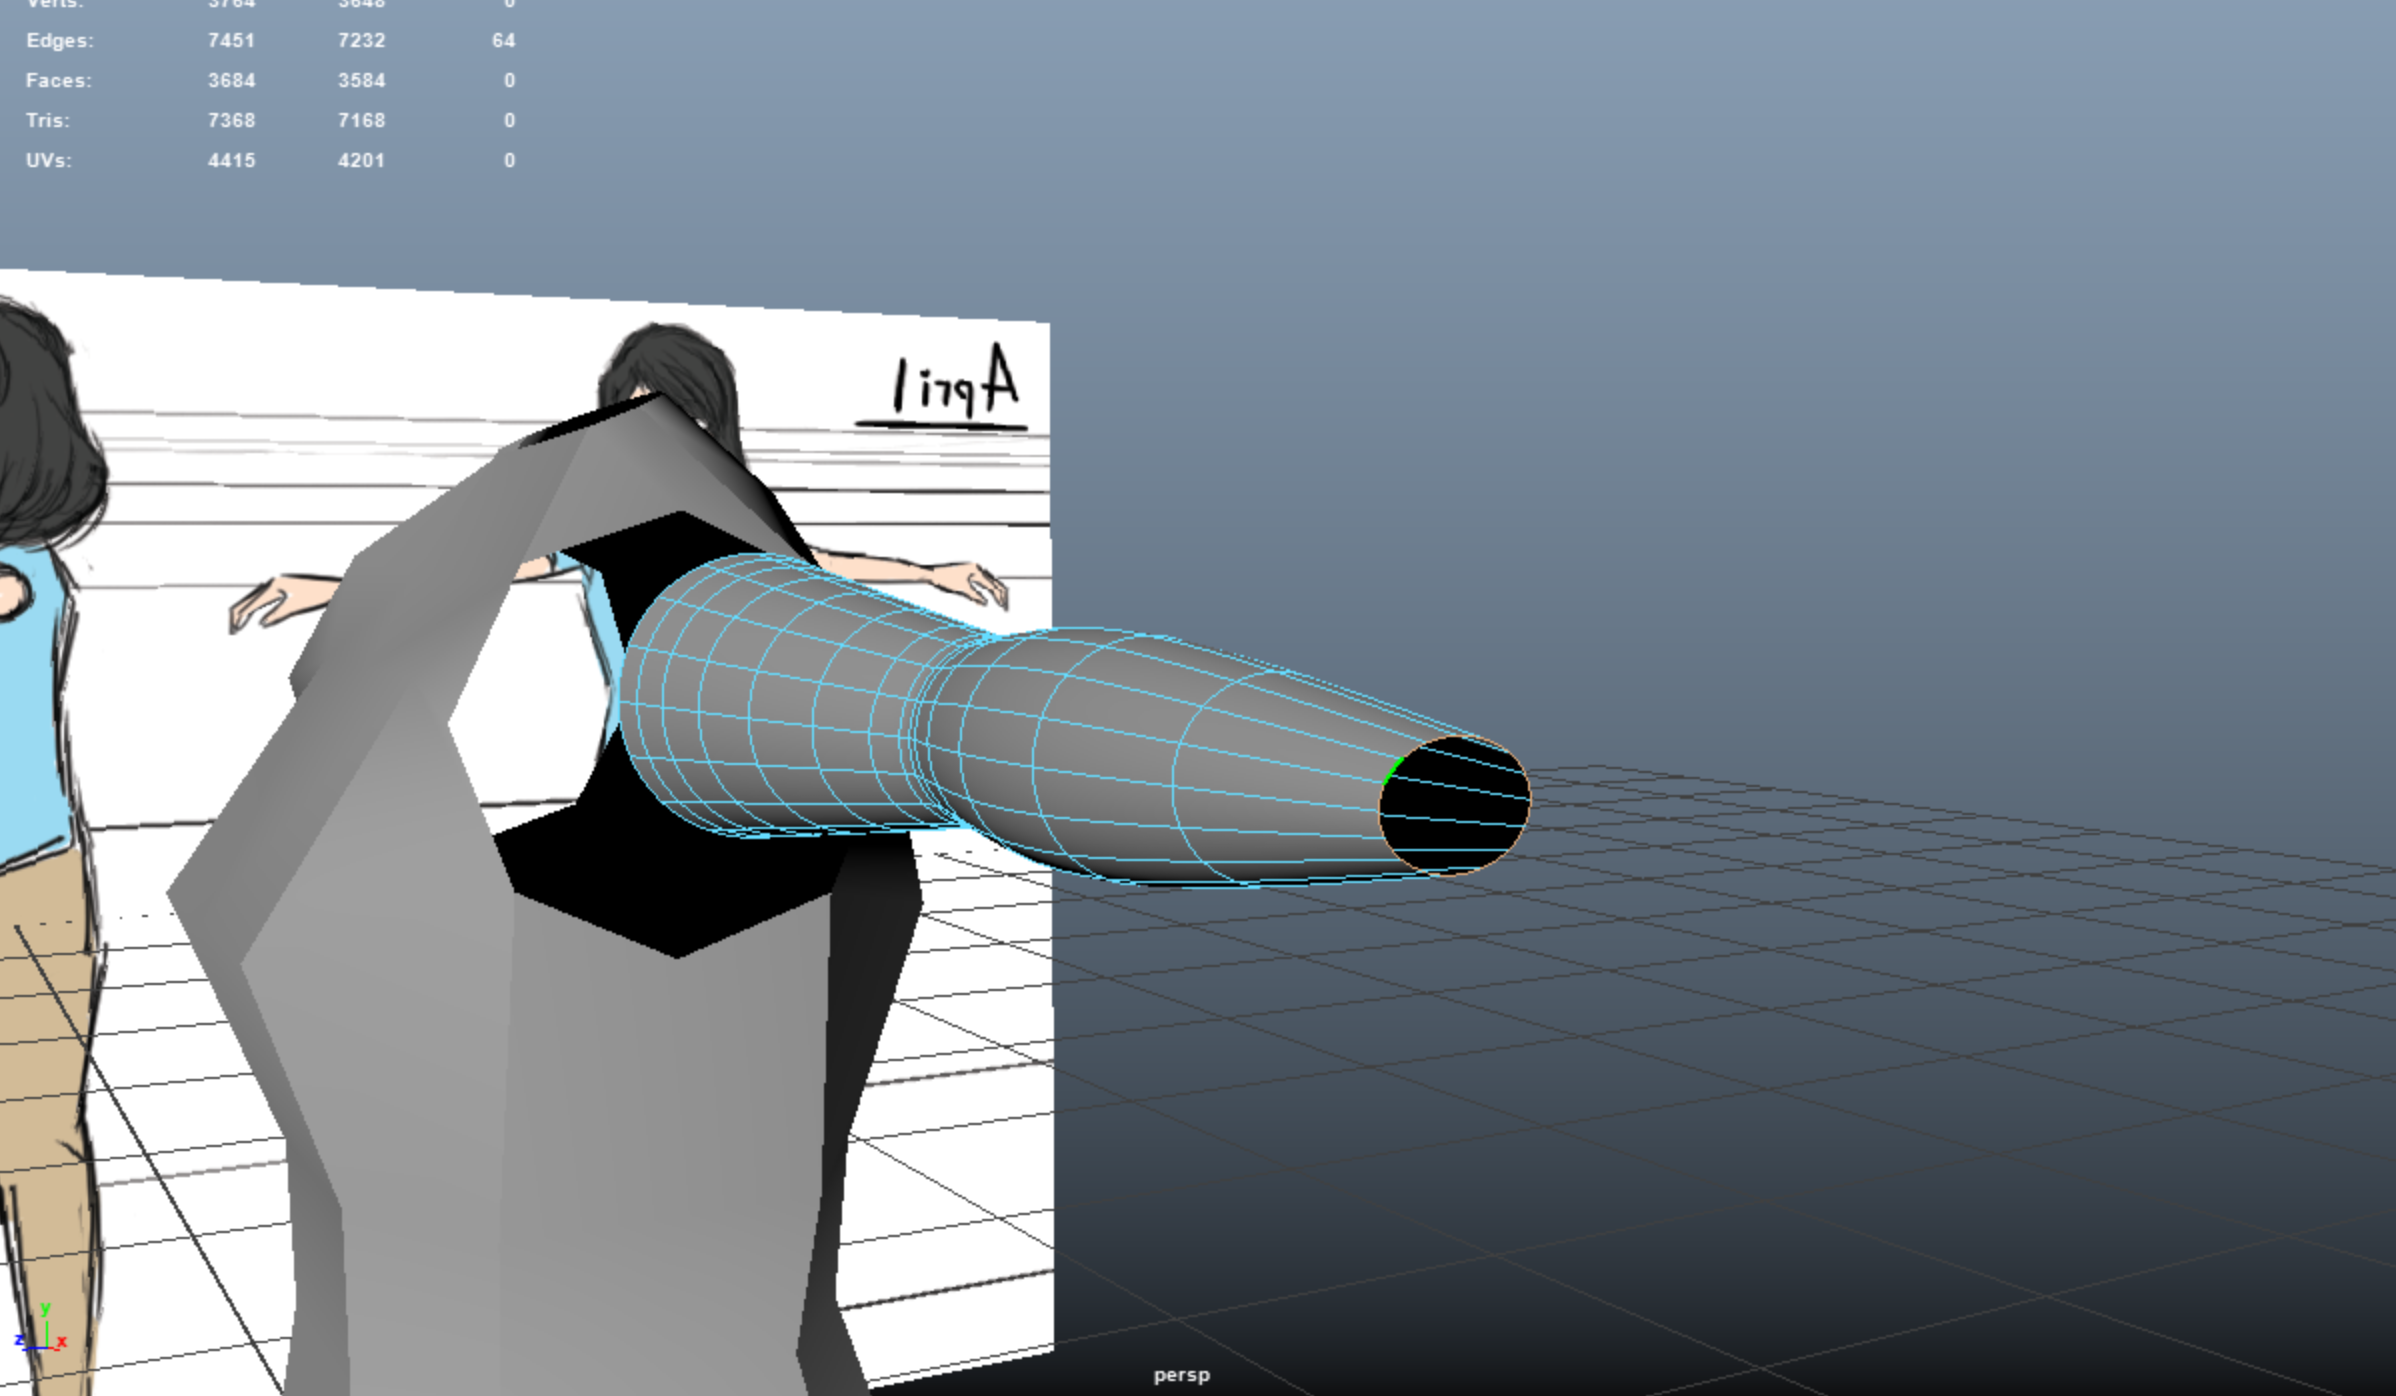
While this screenshot above doesn’t have vertices selected, we can use the Heads Up Display in Maya’s viewport to show the number of vertices (Verts) that we have selected. This is an easy way to verify that the holes on the meshes we’re stitching together have the same number of vertices.
Next, we’re going to stitch the arm onto the torso, then the hand onto the arm. My workflow here is again Combine then Target Weld.
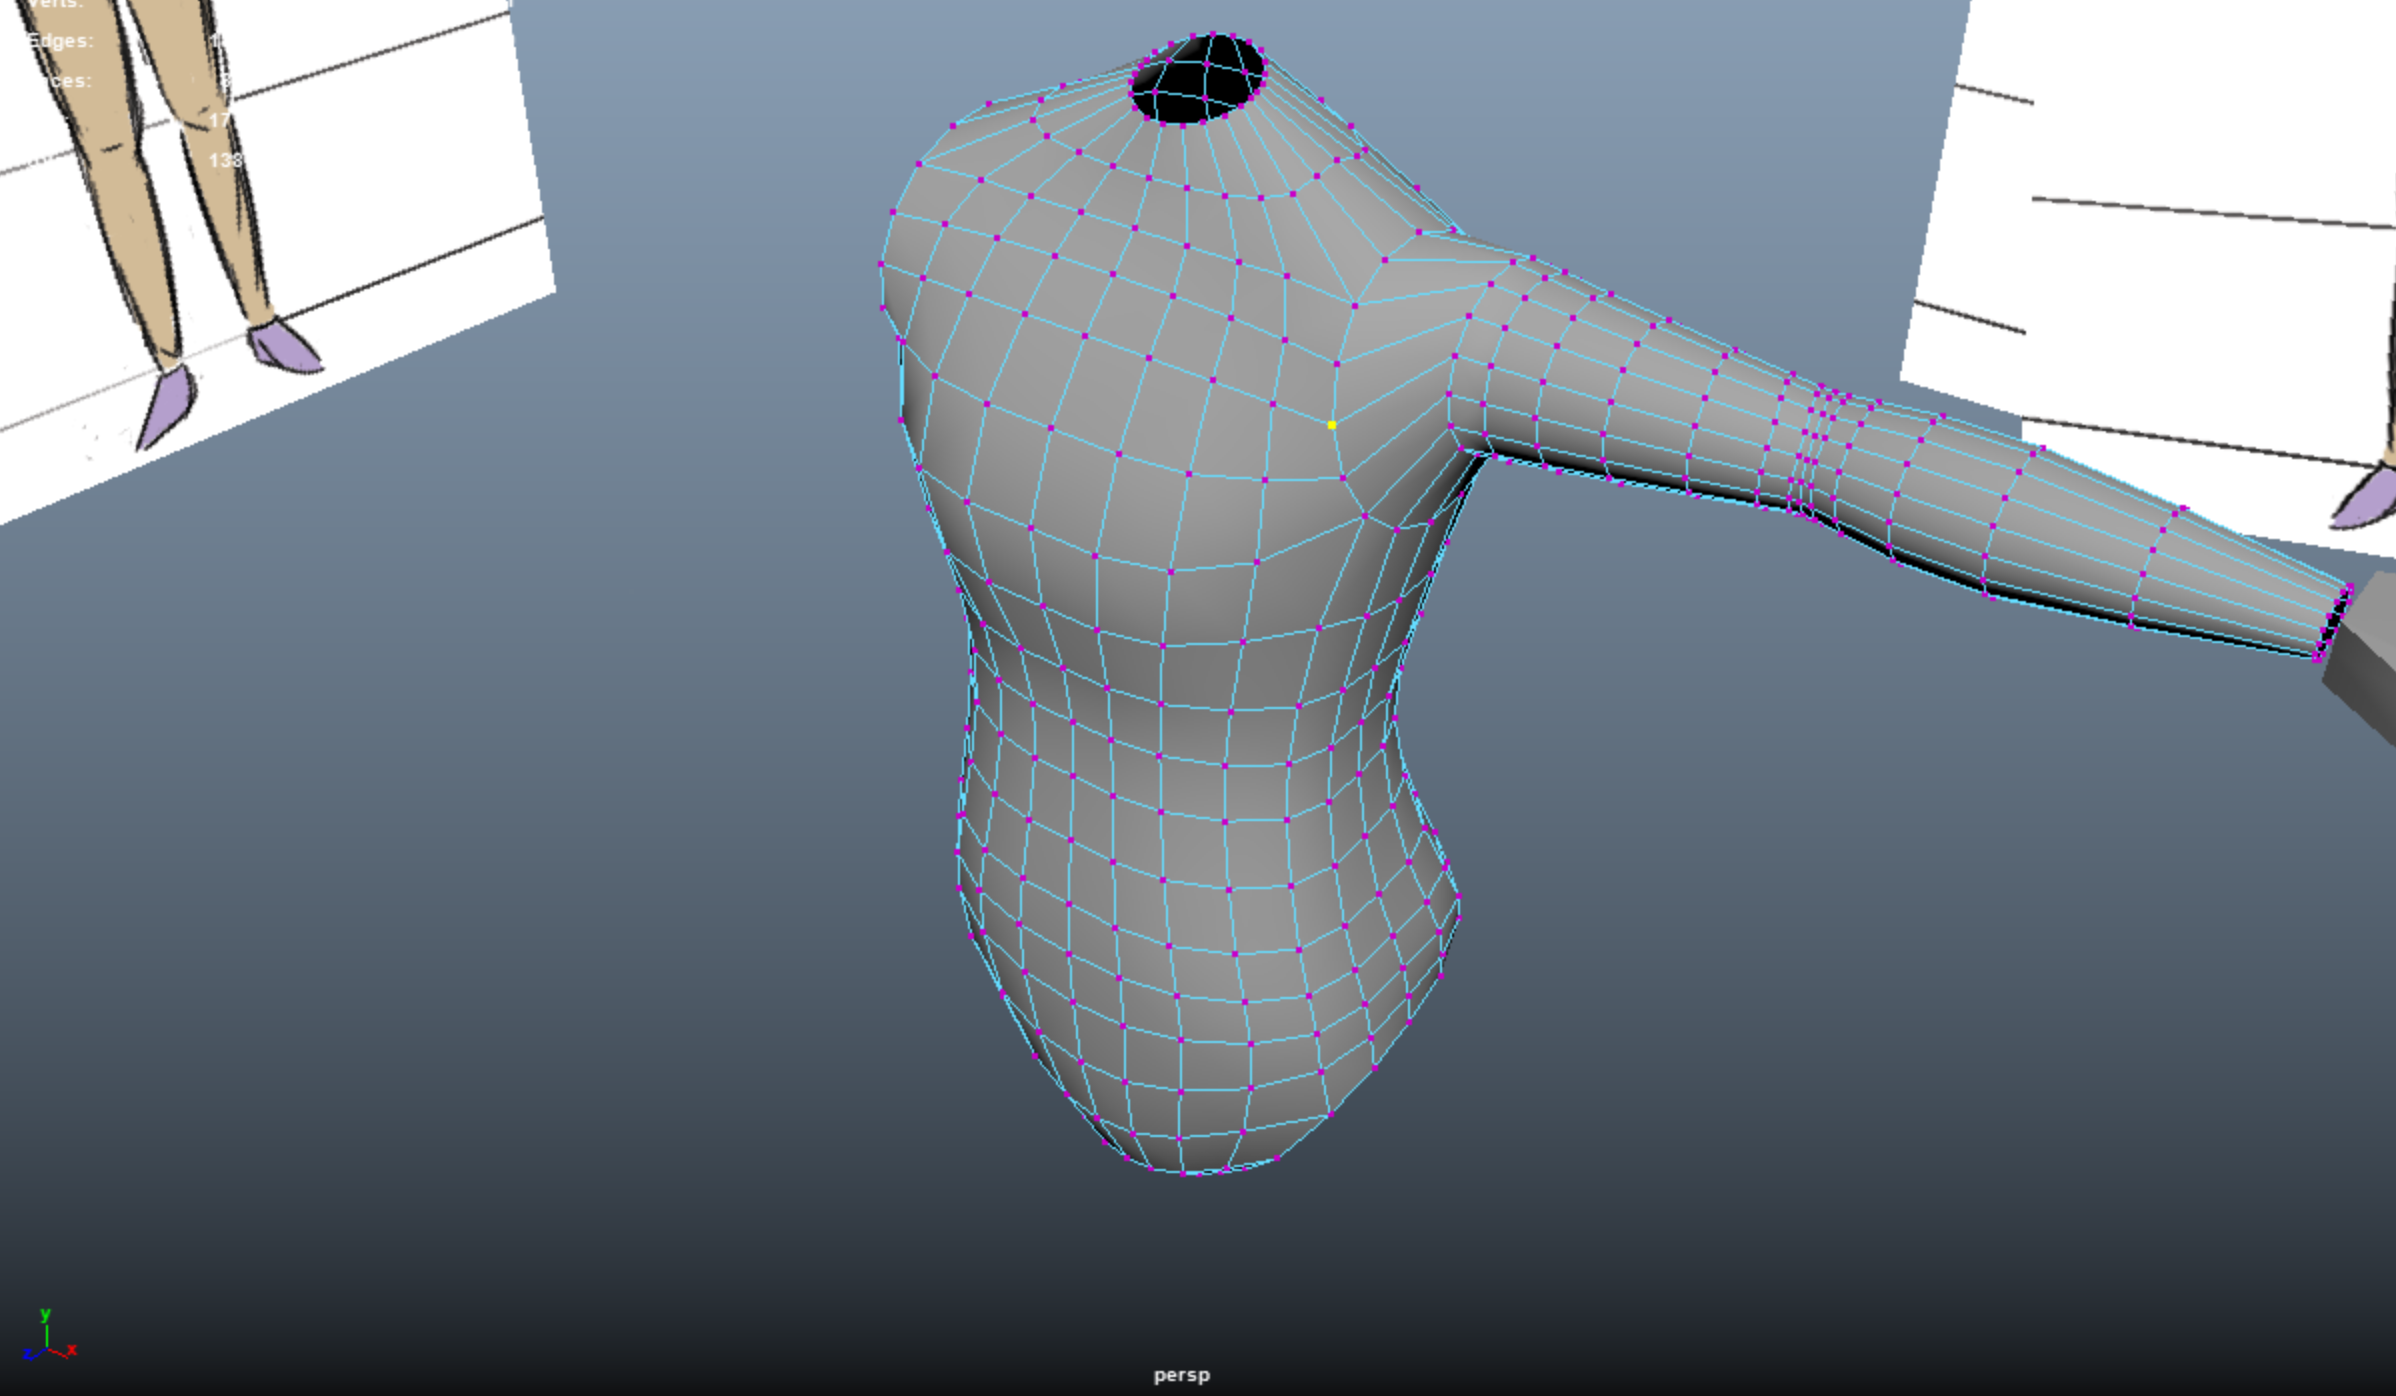
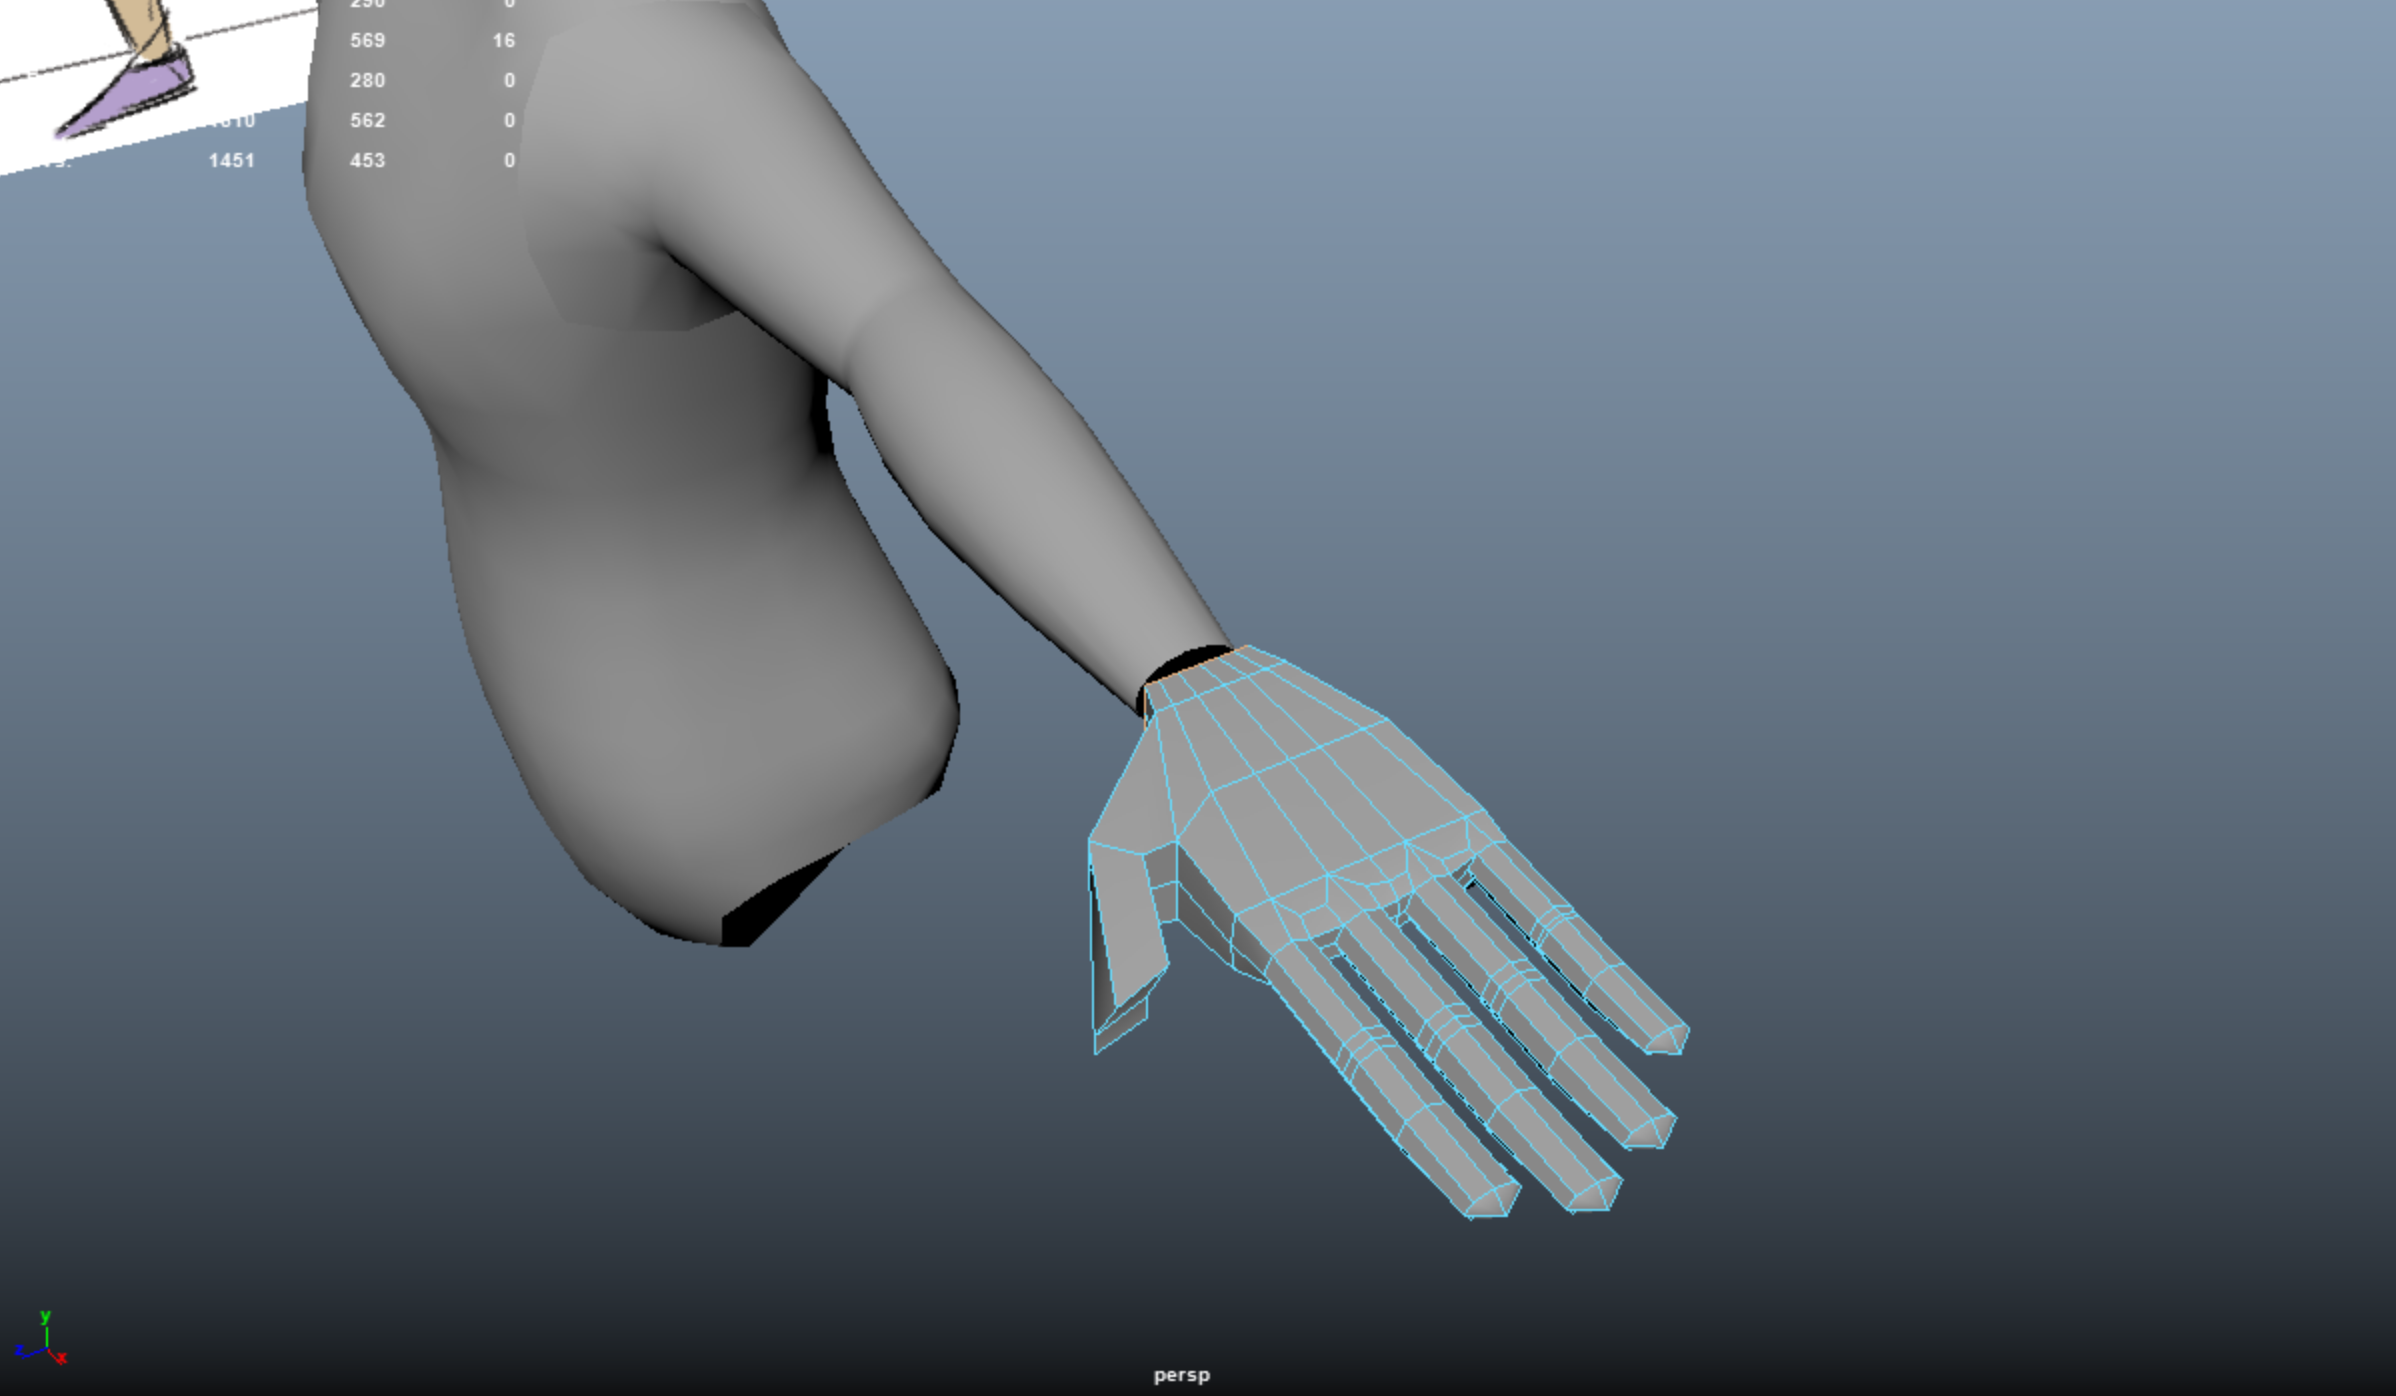
Spend some time to add more edge loops and fix up the mesh. One helpful tool for fixing wonky looking faces is the Relax tool, found in the Sculpting shelf. This tool tries to regularize the faces within the brush radius, making the topology more regular and reducing the number of weirdly shaped faces on your mesh.
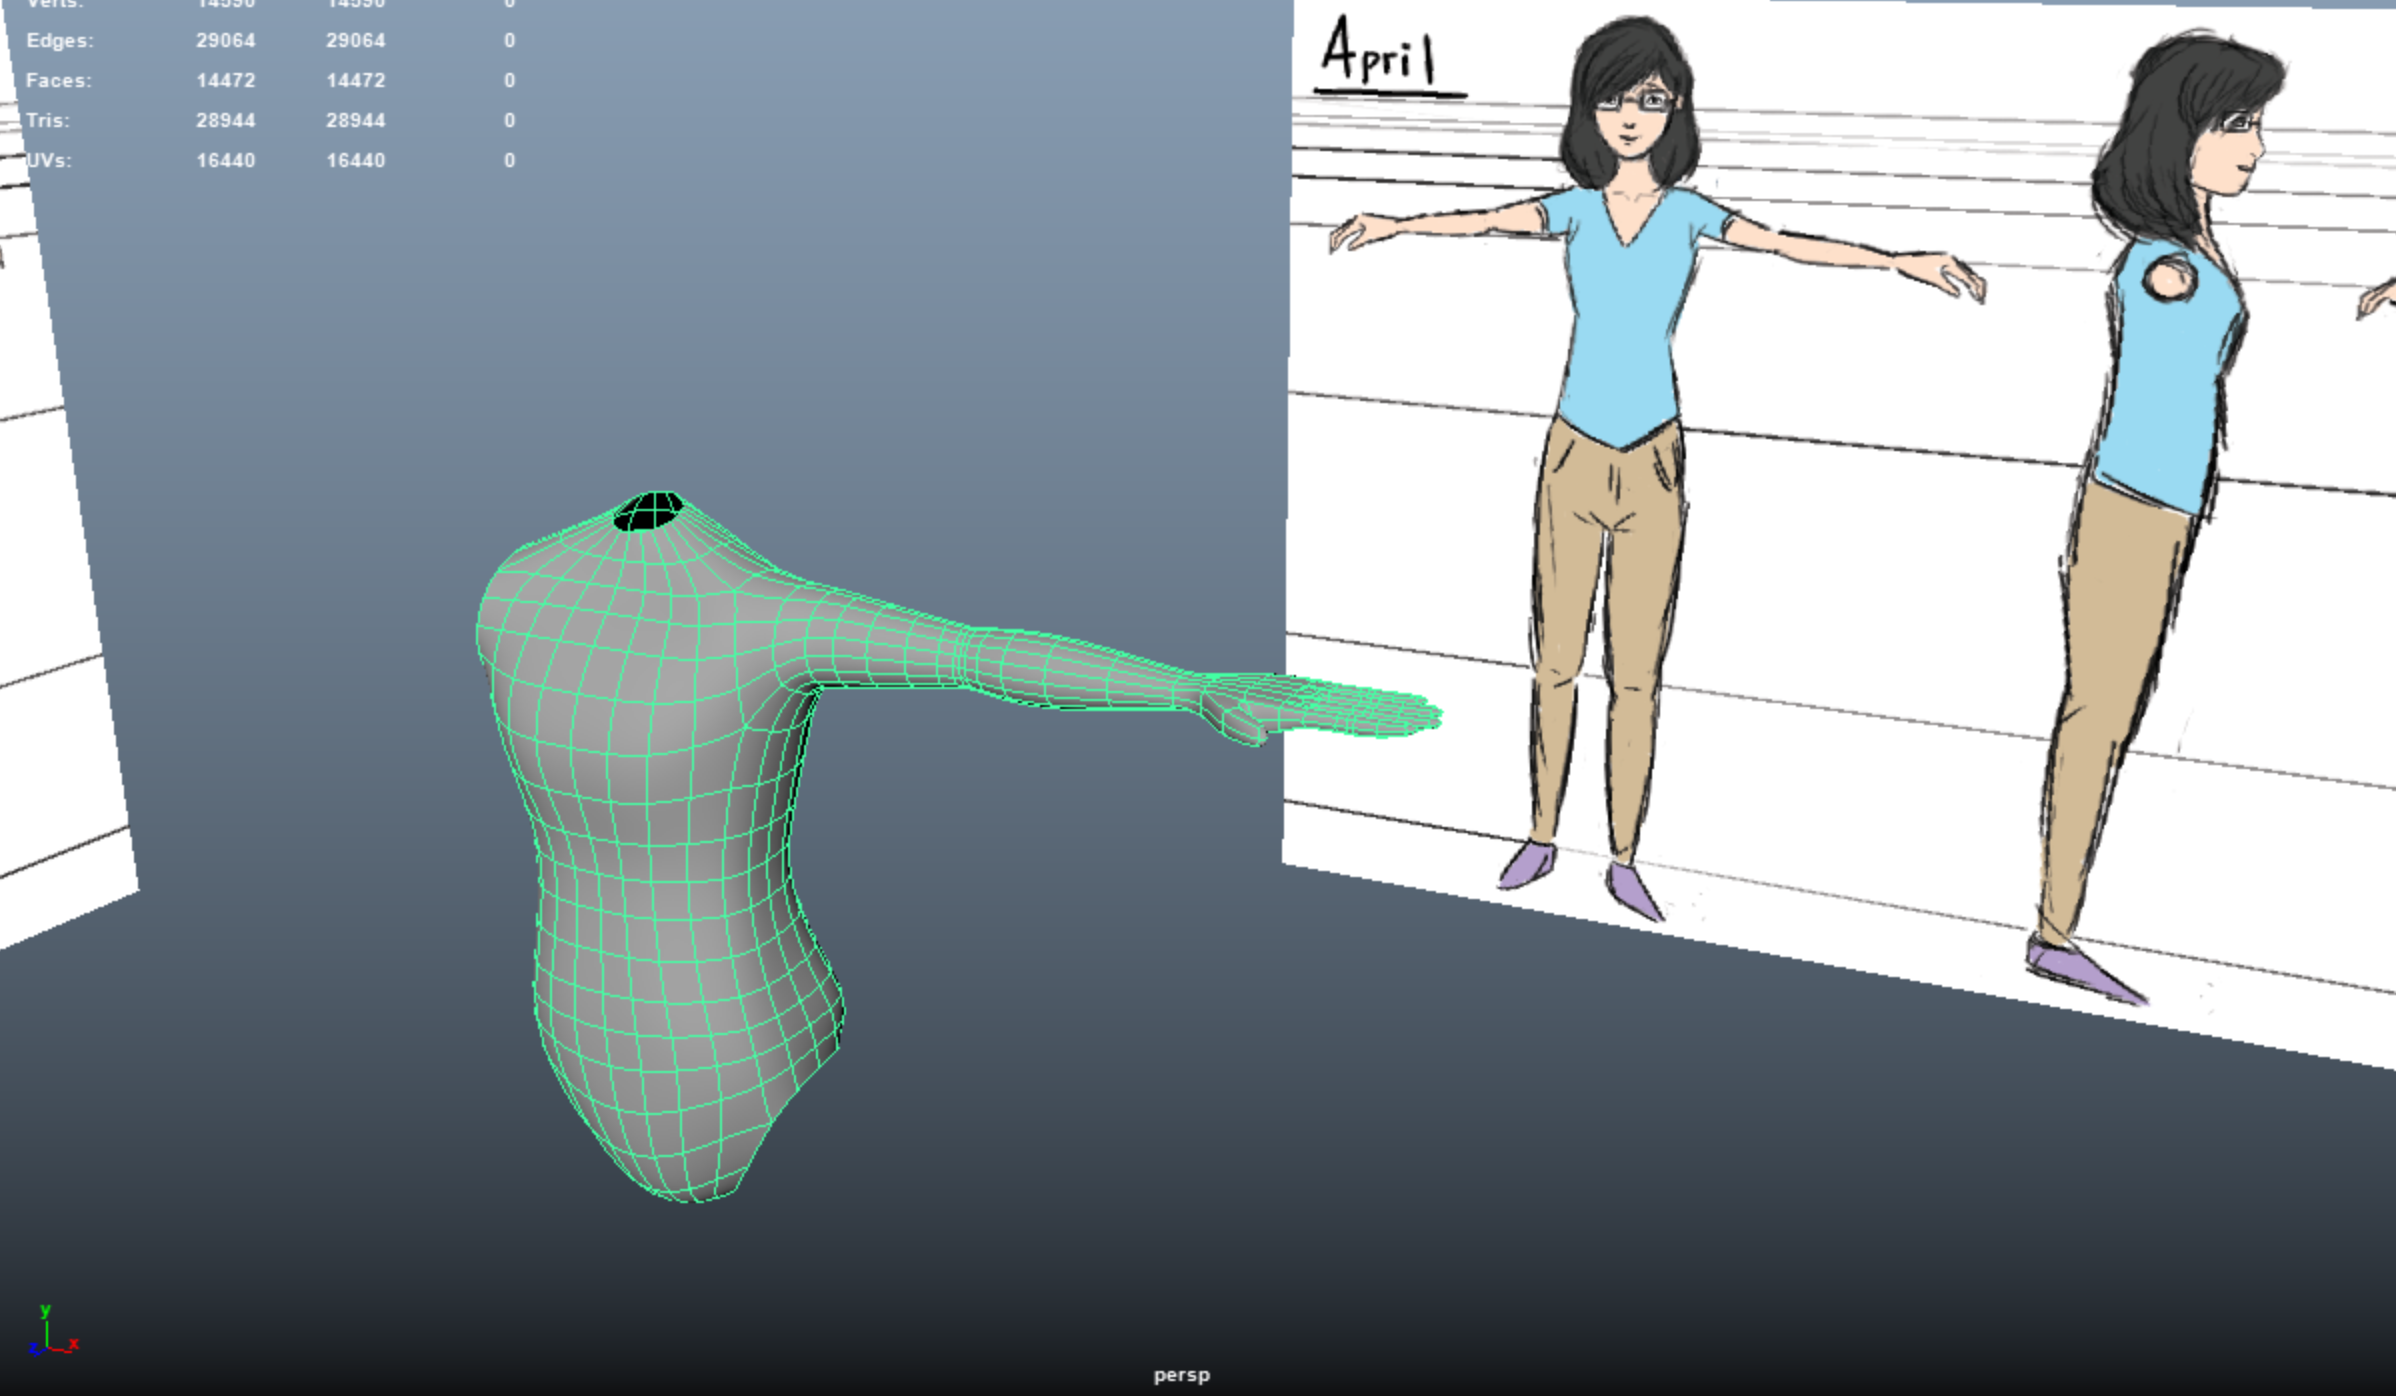
After finishing, I deleted half the mesh and mirrored it. Since our model is starting to get more complex, be wary of the Threshold setting when you merge—make sure that it’s high enough that it’ll merge all vertices across the border of the Mirrored geometry, but not so high that it combines vertices that you didn’t intend to combine. Before mirroring, always check that you have no overlapping / touching vertices when in hard surface mode (1 mode).
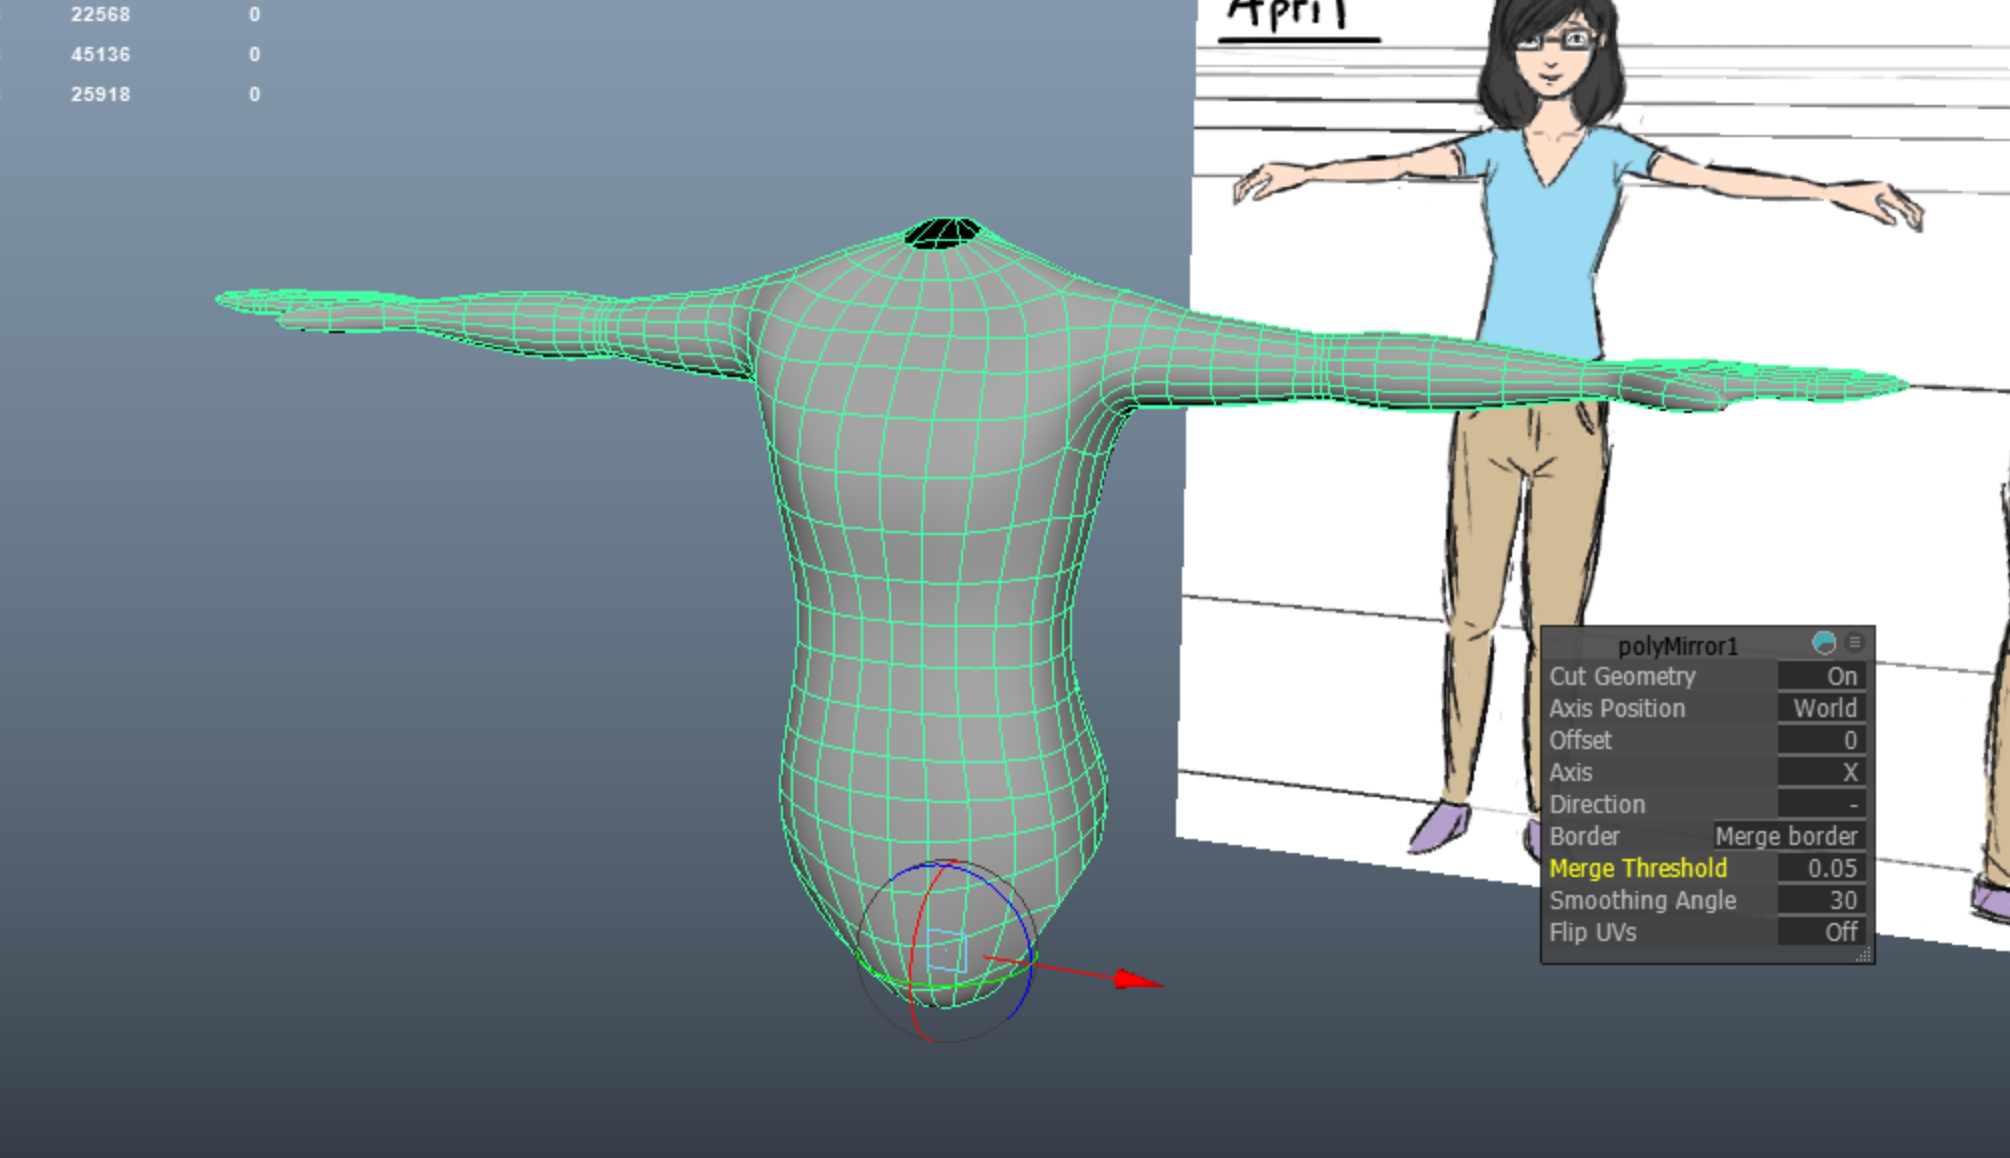
I did a few more touch-ups to better define the areas where I sewed stuff on (such as creating a more defined armpit), and there’s definitely more that can be done! But for now, here’s our torso with our arms and hands attached.
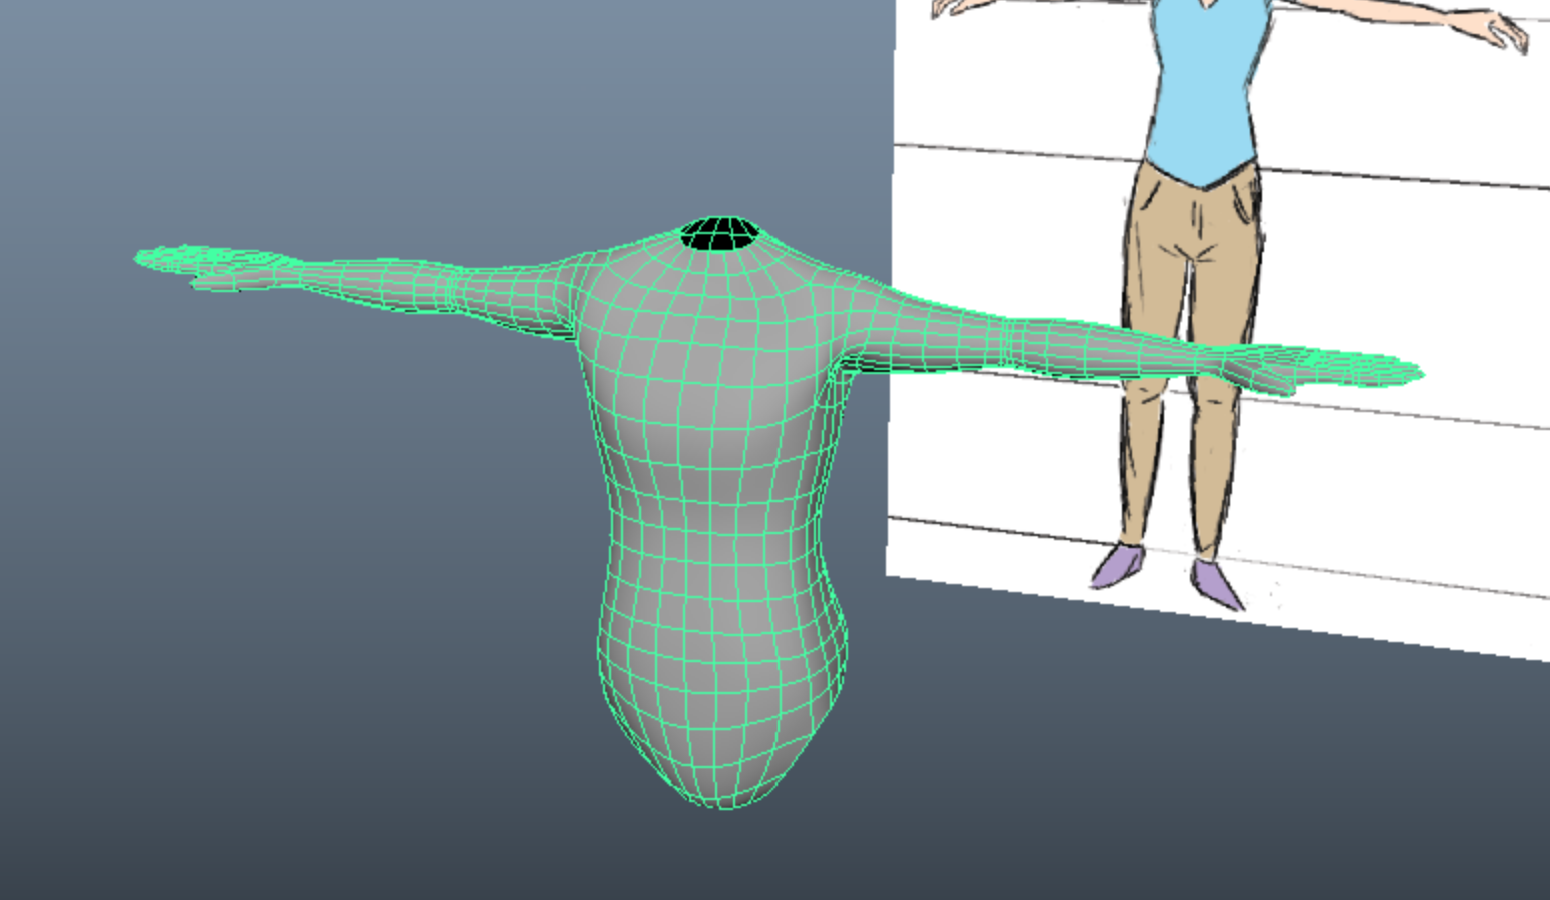
CREATING THE LEGS AND FEET
Honestly, a lot of the process for creating the legs is pretty similar to making the arms, so I’ll just drop these screenshots here and have brief explanations for the steps in between.
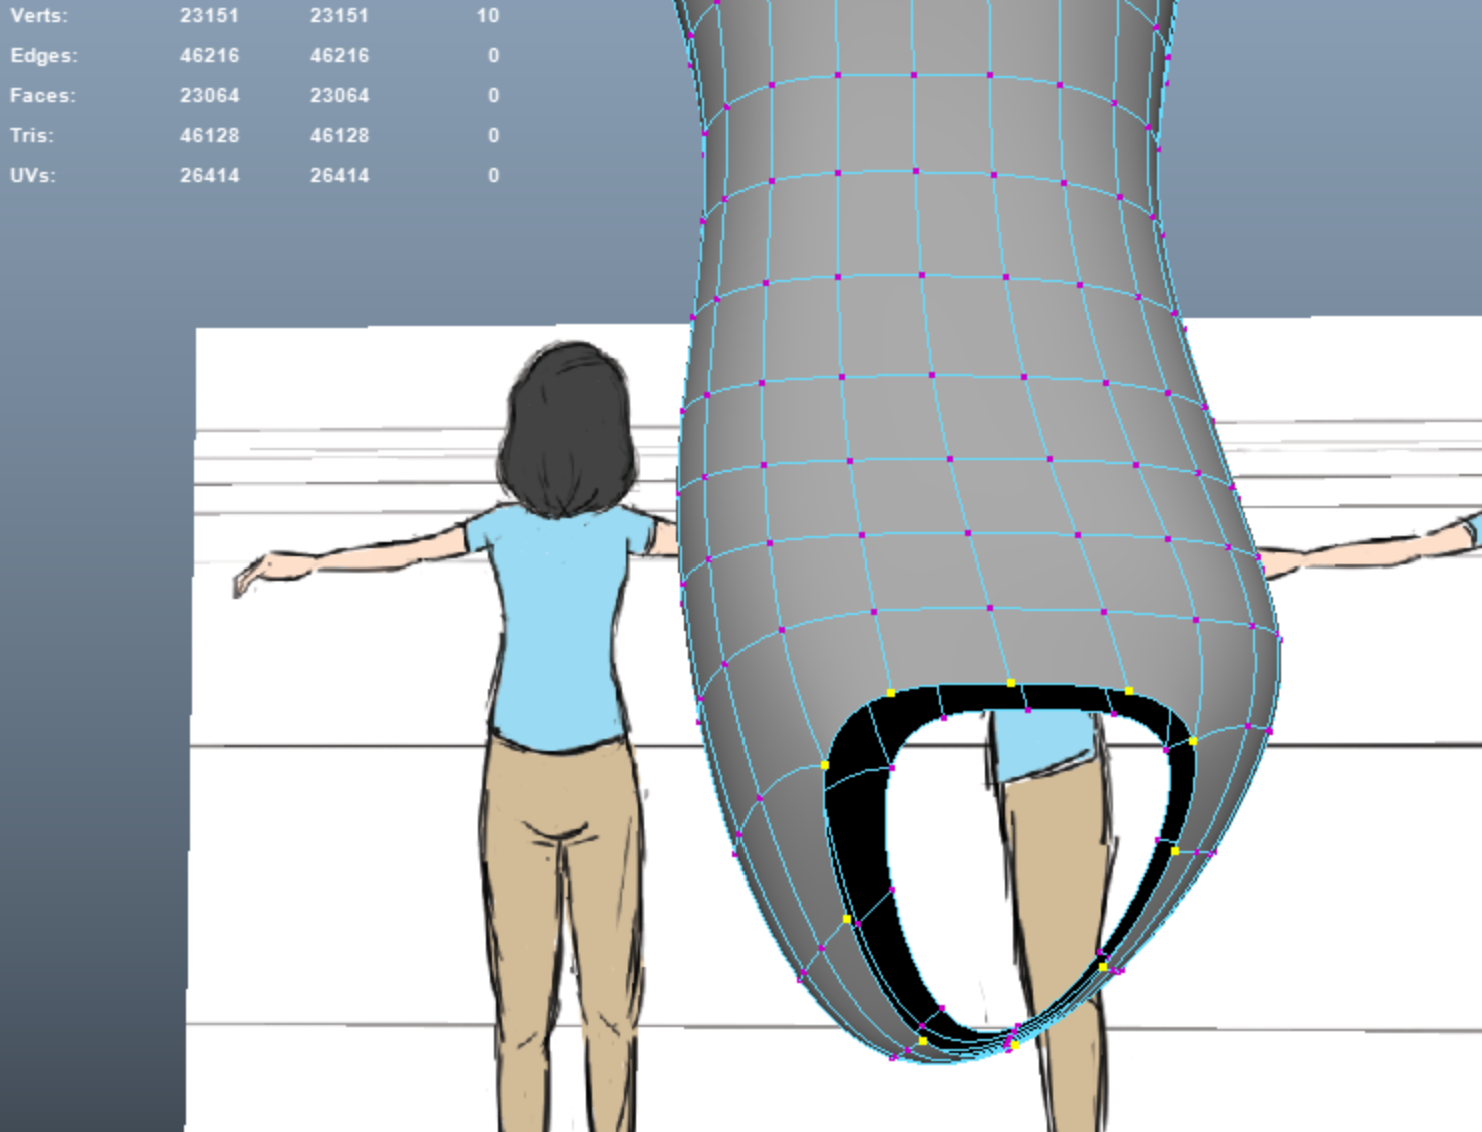
Let’s count the vertices at the hole and create a cylinder accordingly. We’ll position this cylinder and extrude it down in the shape of a leg, following the model sheets.
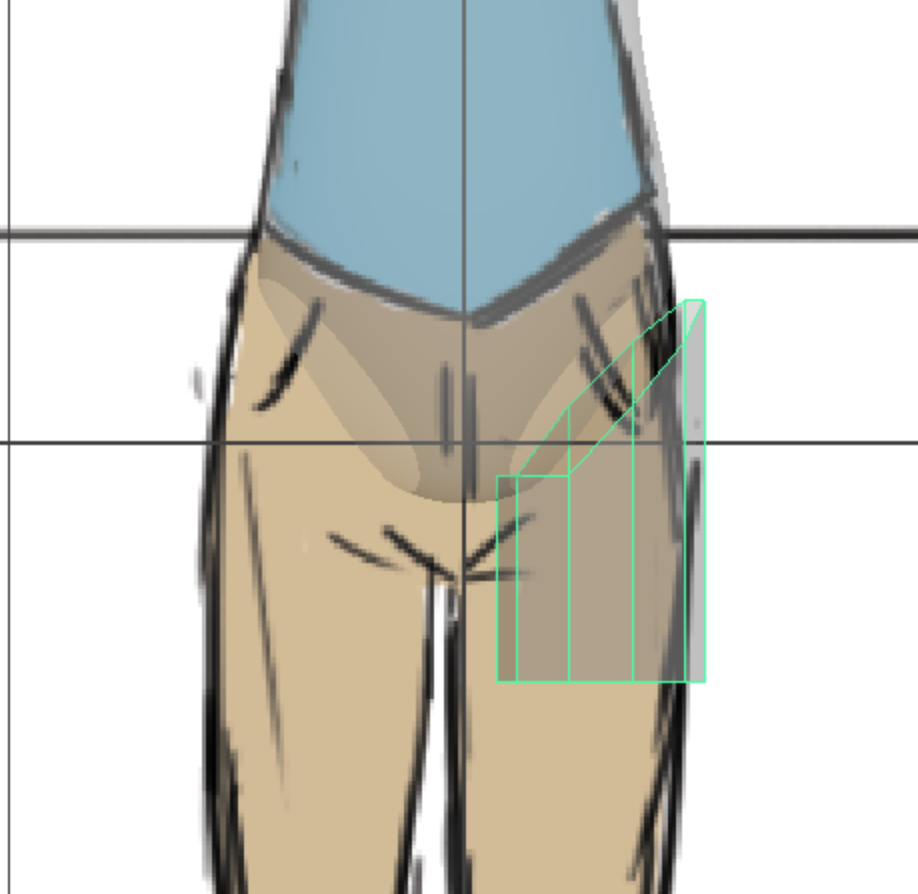
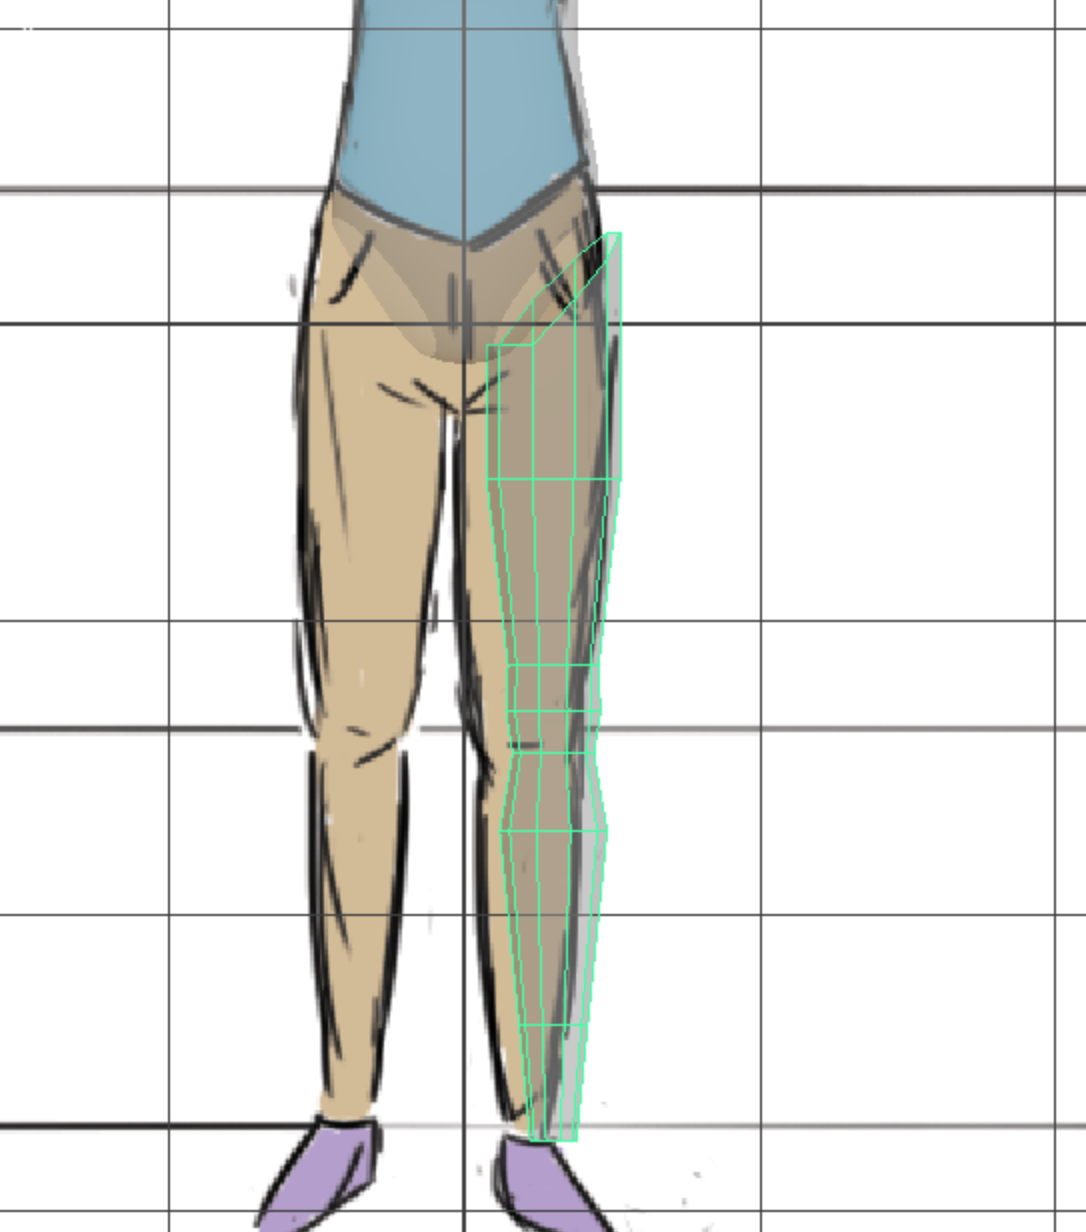
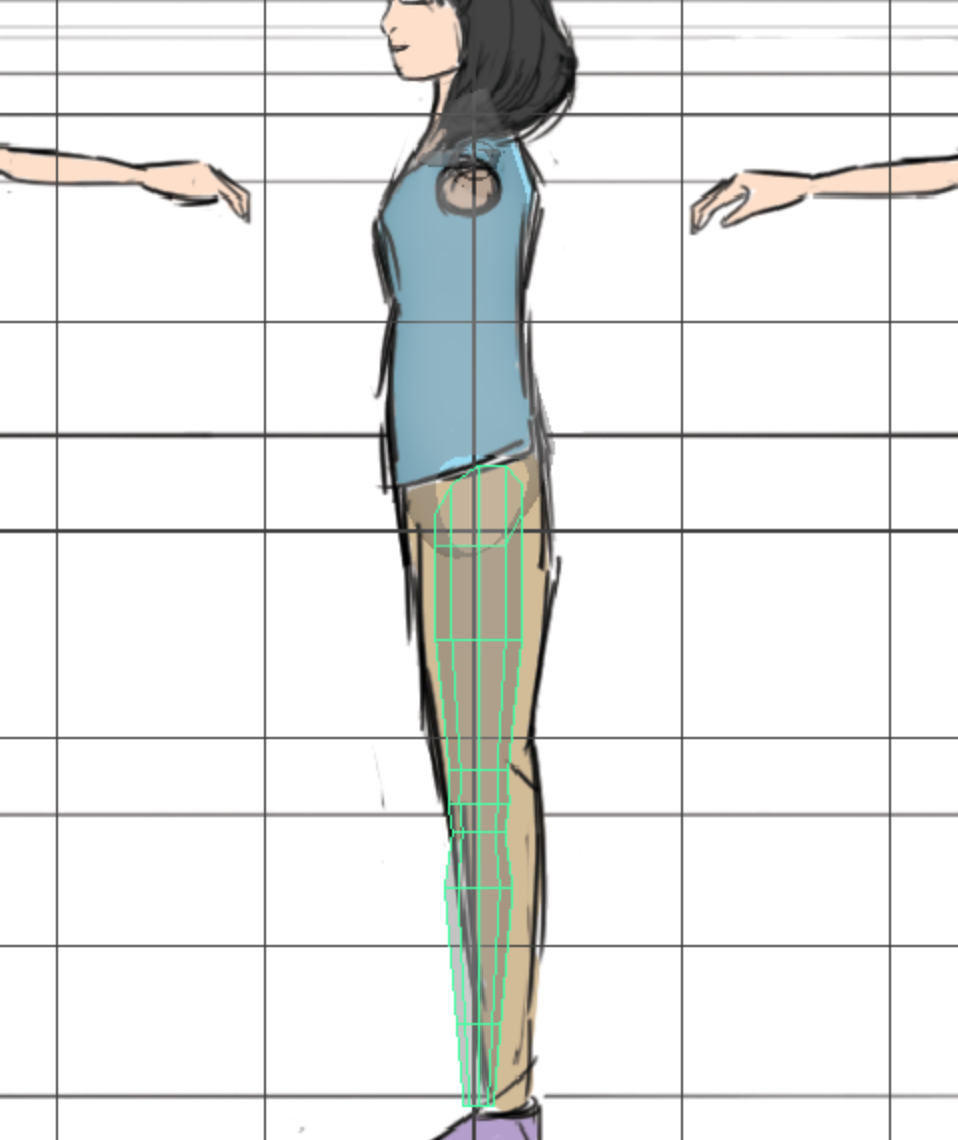
After some adjusting, let’s sew this leg on. After sewing, we can mirror so that our model can have two legs.
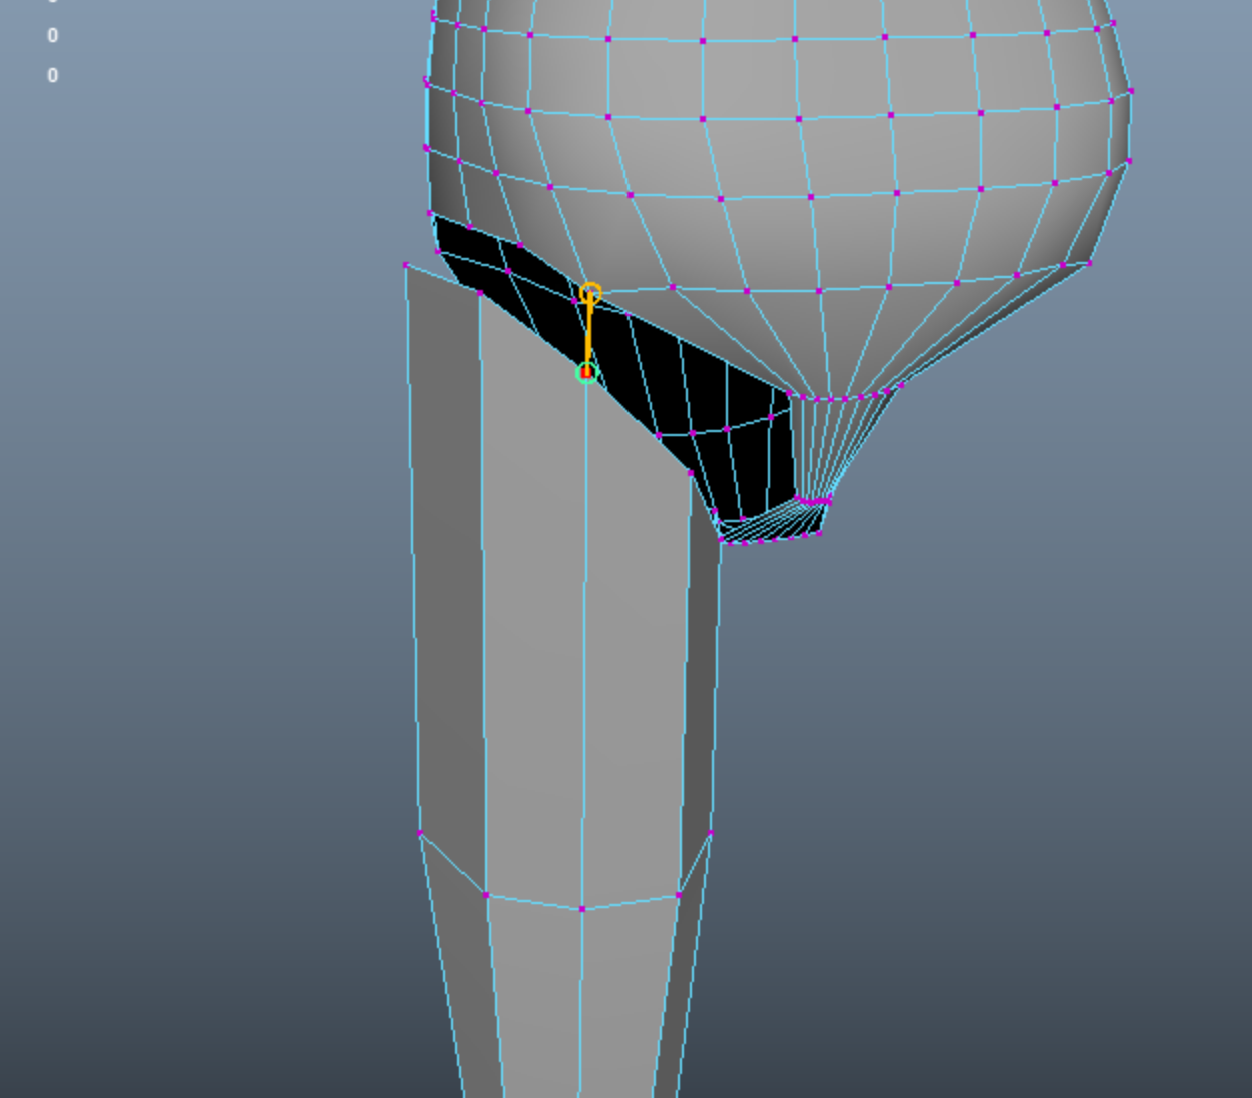
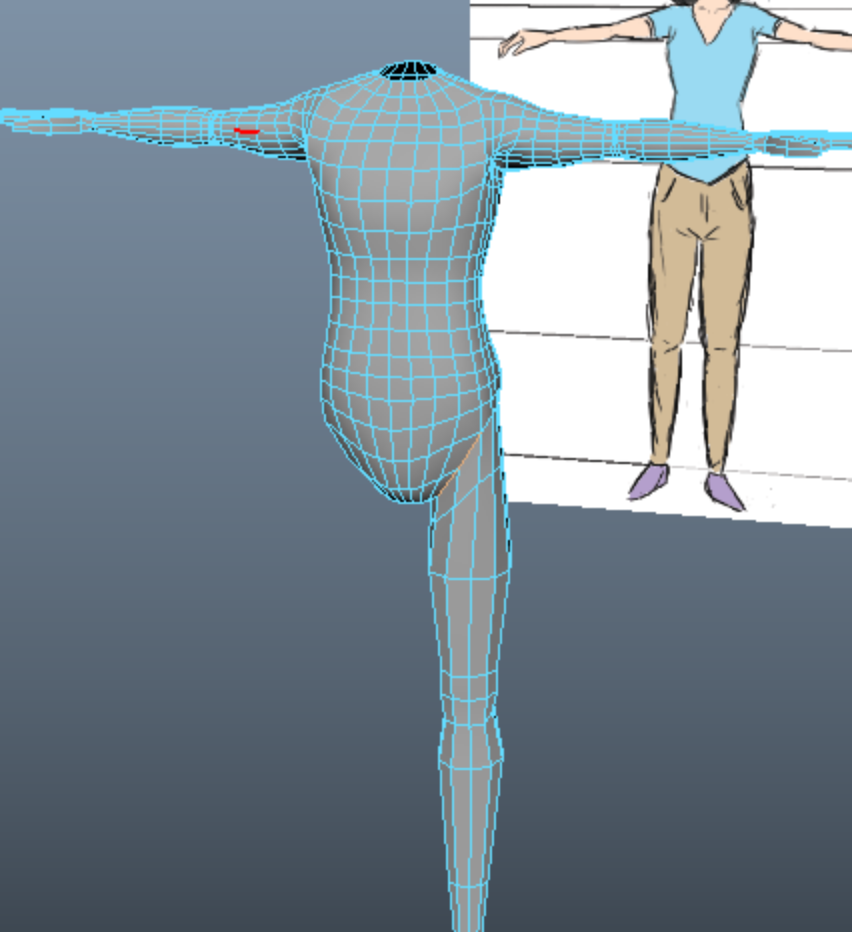
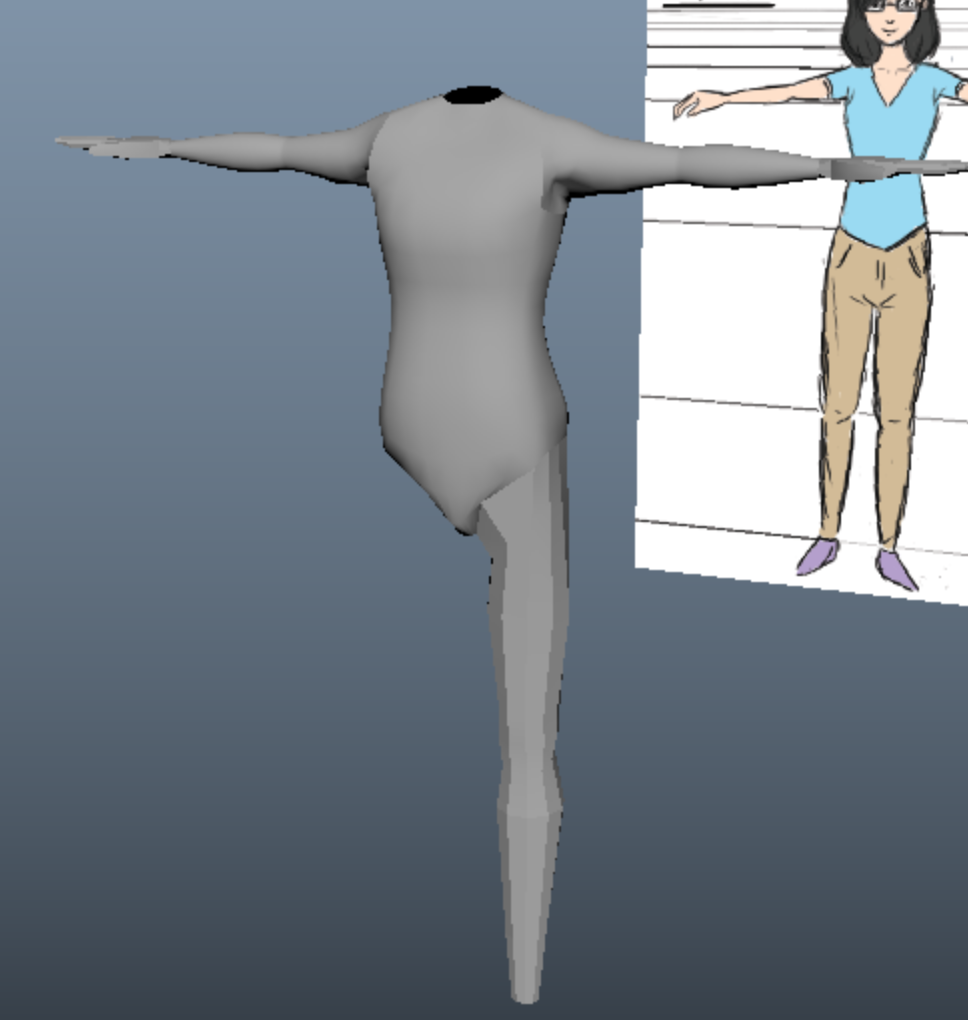
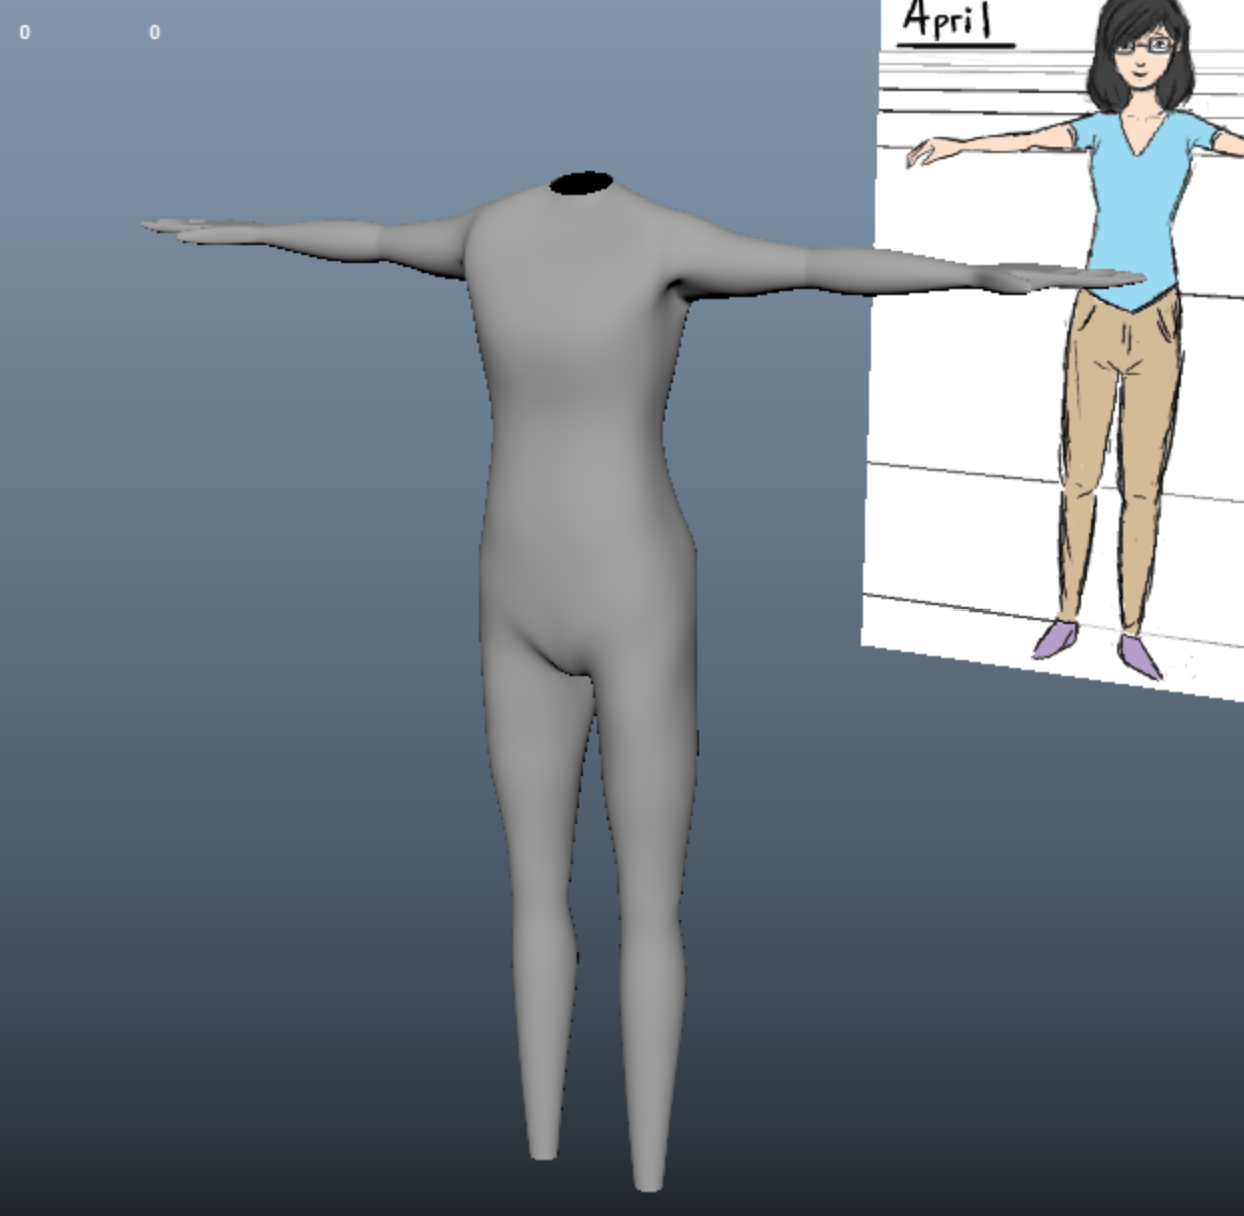
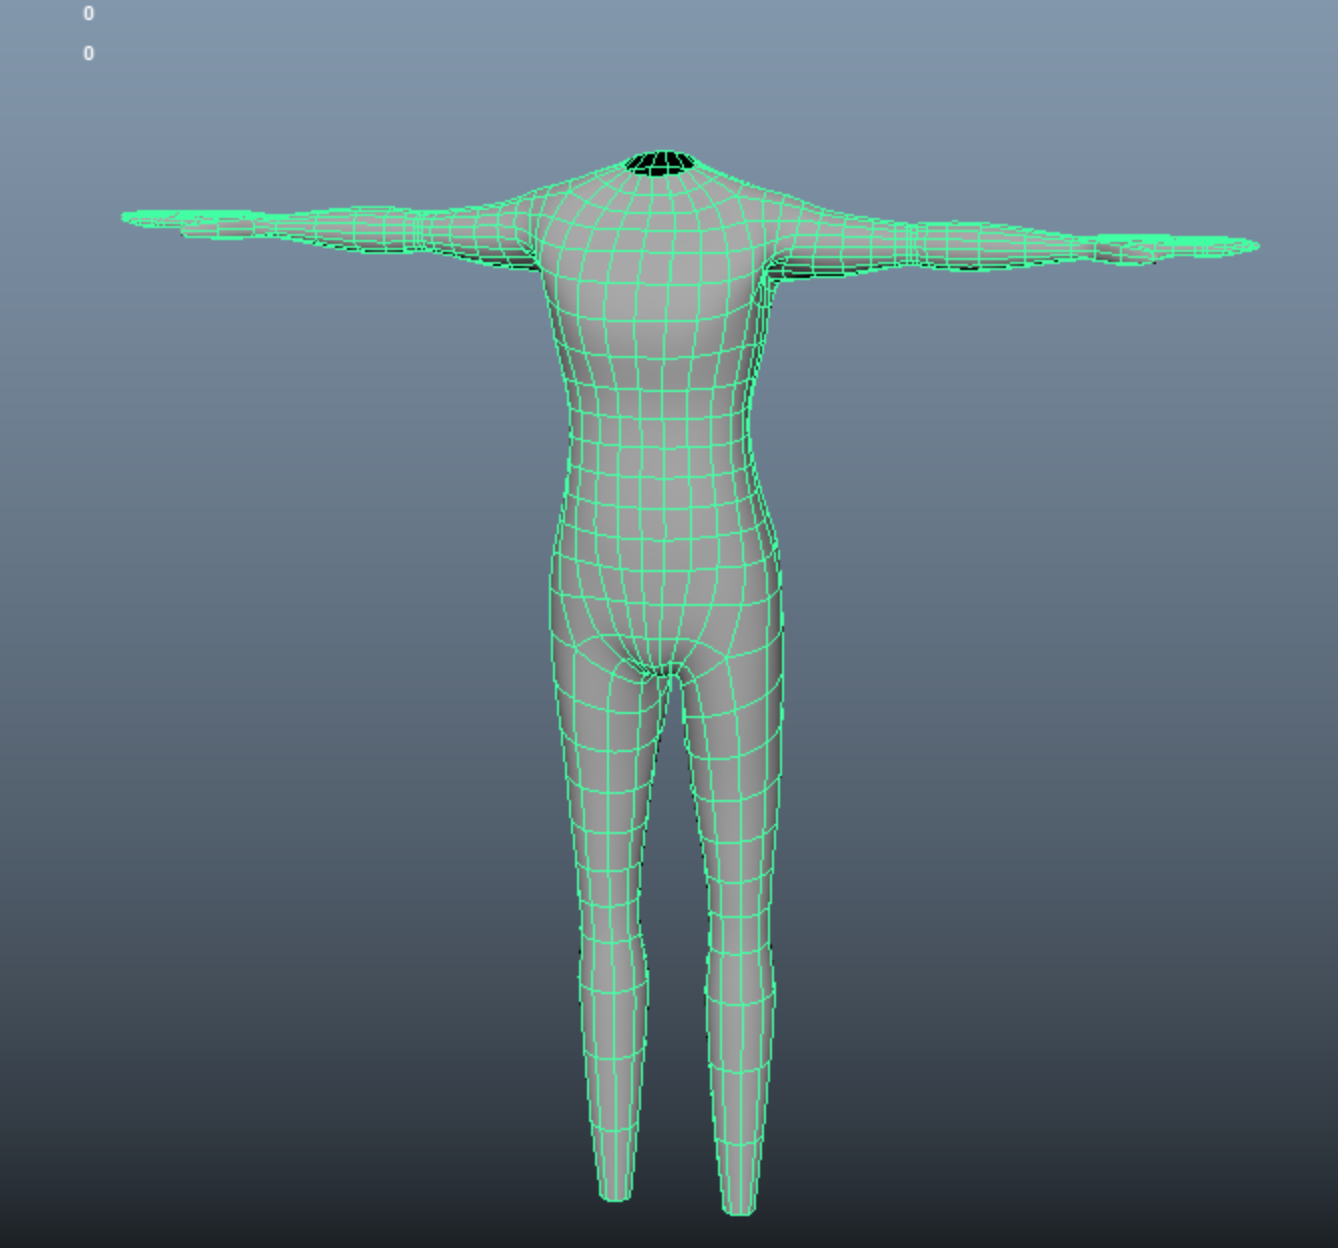
Let’s get started on the feet. I extruded down the bottoms of each leg, following the model sheet. Feet flare out from the ankles, so make sure to capture the general shape of things, even in a blocky way. Looking up reference images of feet can be really helpful, even if it may yield some…strange Google search results.
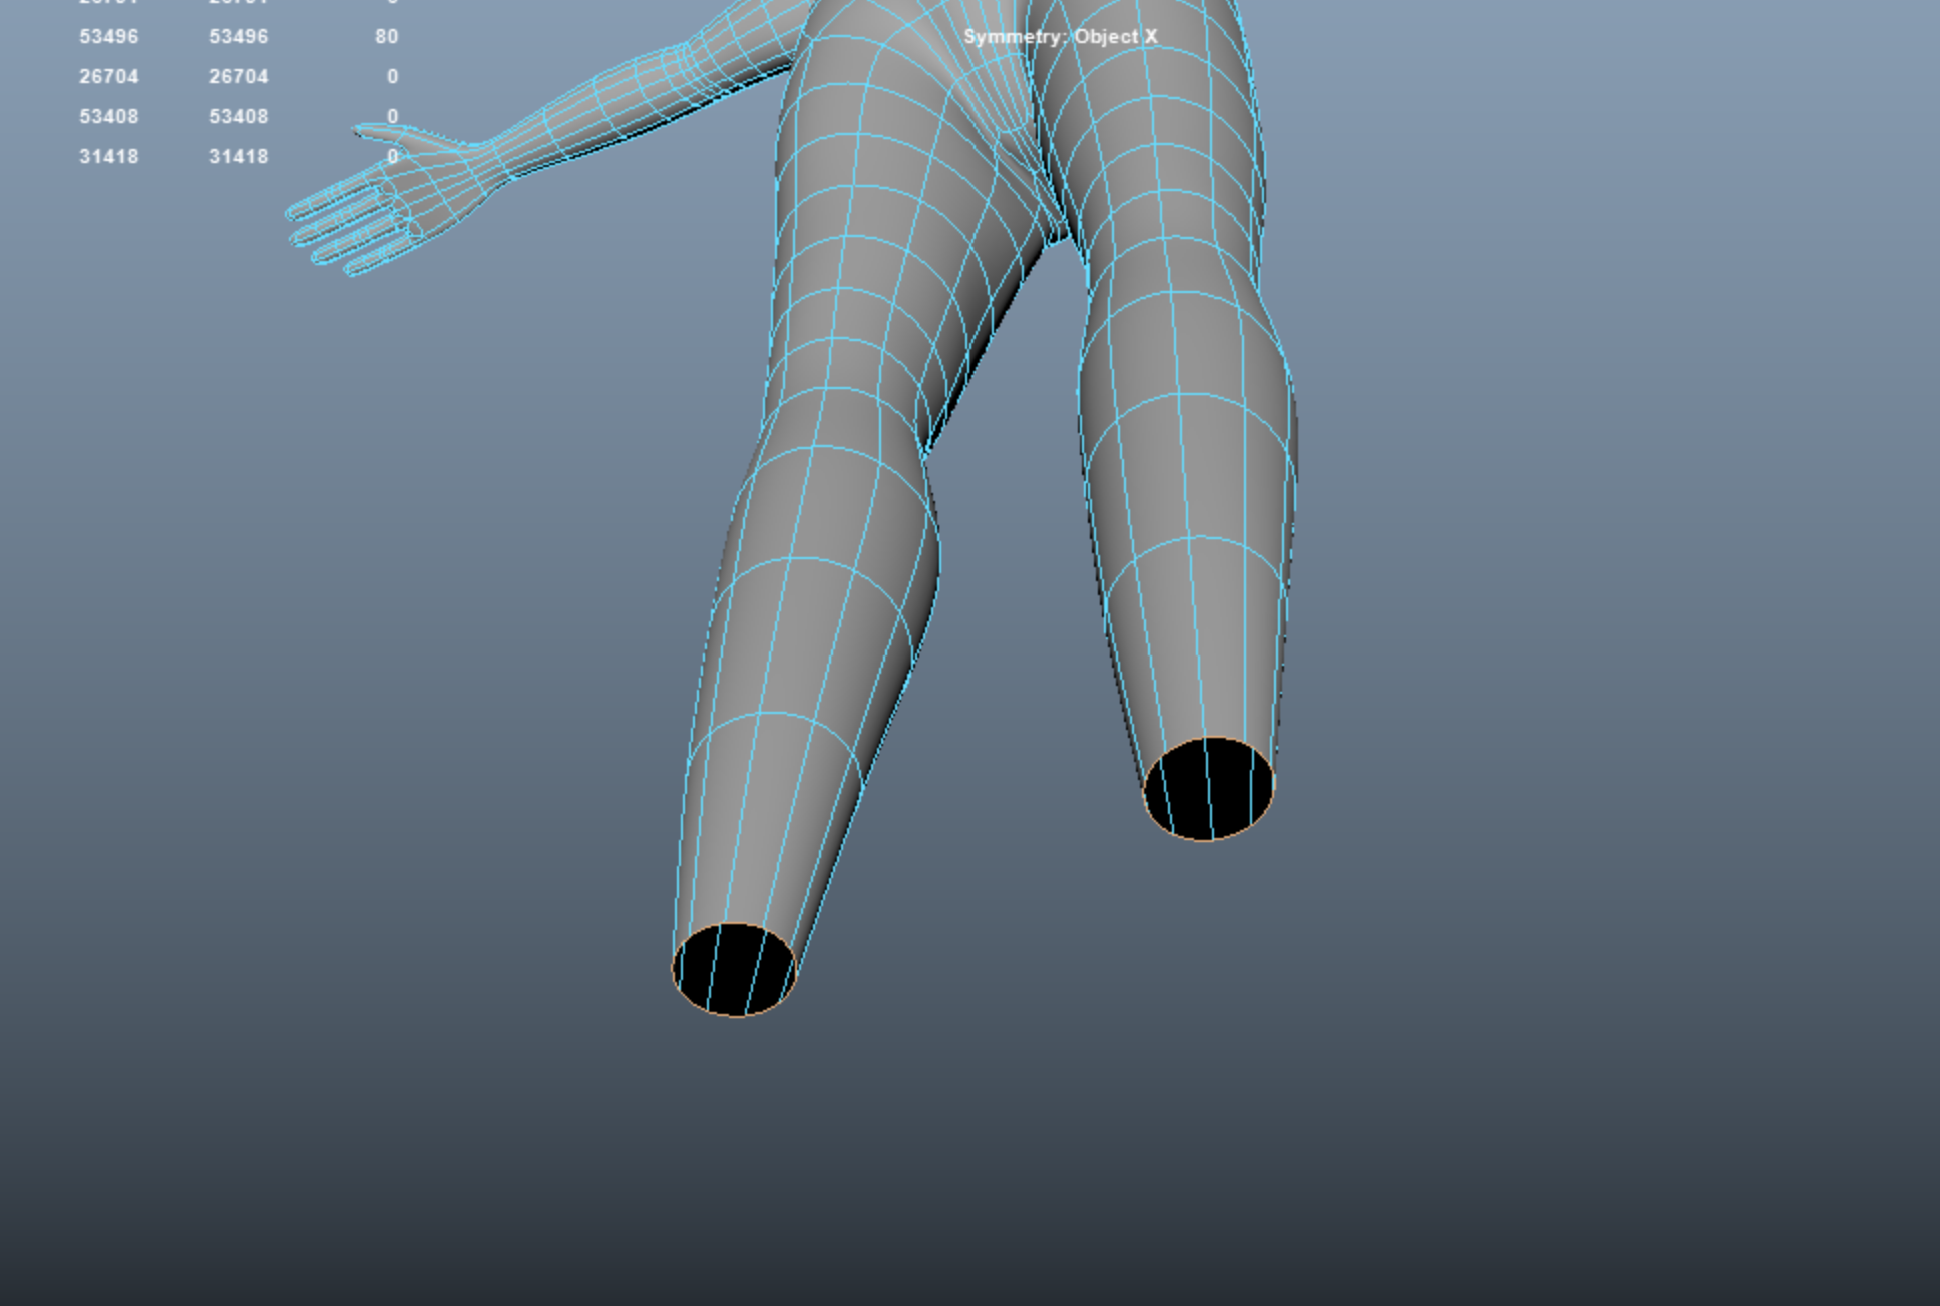
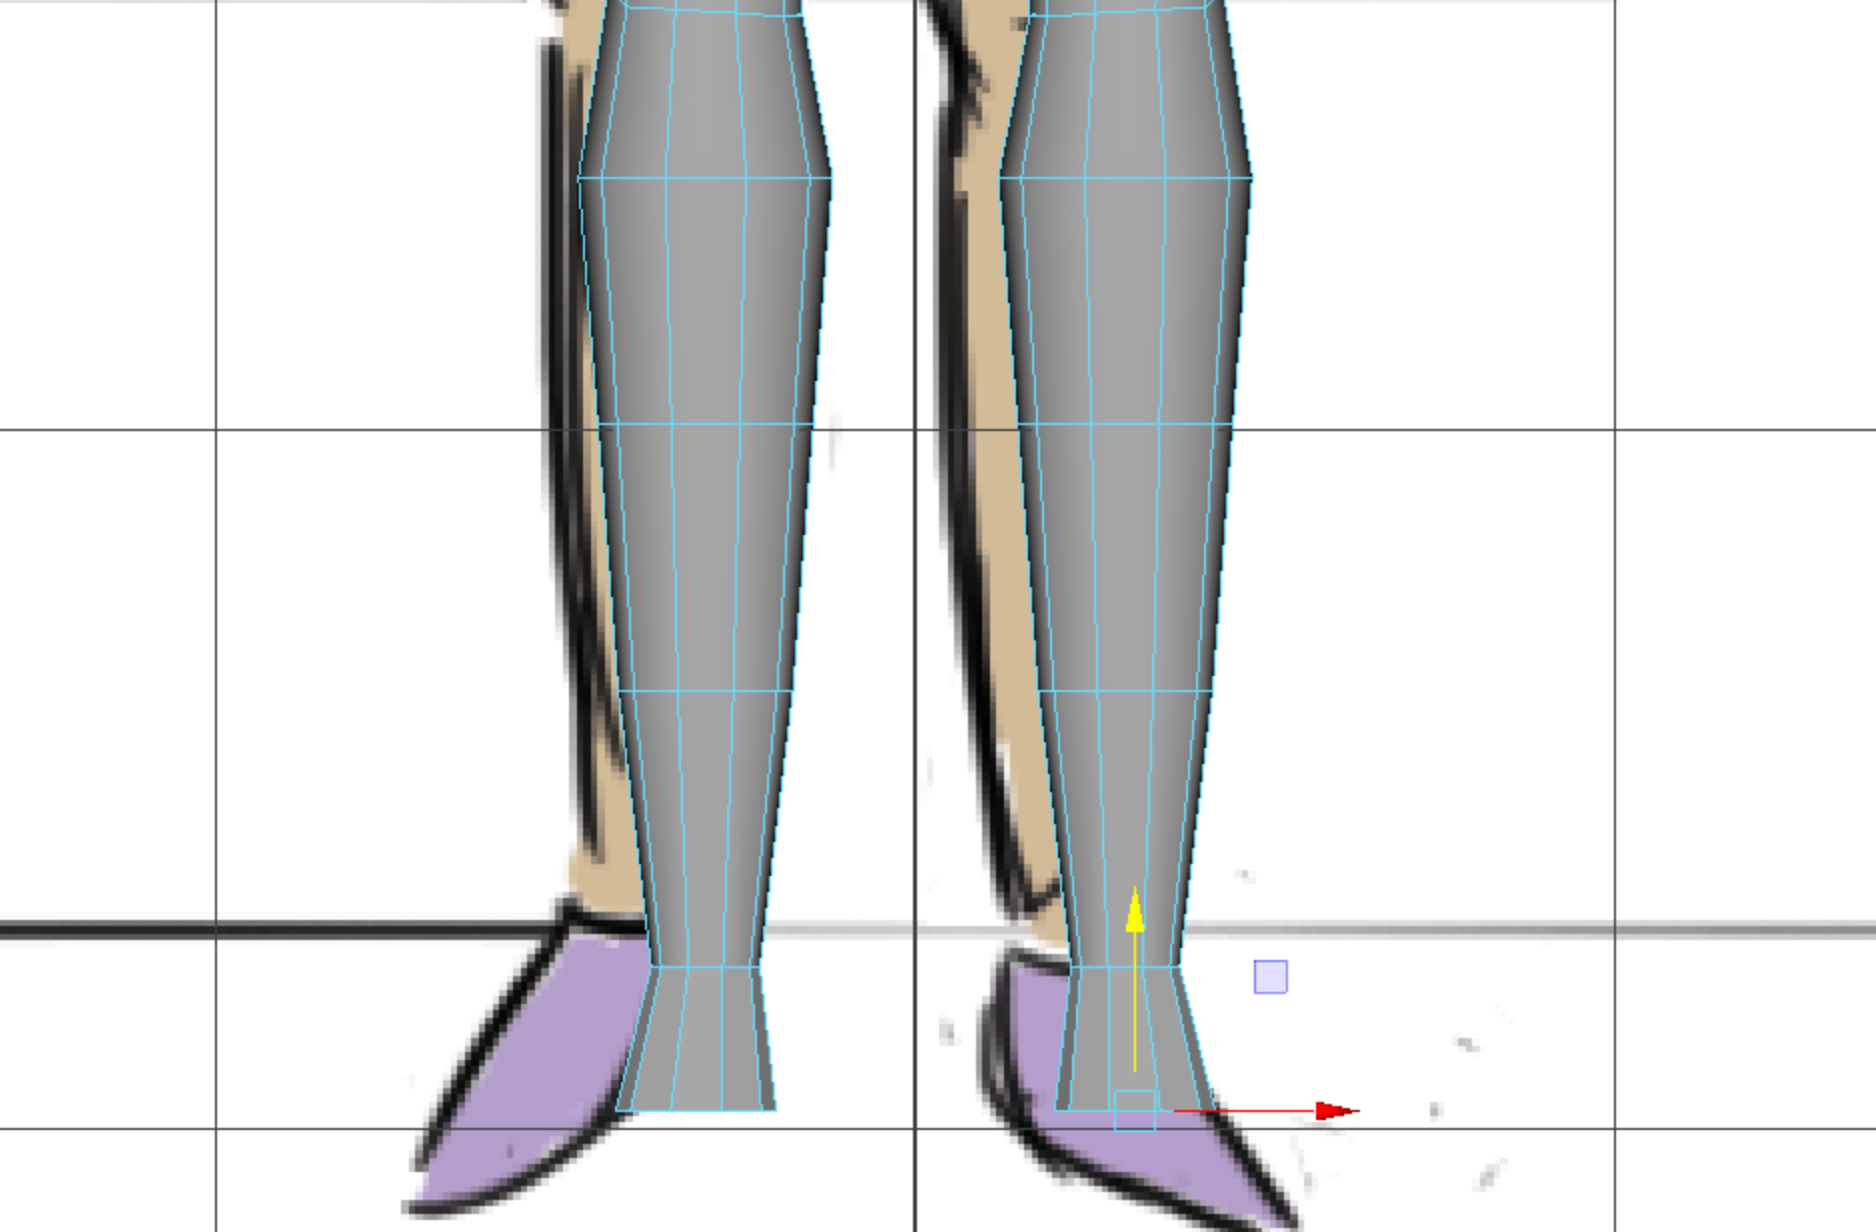
When we’re ready to extrude the actual feet, I selected 5 faces at the bottom of the cylinder and extruded them forward. Why five, you ask? In a bit, we’re going to extrude these five faces again, but this time with “Keep Faces Together” off. This will allow us to create 5 toes.
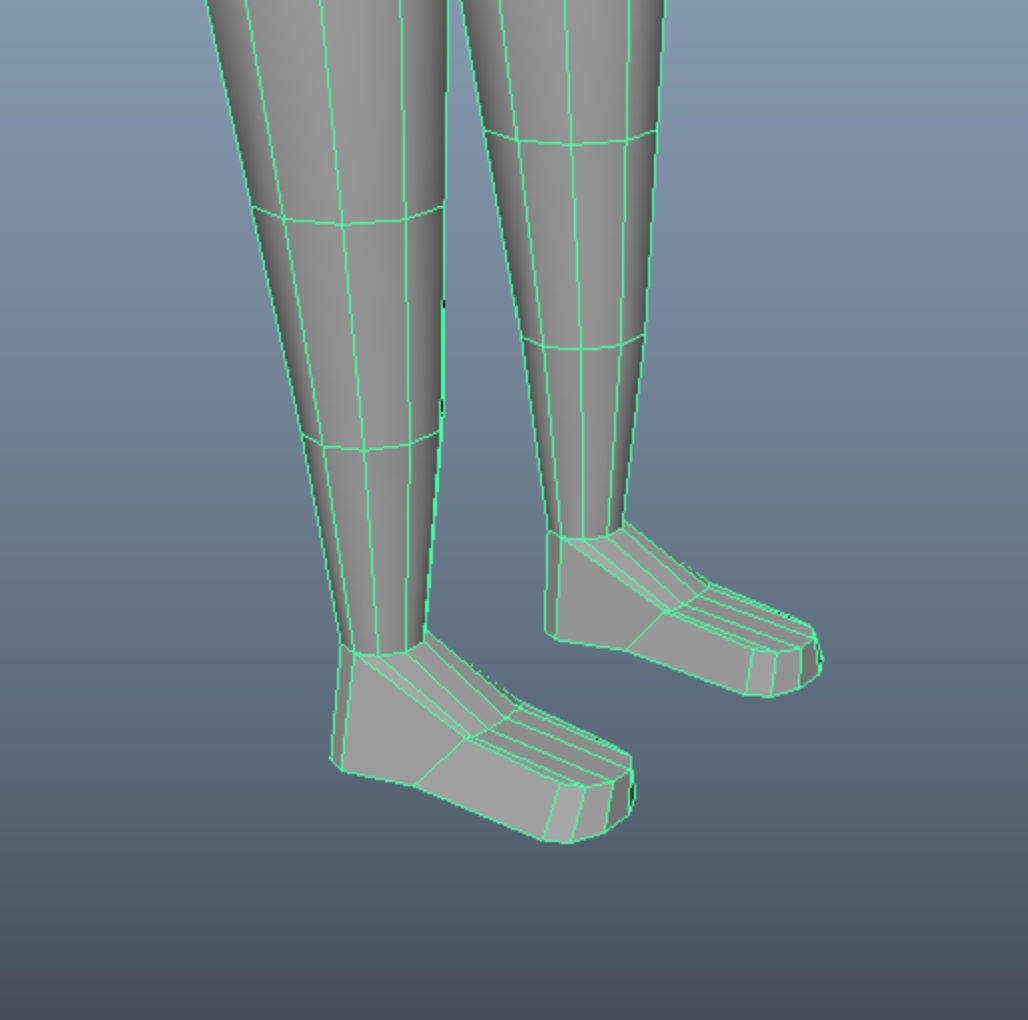
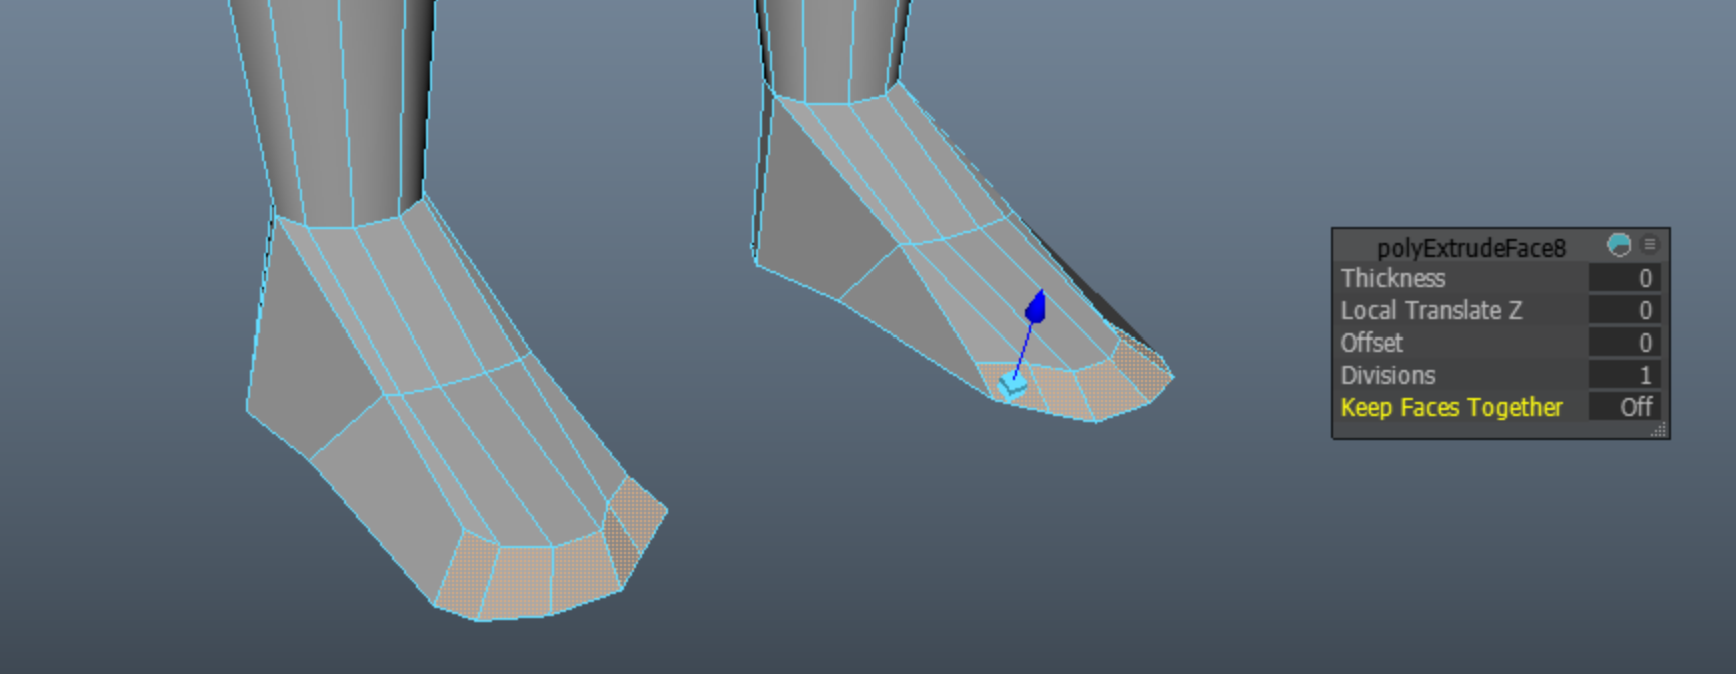
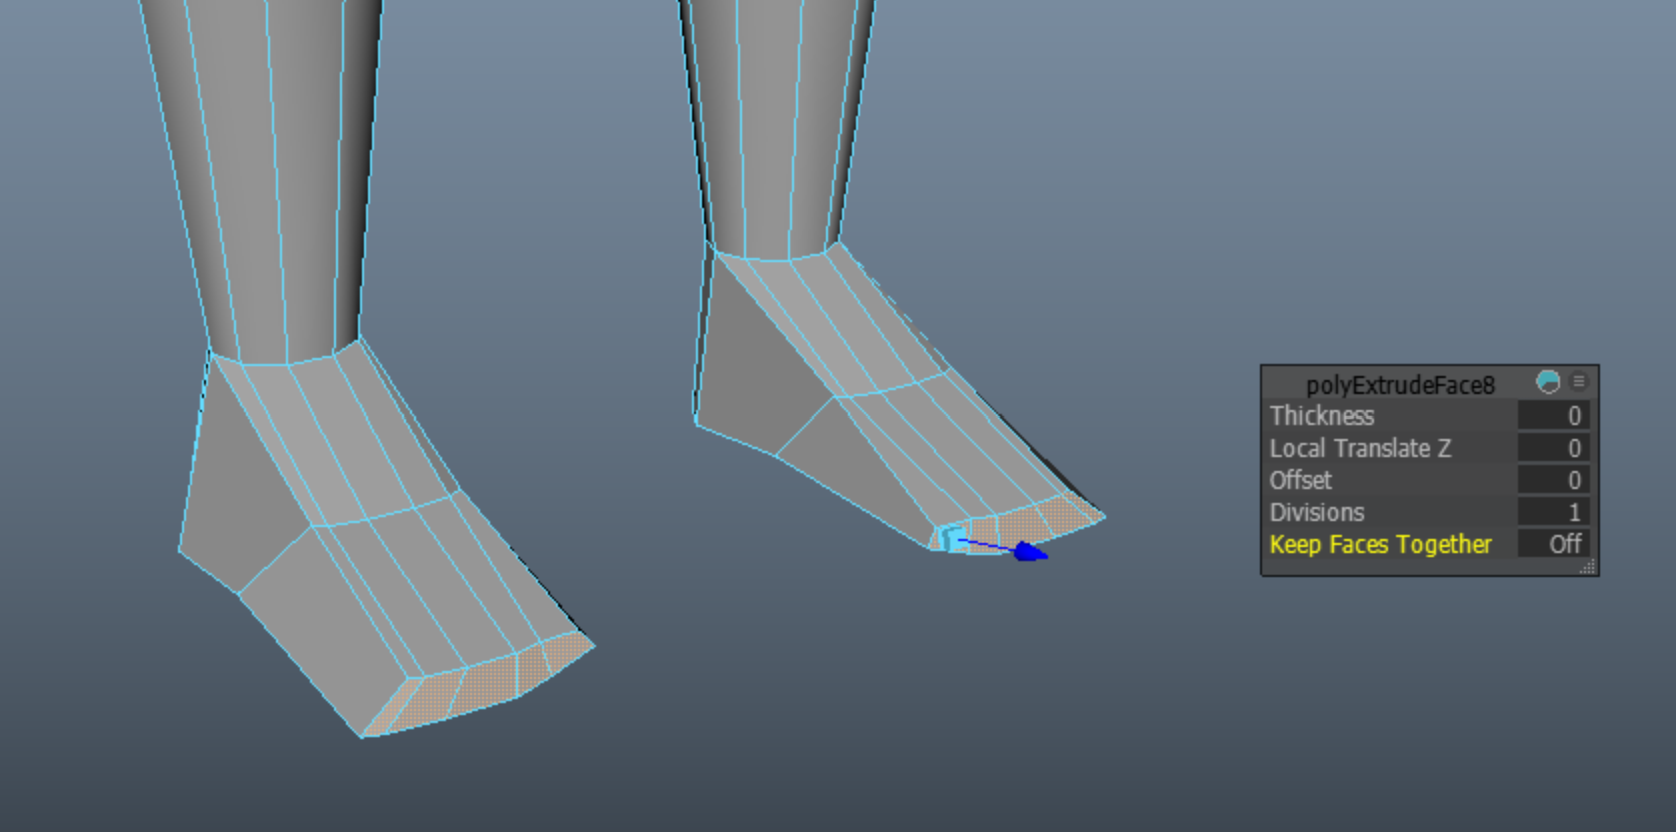
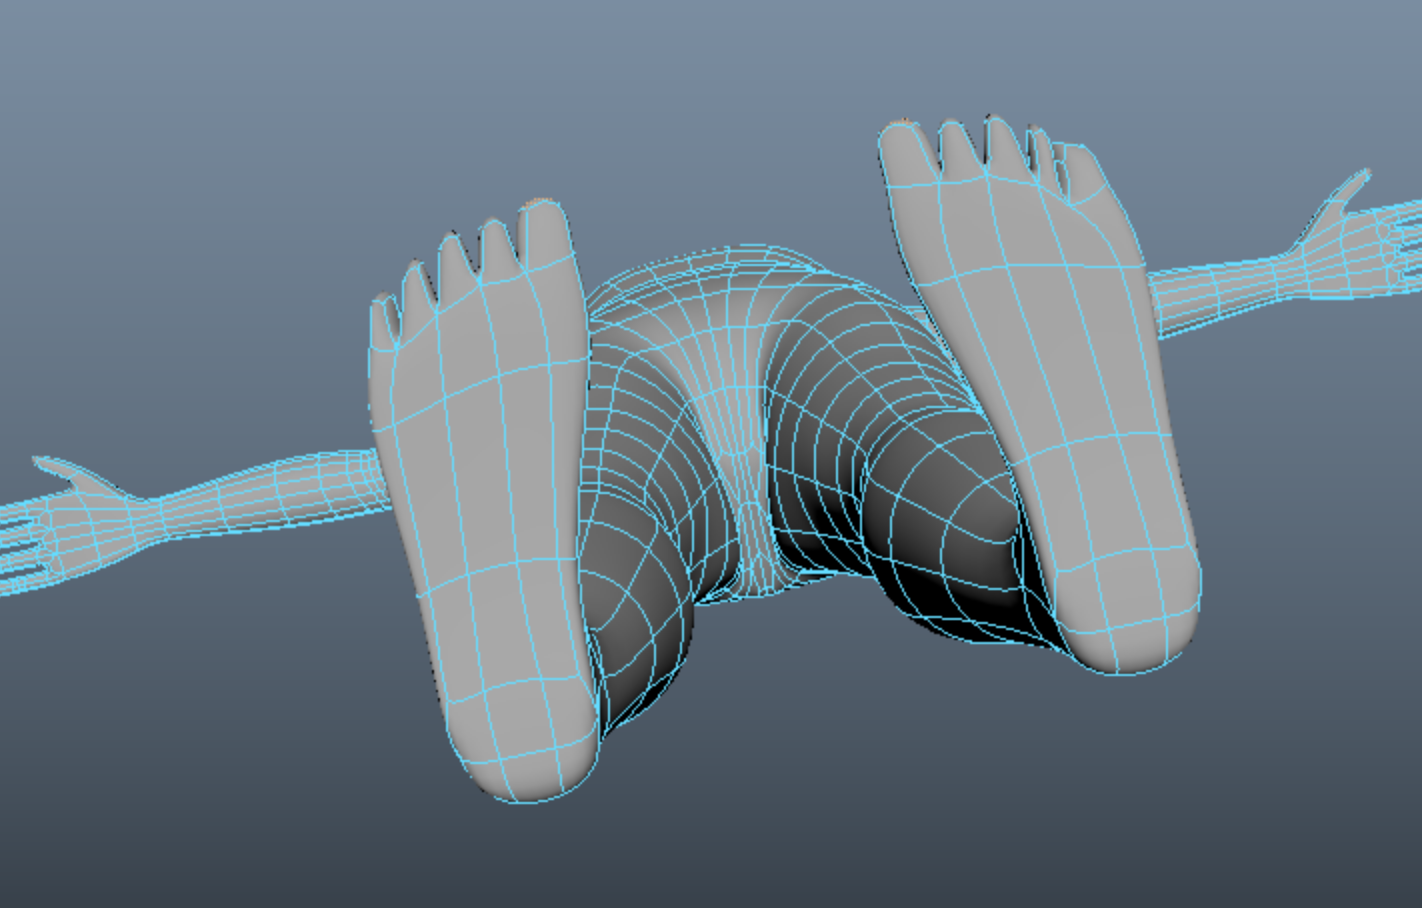
The general shape of the foot is here, so now it’s just a matter of moving vertices around then adding more edge loops to refine the shape.
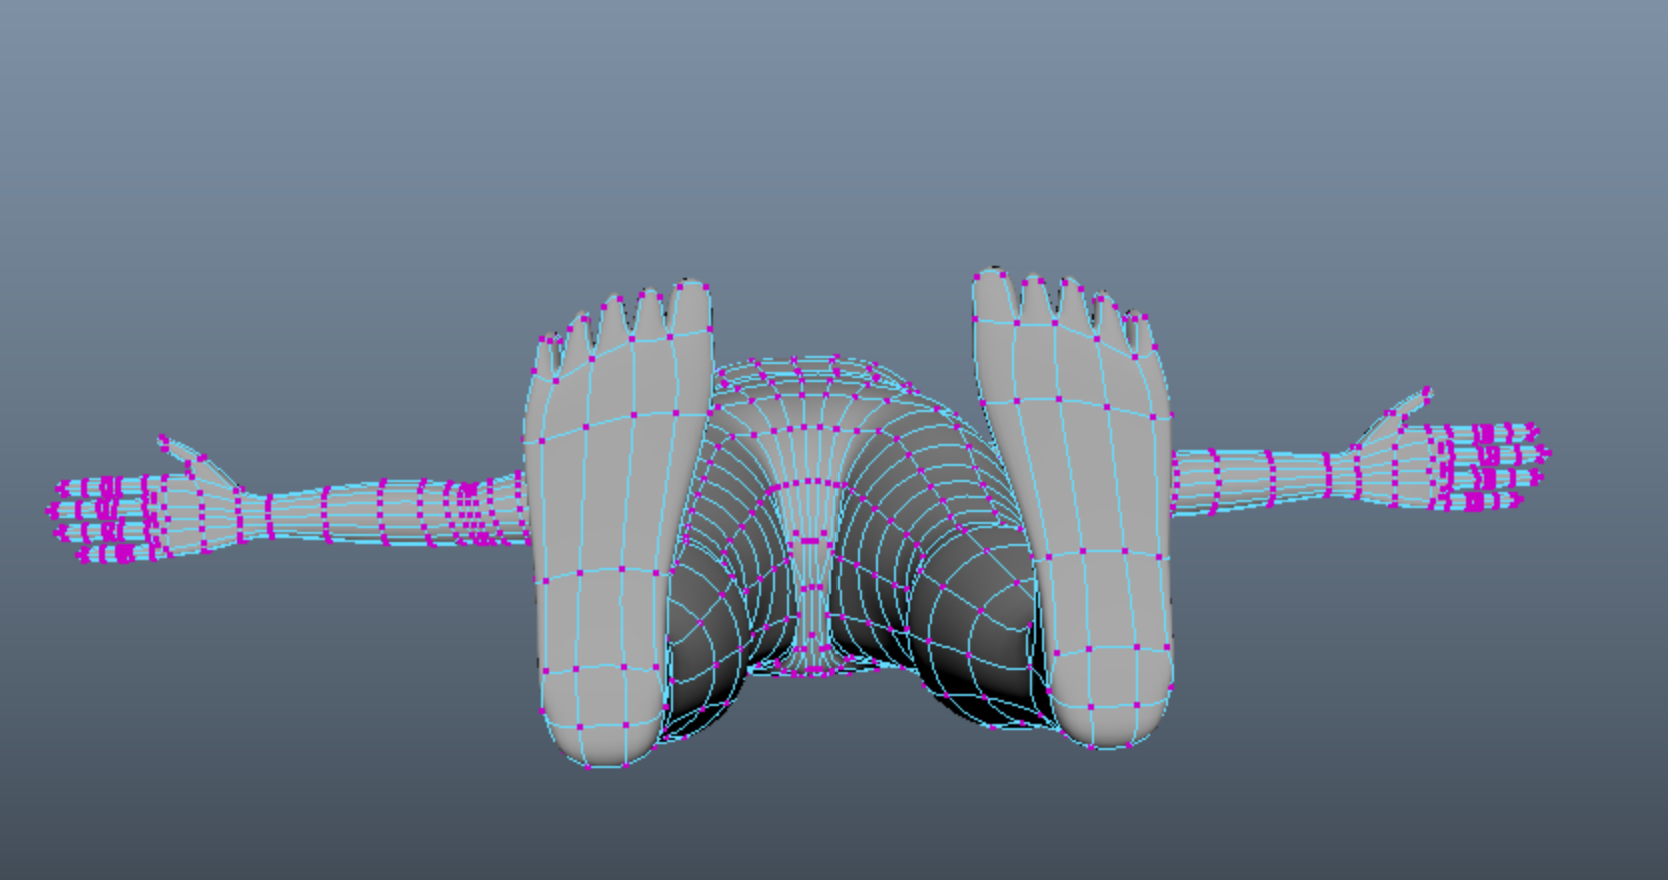
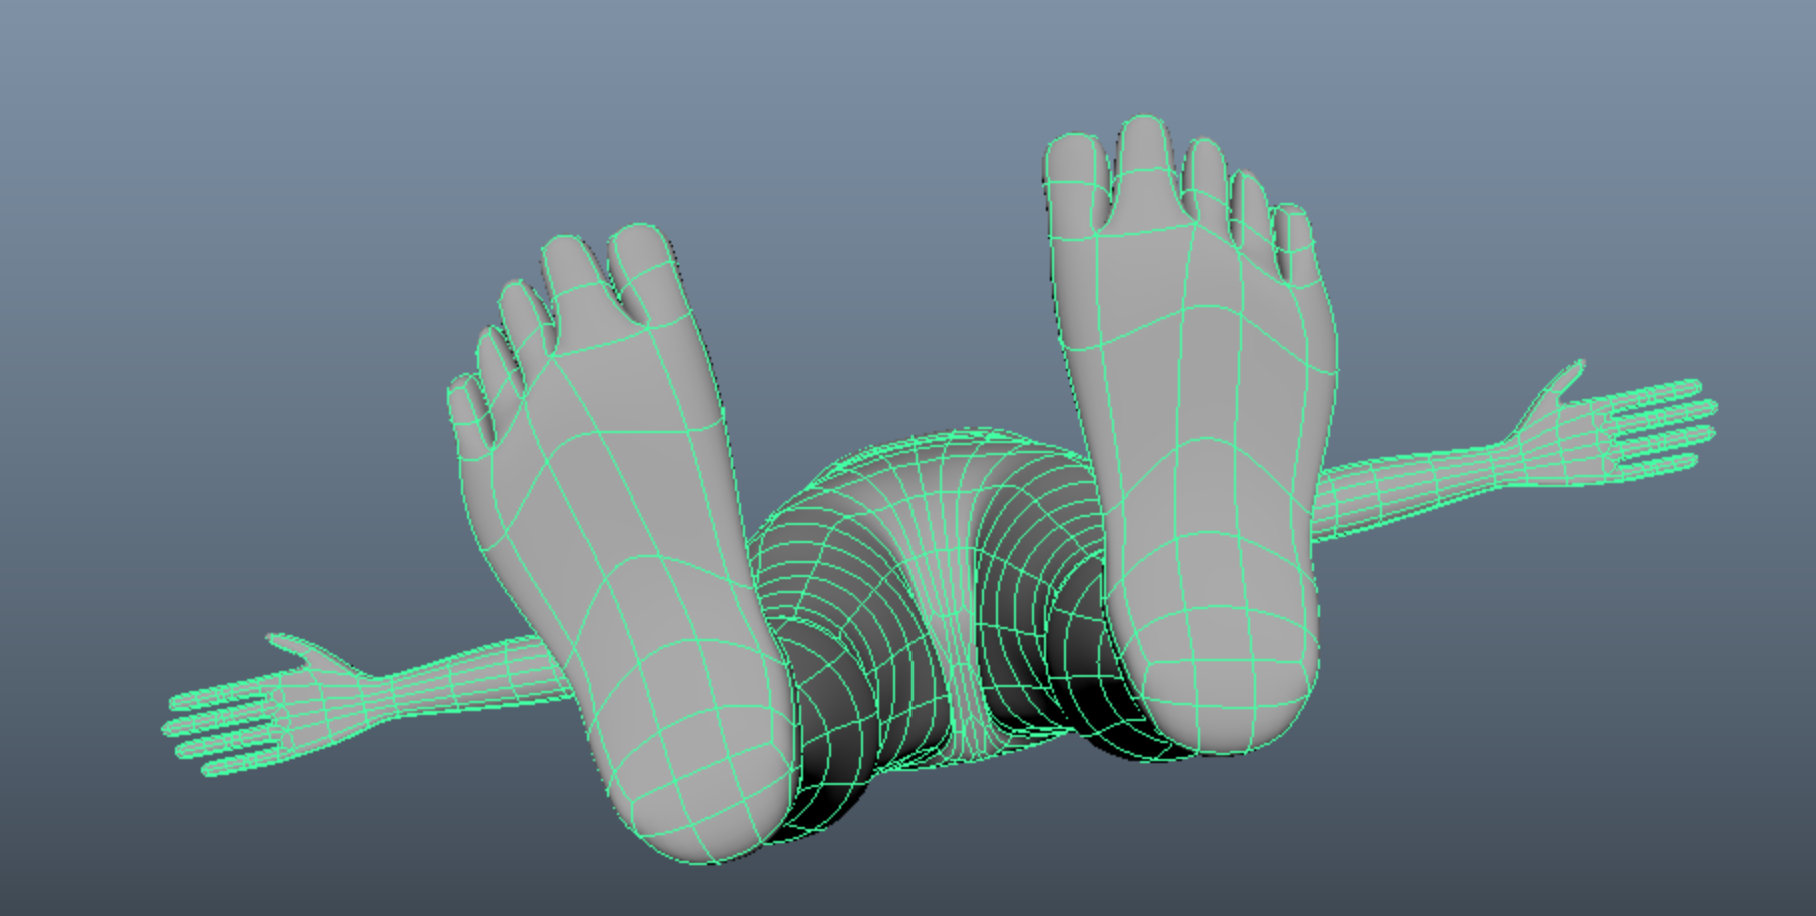
Before this last image, I extruded the faces located at the knee area to make more defined kneecaps. I also moved around a lot of vertices on the feet in order to get the shape to look more like the reference images I had gathered.
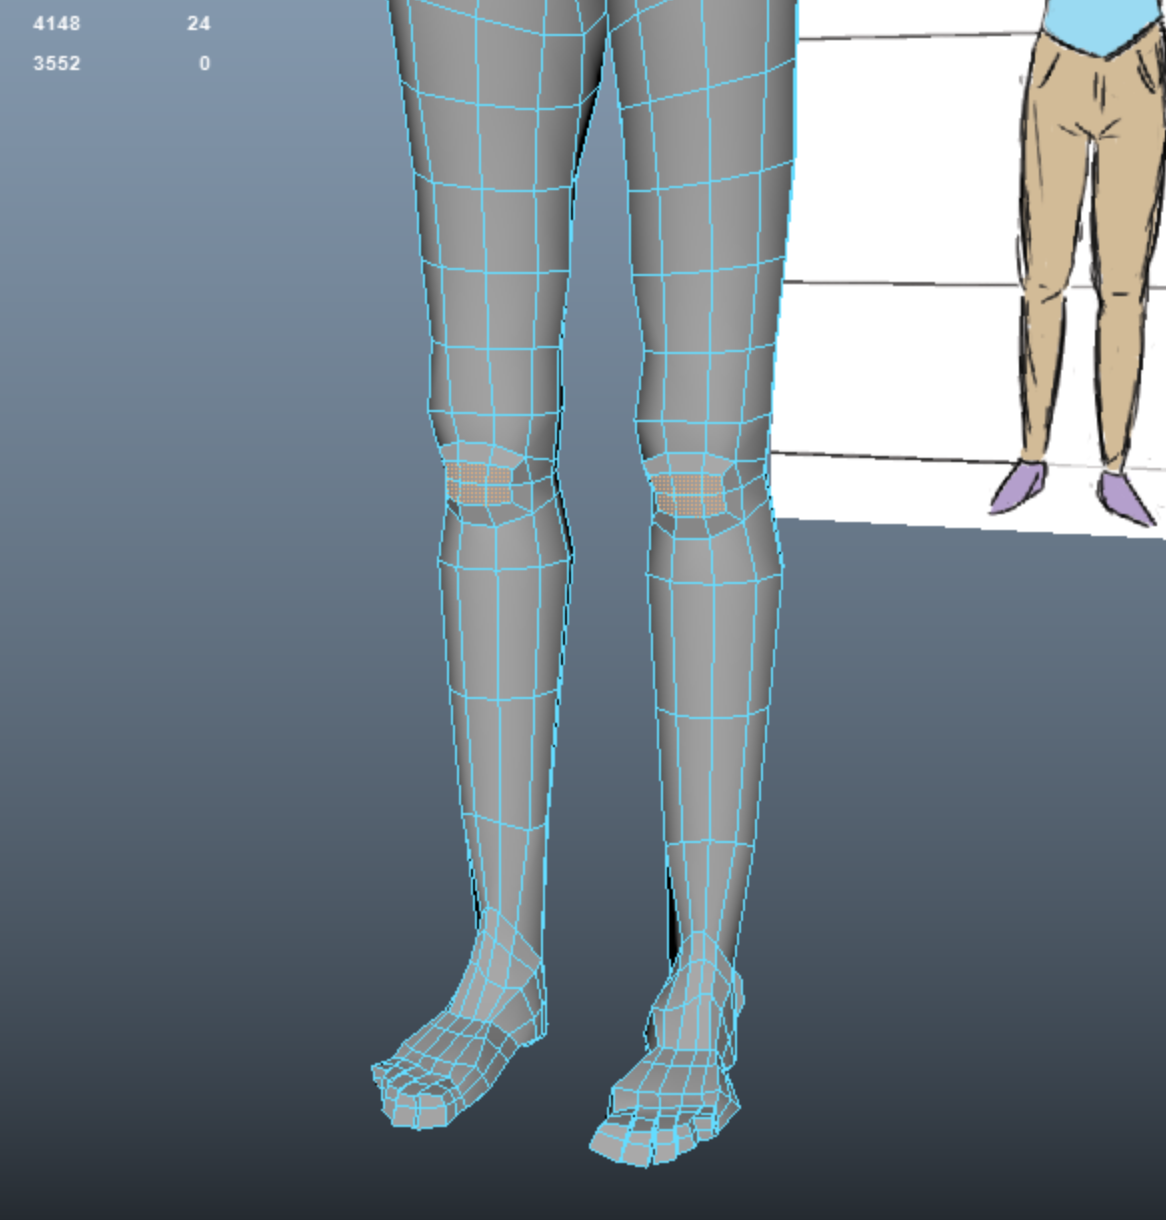
FINISHING UP & SUBMISSION
With the legs and feet done, all that’s left is to attach our head. Our head already has a certain number of vertices at the base, as does our hole that we’ve left for the neck. Add edge loops and fiddle with the mesh as needed to get to the right number of vertices at the border. In my case, I didn’t need to add anything, since all of these steps somehow ended up with 24 vertices on the holes for each side.
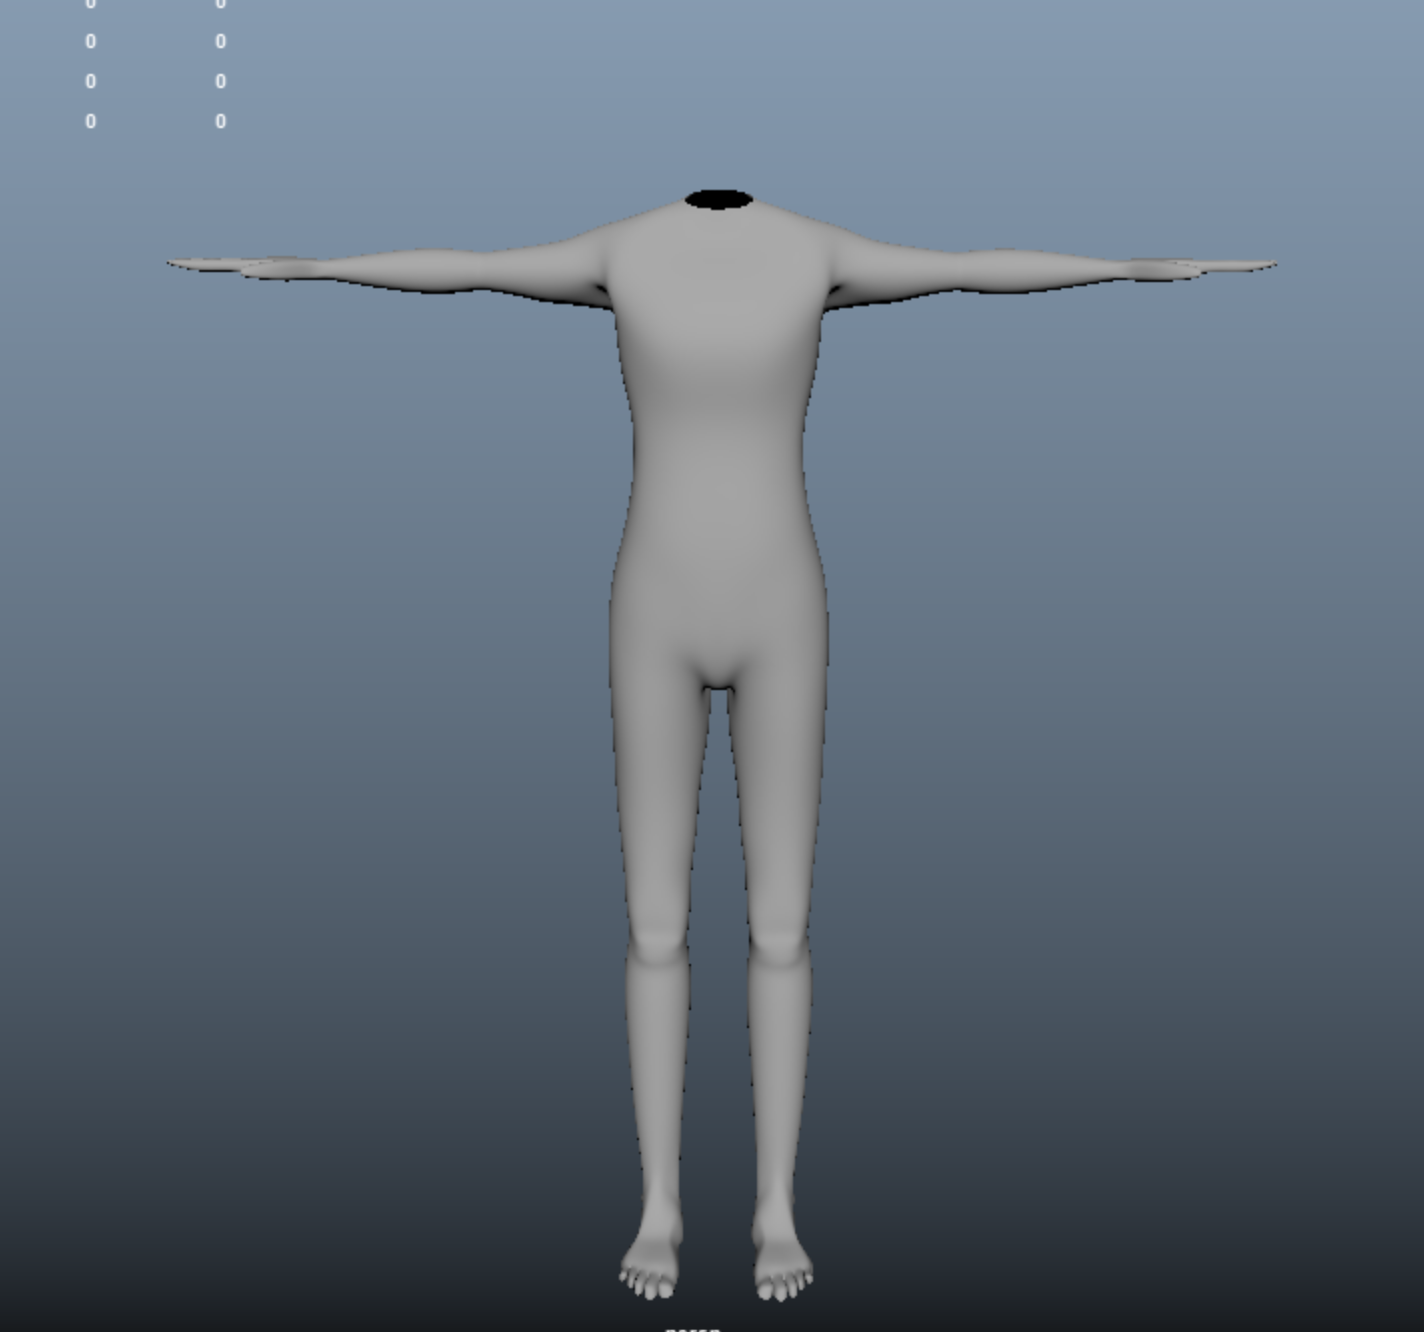
After more sculpting, we’ve gotten a completed human body model, which looks slightly terrifying because it is naked and textured and soulless. It’s a good start, though, and if we so desire we could continue to subdivide or add edge loops to the mesh to keep adding in more detail. Remember, though, less is more, and high poly meshes take longer to render.
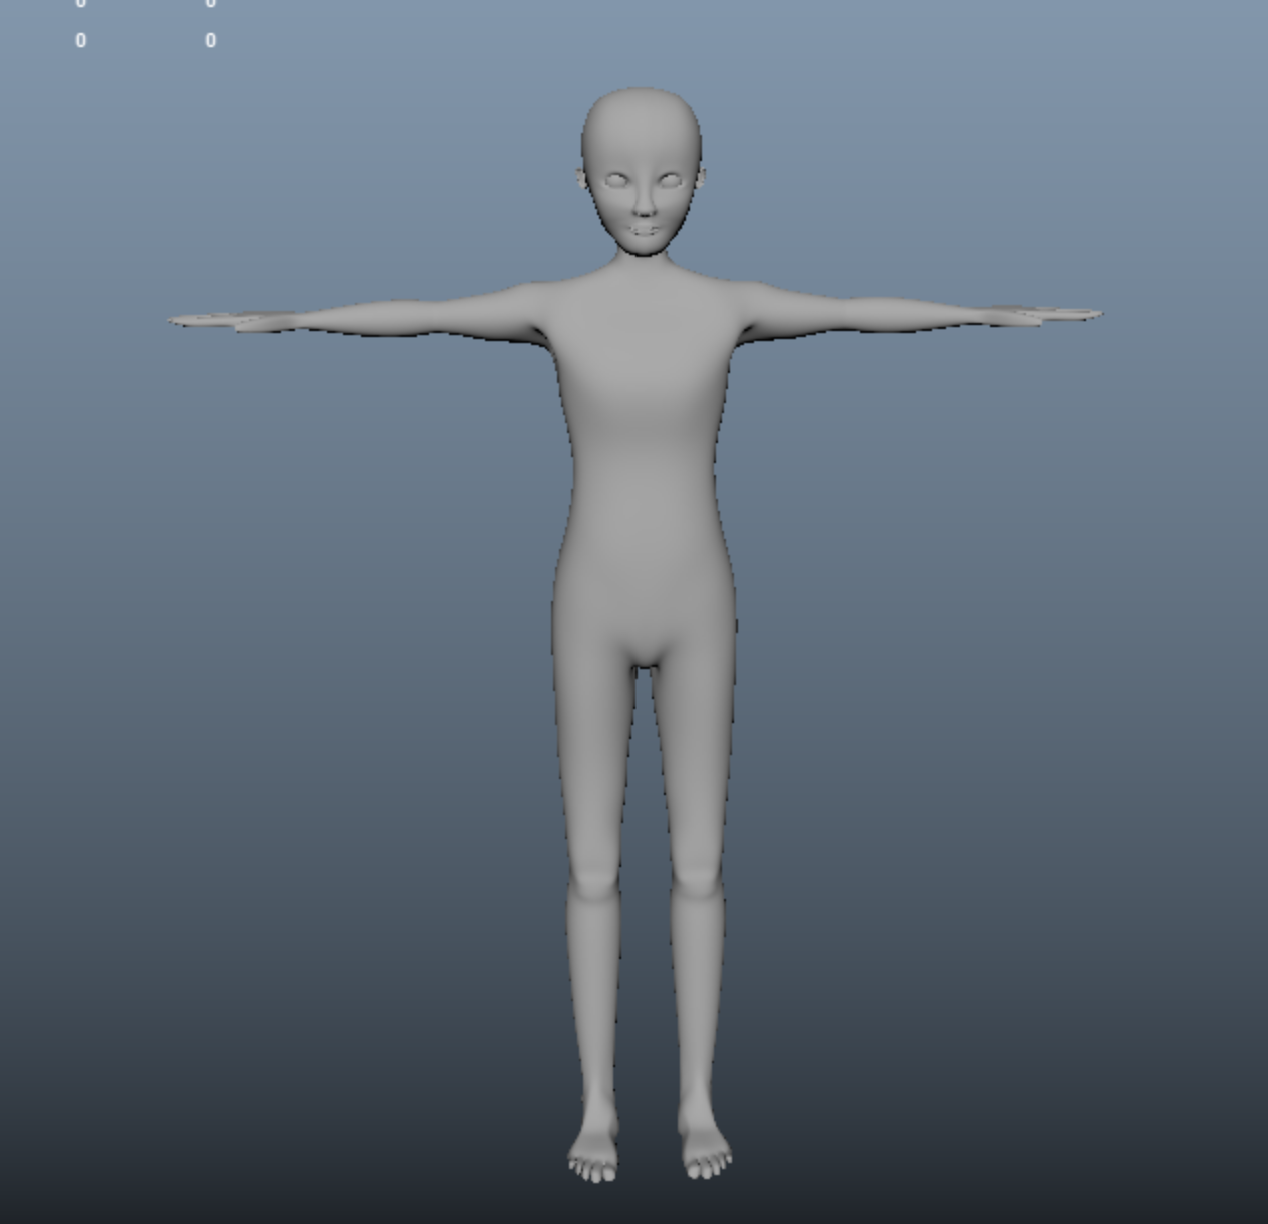
And there she is.
Please submit a cleaned up version of your model to the homework form. We will NOT accept any misshapen human models, so please be sure to look up anatomy references or use your own character sheets as guides!
CLOTHING & ACCESSORIES (Optional)
At this point we have a mostly finished model with great topology and edge flow as well as the details we want in our character. The last step for us to have a complete model is to give our character some clothing and accessories.
THIS PART OF THE LAB IS OPTIONAL especially if you are not using the character you created for your short films. However if you do plan on using your character for your shorts, then I highly recommend you look through this section as a guide (unless you plan on having a naked and/or bald character o.0)
Clothing
We’re going to start with sculpting on some clothes for April. I find that the easiest way to create clothes that ensures that they will easily fit your character and have better topology is to make the clothes directly from the body of the character. What that means is that I will be duplicating April’s mesh and keeping only the faces that I need for each specific item.
Let’s start with her shirt.
First, I’m going to duplicate April’s body mesh (remember that your objects should be NAMED IN YOUR OUTLINER). Then I’m going to delete the faces that I don’t want to be a part of her shirt mesh. I’m going to start with the arms.
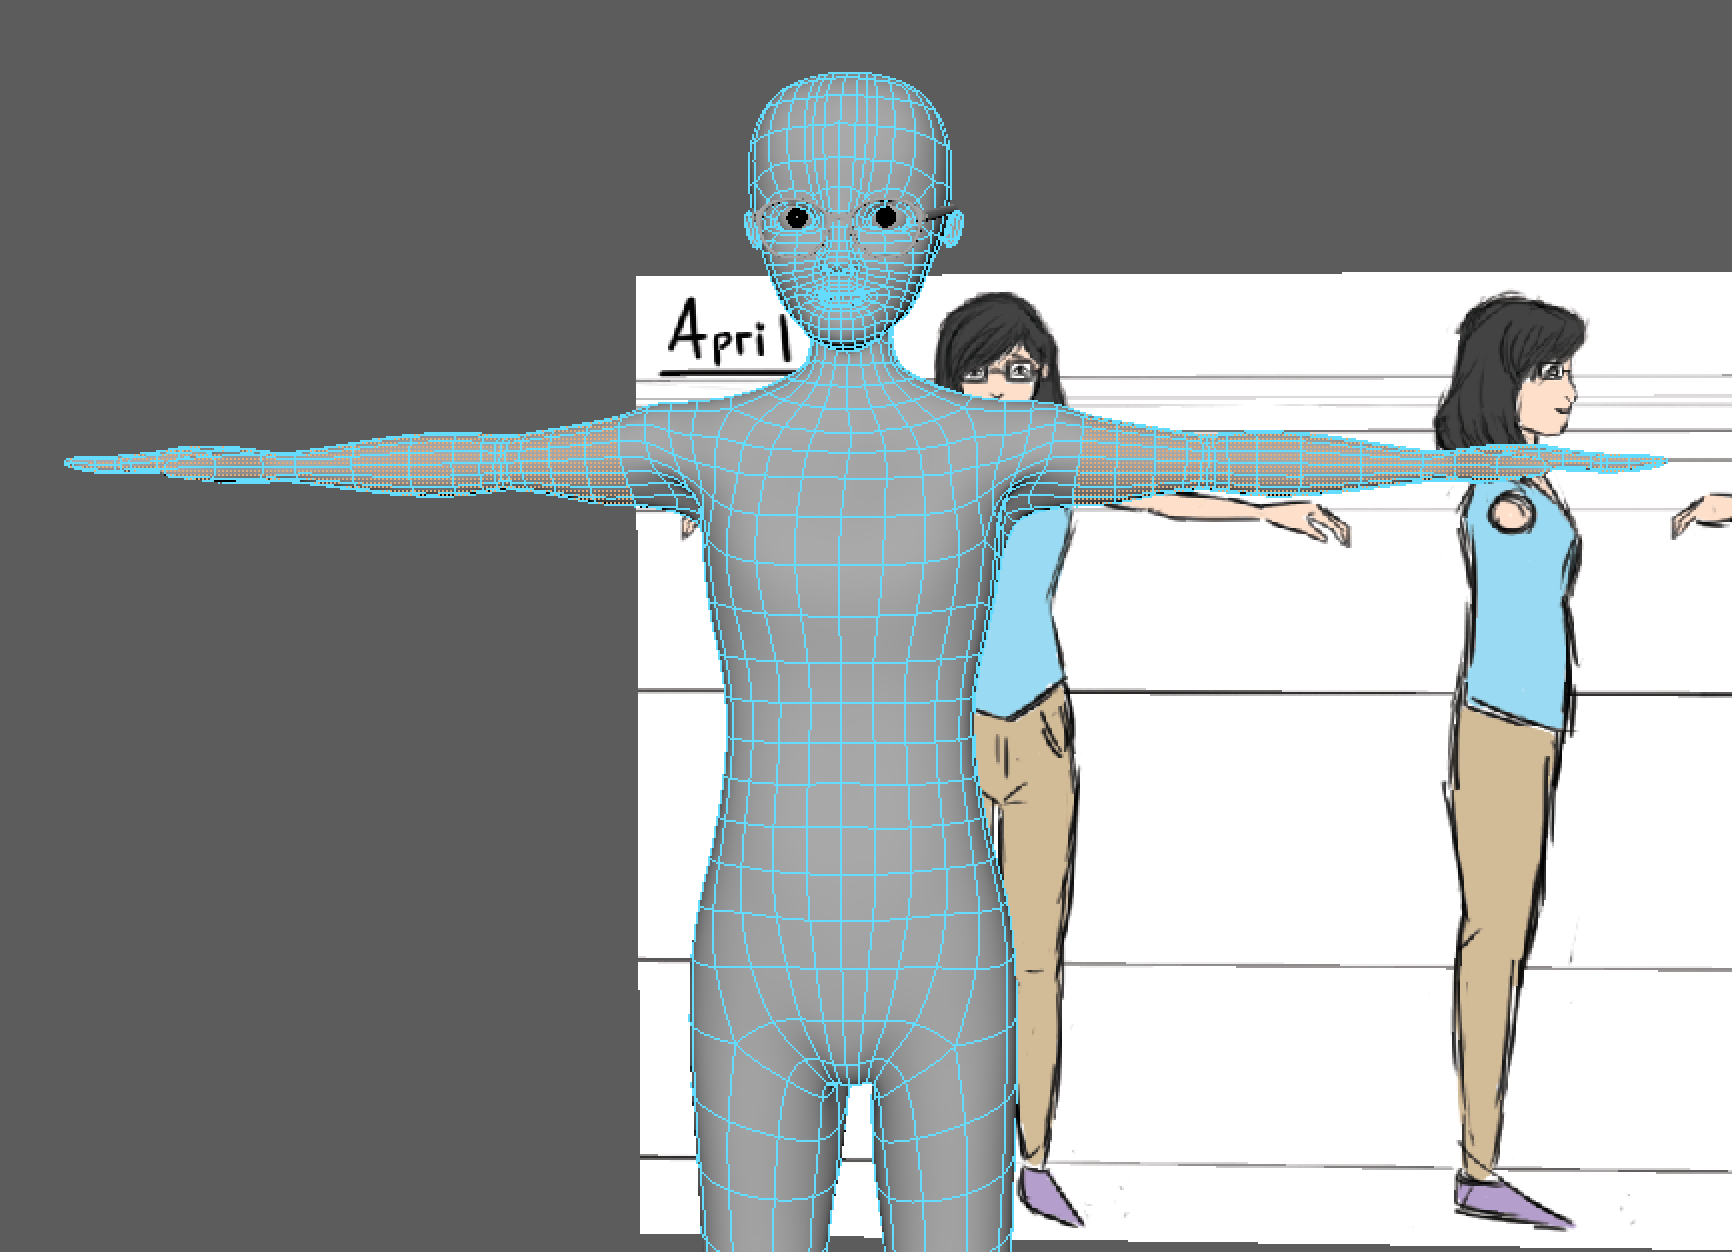
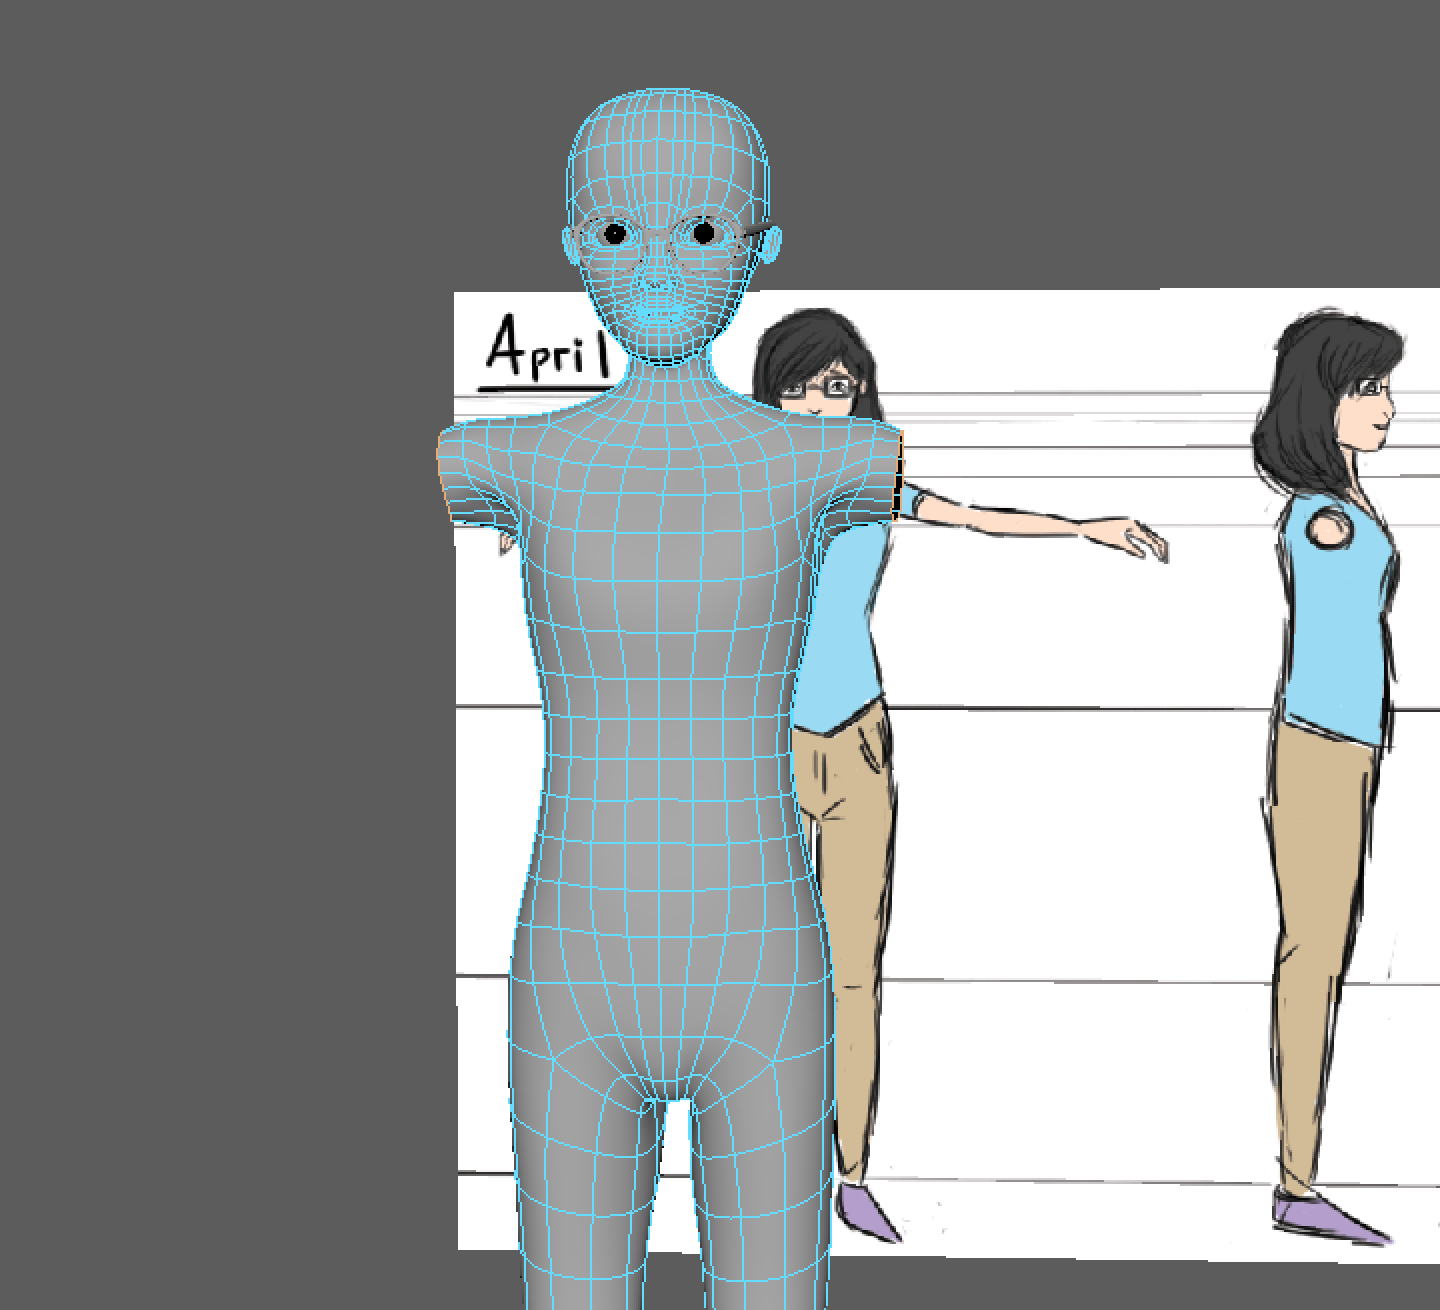
Then I’m going to delete the faces for her head and legs.
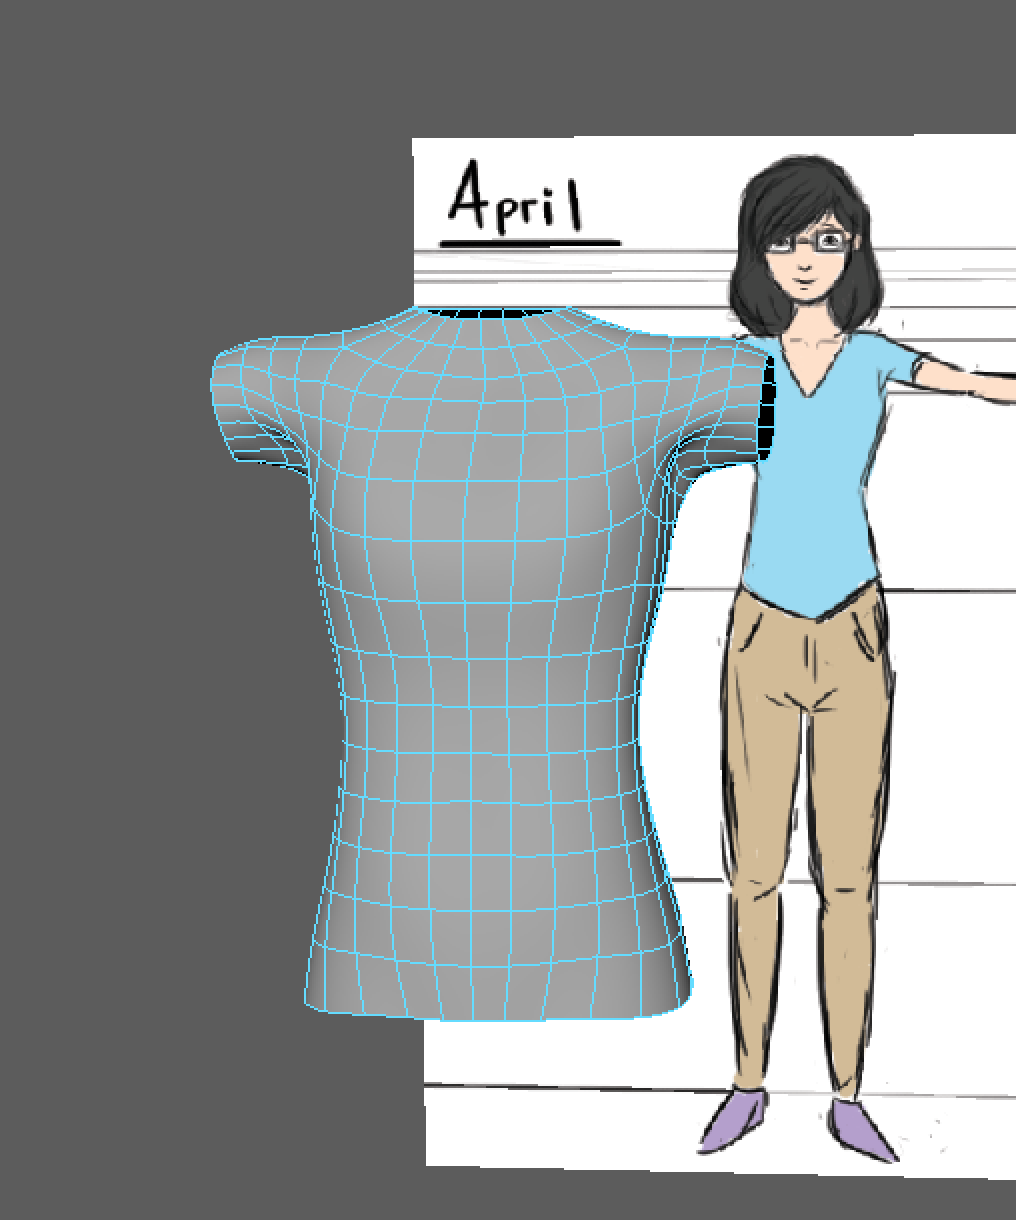
Now that I have the basic shape that I want for the shirt, I’m going to use the sculpting tools to get the specific details to match my character sheets.
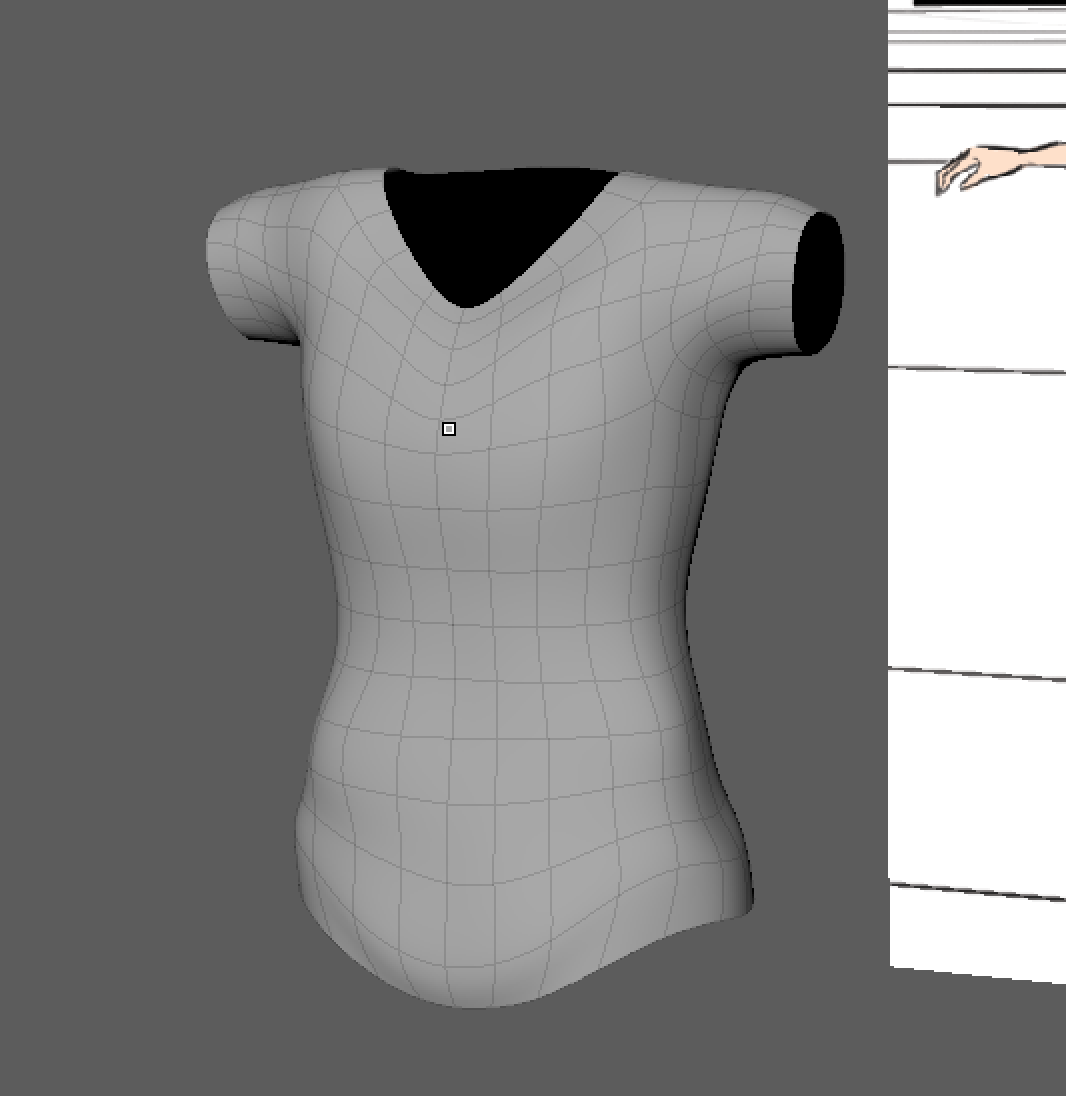
With this, I have the look that I want for the shirt. I’m going to extrude the mesh of the shirt outwards so that we don’t see the reverse side of the normals.
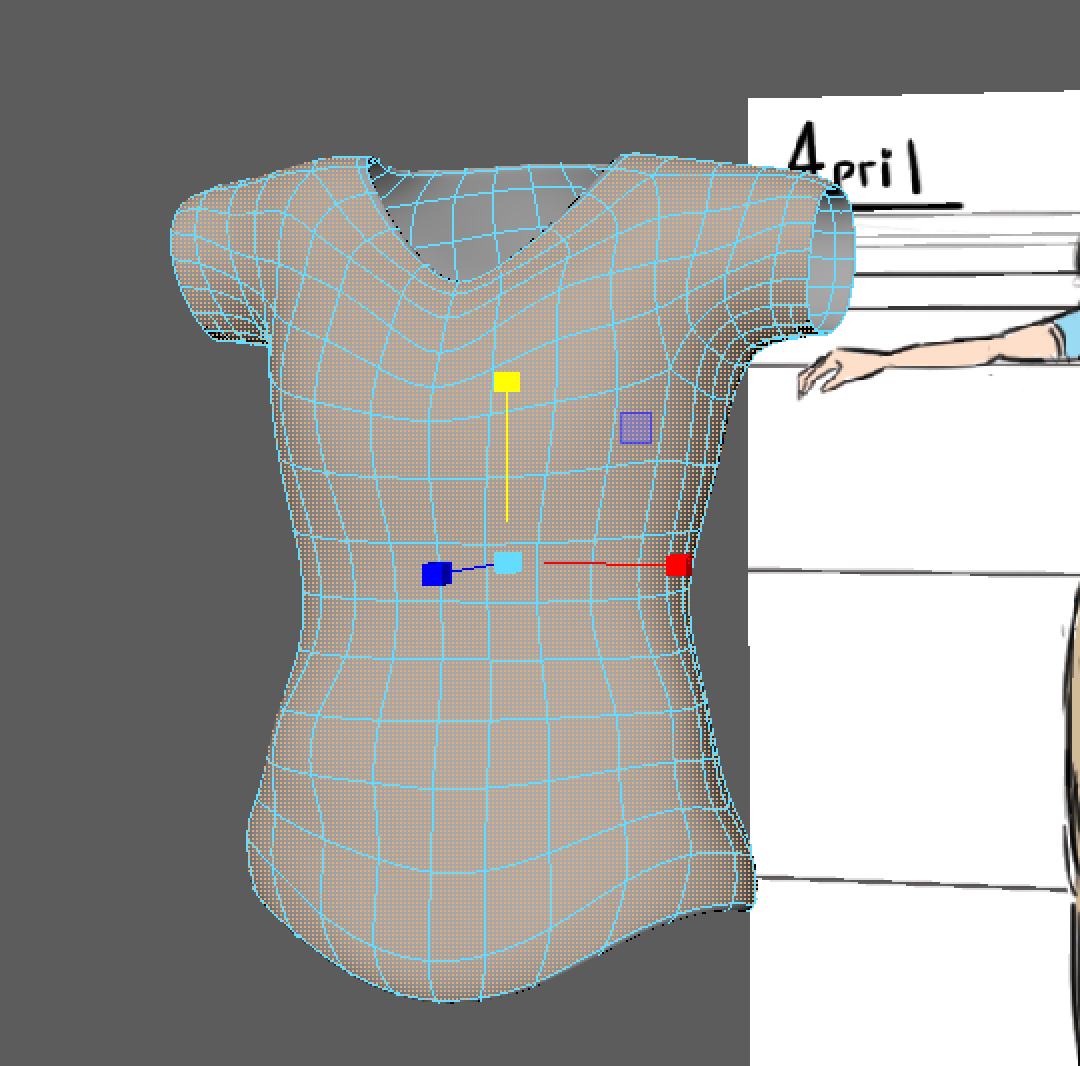
Now I’m going to adjust the shape of the sleeves a bit to give it more volume.
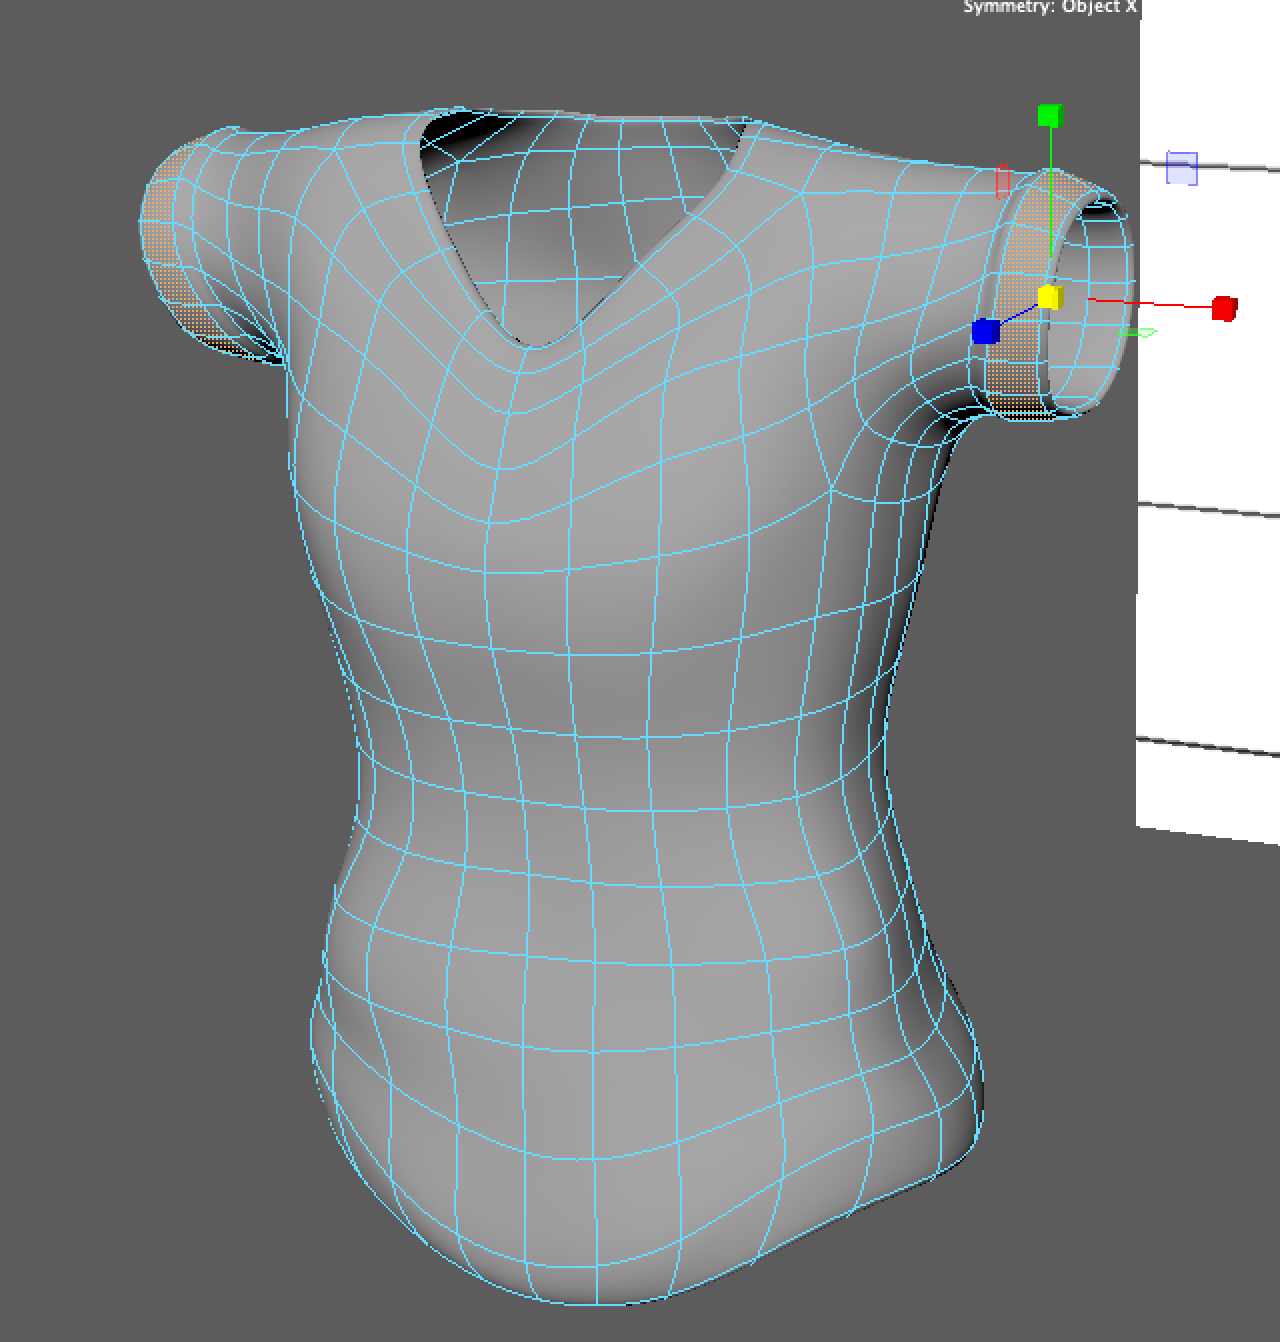
We are going to repeat the same process for the pants (keep in mind that the process we laid out earlier can be done with almost any clothing item).
Duplicate the body mesh again and delete the extraneous faces.
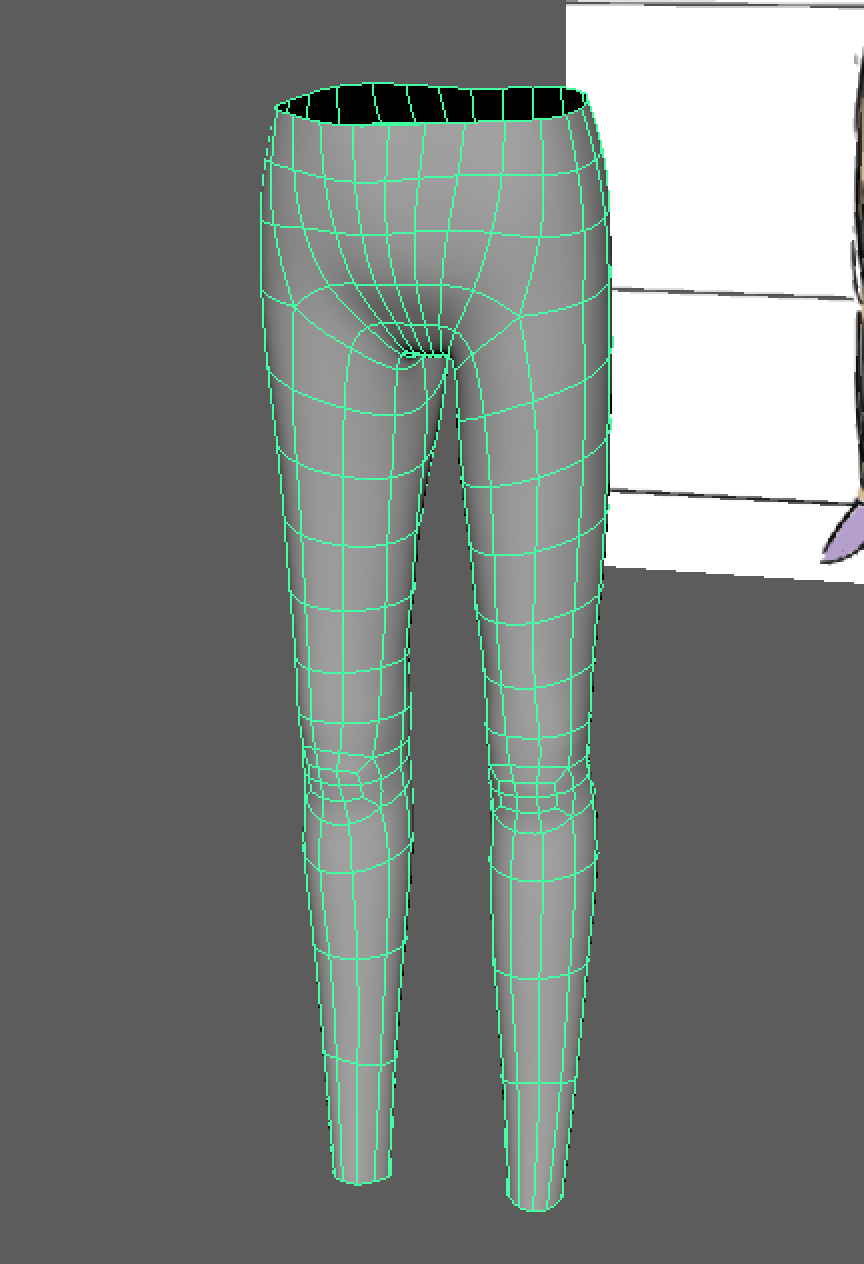
Sculpt and shape the clothing item how you see fit and then extrude outwards.
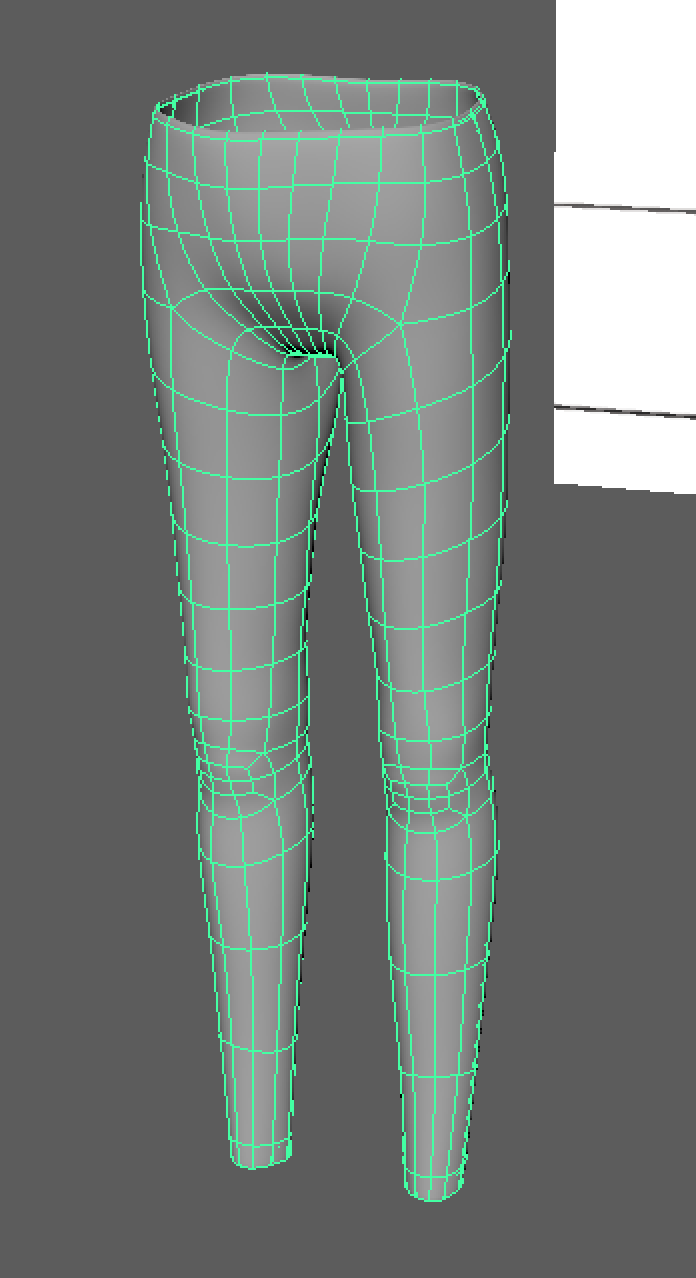
Now you can fit the clothing item onto your character. Make sure that the body mesh does not stick out of the clothes (if it does, make sure you go back and sculpt more on the clothes)
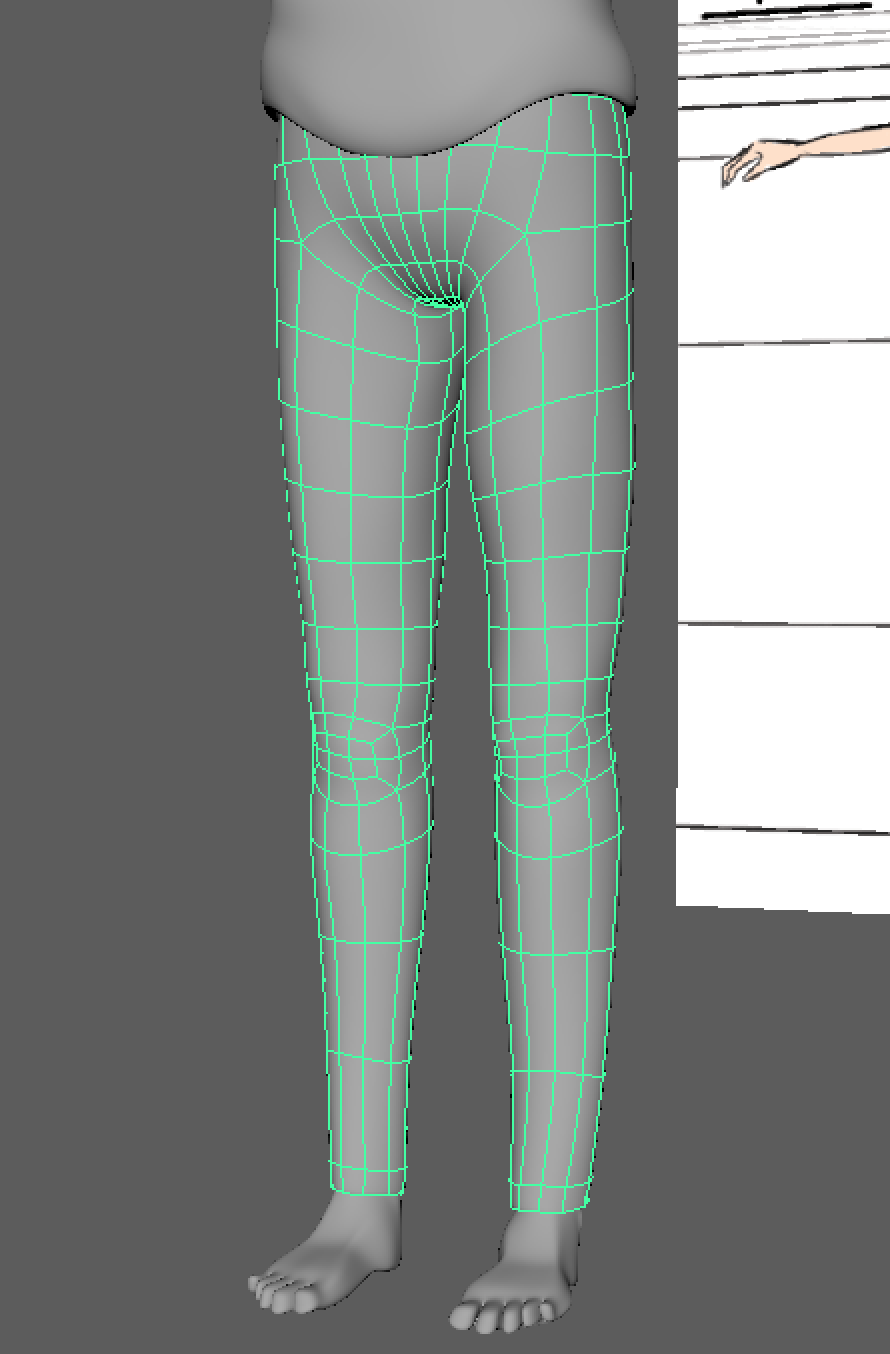
Before you move on, make sure you name everything in your outliner.
Hair
There are many many different ways to handle hair for a character in 3D animation, however for the sake of our class, most students simply sculpt on hair for their character so that’s what we’ll do here.
If you are interested in experimenting with different styles of hair, feel free to look into programs like XGen (if you have the time).
We are going to repeat the same process as earlier (i.e. duplicate the mesh, delete extraneous faces, and sculpt).
First, I’m going to duplicate April’s mesh one more time and delete all of the other faces except for the top section.
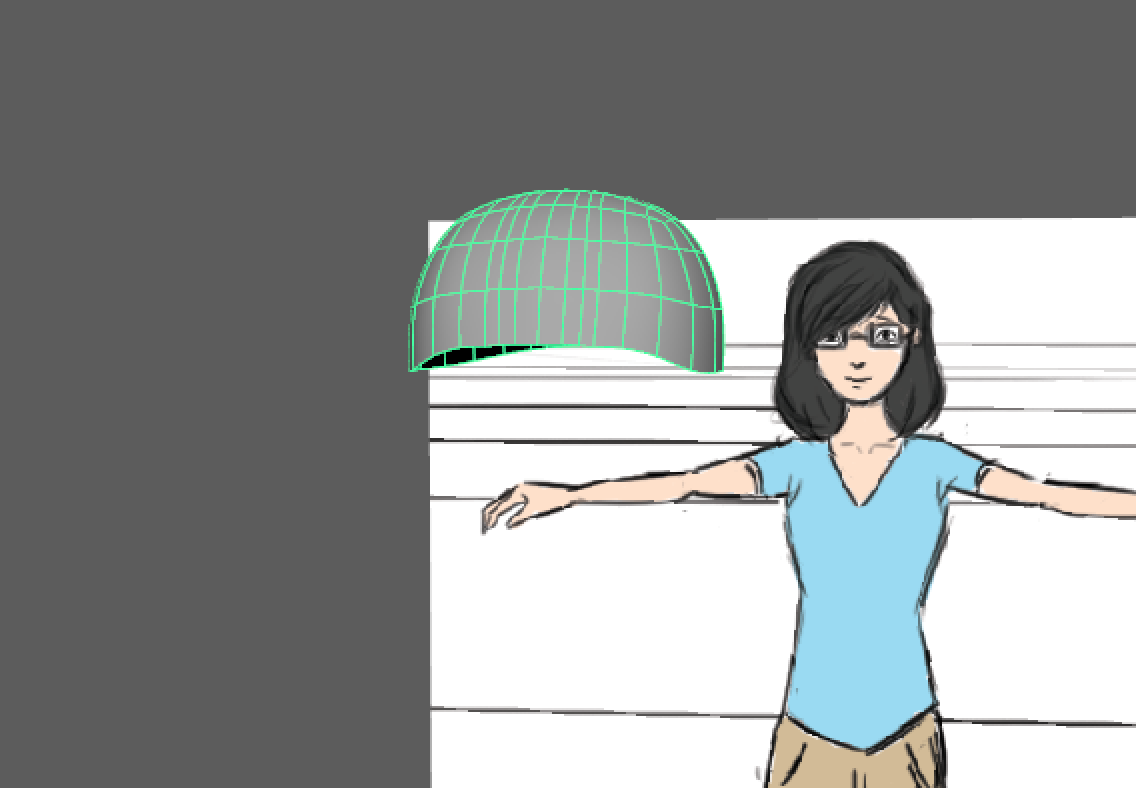
At this point, this mesh might look something like a helmet on top of your character.
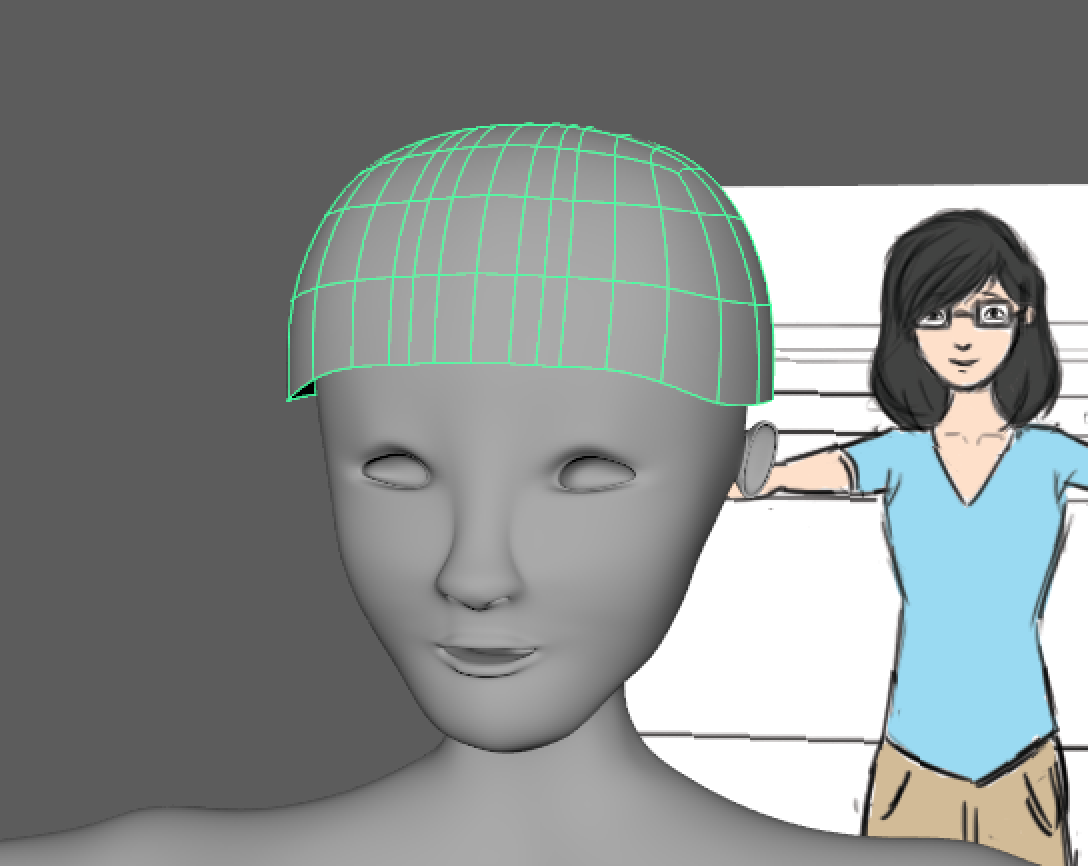
Now I’m going to select the bottom ring of faces and extrude them downwards.
Keep in mind the steps I am doing might be more specific to my character’s hair so feel free to branch off and do what you need for your character.
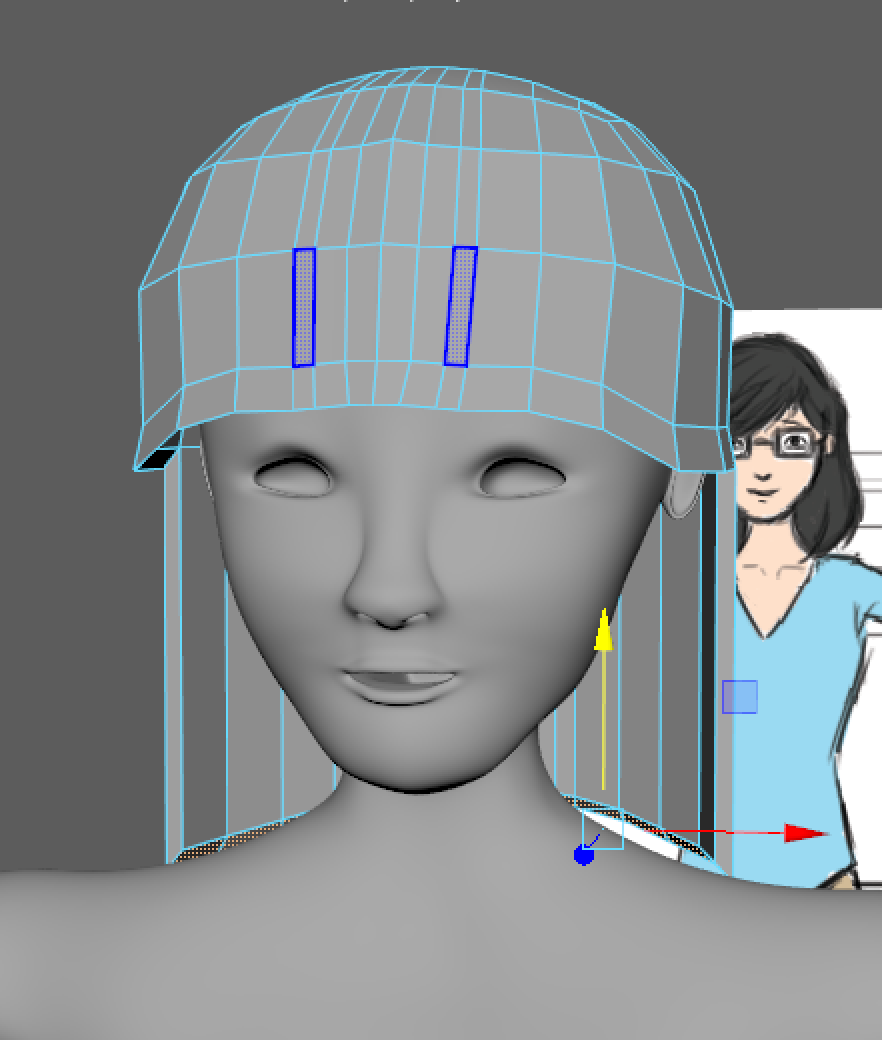
Now I’m going to add some more edge loops in the back to get more flexibility for sculpting.
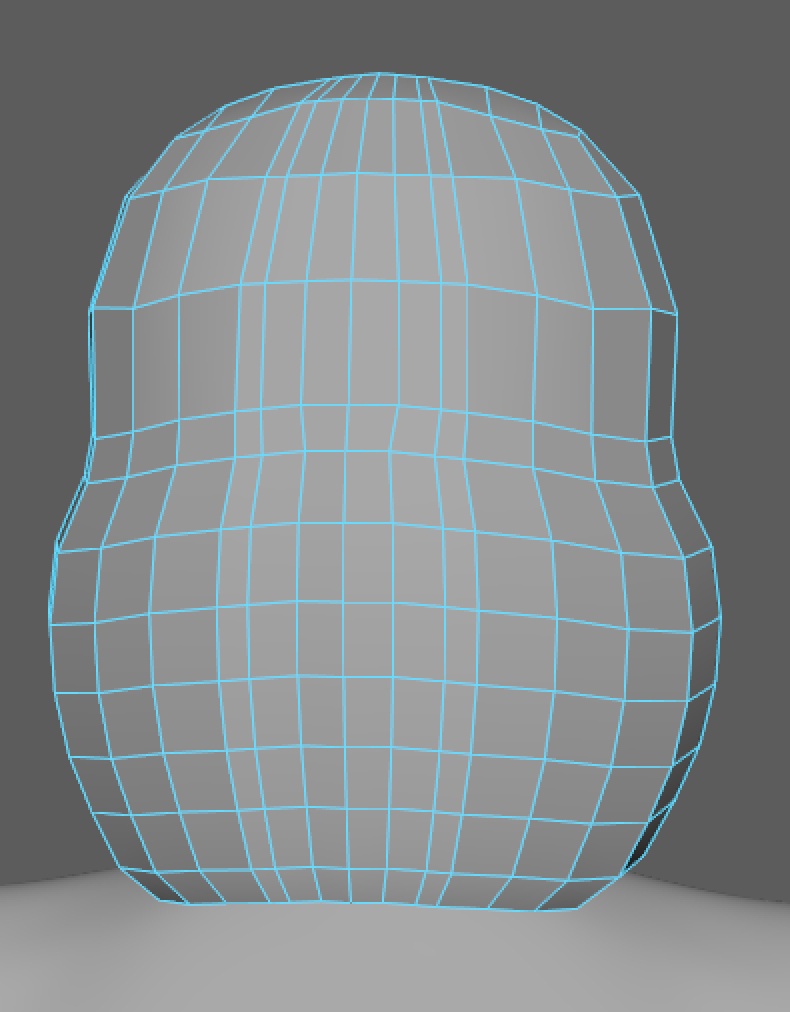
At this point, I spent a lot of time sculpting the hair to get the shape that I wanted. One tool that I found extremely helpful was the inflate tool in the sculpting tools shelf. This gave the hair some weight to it.
This is where you need to utilize your own creative decisions and skills to get what you want for your character.
For now, I am satisfied with this for the hair:
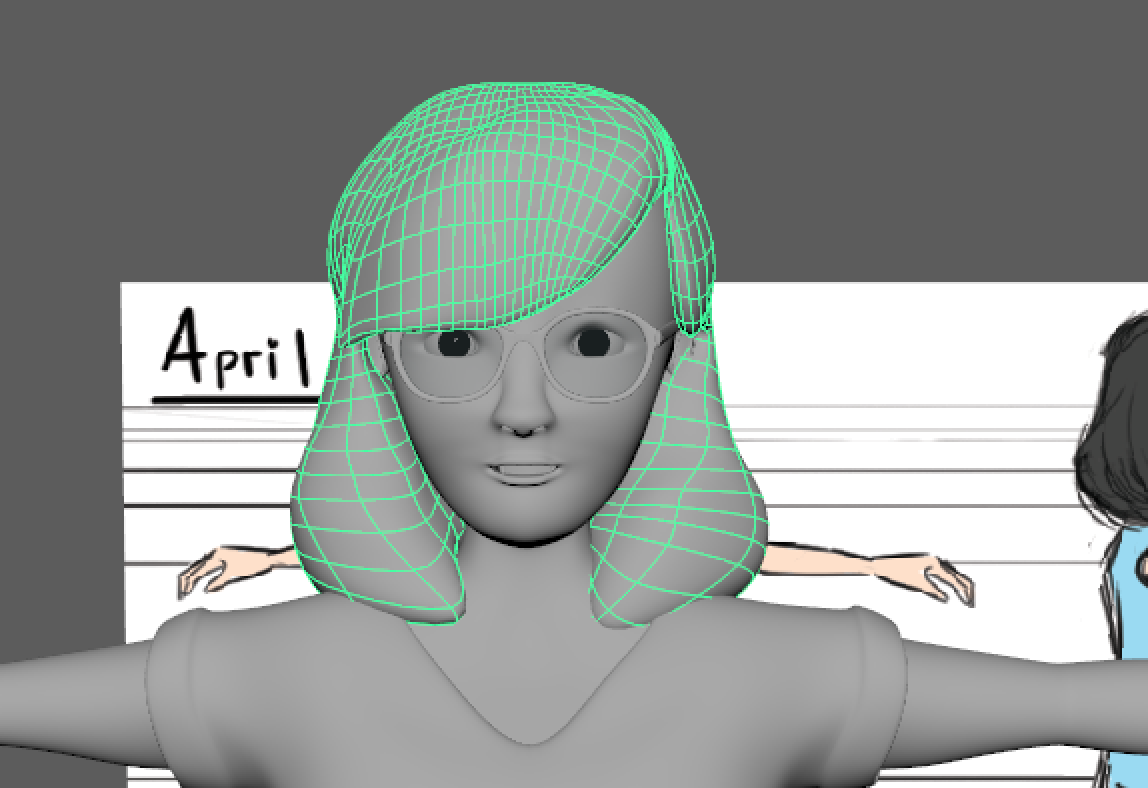
At long last, we have our completed character with great topology and great details.
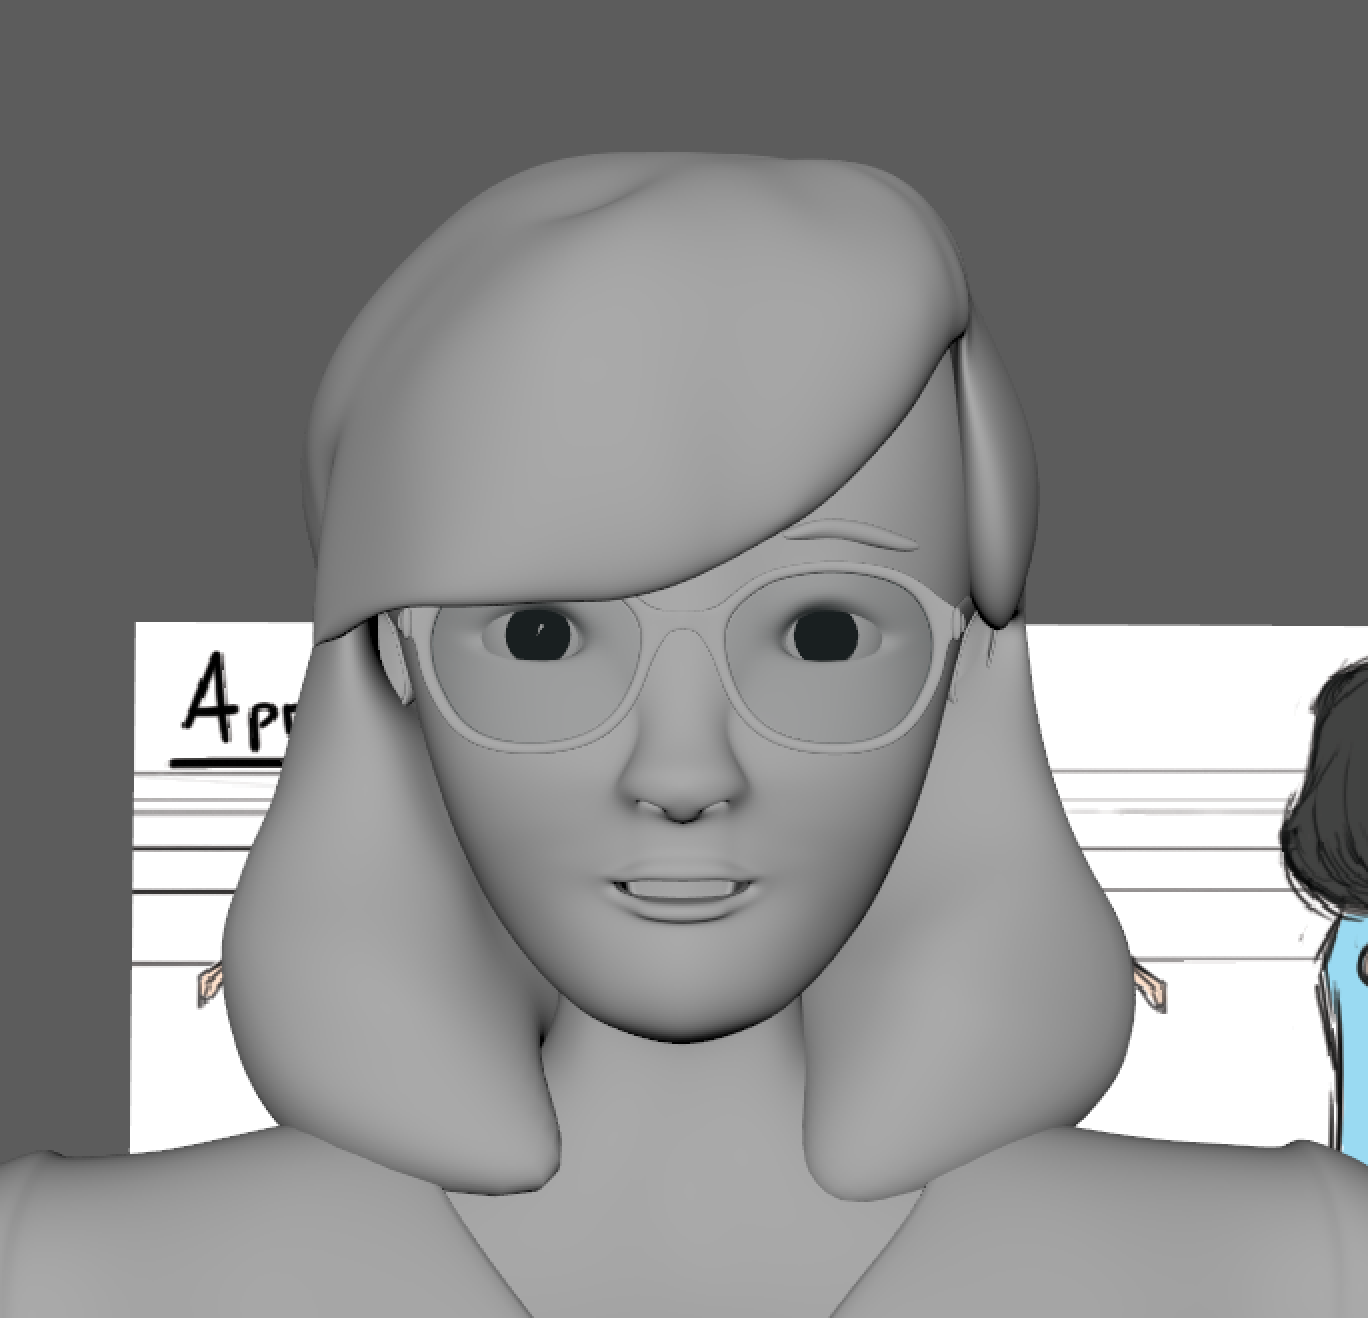
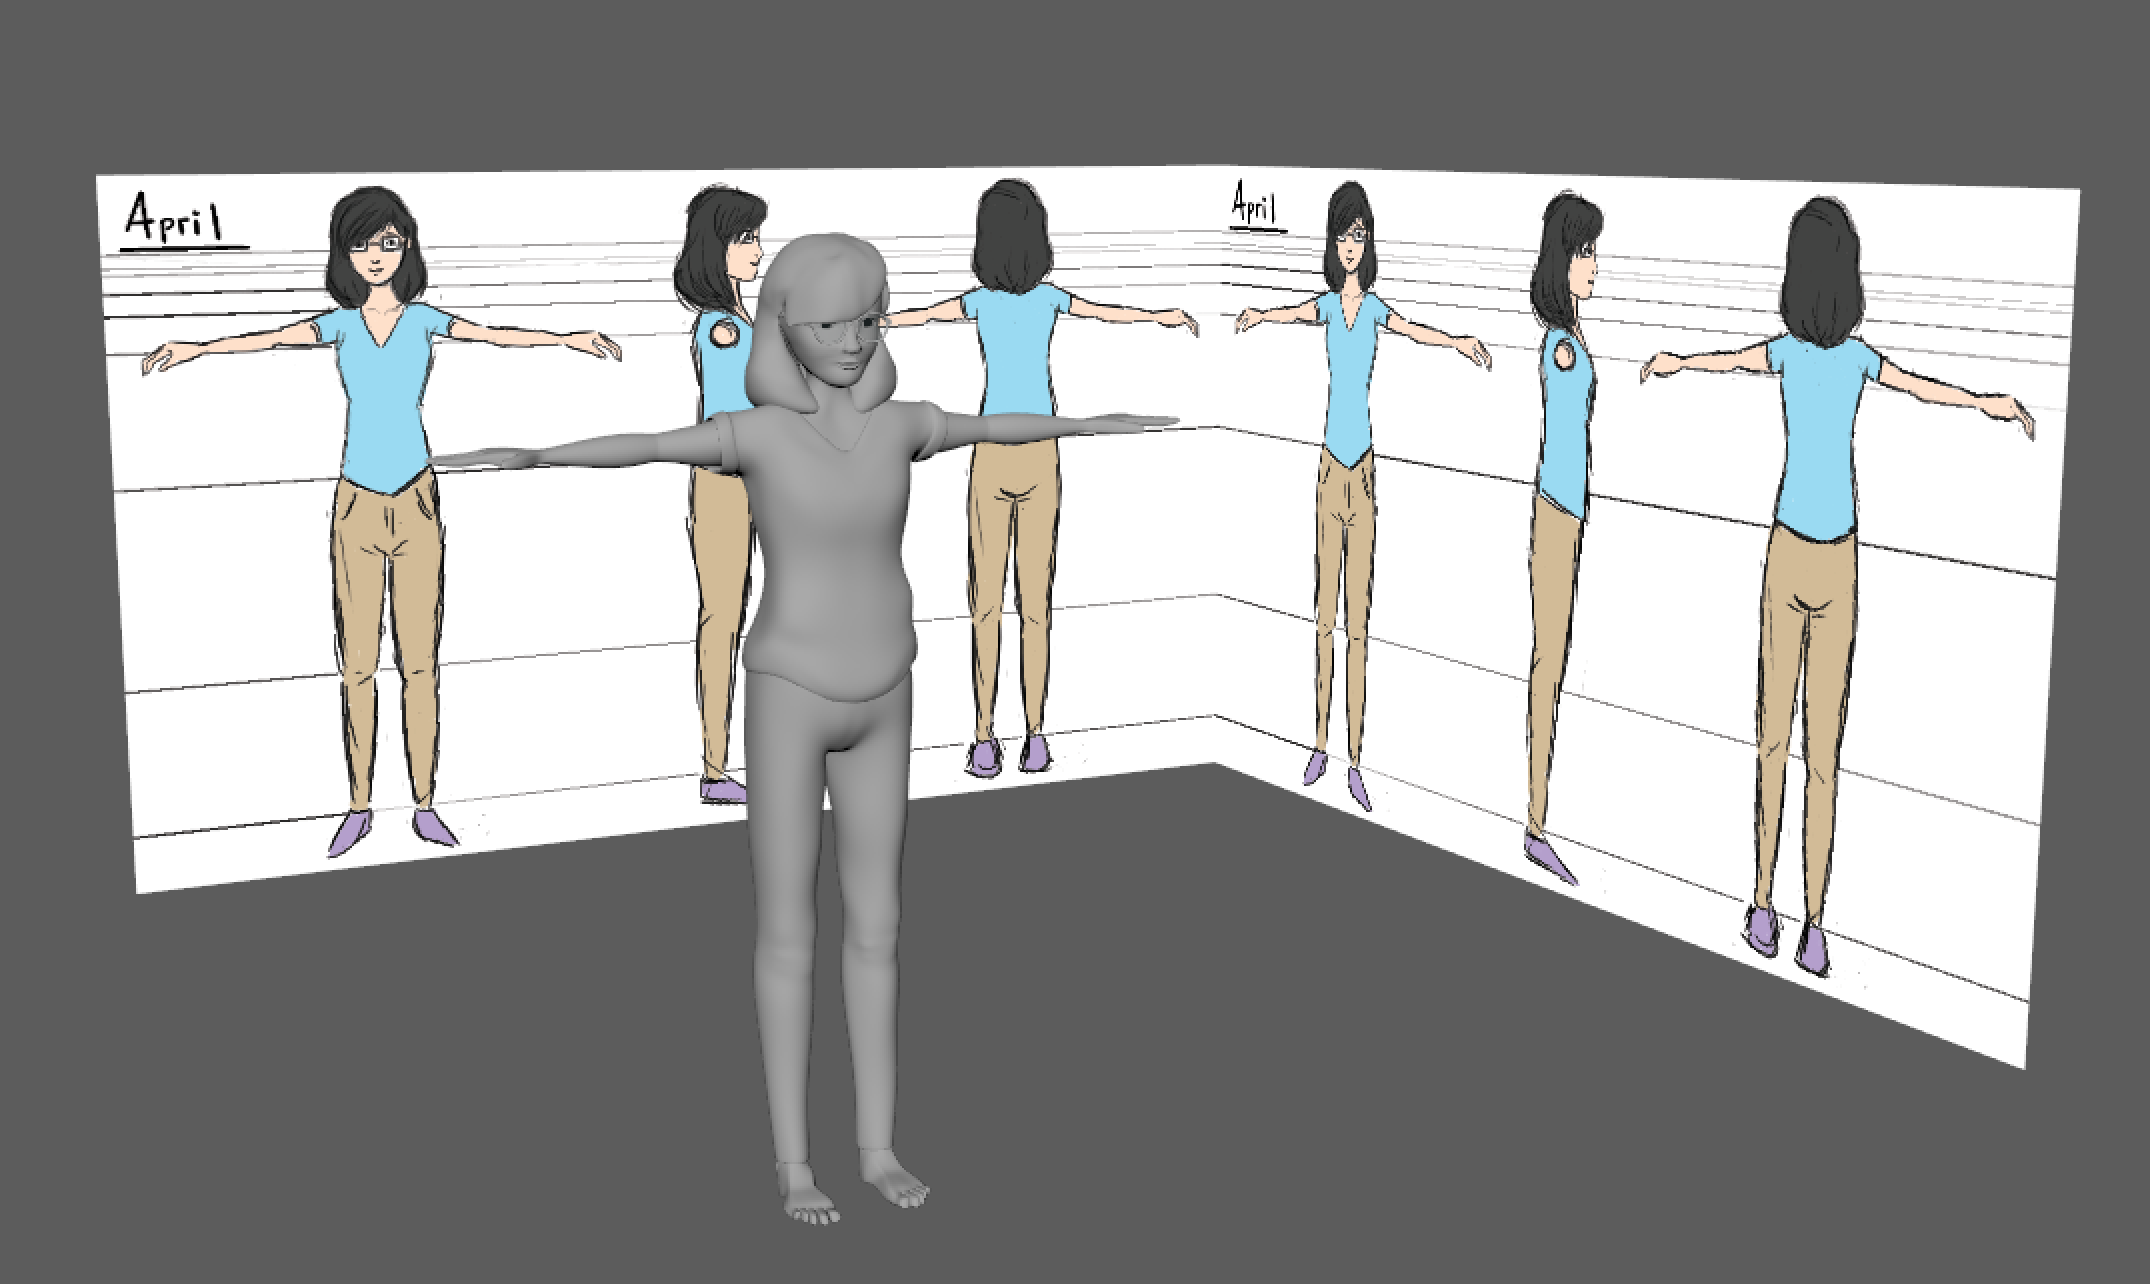
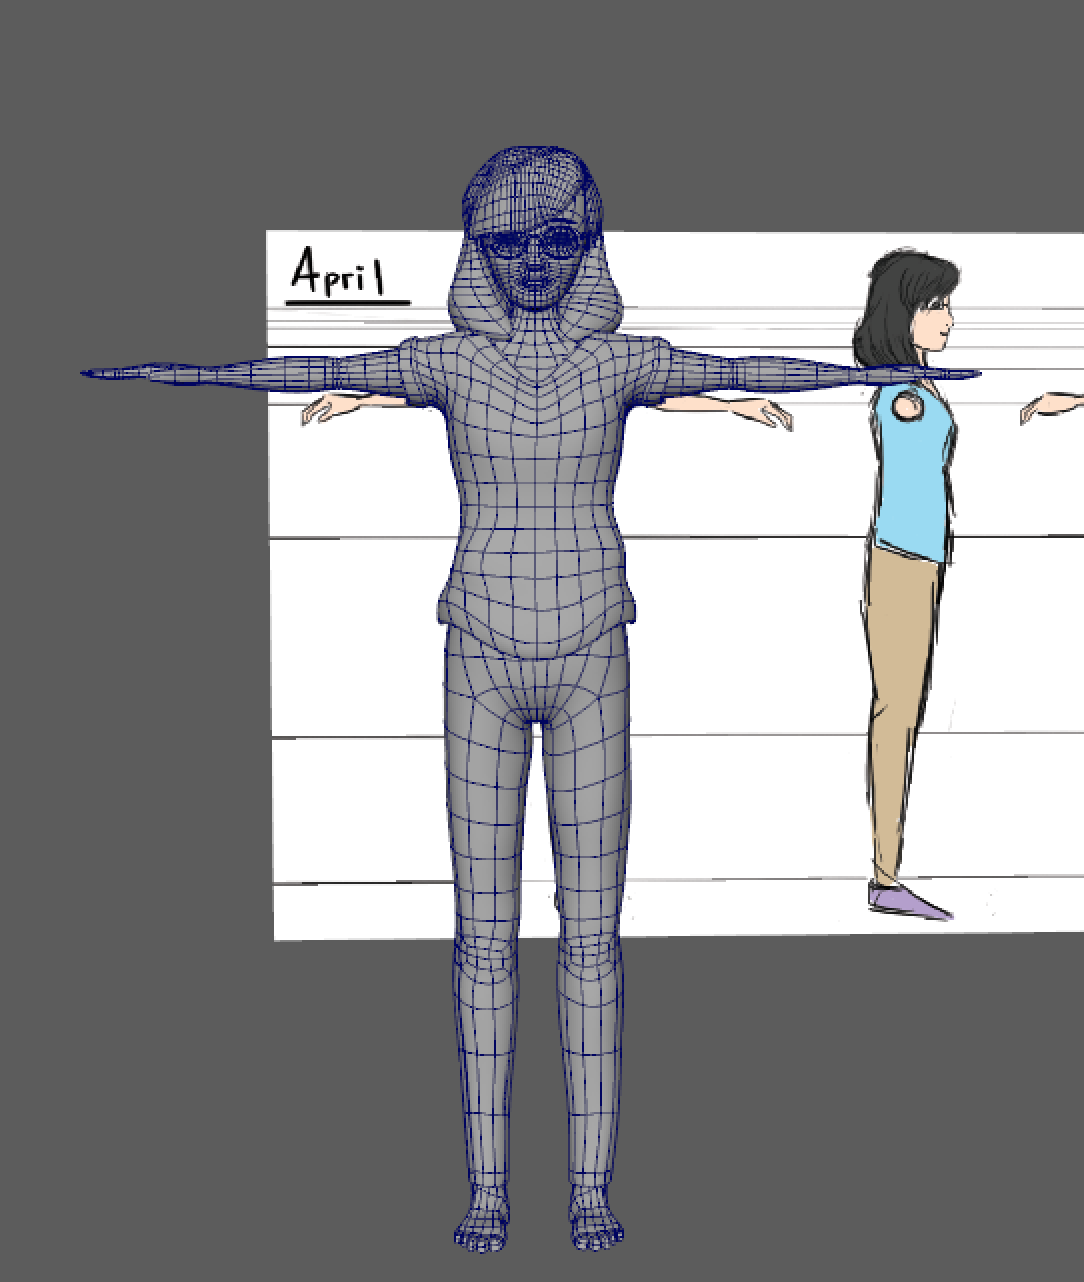
Congrats on finishing the lab!! We know that it was a long one but we hope that you learned a lot about organic modeling in the process. Once again, feel free to spend as much time as you want to get your character to look the way you want. Make sure your outliner is clean and organized before you submit!