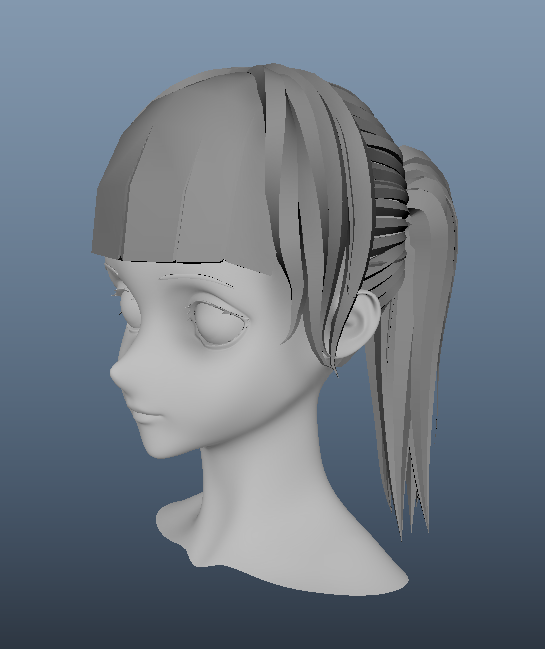
Polygon Hair Modeling
Welcome to the polygon hair modeling lab! There are quite a few different ways to model hair. Today, we’re going to model it using polygons! Polygon hair makes a really stylized look that is perfect for anime or cutesy low-poly models (or if you don’t want to deal with xgen).
In this lab, we’re going to be making a long ponytail with bangs. We’ll be going over some different techniques for making different hairstyles as well. Then, at the end, we’ll briefly touch upon methods on shading the hair.
For all of these sections, please download and reuse this anime head mesh, taken from Marfab.
“Anime Head Base Mesh” (https://skfb.ly/oBSEQ) by MarFab is licensed under Creative Commons Attribution (http://creativecommons.org/licenses/by/4.0/).
Back Hair
Let’s start off with modeling the back of the hair. To do this, we’re going to be using the sweep mesh tool extensively.
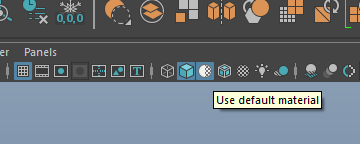
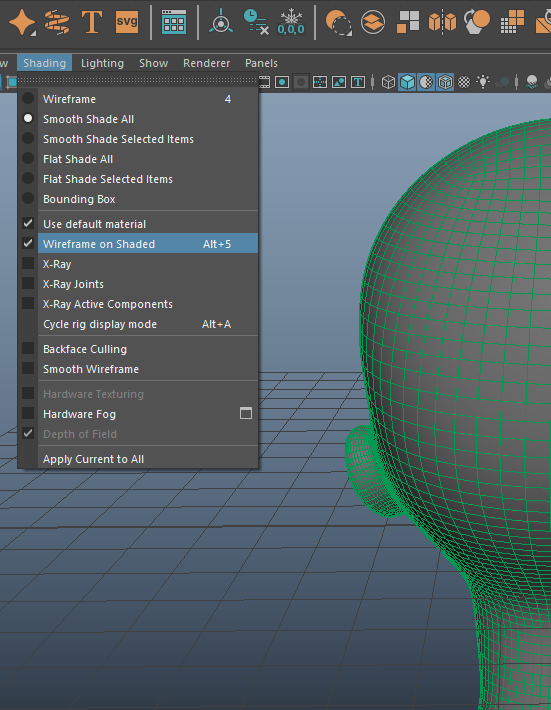
To begin with, we’re going to toggle the Use Default Material button just to make our lives easier so we don’t have to deal with shaders messing up visibility on our viewport.
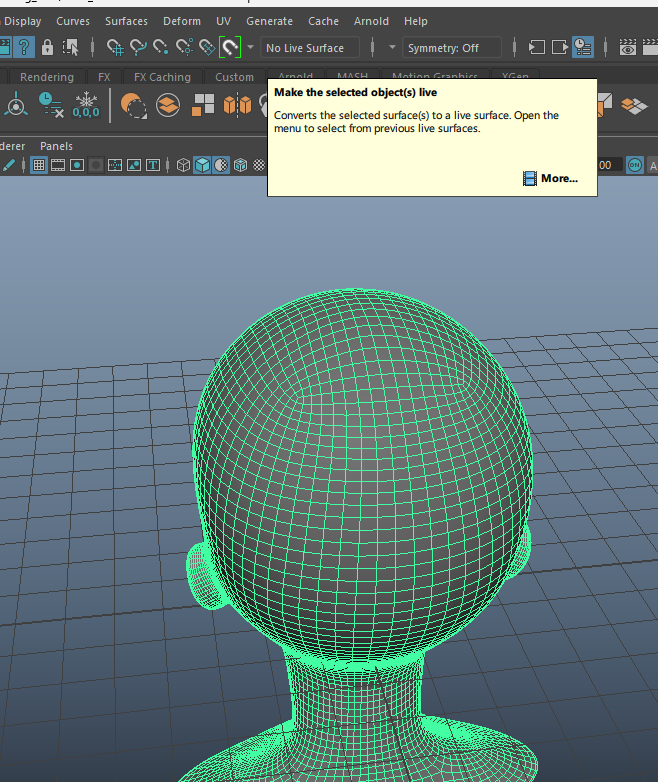
With our selected object, we want to click the Make Selected Objects Live button here. You may already be familiar with this if you’ve done retopology, but essentially, for our purposes, this will make the curves we create next stick onto the mesh.
You will notice that once an object is live, you won’t be able to select it normally. That’s ok. In order to still be able to see the wireframe, we can click Alt + 5 to toggle on wireframe on shaded display mode. Alternatively, you can click this button here.
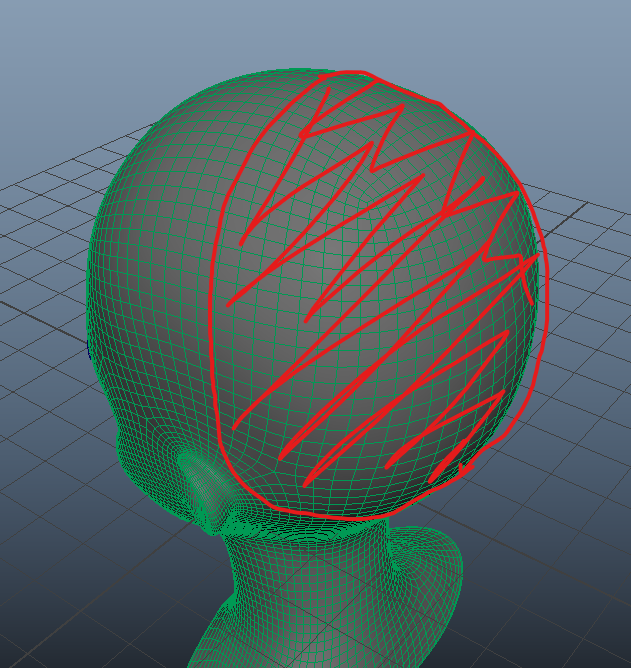
We define the back of the head as this entire section in red here. Everything behind the ears is essentially the “back” here.
Begin by using the EP Curve Tool (or any curve creation tool of your choice) to create evenly spaced strands that focus towards the start of the ponytail here. It is okay if your curve doesn’t fully appear on top of the mesh and is partially obscured. We will be fixing that in a bit.
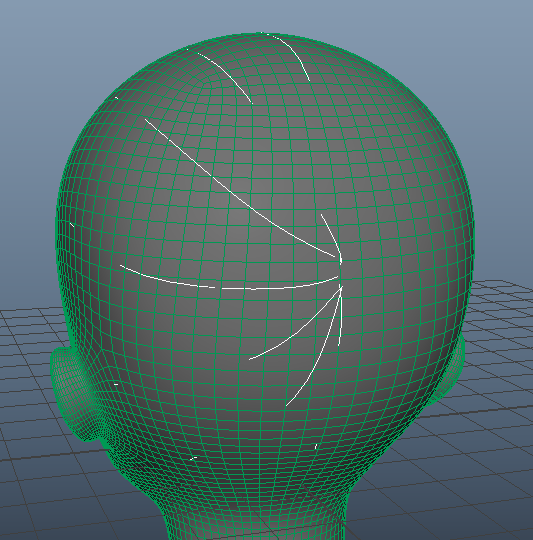
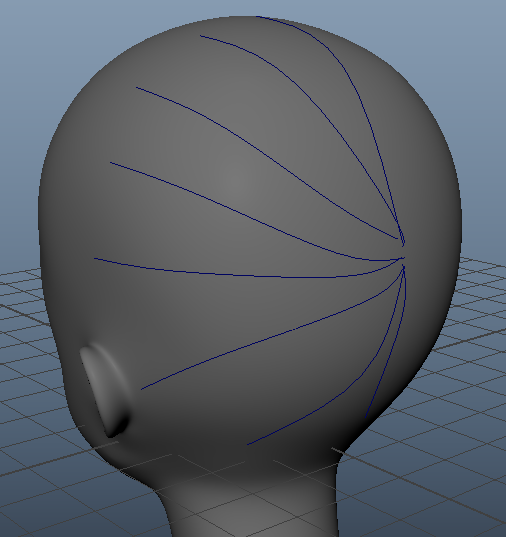
I’ve highlighted the curves here so it’s easier to see. We only need to do it for once side since we’ll be mirroring it shortly.
After we’ve created these curves, let’s select them all and move them a bit to offset them so they don’t clip inside the head. Feel free to turn off live surface and display wireframe on shaded to adjust the curves as you feel fit. It might be useful to add new points, adjust the control vertexes, or adjust the points of the curve to create a better distribution.
We won’t be needing live surface or display wireframe on shaded next, so I’ve disabled them.
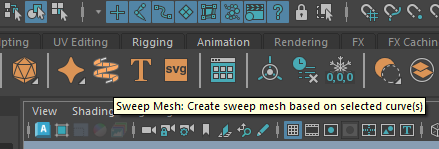
Let’s now select one of our curves and create a sweep mesh from it. You can create a sweep mesh by going to Create -> Sweep Mesh, or you can click this button.
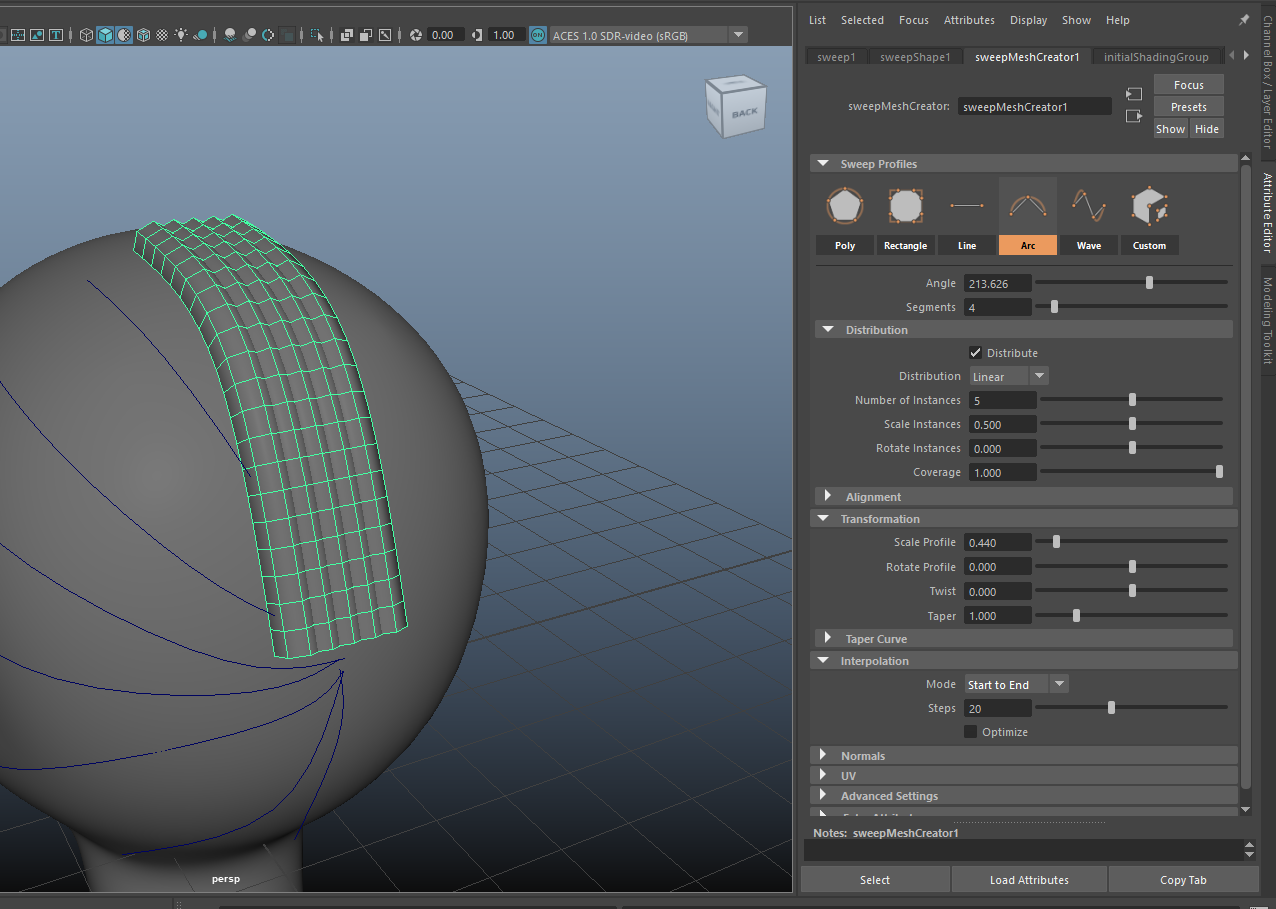
We can then change the sweep profile to Arc, adjust the angle the segments, and distribution profile. Here I’ve set the distribution type to linear and also the Interpolation Mode to Start to End. I’ve also decreased the scale profile and moved the Angle a bit.
The thought process behind these settings is that we want these hair strands to spread out over a decently wide area on the hair.
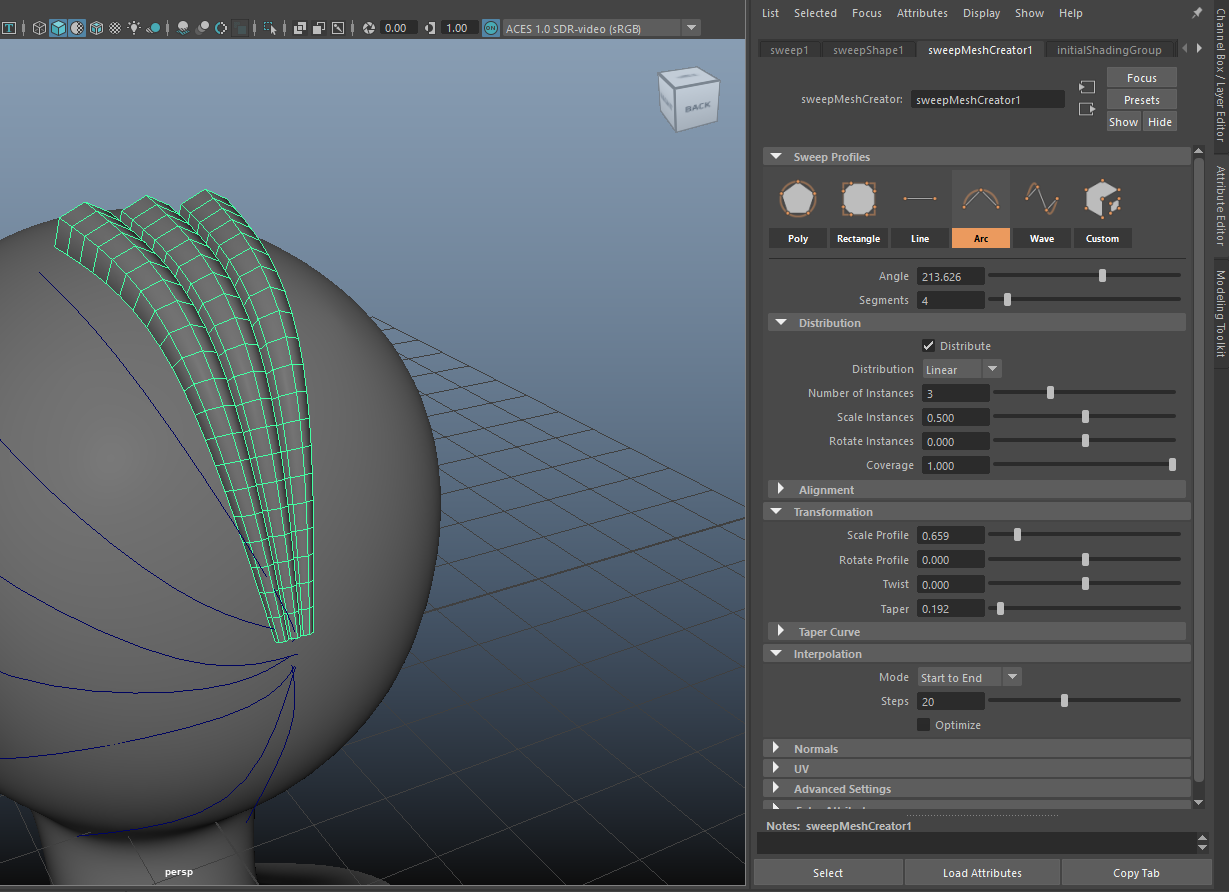
We can then adjust the taper of the sweep mesh to make the hair strands converge to a point. Here I’ve also tweaked the settings again to get a better distribution.
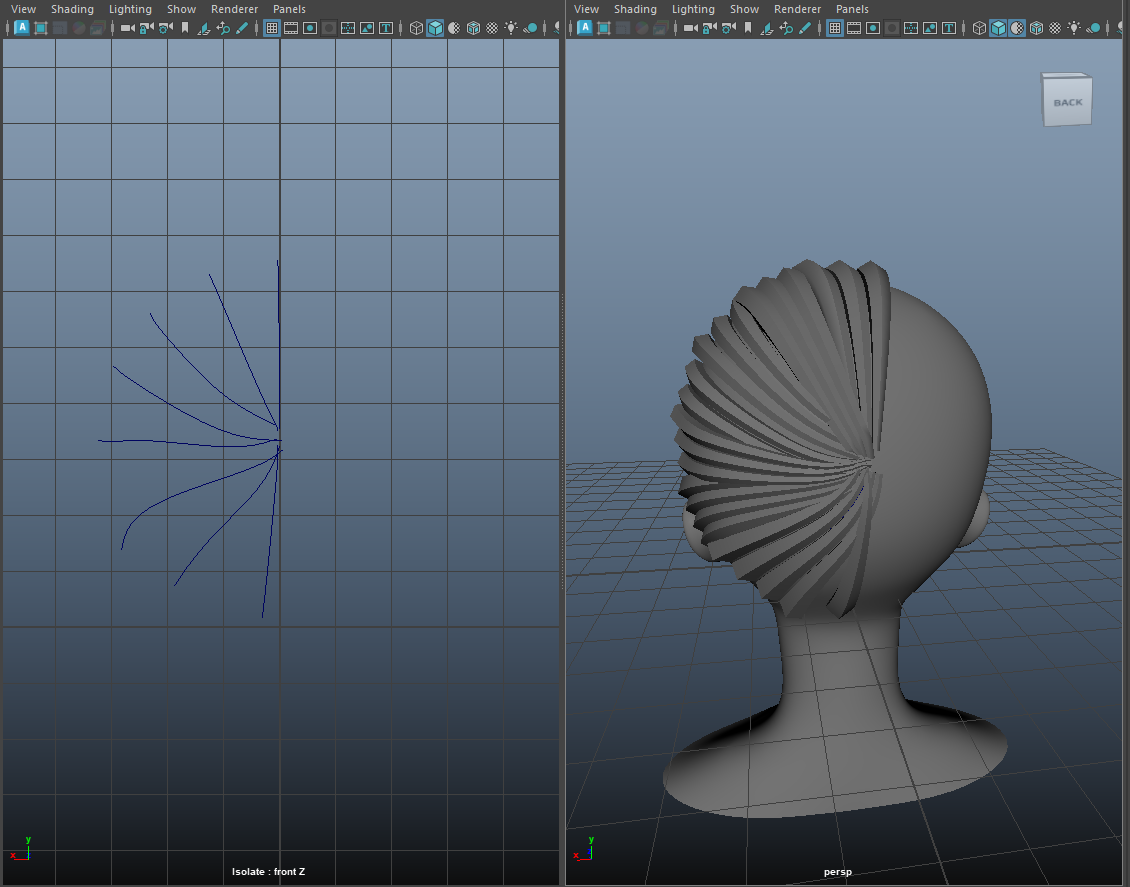
Let’s then repeat the same thing we did but with the remaining curves. I mainly adjusted the Distribution coverage, instance number and scale, the Rotate Profile and the Scale Profile. Sometimes it’s helpful to use the Alignment settings on the sweep mesh to get the right look too.
This is what it looked like after I was done. It was helpful to have a second panel on the side with only the curves (isolate select) so I can easily select edit the control points of the curve as I worked.
Front Hair
Let’s move on to the front hair for now. Here, we’re going to be creating some bangs.
Here, I created a plane with some desired subdivisions and scaled and positioned it like so, where it is nearly touching her forehead.
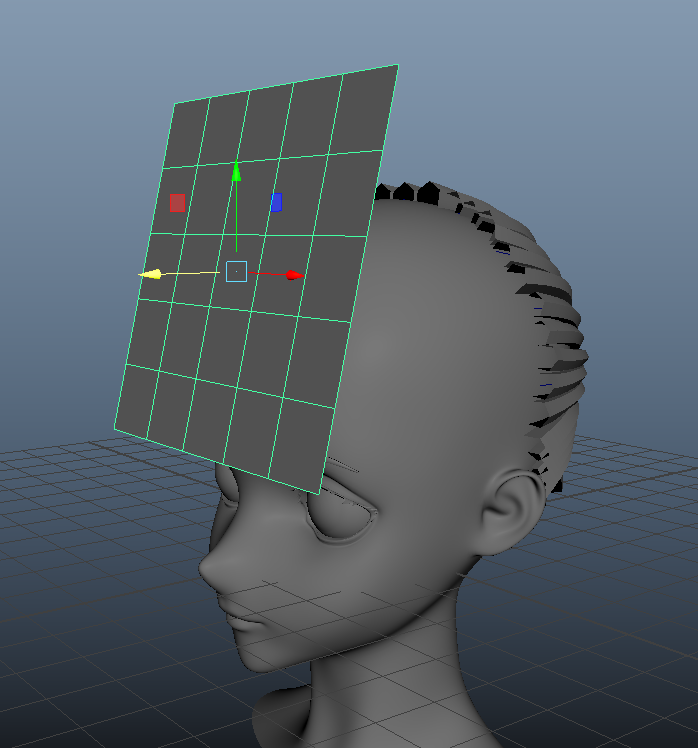
Then, selecting the plane first and then the head, we can use the Shrink Wrap Deformer.
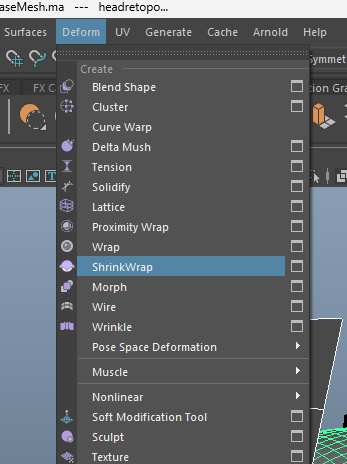
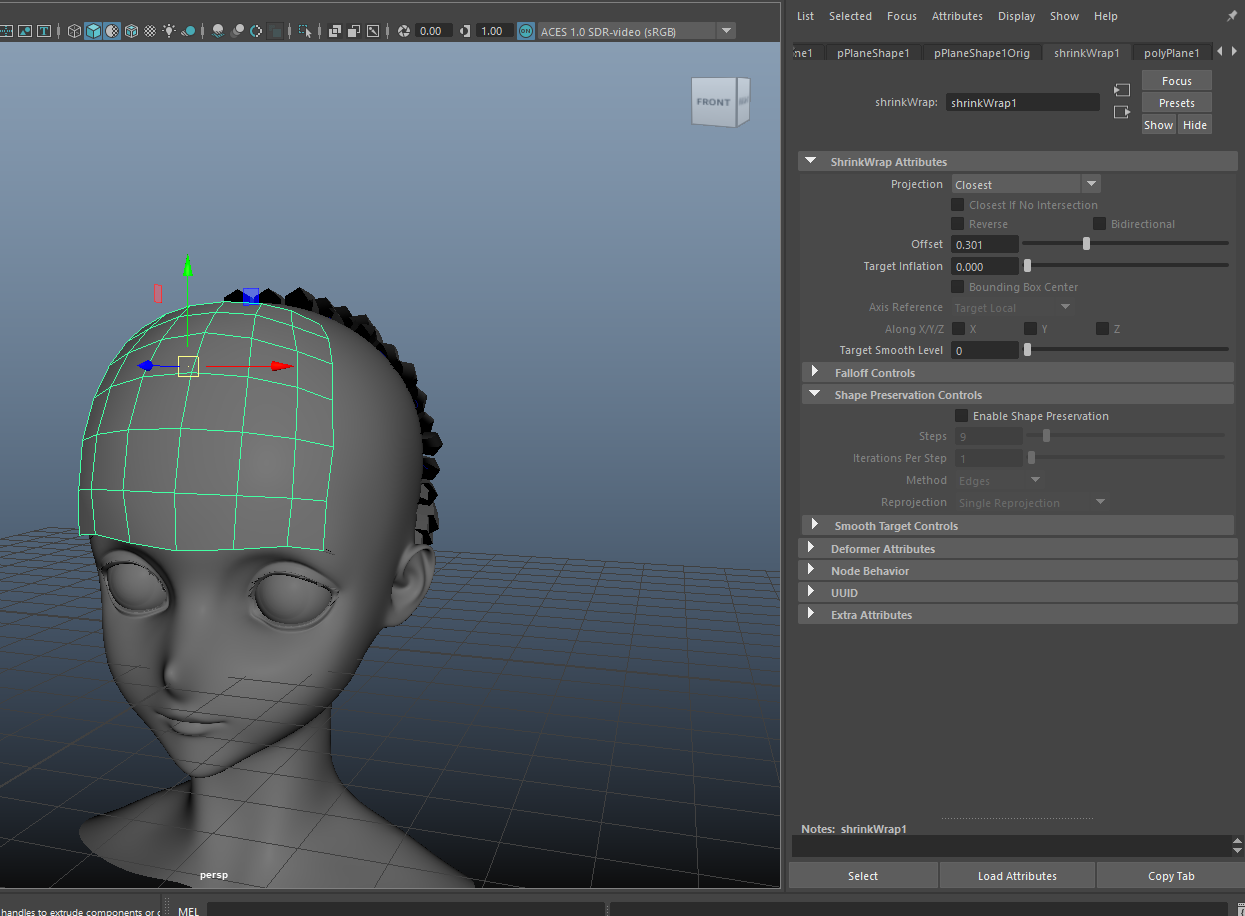
Then, I adjusted the settings of the shrink wrap. The thing to note the most is the change in projection method to closest and also the offset value. For your own custom meshes, it might be helpful to play around with the Target Inflation value as well as the Shape Preservation Controls.
I then scaled and moved the plane up a bit to make it be more in place like so. Make sure to keep your pivot close to the head if you don’t have shape preservation turned on.
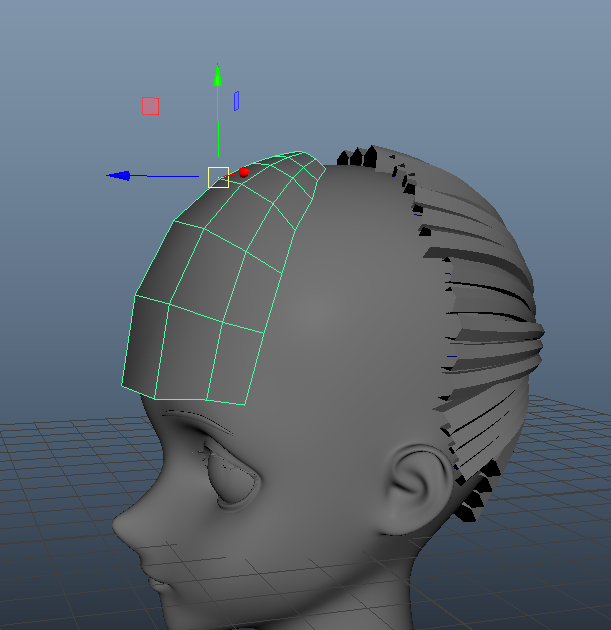
After this, we delete history on the plane to apply the deformer. I also deleted half the faces and mirrored it to ensure symmetry on the plane.
Using the multi-cut tool, I cut out some lines here for the separation of the bangs.
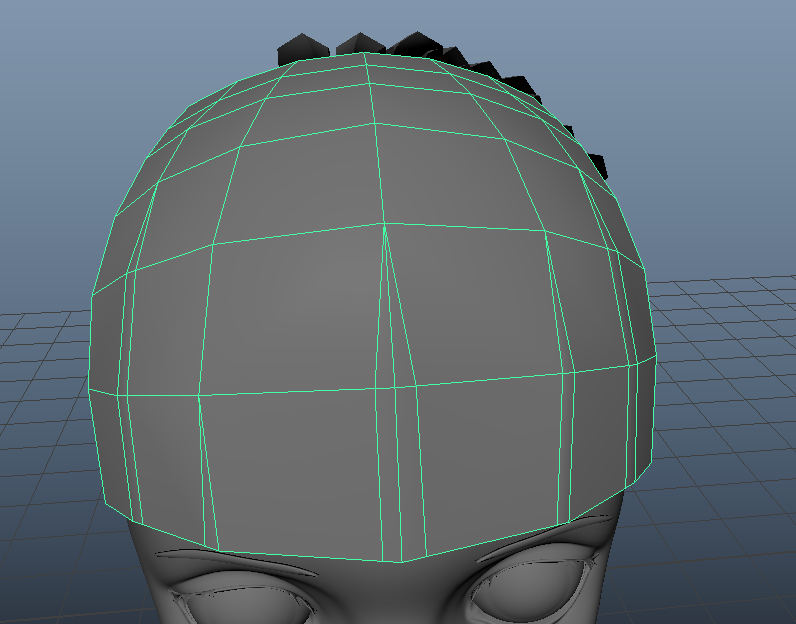
We can use the insert edge loop tool to fix up some of these cuts.
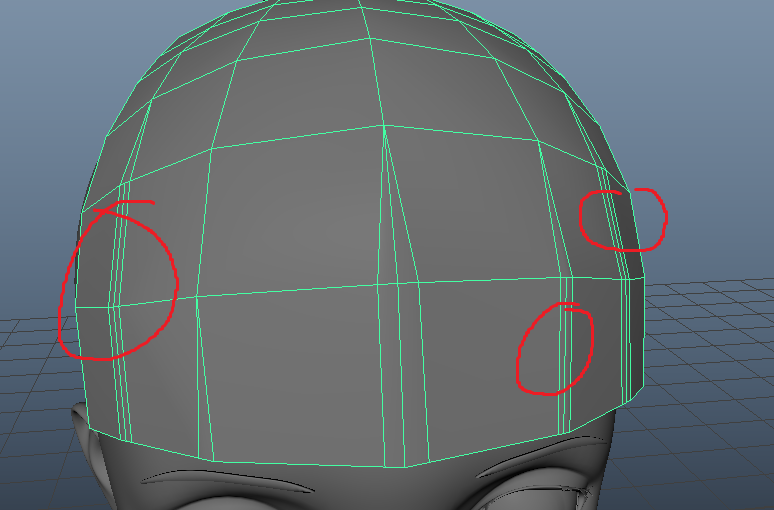
And then we can use the multi-cut tool again to extend those lines up to the start of the division.
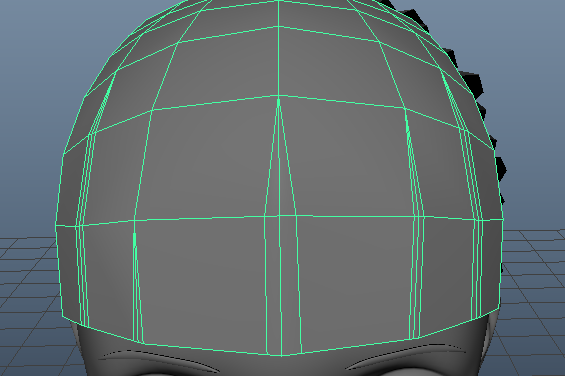
Next, let’s inset those center edges and adjust the surrounding edges to give it a bit more of a 3D feel.
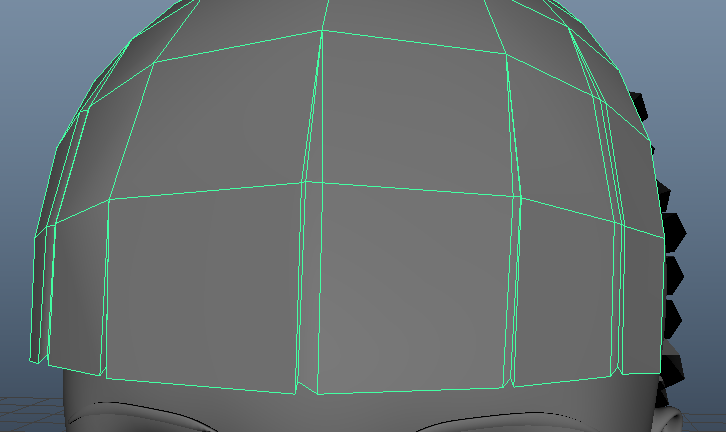
Now, we can extrude the plane to make it a solid object.
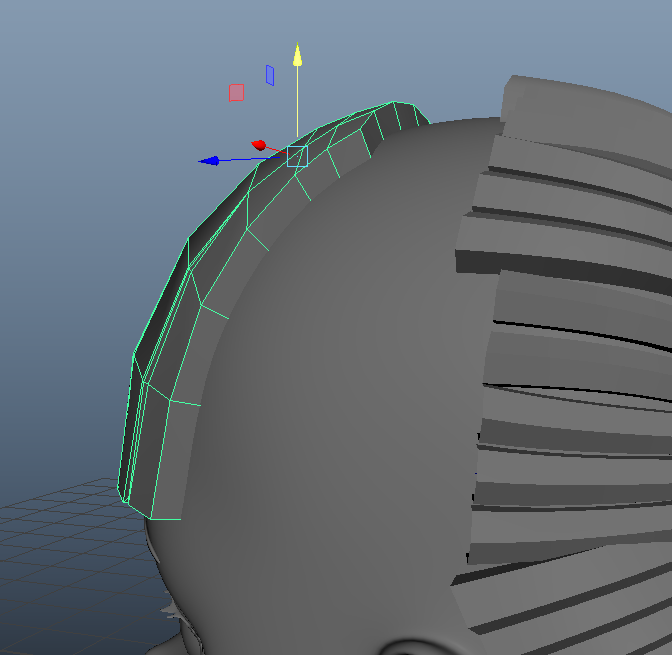
While we’re at it, let’s move the edges on the back of the bangs so that they meet up with the back hair strands.
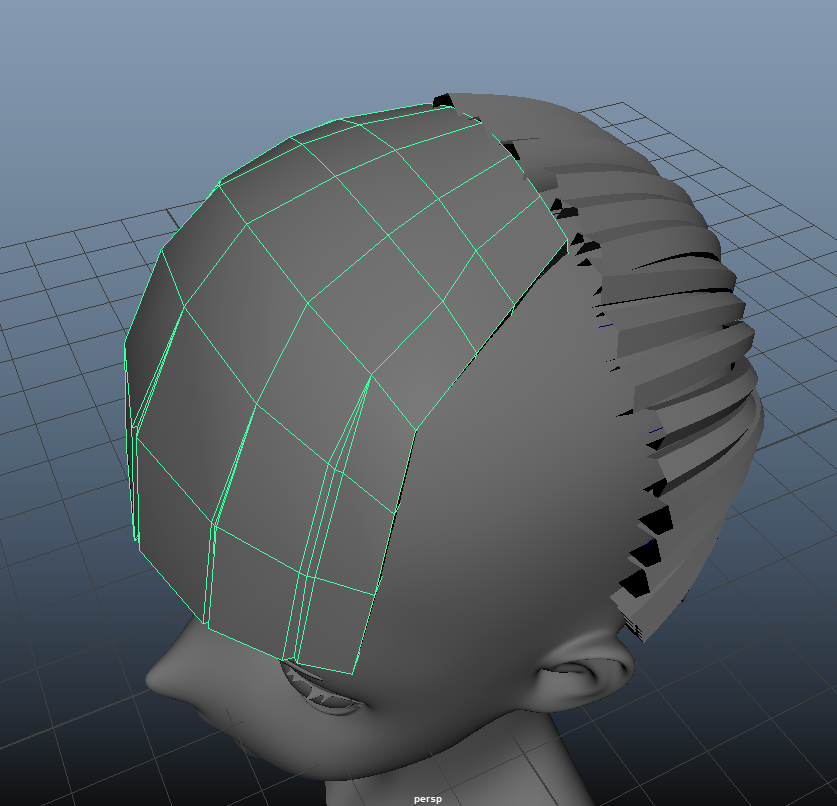
Side Hair
Let’s now move on to the side hair. Once again, we can repeat the same process we did with the back hair. We can turn the head into a live object, create curves, and then use the sweep mesh. Our goal is to fill in the gap between the back hair and the front hair.
Once again, I split the view into 2 panels and use isolate select on the left panel so I can easily select the curves I’m working with. I’ve created two starting curves here like this.
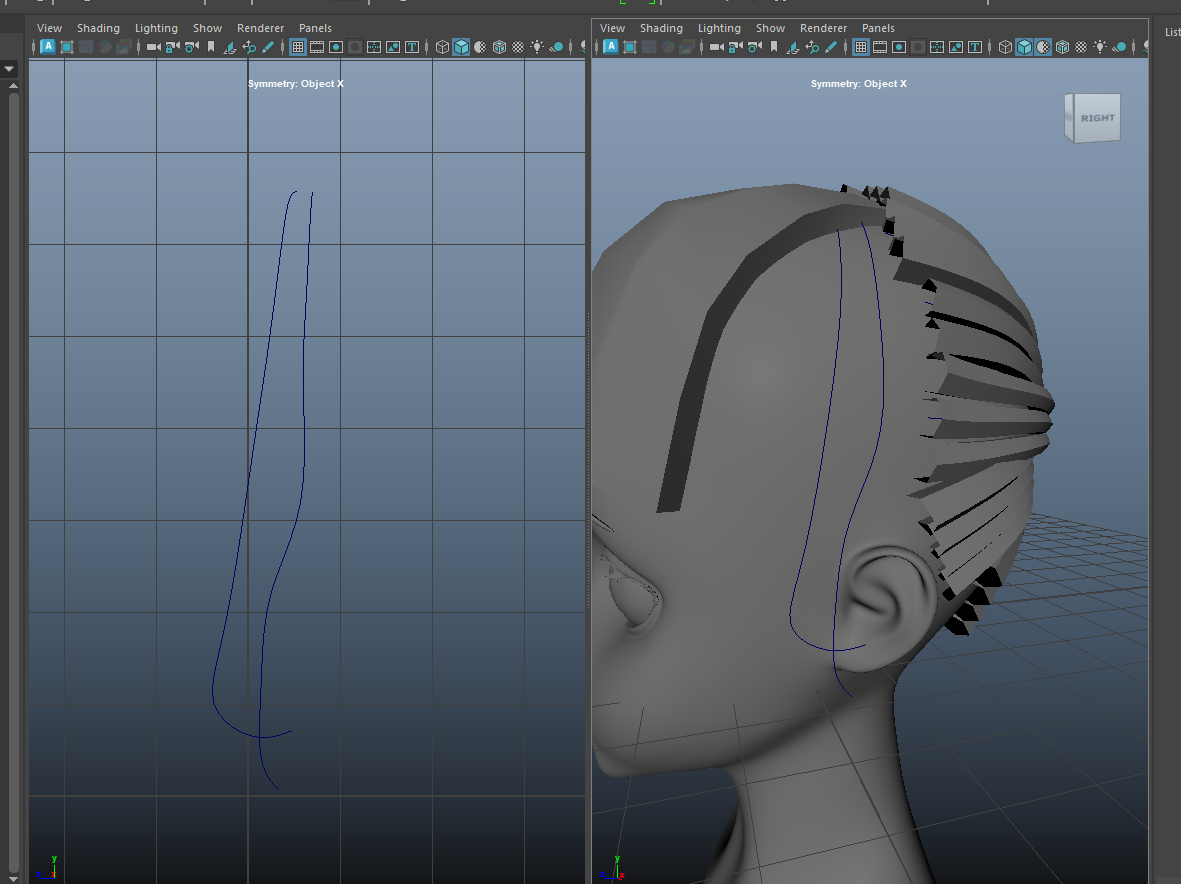
Let’s then create a sweep mesh again and adjust the settings. Here, the thing we want to pay attention to most is the Taper Curve. We can create a custom taper curve to determine what the rate of tapering looks like.
I’ve also taken the liberty to adjust some of the back hair curves to better aline with this strand.
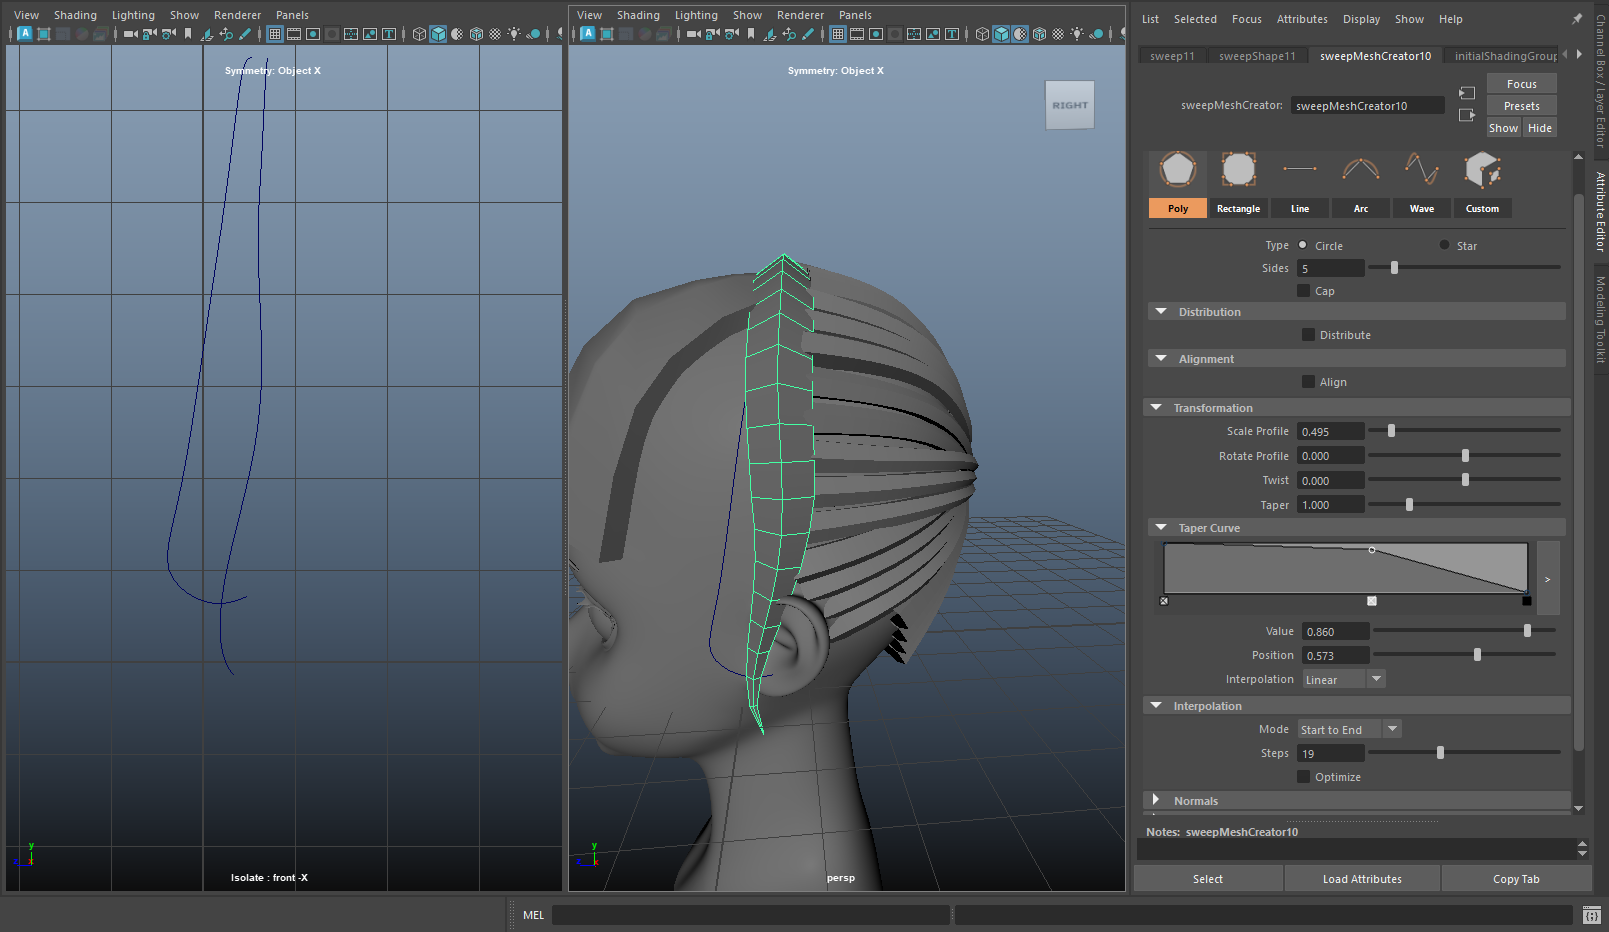
Here’s what my second strand looks like. I’ve turned on ambient occlusion just to make it easier to see.
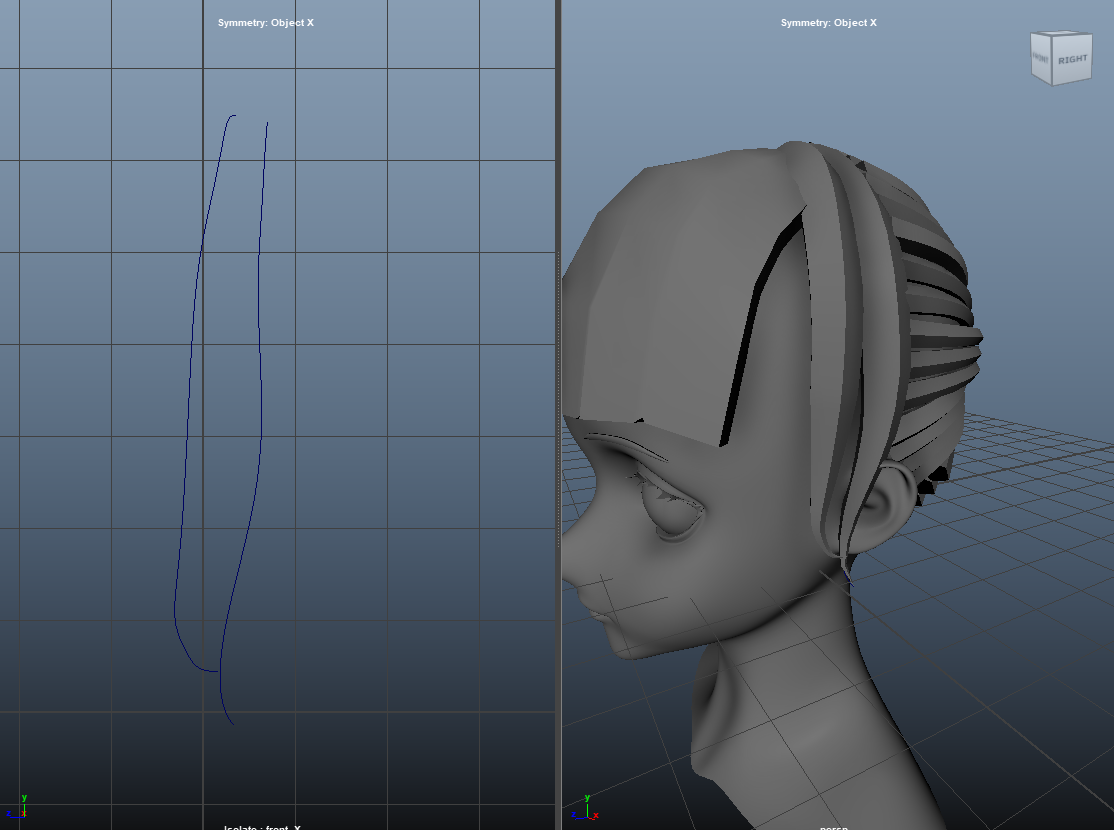
Keep repeating this process. It might also be helpful to mess around with the Twist parameter. You can also duplicate the curves to save you some time. Here’s what mine ended up looking like.
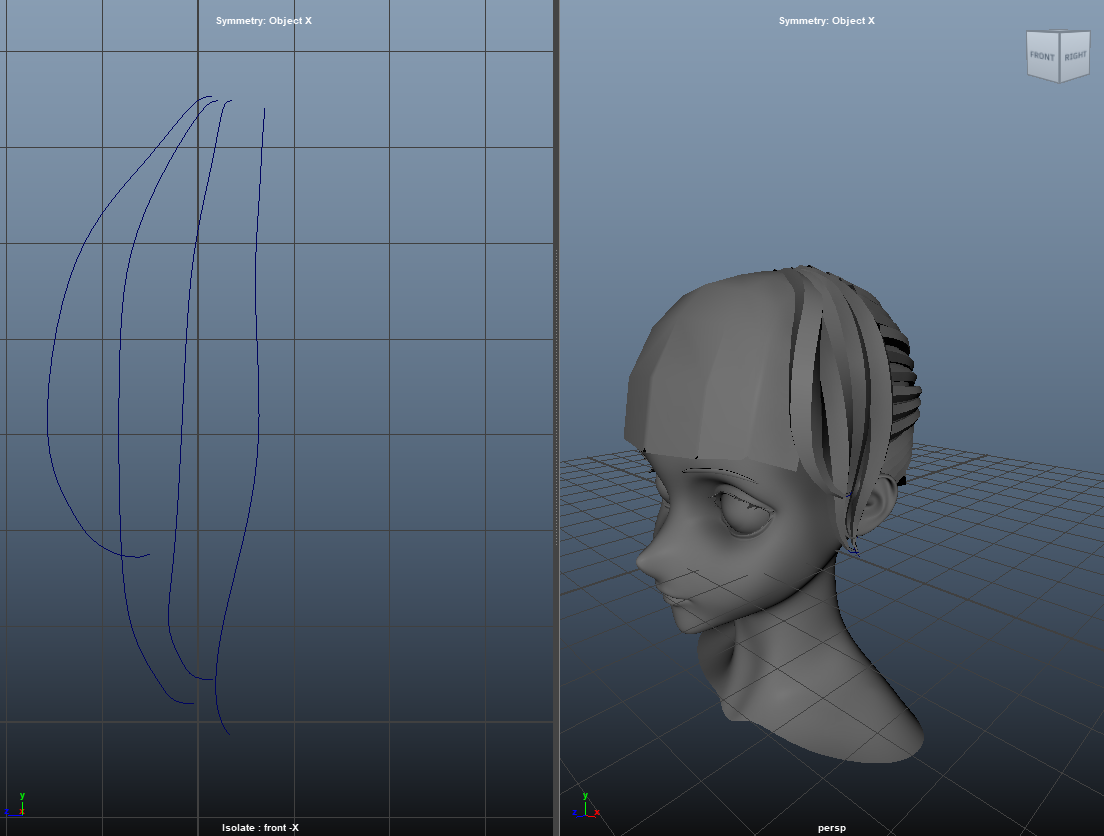
Adding Volume
To add more “hair”, we can create more strands of hair with curves to fill in the gaps. These strands can be smaller to sell the illusion better. It’s often very helpful to duplicate existing curves.
Here is what my back and side look like after adding additional strands and also adjusting the placement of the curves.
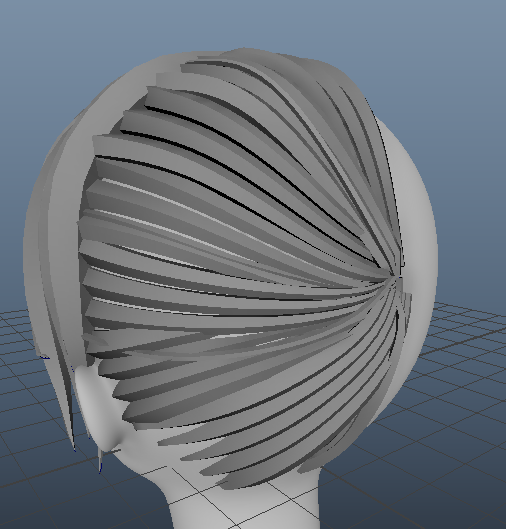
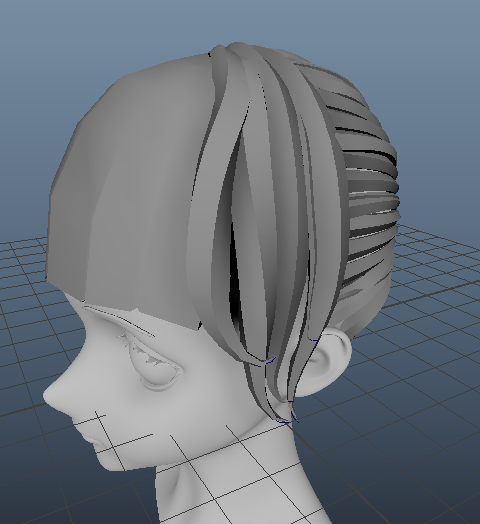
At this point, let’s also select all our hair geometry (not the curves), and mirror it to the other side with the mirror tool. If you want the hair to be assymetrical, you’d have to repeat the process for the other side instead of just mirroring.
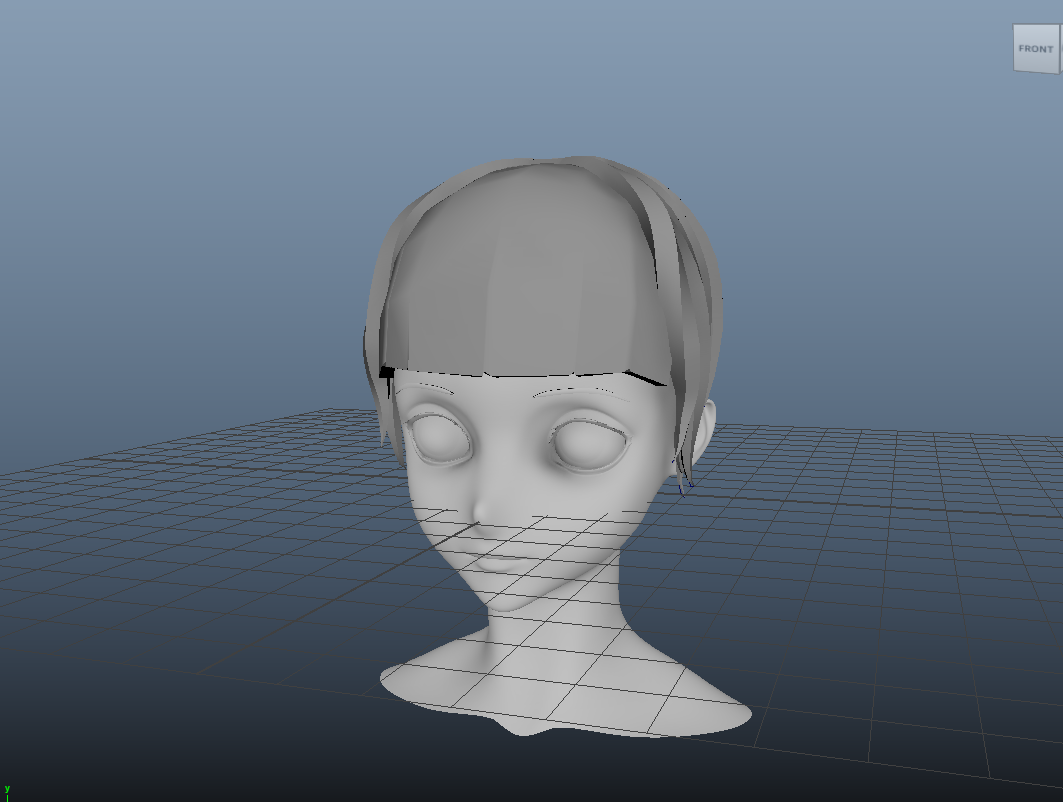
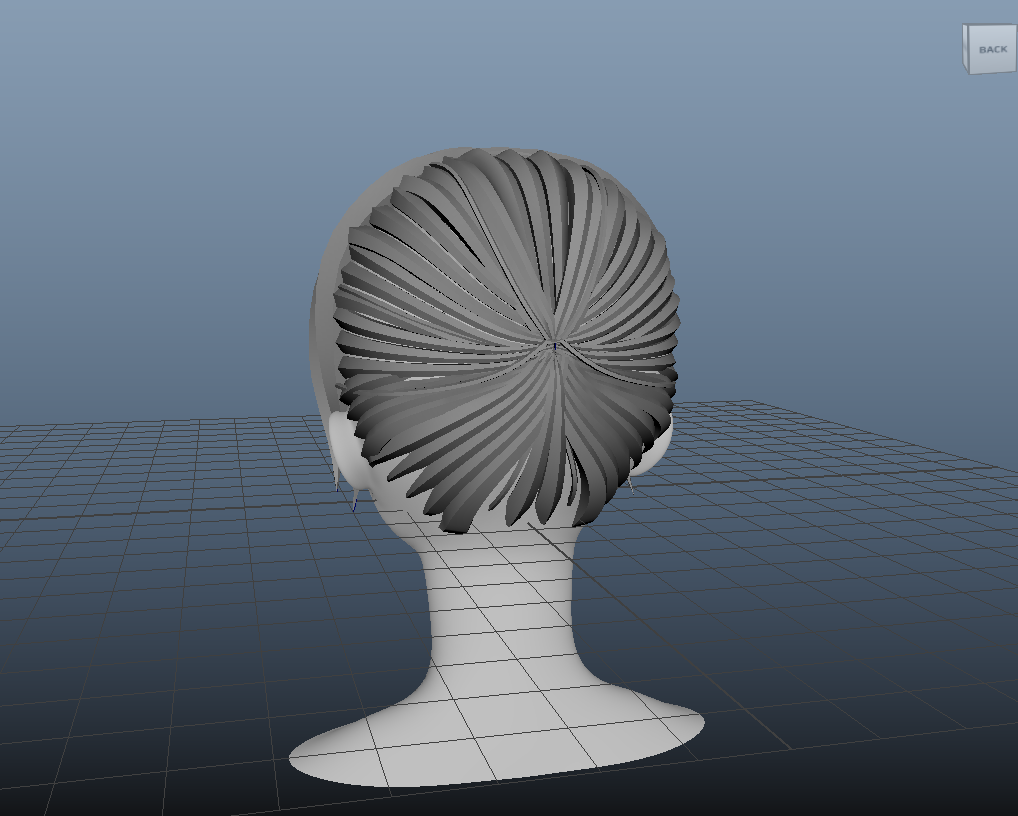
You can mess around with the merge border threshold to make sure the two sides connect to each other. Feel free to continue tweaking things as well until things look nice.
Ponytail
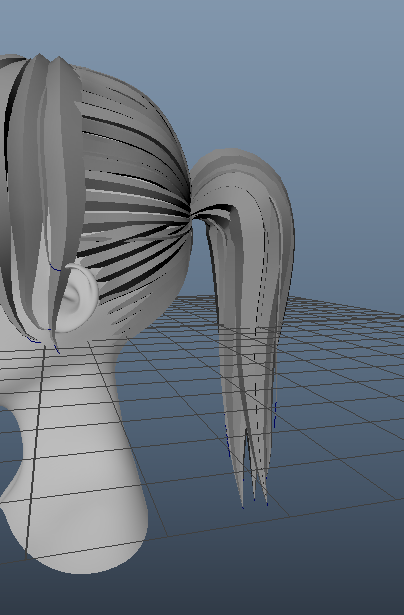
To create the ponytail, I create curves once again but this time in side view. This allows us to easily create the general shape of the ponytail. I recommend looking at references! Especially if it’s a hair style you’re not familiar with.
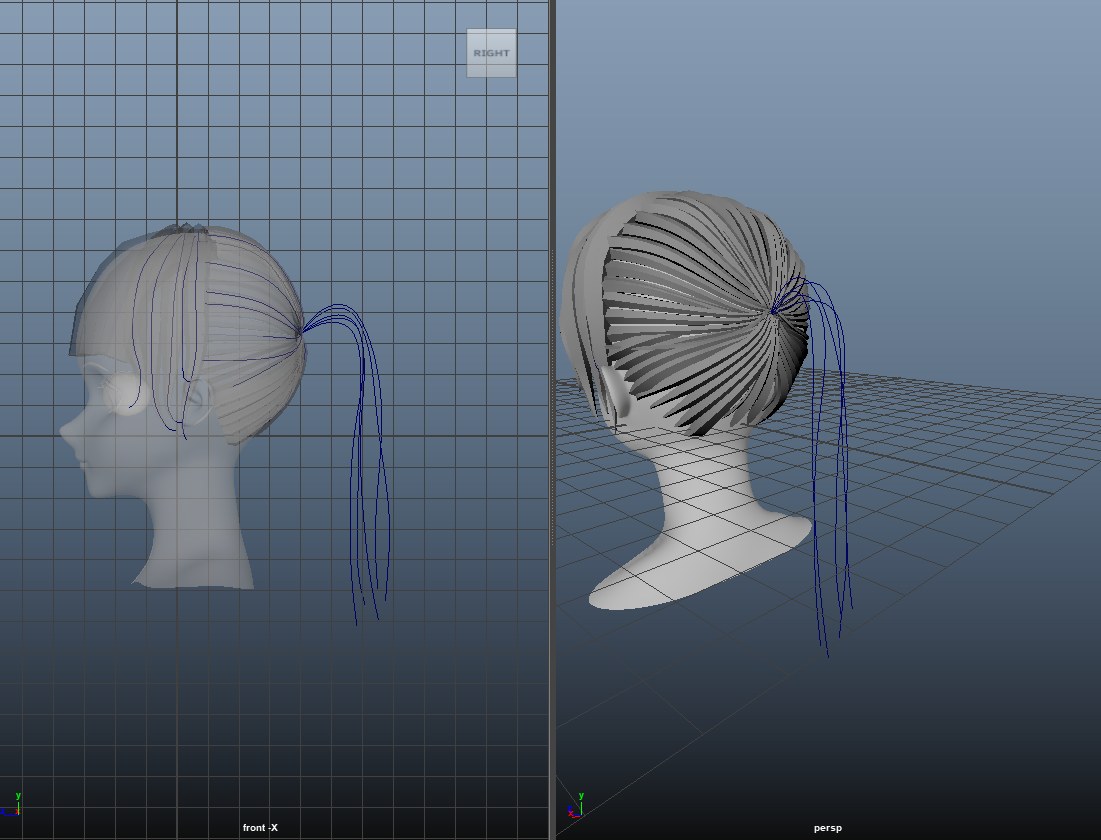
It’s difficult to know what the final look will look like with just curves, so let’s sweep mesh! To make our lives easier, we can create multiple sweep meshes at once by selecting all the curves first before creating the sweep mesh. Note that if you do this, all the curves share the SAME sweep mesh.
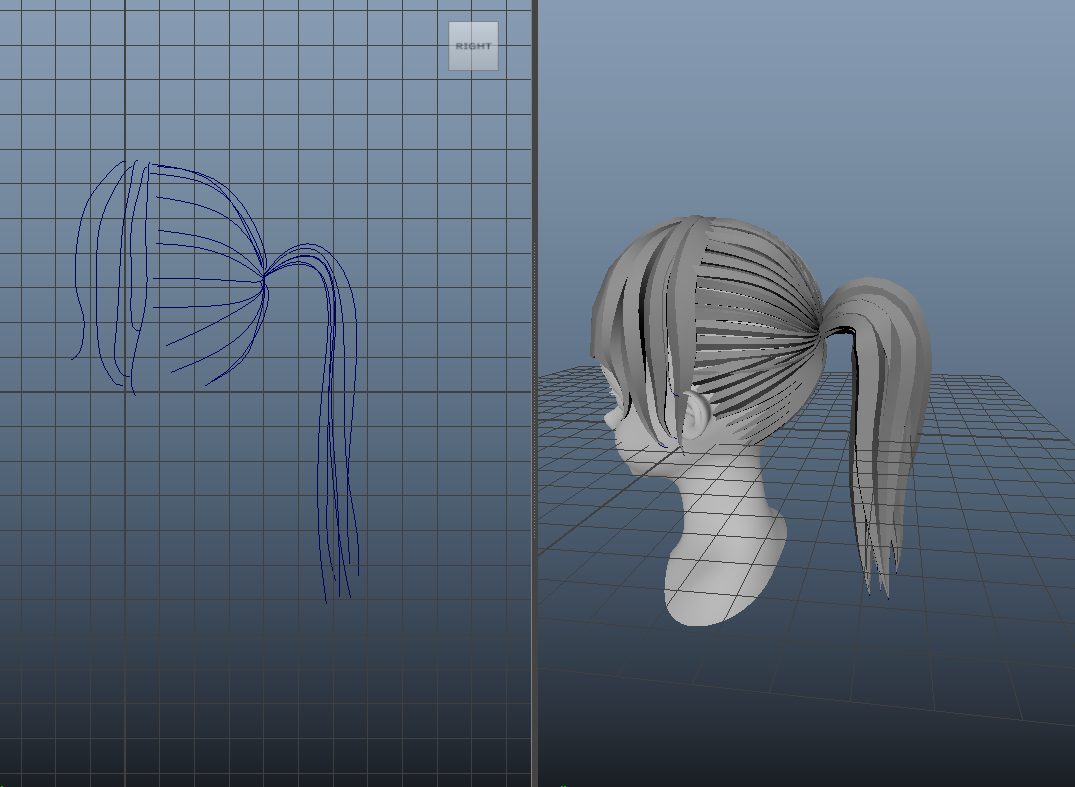
Using the techniques from earlier, let’s also add some small strands.
Hair tie
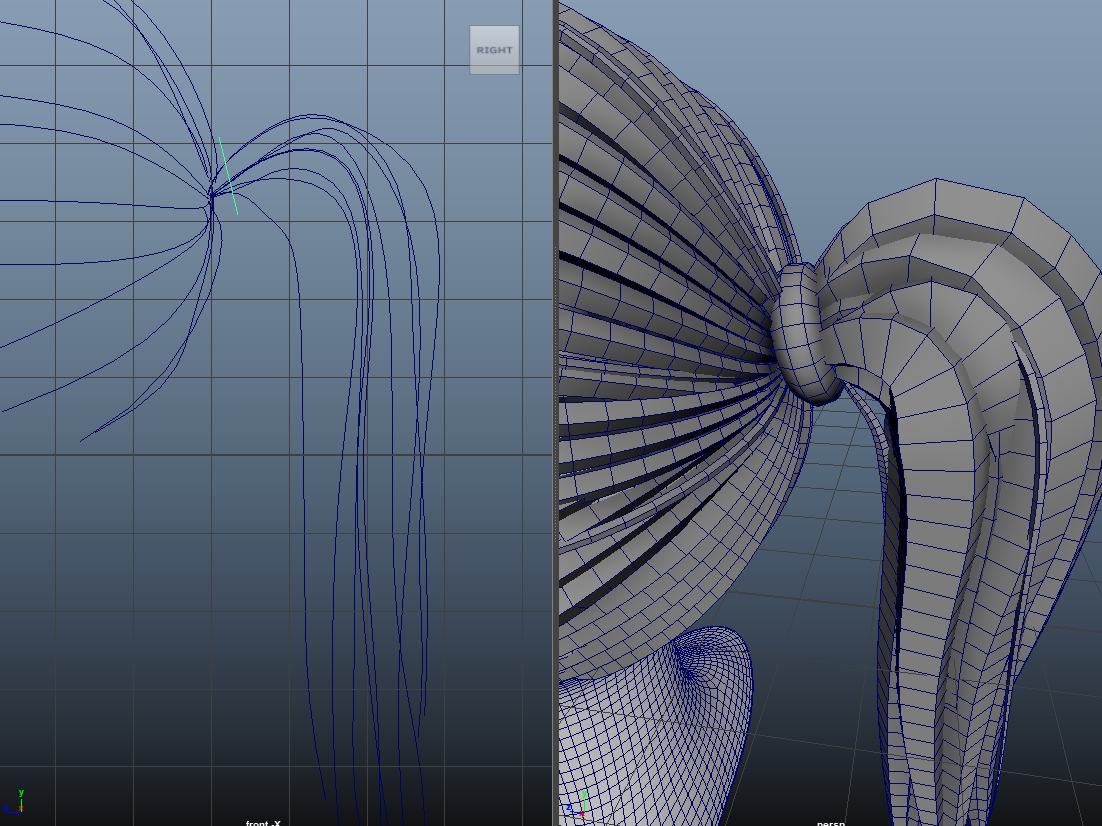
The hair tie is actually super simple to make. It’s just a torus. You could use the torus primitive here, but I’m gonna use the sweep mesh. You can do this easily with the circle nurb primative.
Final Touches and Cleanup
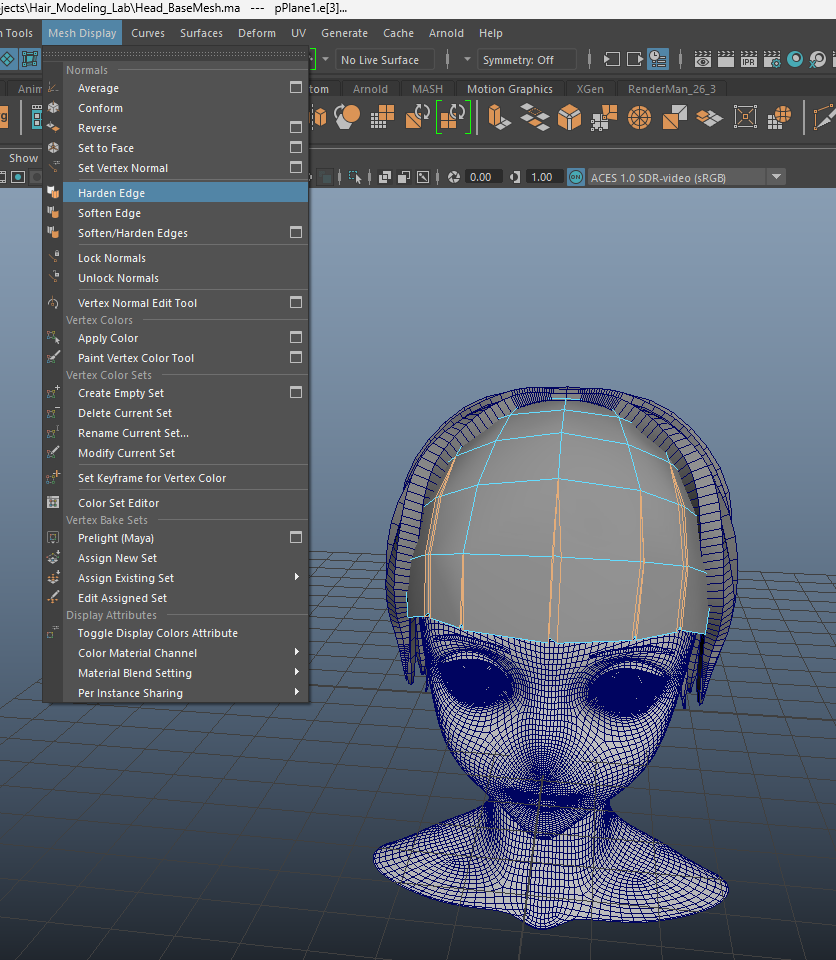
As a final touch on the shading, I selected all edges that made up the inset edges on the bangs and went to Mesh Display -> Harden Edge. This will just make these bang separations pop out more.
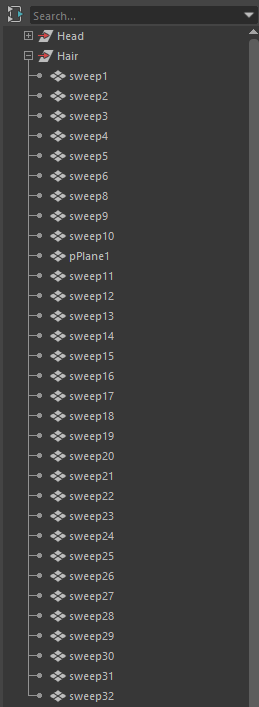
Before we close off, let’s clean up our outliner. Here, it’s good to create a copy of your file first. Then, select all your hair objects and delete history! You can then delete all your curves and delete them from your outliner.
I made my life easier by selecting all objects and going to Show -> Show Selected Type(s) in the outliner tab. This will group all the curves together.
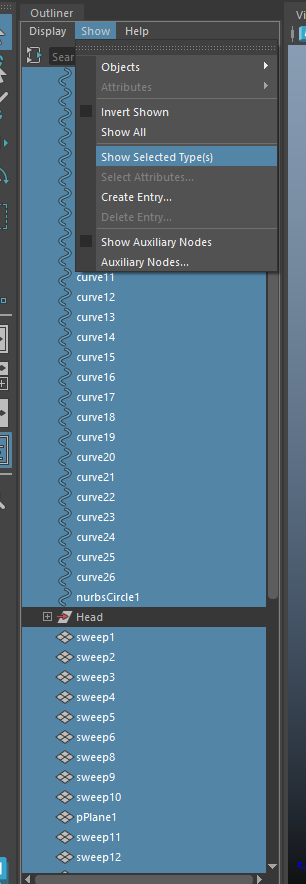
You can then group all your hair objects into a group for organization.
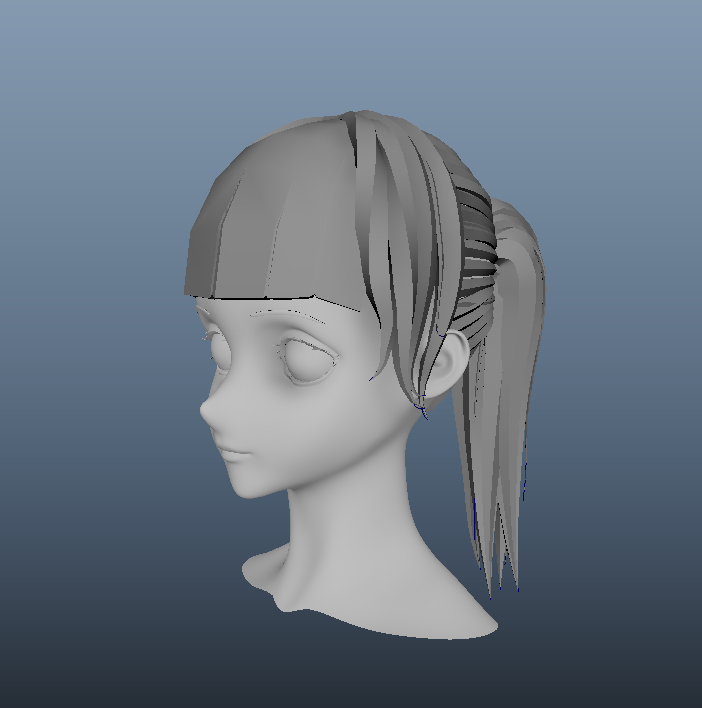
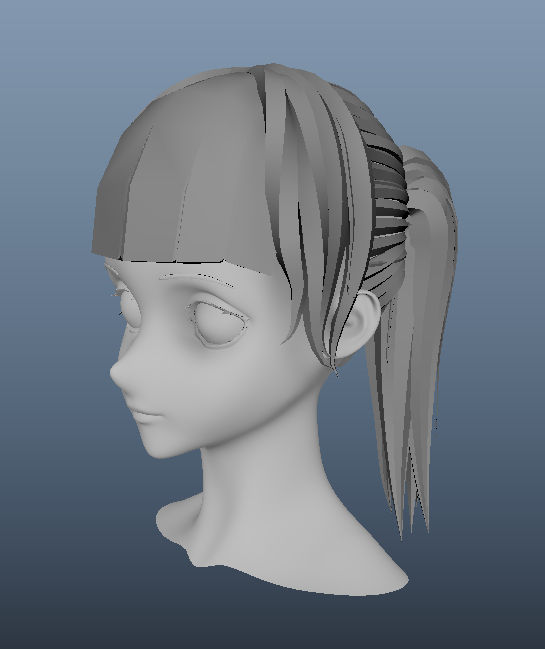
Here is the final image!
Notes and learnings
The important thing to take away is that hair is essentially divided up into 3 parts. The back, the front, and the side. Keeping this in mind when modeling hair is very crucial. Additionally, when should you use strands and when should you use a plane? Generally speaking, for short hair, you want to use a plane while for long hair, you want to use strands. If I was modeling a short haired character, I would use a plane in the back instead of multiple strands. Though this also depends on the style you’re going for.
(!info)
If you find that you end up having gaps in your hair that would be too much to add more strands to cover up, you can always consider creating a hair cap. This is essentially just a dome that sits above the head and below the hair that fills in the gaps uniformly.
Shading
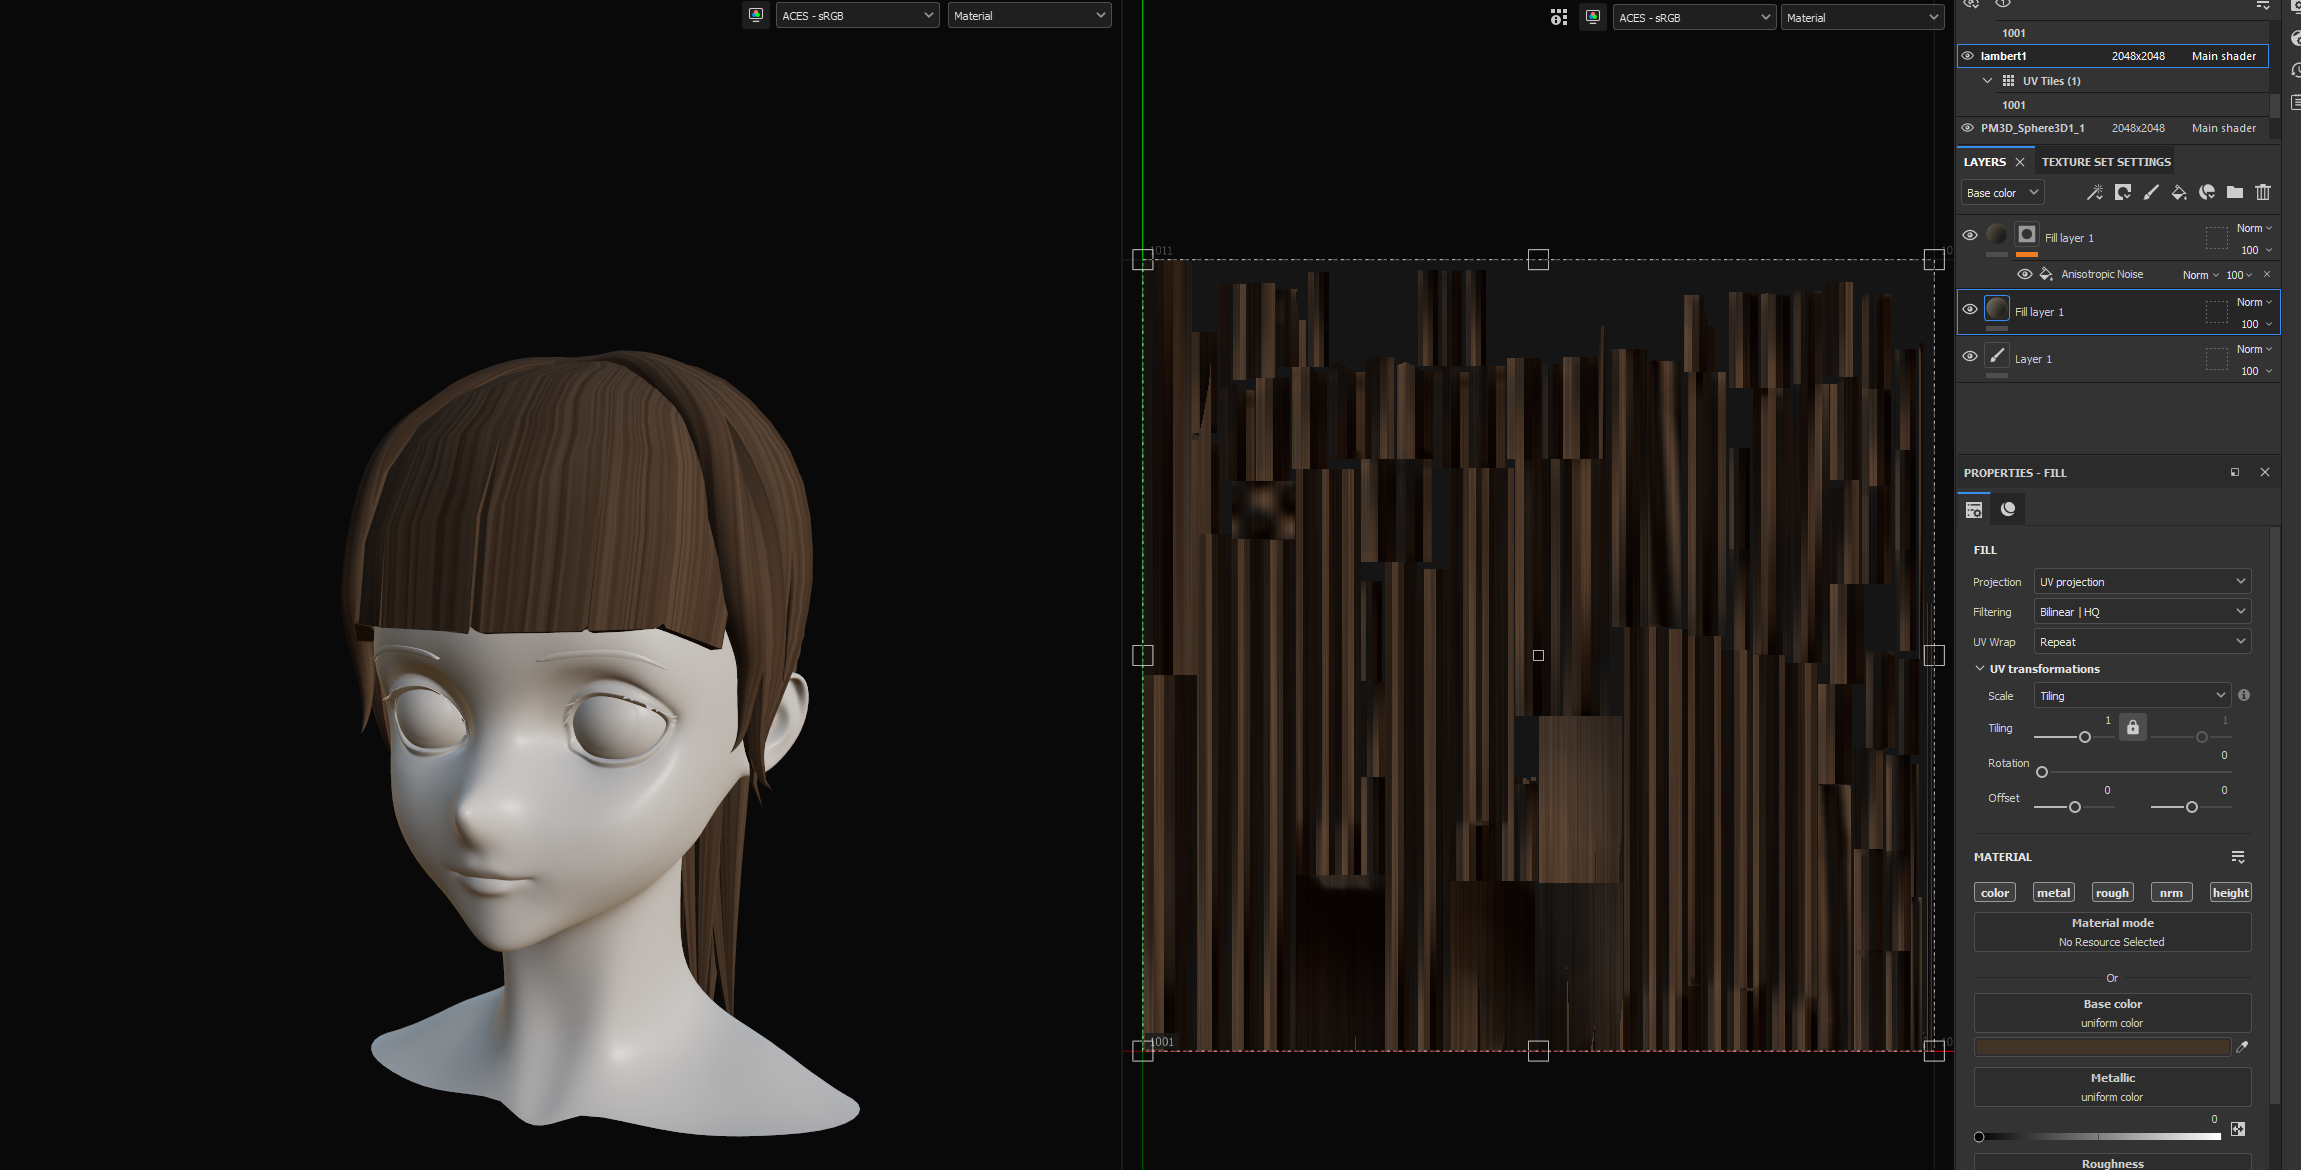
For those curious about adding more detail to the hair. You can do some stuff with shading to make it more detailed w/o actually giving it geometric detail. Here’s a really rough paint job done in Substance Painter. (The normals got a bit messed up on import but exporting back into Maya w/ just texture should pose no issue)