Introduction
Welcome to the rendering lab! This lab will cover how to set up basic render settings in your scene as well as how to use AOVs to optimize the speed of your renders. Note that rendering can get quite technical and is quite complex, however, this lab is meant to provide you an introduction to rendering optimization.
What is Rendering?
Rendering is the process of simulating light using a process called path tracing to accurately represent your entire scene with proper colors, lighting, geometry, shadows, textures, and more.
In real life, light comes from the sun (or other various light sources) as photos and bounces around. These photons (or rays) eventually hit your eyes. Each bounce accumulates some data about the color of what it collided with, so when it hits your eyes, your eye interprets that as the color for the objects you see.
Rendering is the process of simulating this physical phenomenon on our computer, which means it is a very computationally expensive process. It can take a very very long time
What are samples
In real life, light can bounce around an infinite amount of times in an infinite number of directions. When we’re simulating this, we can only approximate this behavior. The number of directions we “check” in order to approximate this infinity is called a sample. In other words, assuming there is a “ground truth” that is the true representation of the scene, each sample is a singular guess we can make to approximate it.
For example, when a ray hits a diffuse surface, in real life it can bounce in every direction. However, since we’re approximating all of the light that can possible come from any direction, we can just check 4 different random directions and call that good enough. That is 4 samples
Considerations Before Starting
Danger
Rendering takes a long time, and optimizing renders requires you to render multiple images. These can take a while depending on how powerful your computer is. It is important that you allocate enough time to this process as you will not be able to use your computer while rendering
Getting Started
To start, please download this lab file.
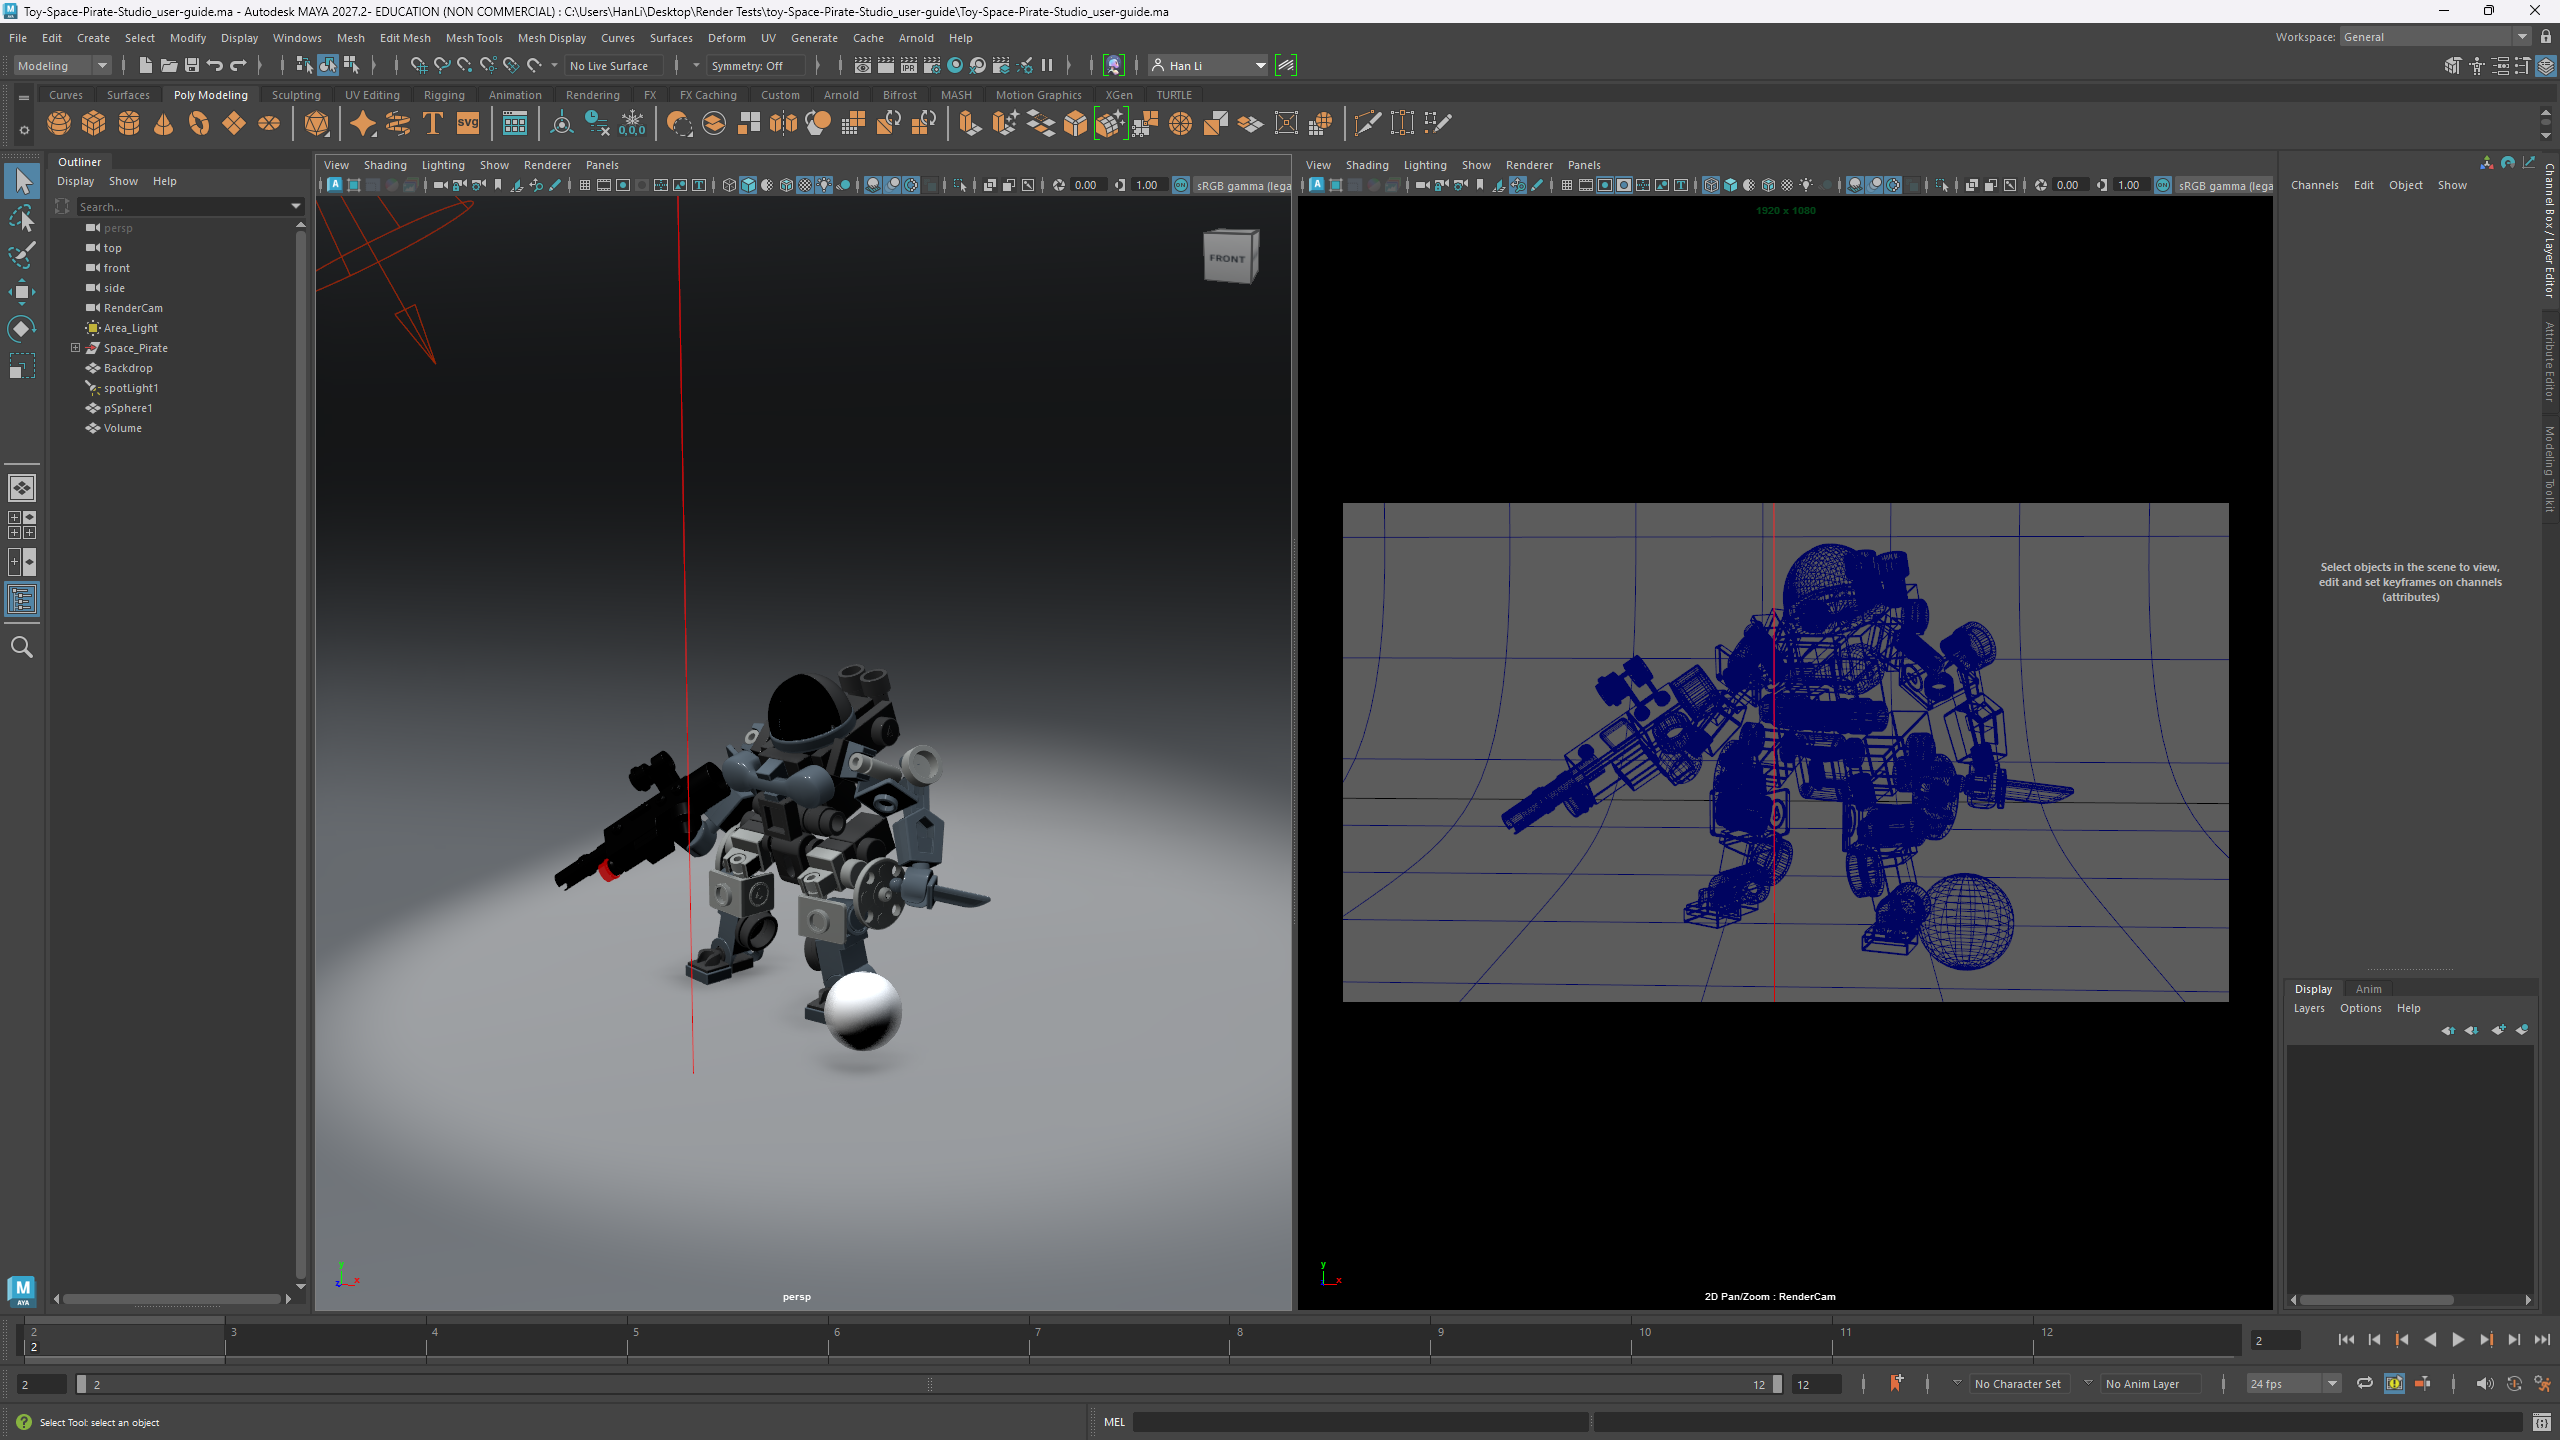
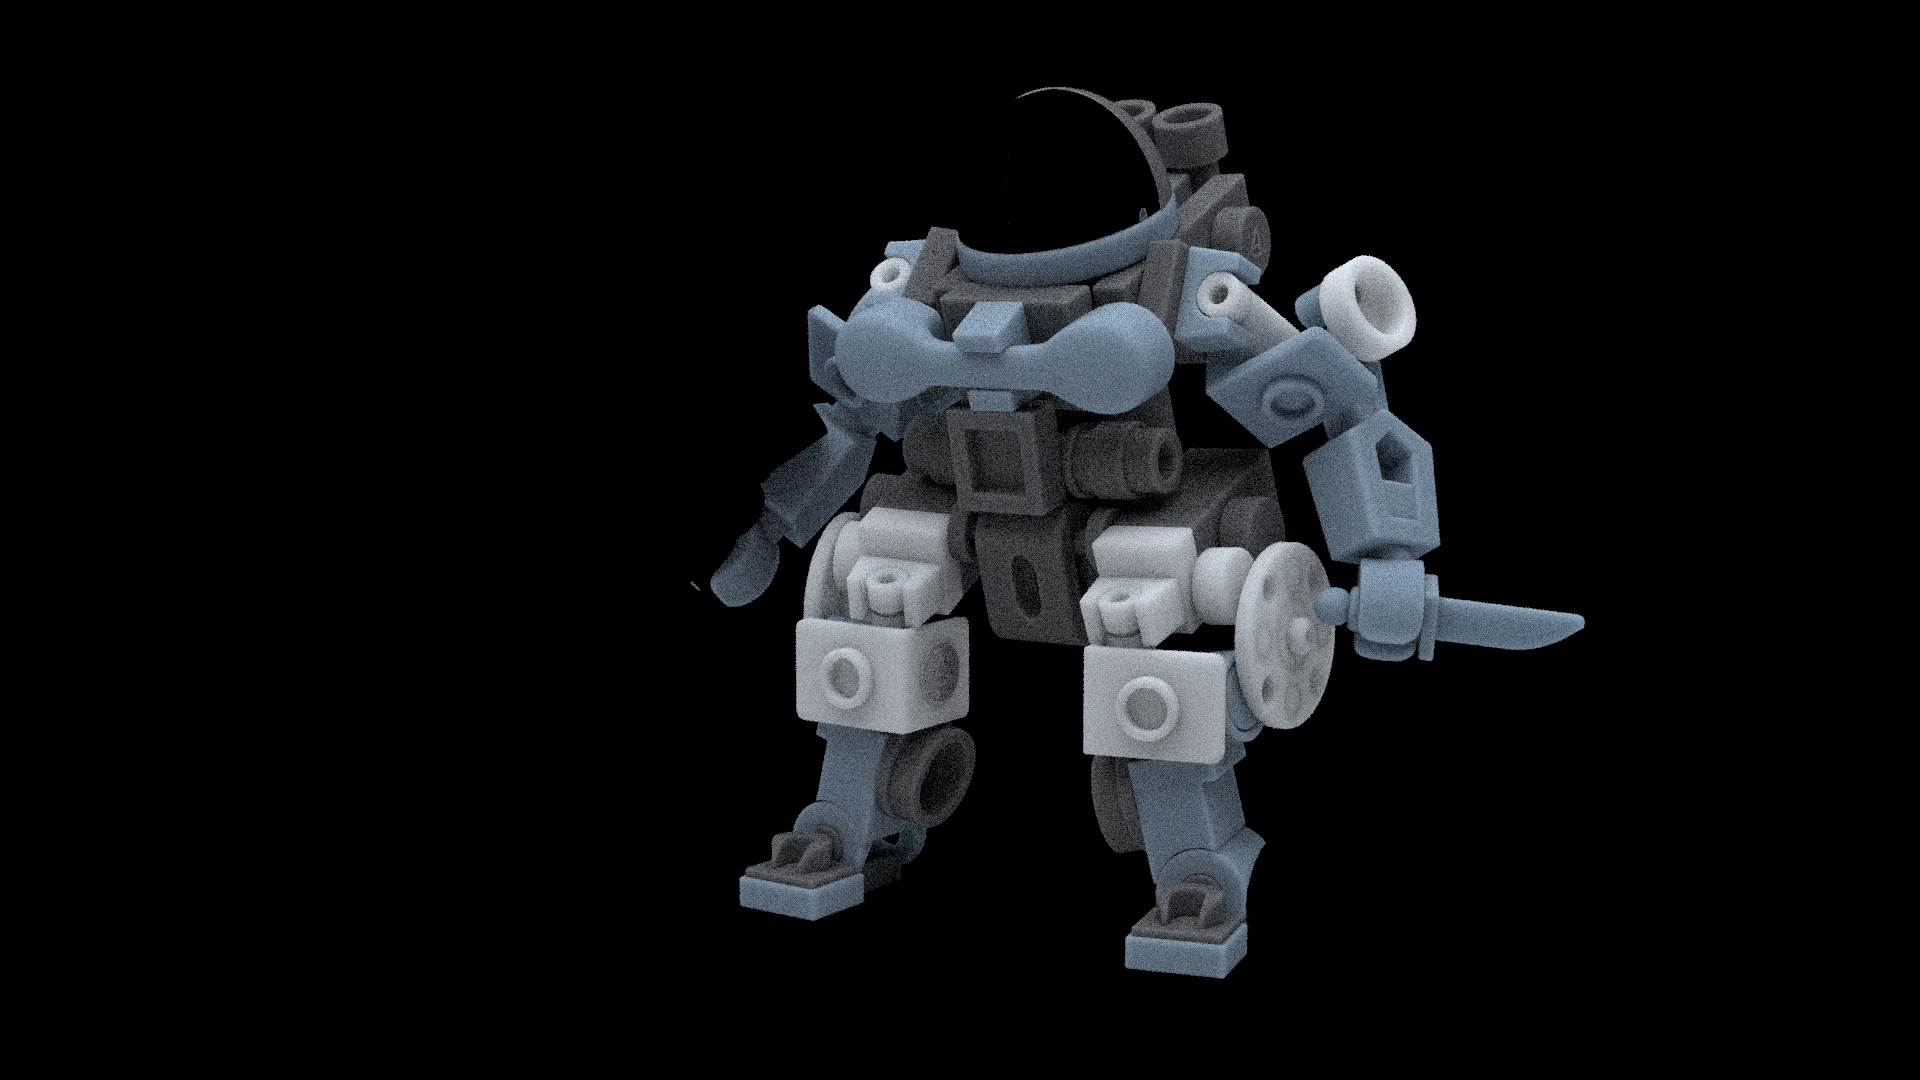
You should see a scene that looks something like this:
Render Settings
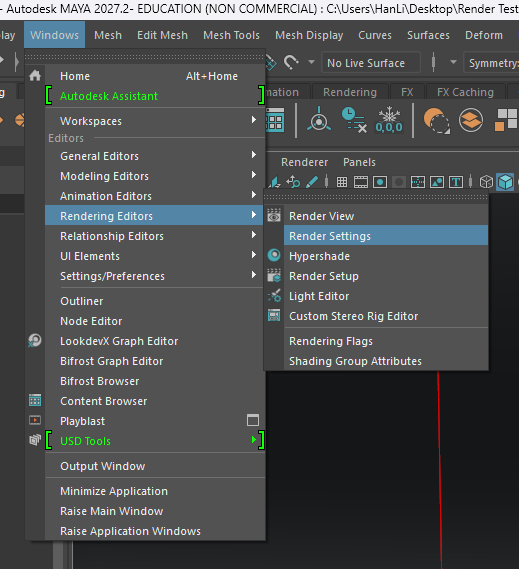
The first thing you should do before rendering is to check your render settings. To do so, go to Windows → Rendering Editors → Render Settings.
The follow settings should be checked on:
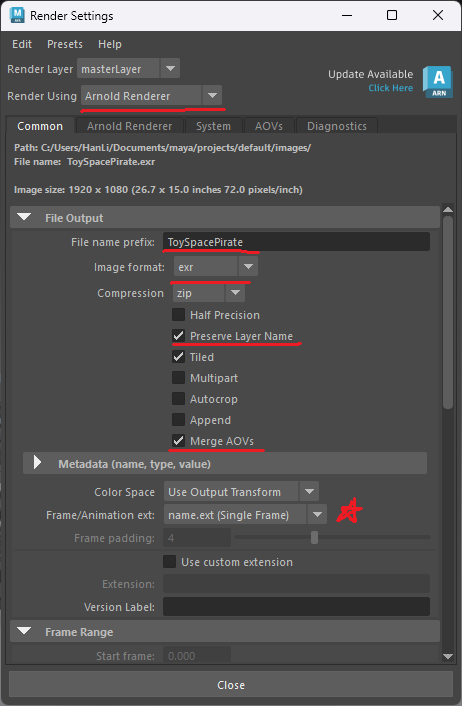
- File name prefix: This is the name of your output file. You should name it something descriptive related to your scene/shot number. It is extremely important that you DO NOT have spaces or special characters
Danger
Do NOT have spaces or special characters in your file paths. These include these following characters */\()<>!@$%^&?;:’”|+=
This is a non exhaustive list. Use hyphens or underscores for spaces instead
- Image Format: This ensures that your output file is set to an exr file instead of something else. EXR files can store a lot of image data as well as AOVs
- Preserve Layer Name: This is important to make sure your AOVs stay the same name
- Merge AOVs: This is important to make sure that each AOV is combined into a single file. If this is unchecked, that means that you will render out a separate file for each AOV
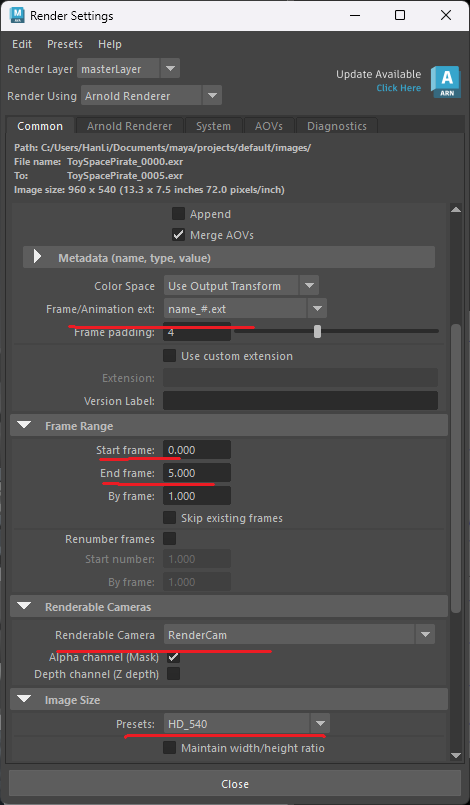
- Frame/Animation ext: This is the extension naming scheme that is used to number your frames. For the purposes of this lab, you do not need to change this. However, when rendering your own animated sequences, it is recommended to change it to something like
name_#.ext. This will number your framesframe0001.exr,frame0002.exr, etc
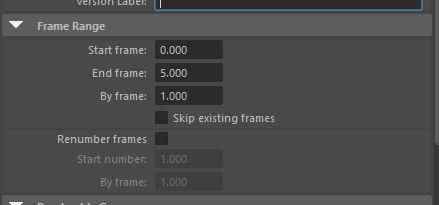
When rendering out a sequence of frames, make sure you set your start and end frame as well. Again, for the purposes of this lab, this is not necessary.
Scrolling down, we need to make sure we are rendering out of the correct camera. For this scene, the renderable camera is named RenderCam.
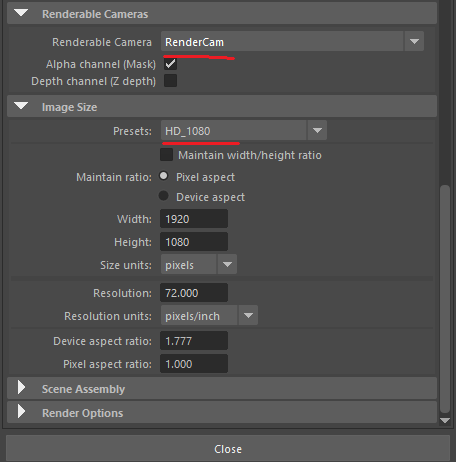
Additionally, we need to make sure we are rendering with the following HD_1080 preset. This will ensure we have the correct image resolution upon exporting.
Next, let’s go over to the Arnold Renderer tab and remove the defaultArnoldDenoiser imager.
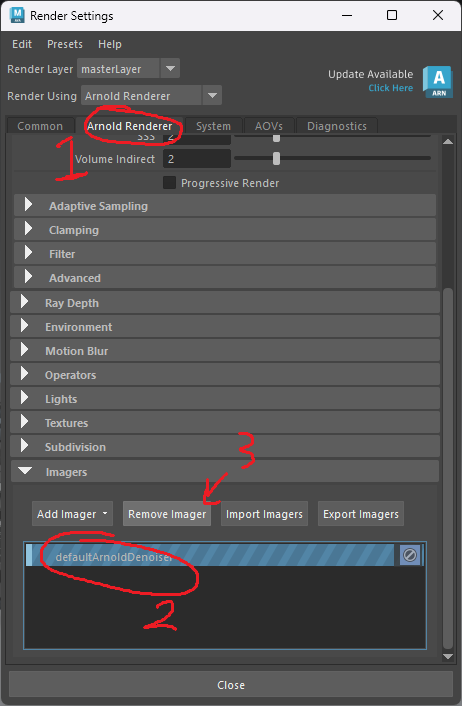
Imagers are Arnold’s post-processing filters that are applied after your render. When we do compositing, we rarely want to rely on these imagers to modify our final output image. This because we want to have more precise control in our compositing software, and if we decide we don’t like something when using an imager, we will have to re-render the entire thing.
Specifically, every scene that is created (as of Maya 2027) includes the defaultArnoldDenoiser imager automatically. This is incredibly useful for look development and IPR renders, however when optimizing our scenes, we do not want to rely on the denoiser just yet. Additionally, it is incredibly important to delete this imager before rendering out a sequence of frames as it is not temporally stable.
Sampling
At the top of the Arnold Renderer tab of our render settings, we can view our samples.
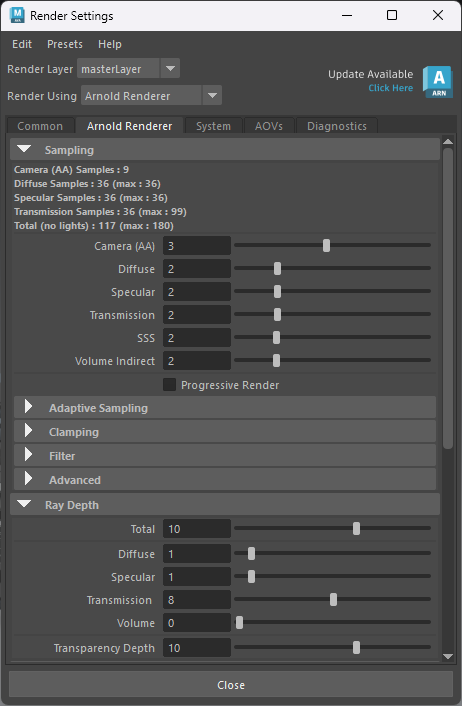
These are the default number of samples provided for this scene. Let’s see how the render looks like as well as how long it’ll take!
Rendering
To open up the rendering window, go to Windows → Rendering Editors → Render View
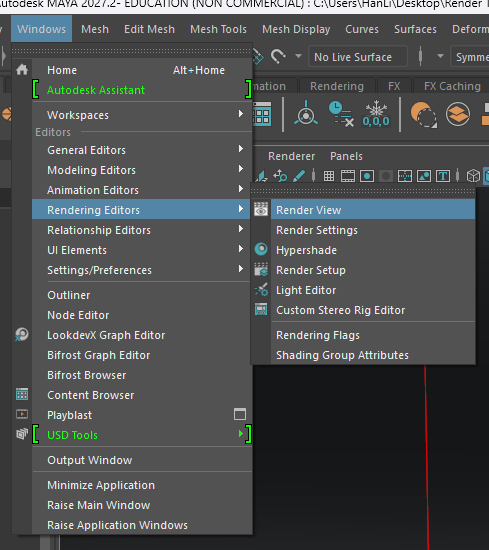
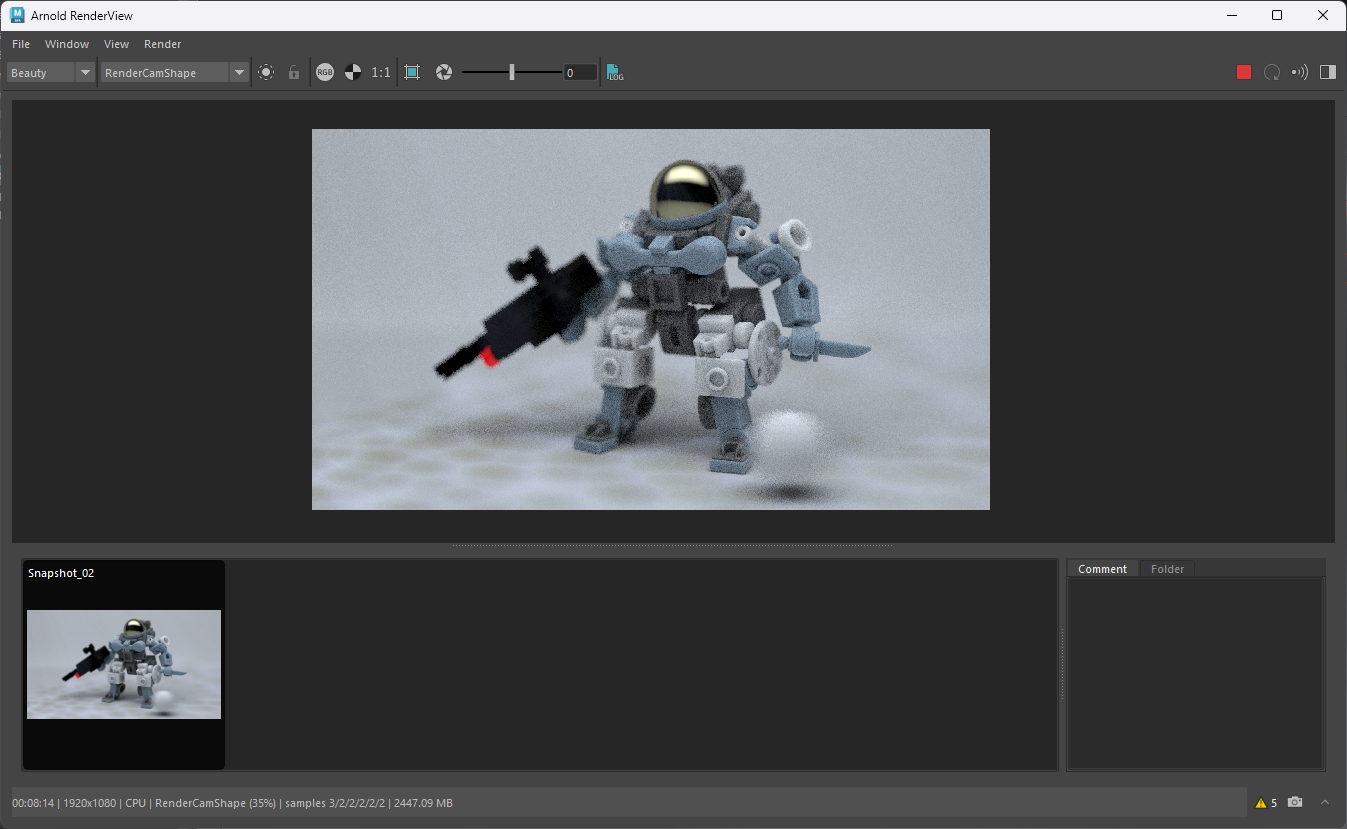
You should see something like that looks this.
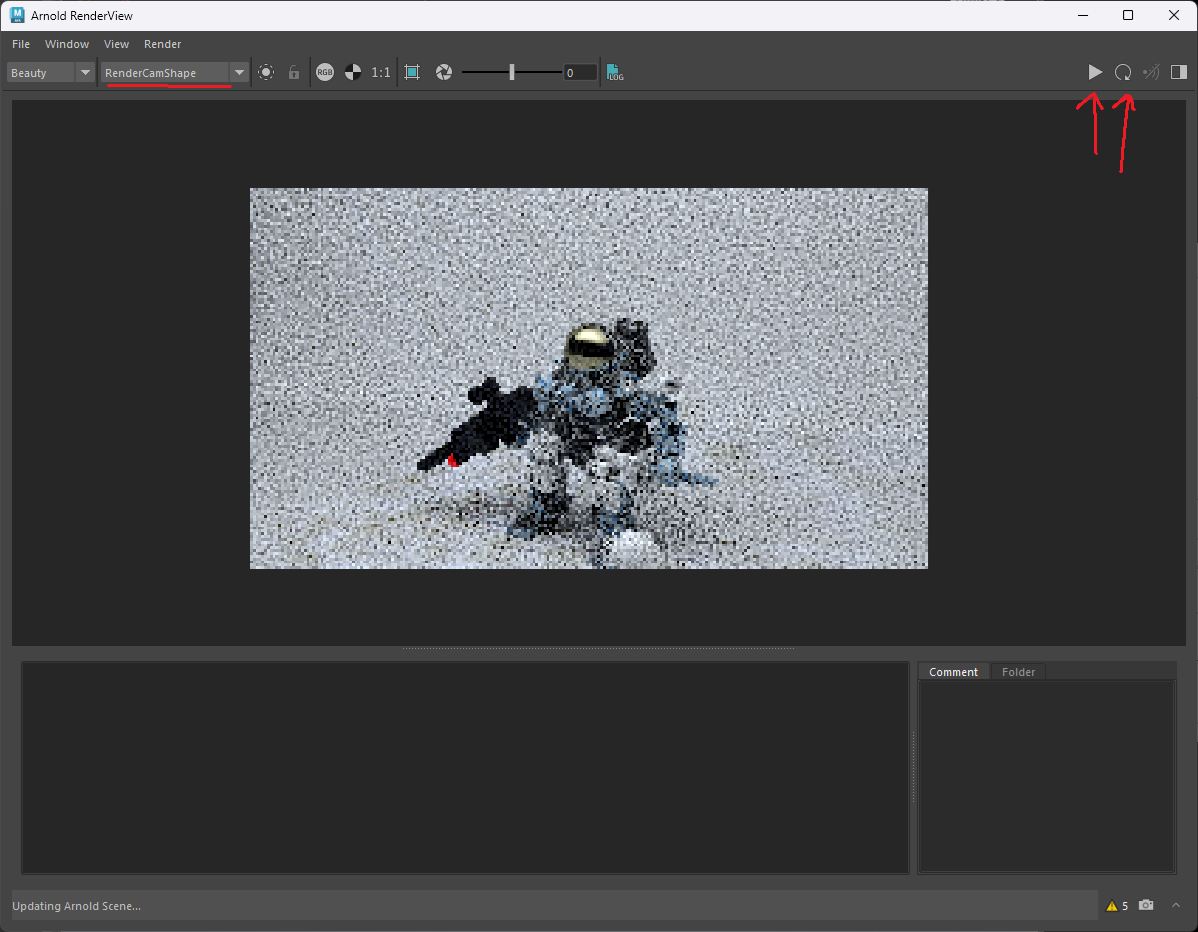
First, we want to make sure that we are rendering out of the correct camera. You can select this in the upper left. If you do not see the name of the renderable camera, you might have to refresh it by clicking the refresh button on the right.
To start a render, click the play button on the upper right hand corner.
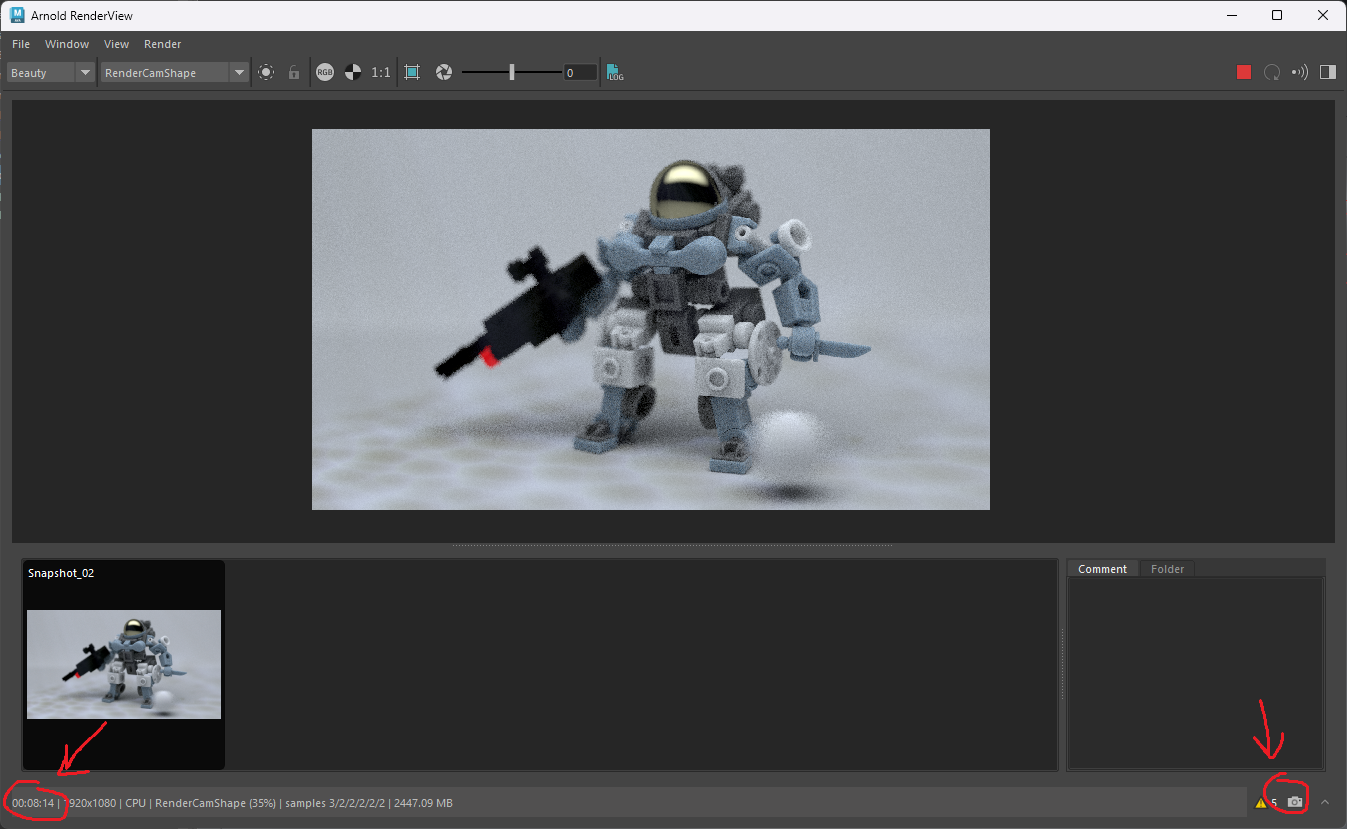
Once it finishes rendering (there will be a progress bar on the bottom right hand corner), you can see how long the render took by looking at the bottom left hand corner. For me on my computer this scene too 8 minutes and 14 seconds to render.
Take a snapshot by clicking the camera button on the bottom right hand corner. This will create a snapshot that you can view to do A/B testing when comparing different renders.
DELIVERABLE: First RenderView Screenshot
Take a screenshot of this window. Make sure the render time is visible
We can see here how our image is quite noisy and looks pretty awful. Additionally, it takes quite a while to render as well! Let’s optimize this scene.
Optimization
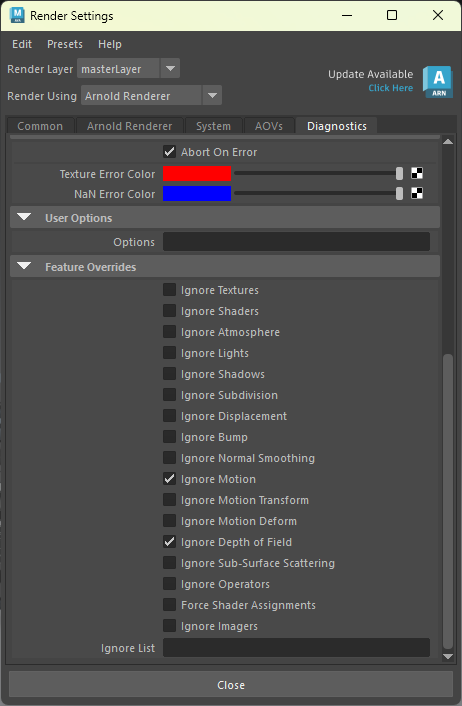
The first thing we want to do is disable render intensive things that we know we can do in the compositing phase. In this scene specifically, there is Depth of Field on the camera as well as Motion Blur enabled.
We know we can recreate this in post using the Z AOV and the motionvector AOV respectively. For now, we can disable these in our render by using a Feature Override.
Go to the Diagnostics tab of the render settings and scroll down to Feature Overries. Here, tick on Ignore Motion and Ignore Depth of Field. This will create an override during your render that will disable these effects.
AOVs
Next, let’s head over to the AOV tab so we can isolate specific parts of our render to view where the noise is coming from!
What are AOVs?
AOVs, or Arbitrary Output Variables, allow you to render out specific data in a scene, also known as a render pass. AOVs use LPEs (Light Path Expressions) to output data instead of color. For example, you can render out only the contribution of light from specular rays using the
specularAOV, the distance from the camera of every pixel using theZAOV, or the normal of every surface using theNAOV.These are especially useful in compositors in order to do certain tasks in post processing such as Depth of Field, Motion Blur, etc
Head over to the AOV Browser and add the following AOVs
- cputime
- diffuse_direct
- diffuse_indirect
- emission
- raycount
- specular_direct
- specular_indirect
- sss
- transmission_direct
- transmission_indirect
- volume_direct
- volume_indirect
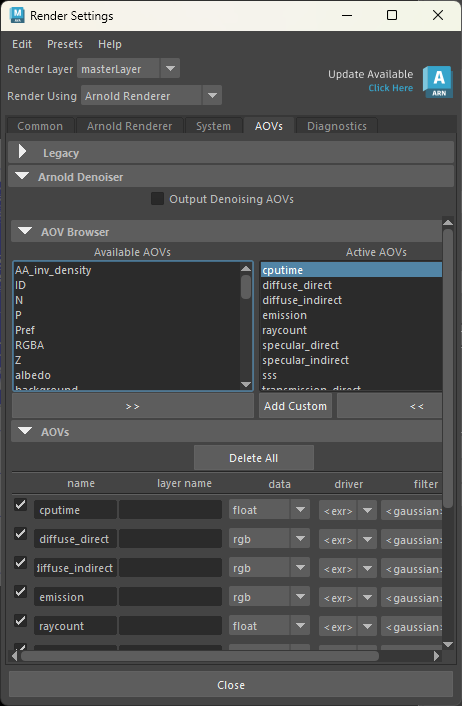
If your specific scene has sheen, coat, etc, you may have to add those AOVs for your specific scene as well.
Understanding the difference between Direct and Indirect
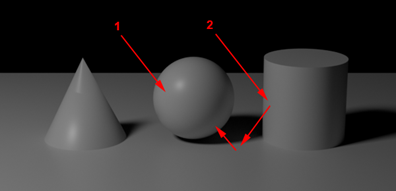
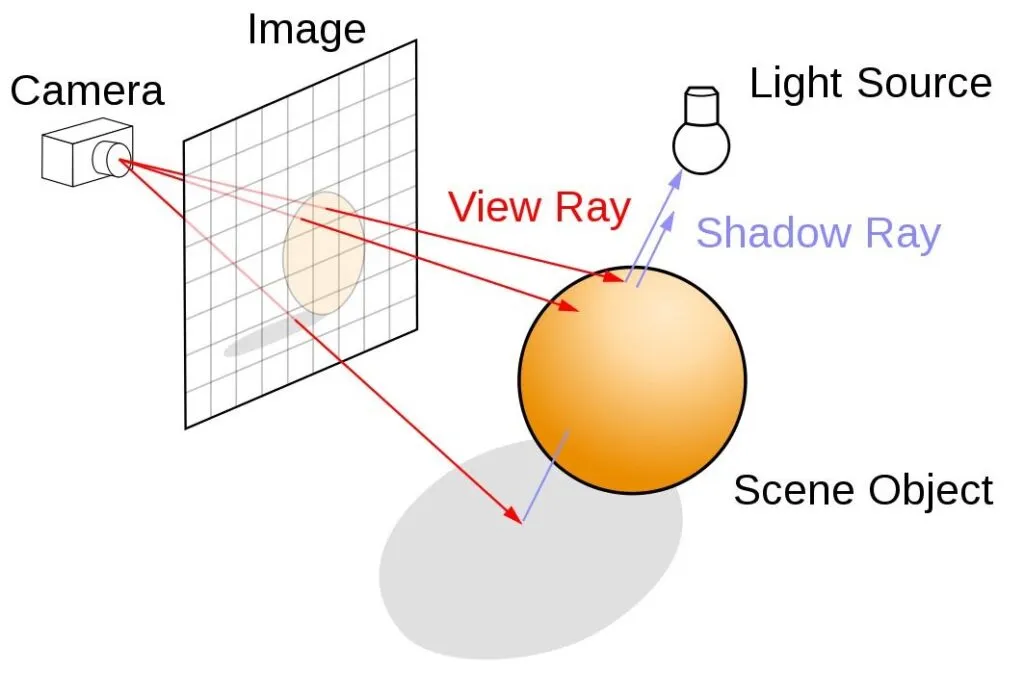
In this image, the first ray is direct light while the second ray is indirect light. In other words, direct light, and consequently direct AOVs, are related to light that comes directly from the source. Indirect light are incident rays that come from a bounced surface first
diffuse_directdiffuse_indirectdiffuse AOV
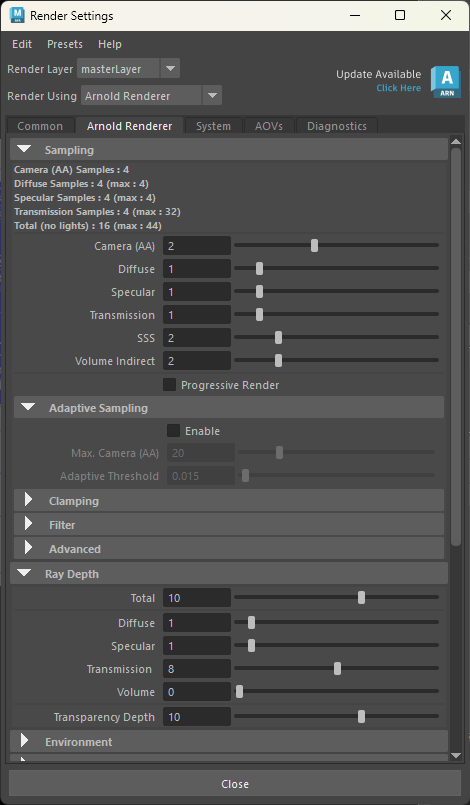
Before we start another render, let’s also lower our sample count in our render settings. Generally speaking, you want to start with something low and gradually work your way up. I like to start with these settings:
Now, let’s start up another render!
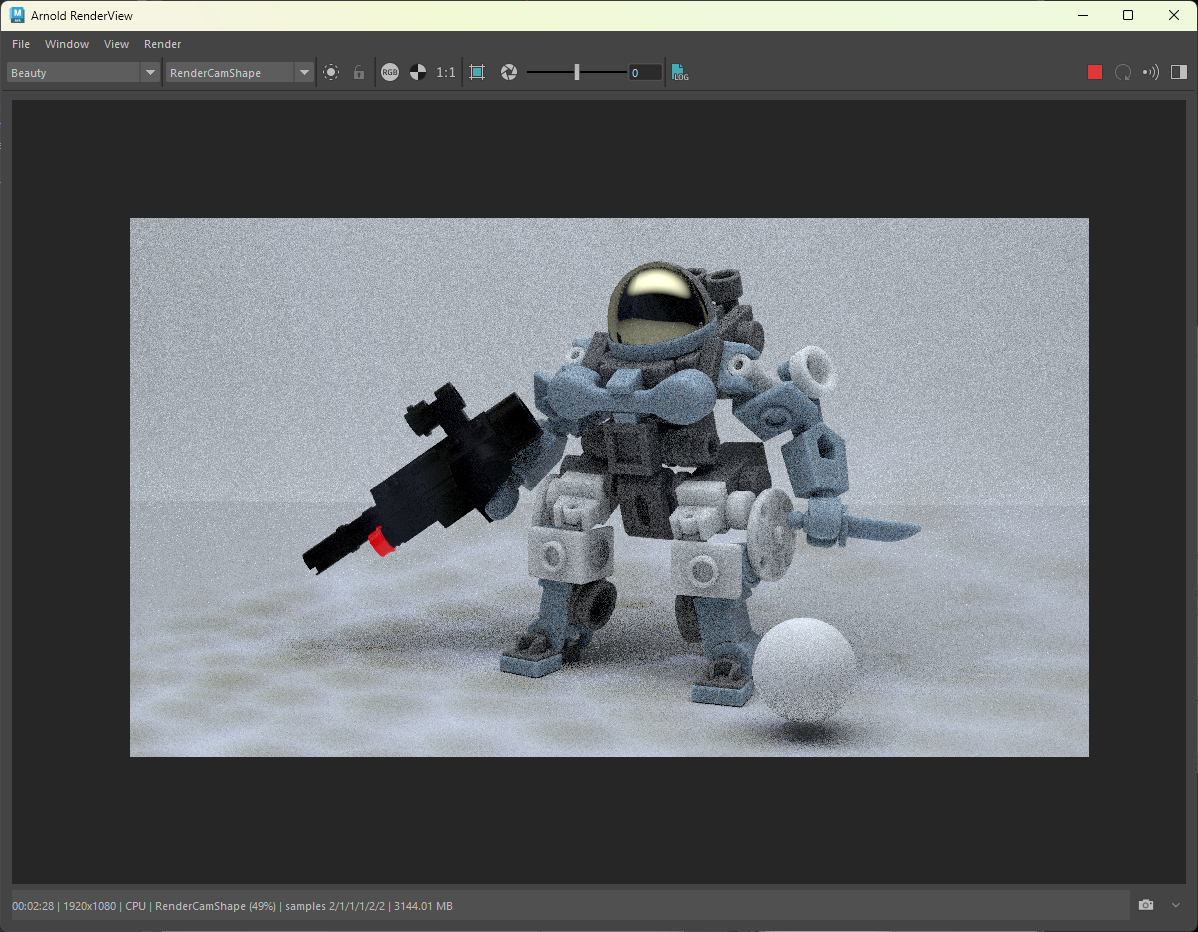
Here this render with the reduced settings looks arguably a lot worse (which makes sense considering we lowered the settings) but provided us with a good starting point, coming in at 2 minutes and 28 seconds of render time.
Before we look at specific AOVs, let’s look at this image cohesively. Specifically, focus on the edges of objects. If these edges are jagged or noisy, the only way to fix this is by increasing the Camera (AA) sample count.
What are Camera (AA) samples?
AA stands for antialiasing, which is a specific technique used to smooth out artifacts caused by changes in frequency (such as edges of your image).
If you recall from lecture, Camera (AA) samples correspond to the rays emitted through every single pixel on the camera. The
Camera (AA)valued is squared, and that number of rays are shot out of every pixel into the world. As such, aCamera (AA)value of 4 means 16 rays are being shot out of every single pixel. Each of these pixels then emit diffuse rays, specular rays, etc when hitting a surface. As such, althoughCamera (AA)samples are a really easy way to decrease noise, they multiplicatively increase the number of other types of rays. Thus, we do not want to increase these samples unless its necessary.
Thankfully for this scene, it seems like a value of 2 should be good enough and thus we don’t have to touch the Camera (AA) samples.
Viewing AOVs
The first thing we want to look at is the cputime AOV. On the upper left hand corner, click the drop down menu to switch the current AOV to the cputime AOV. At first, you might see something that is pure white and that is normal. The cputime AOV contains data pertaining to how much time your computer spent processing different parts of your render. As such, it contains data values much much higher than 1 (the number associated with the color white).
To adjust everything down to a visible range for us to examine, we can lower the exposure of the image. On the right toolbar, you can drag the exposure slider down or input a number. I found that a value of -10 works pretty well for me. A reminder that exposure is a logarithmic scale, which means each additional number is a doubling of exposure.
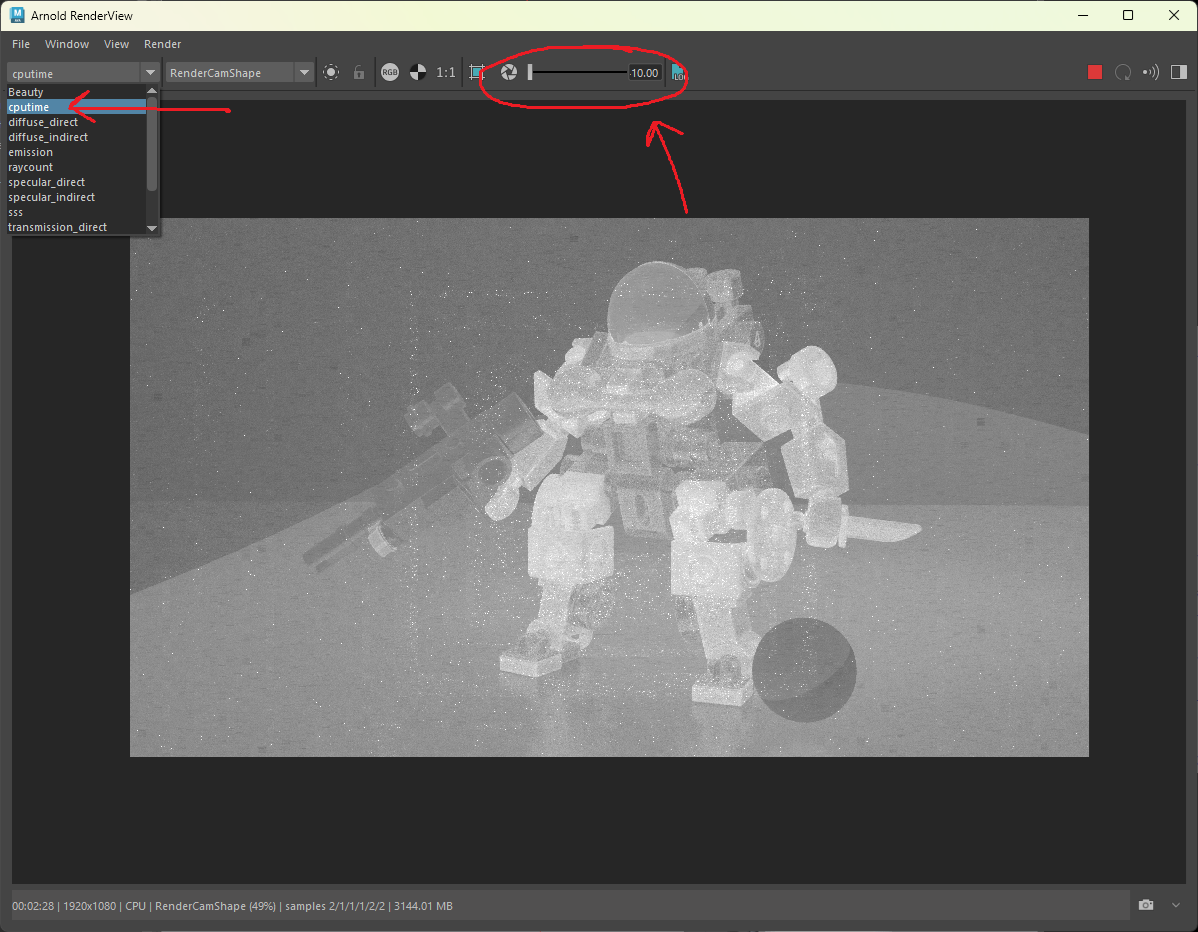
The brighter parts of the image correspond to parts of your render that your computer spent more time on. In this scene, we can see that the brightest parts are the material of the toy’s body. There is very little render time spent on the ball and the gun. Viewing the cputime AOV is a really helpful way to identify and narrow down which parts of your scene need the most attention.
Diffuse Noise
Next, let’s reset our exposure compensation back to 0 and view the diffuse_indirect AOV.
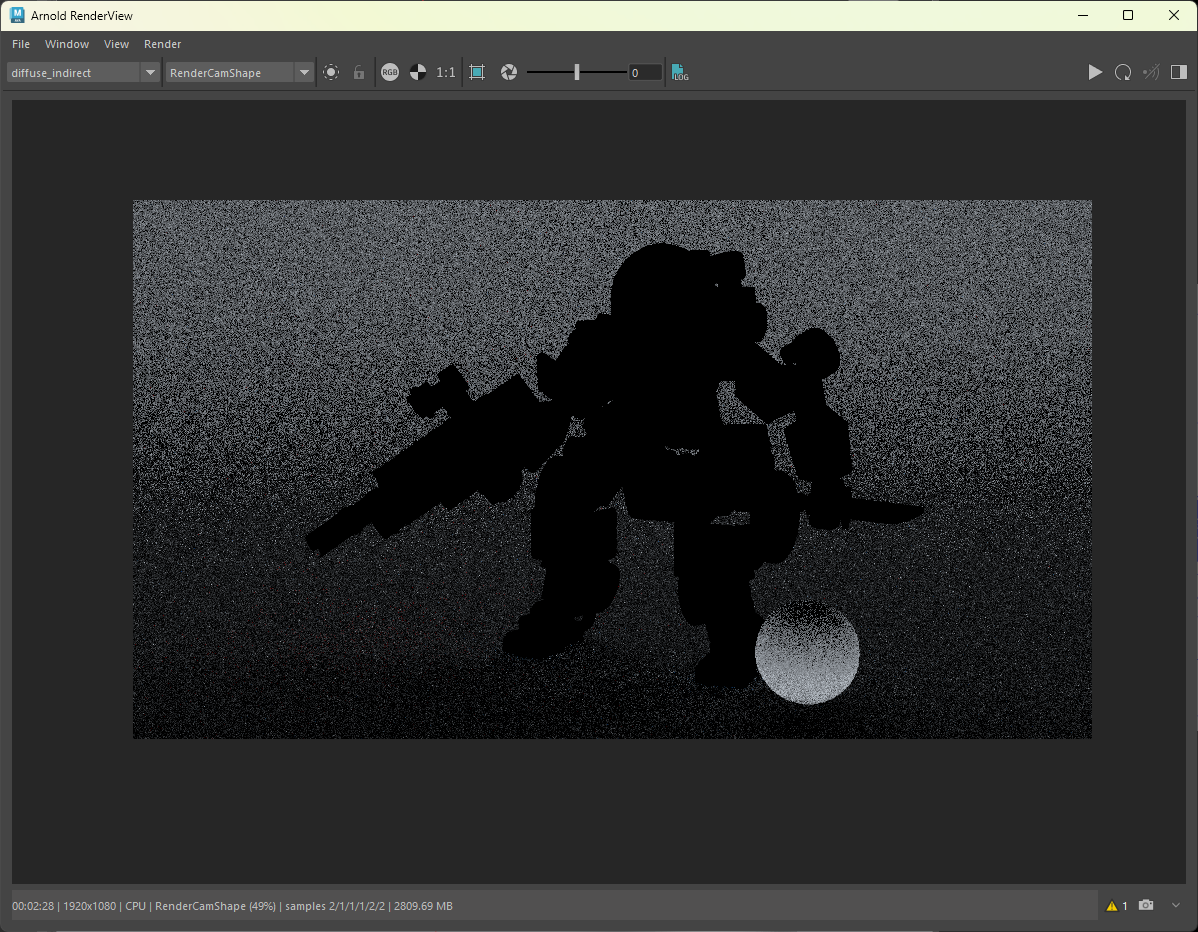
Here we can see that there is quite a noise in this AOV. Since this is the AOV related to indirect diffuse samples, the solution is to increase the number of diffuse samples.
To save yourself the trouble of rendering out the entire image every time, we can define a crop window to render out a specific part of our scene. This is incredibly helpful for debugging purposes like this so we can speed up our optimization workflow.
You can define a crop window by clicking the blue square next to the exposure compensation slider at the top and drag clicking a part in your render to crop out.
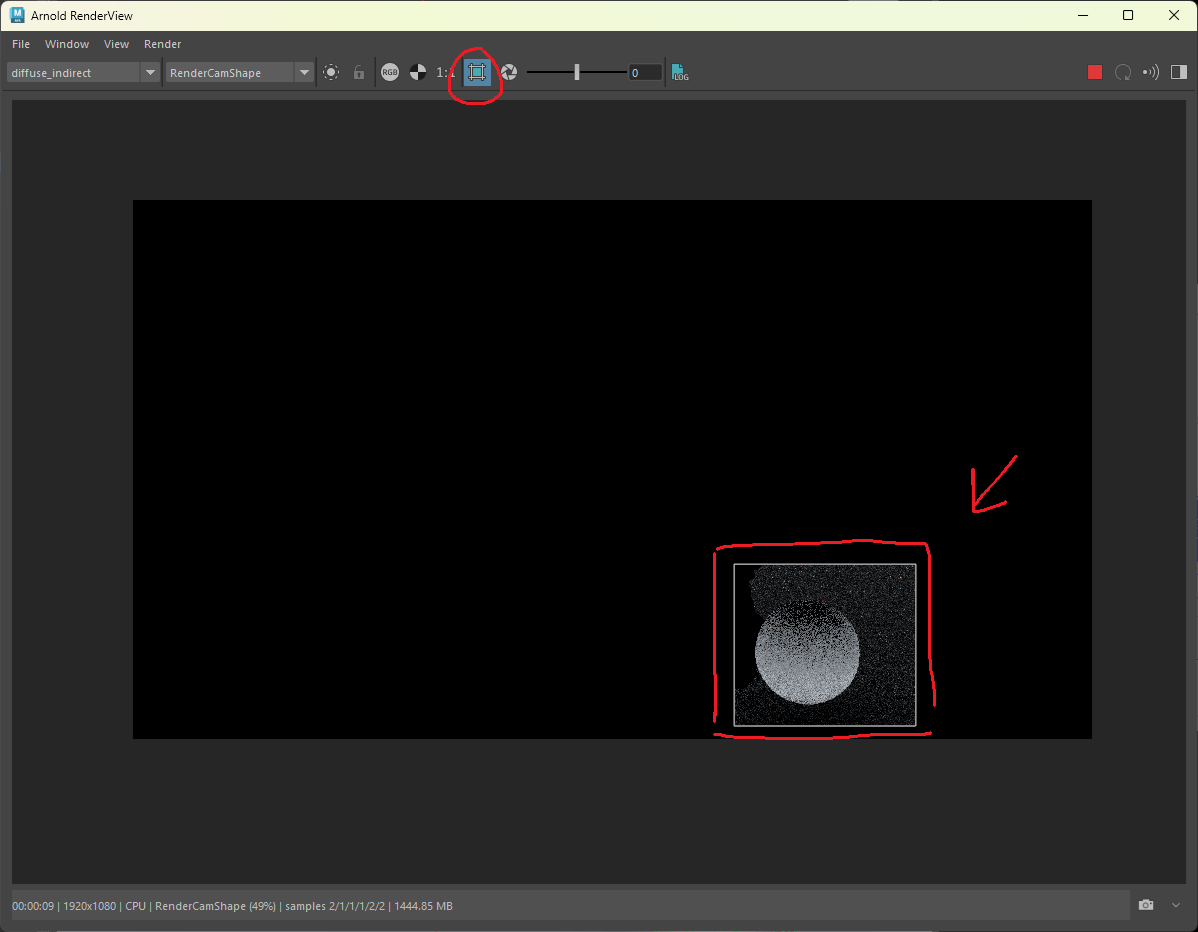
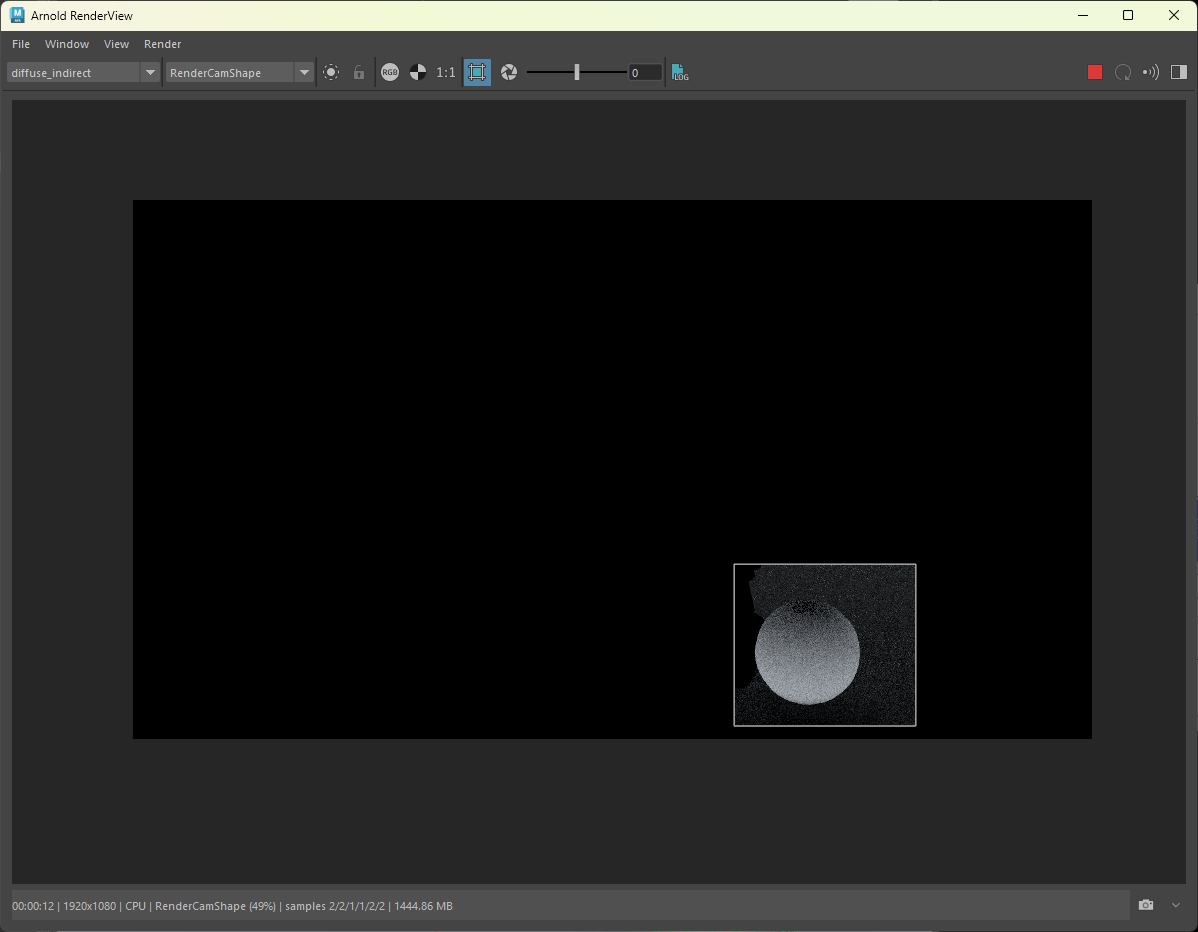
Here is a comparison of a crop window centered on this ball with a diffuse sample count of 1 vs a sample count of 2.
DELIVERABLE: Diffuse Sample Screenshots
Take a screenshot of your entire render view with a crop window defined with BOTH a diffuse sample count of 1 AND a diffuse sample count of 2
Use Crop Window
For the rest of this section, you do not have to render out the entire scene when viewing AOVs. Simply define a crop window to view things specifically. The lab shows you the entire scene primarily just for your understanding of the concepts
Light Sample Noise
Next, let’s take a look at our specular_direct AOV:
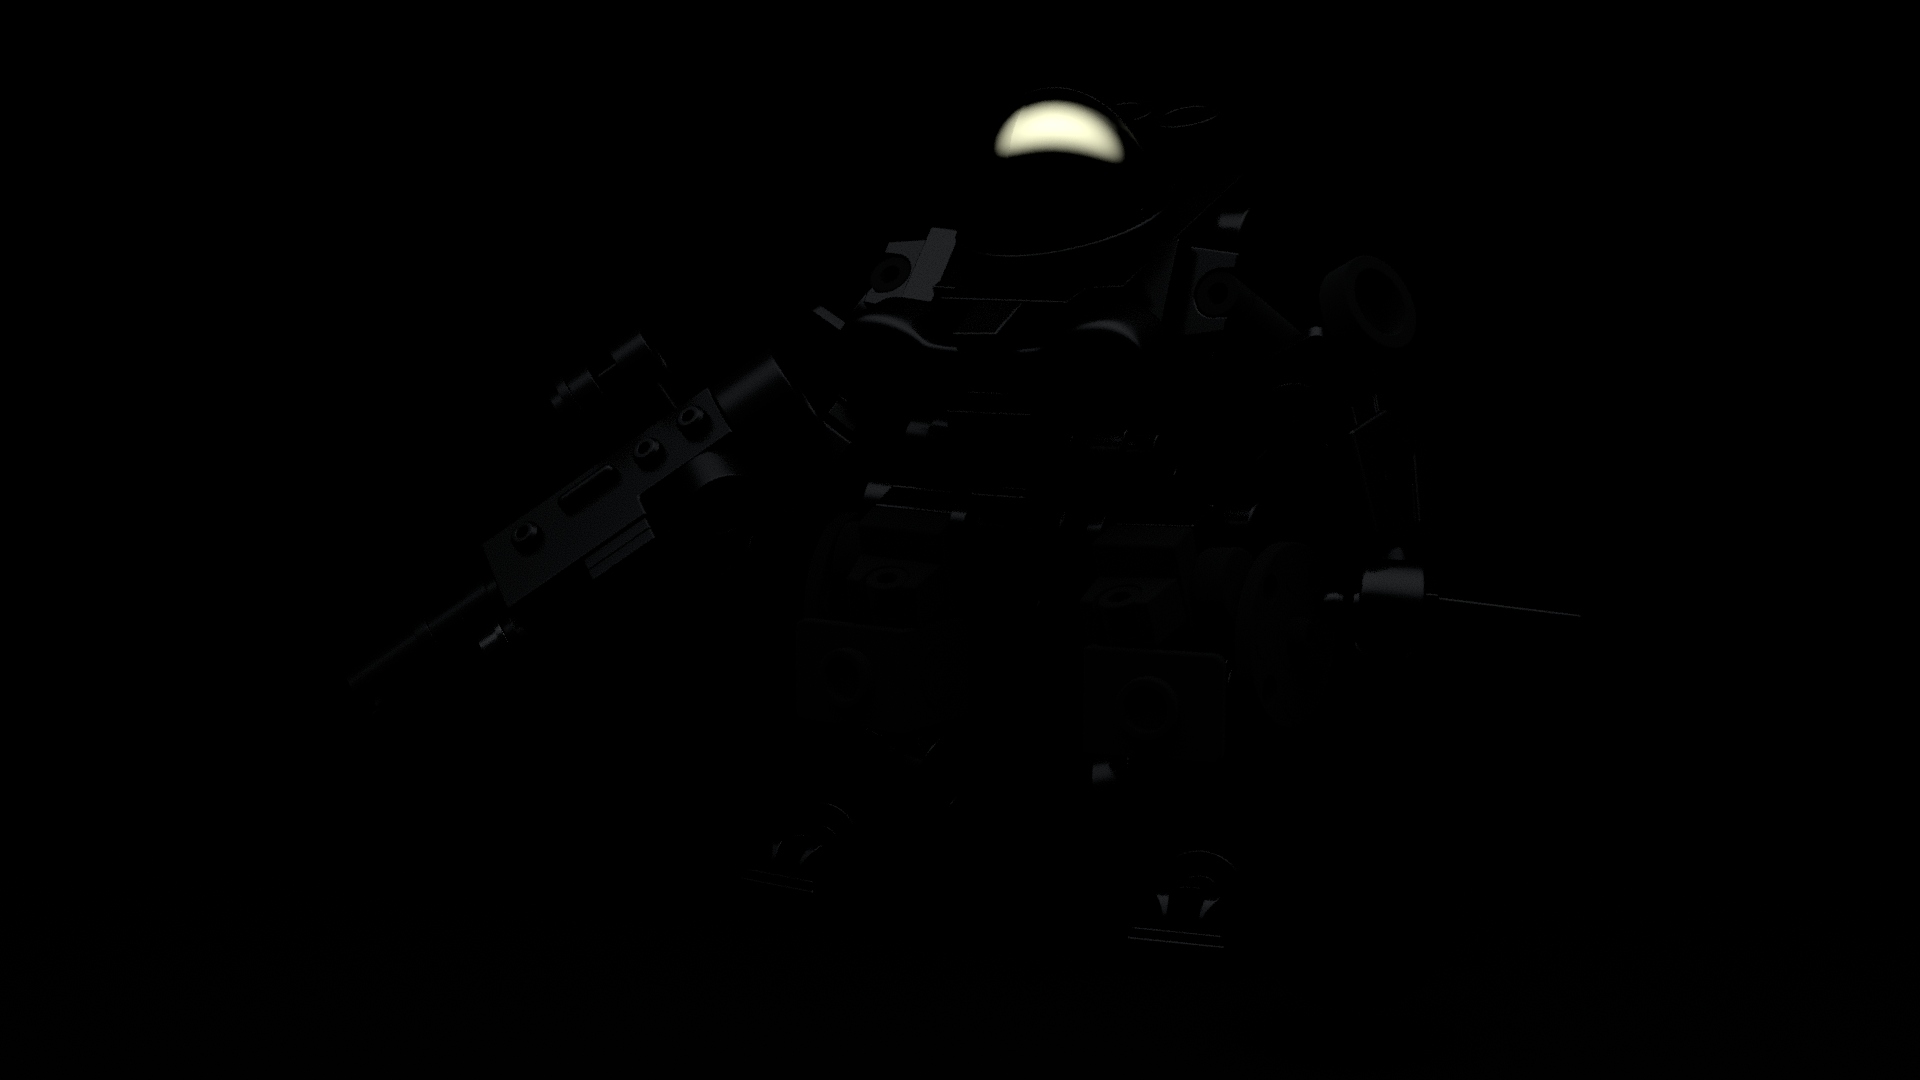
Here we can see that it isn’t very noisy so there’s no problem. If there were noise in this AOV, the solution would be to increase the number of light samples associated with the light that is causing the noise. Next let’s take a look at the diffuse_direct AOV:
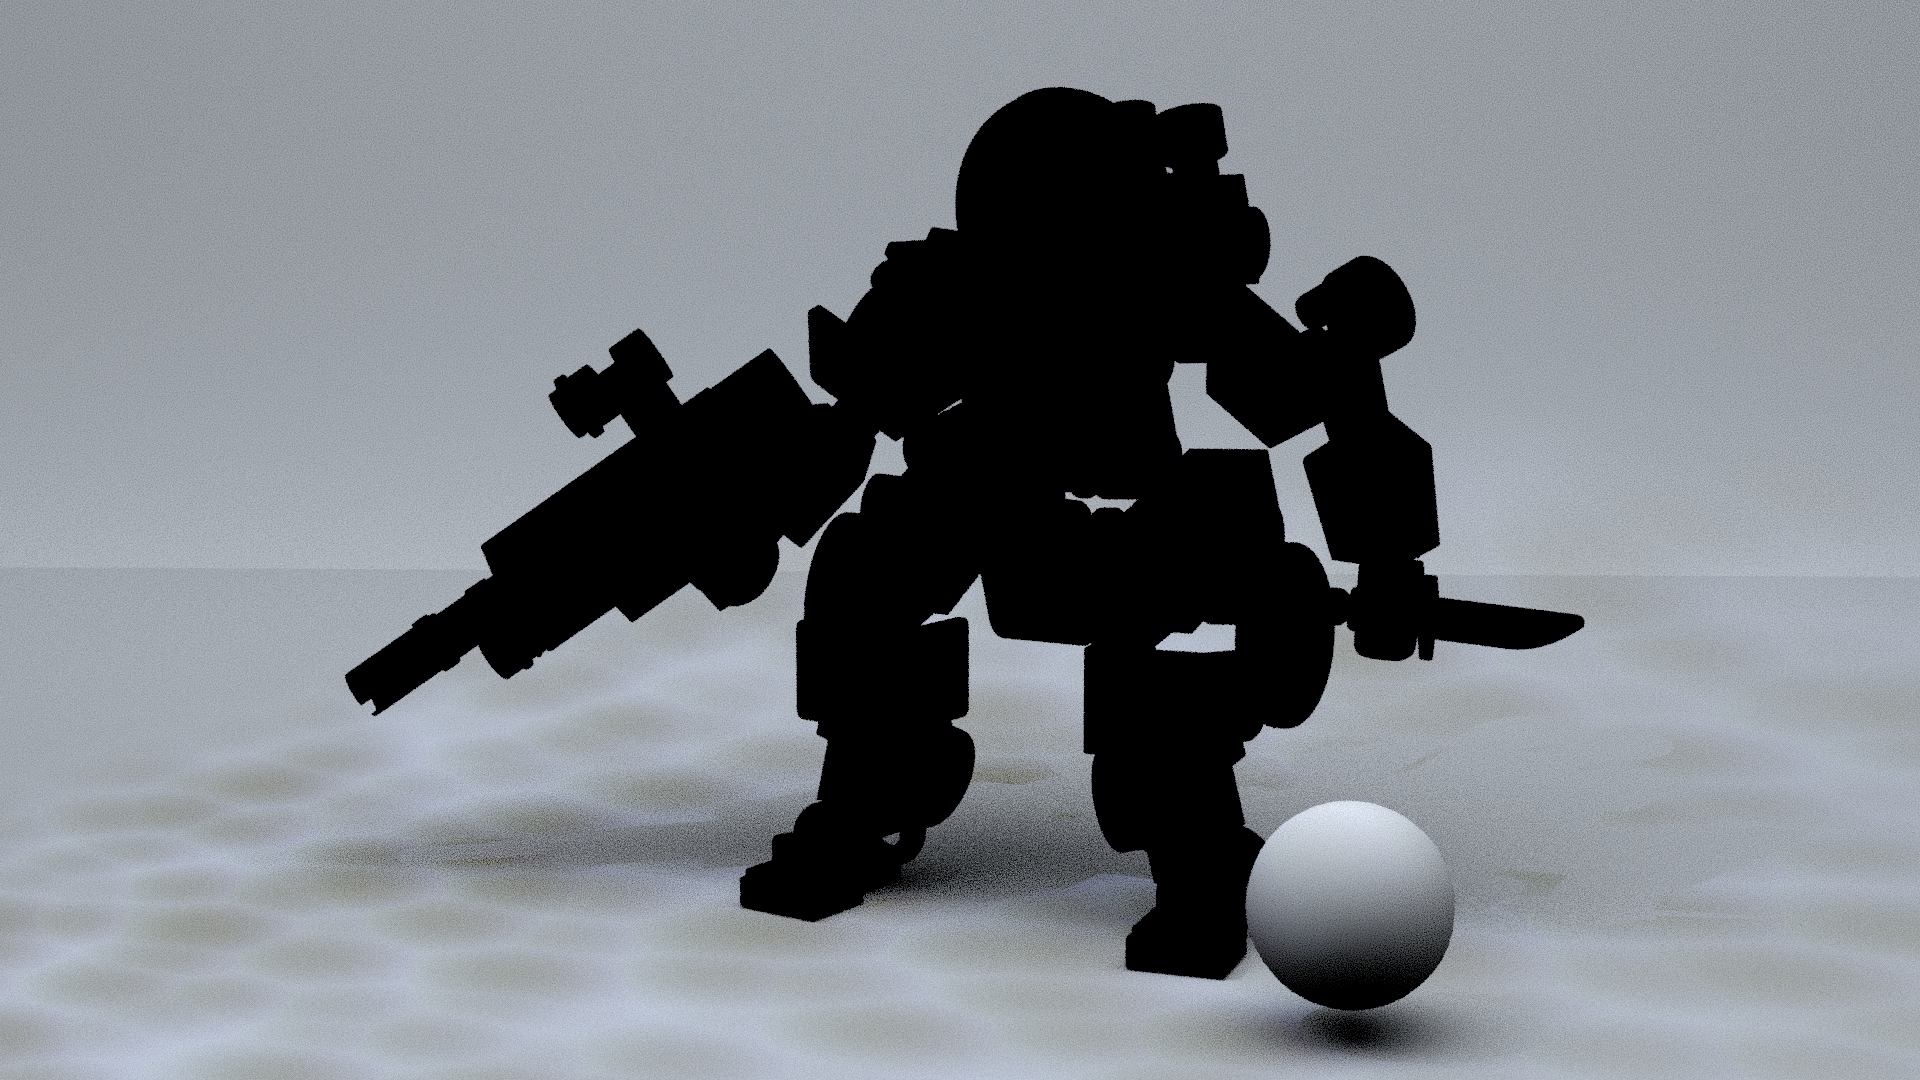
Here, we want to specifically examine the shadows.
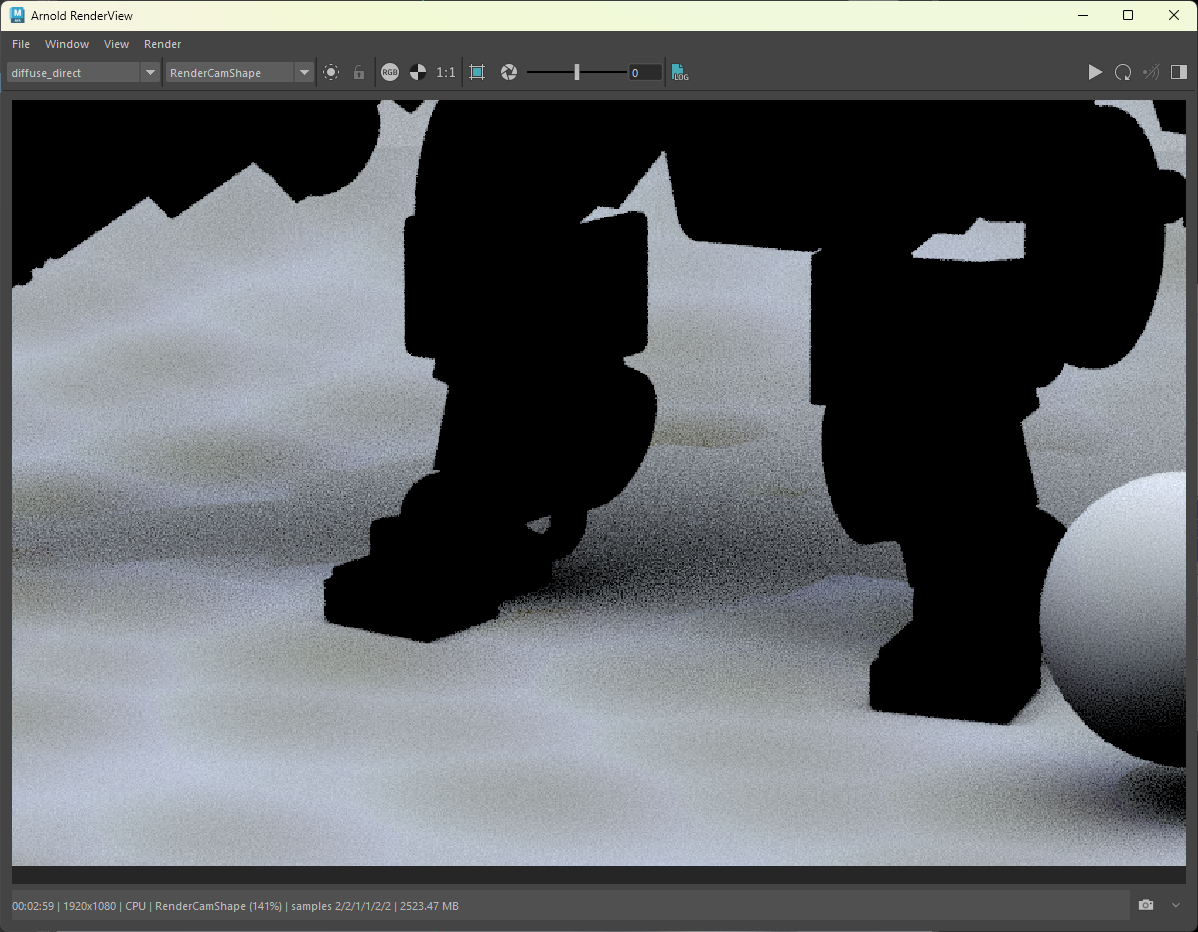
Zooming in, we can see that the shadows are quite noisy. The solution to this is to increase the number of light samples related to the light that is causing this shadow.
Light Samples
When a ray hits a surface, it needs to know if that point is being directly lit by a light. Thus, it shoots a shadow ray directly at every light source. If this light sample gets blocked by an object, then it’s in direct shadow, otherwise, it is being illuminated.
When we have noise in the direct diffuse AOV’s shadows, this tells us that we are not sampling the light source enough.
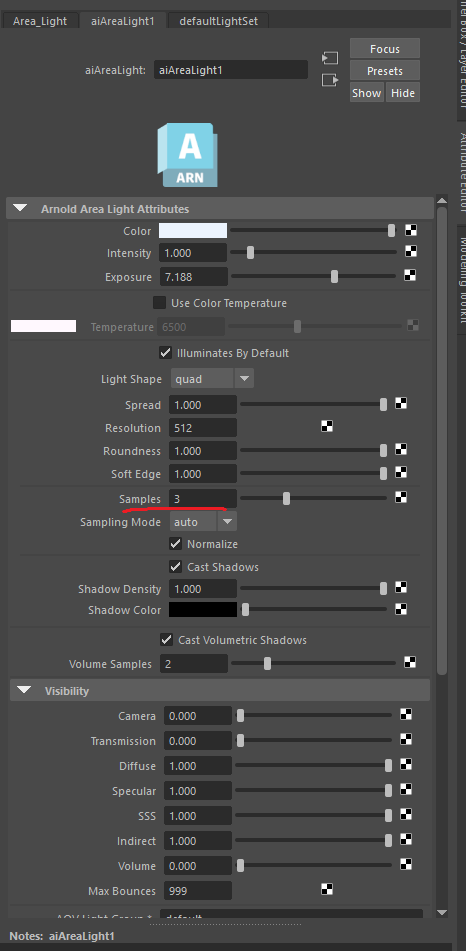
Select the area light in the scene and increase the number of samples from 1 to 3.
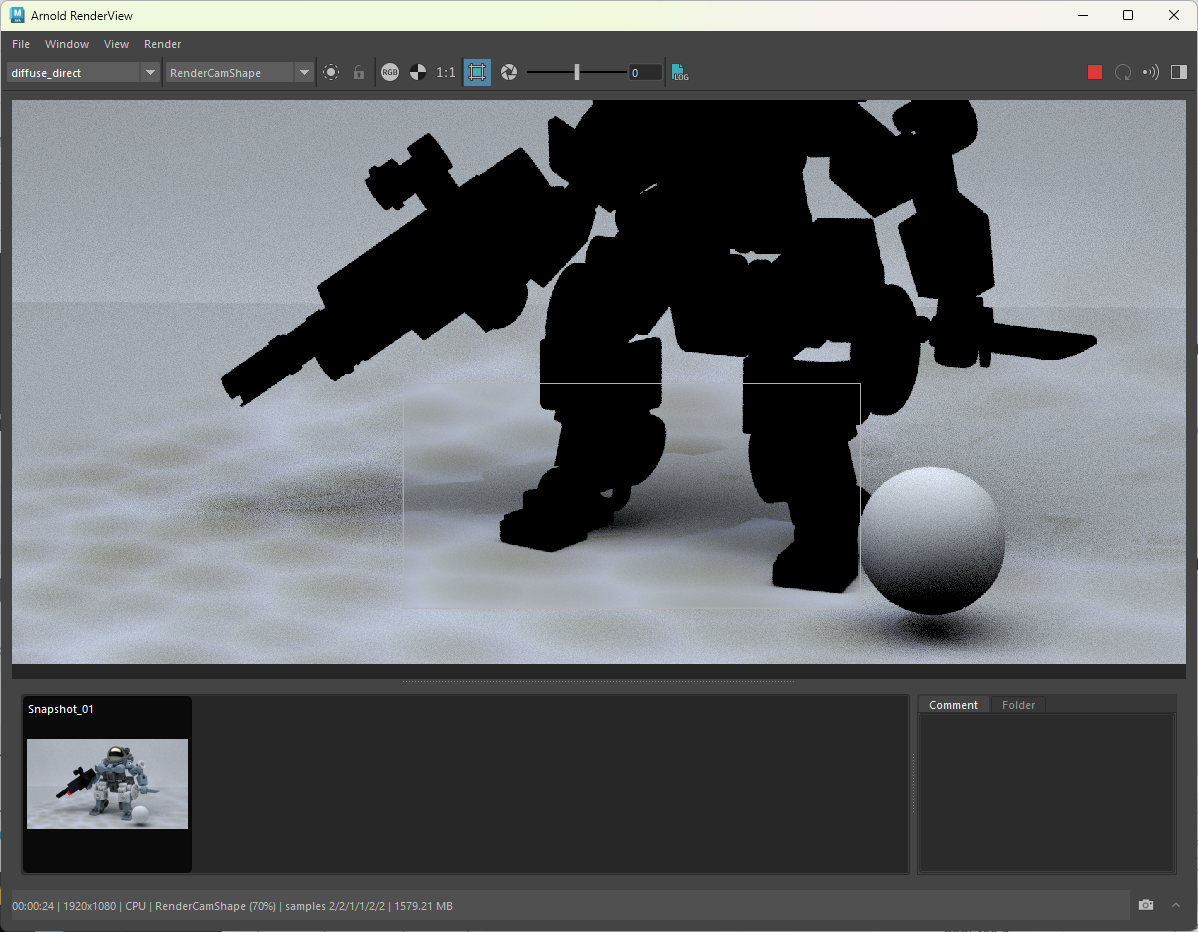
Doing another render, we can see how the noise in the shadows really clears up.
Transmission Noise
Next, let’s take a look at the transmission_indirect AOV:
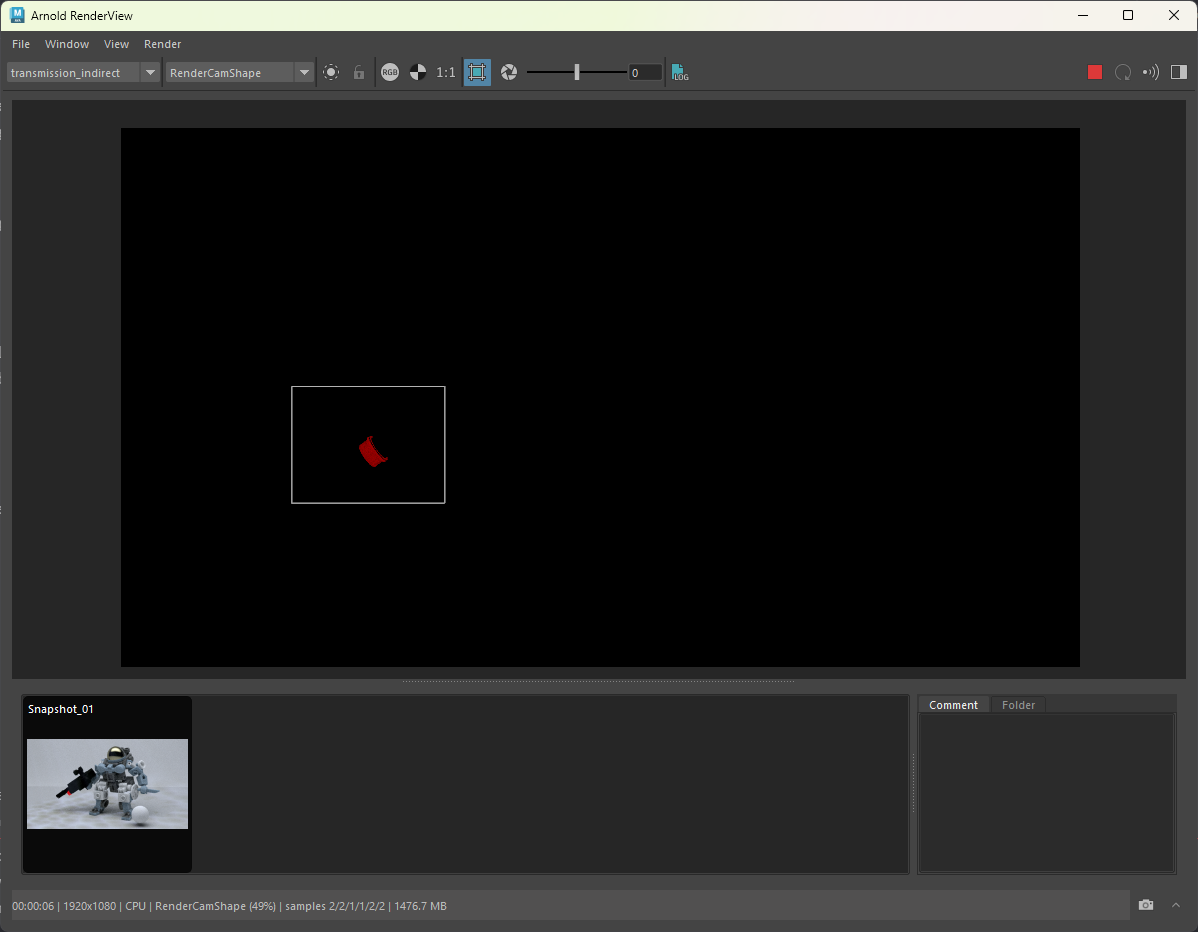
Here we an see that there is very little noise associated with this AOV. If there was noise, the solution would be to increase the number of Transmission samples.
SSS Noise
Next, let’s take a look at the SSS AOV. This AOV corresponds to subsurface scattering in our scene.
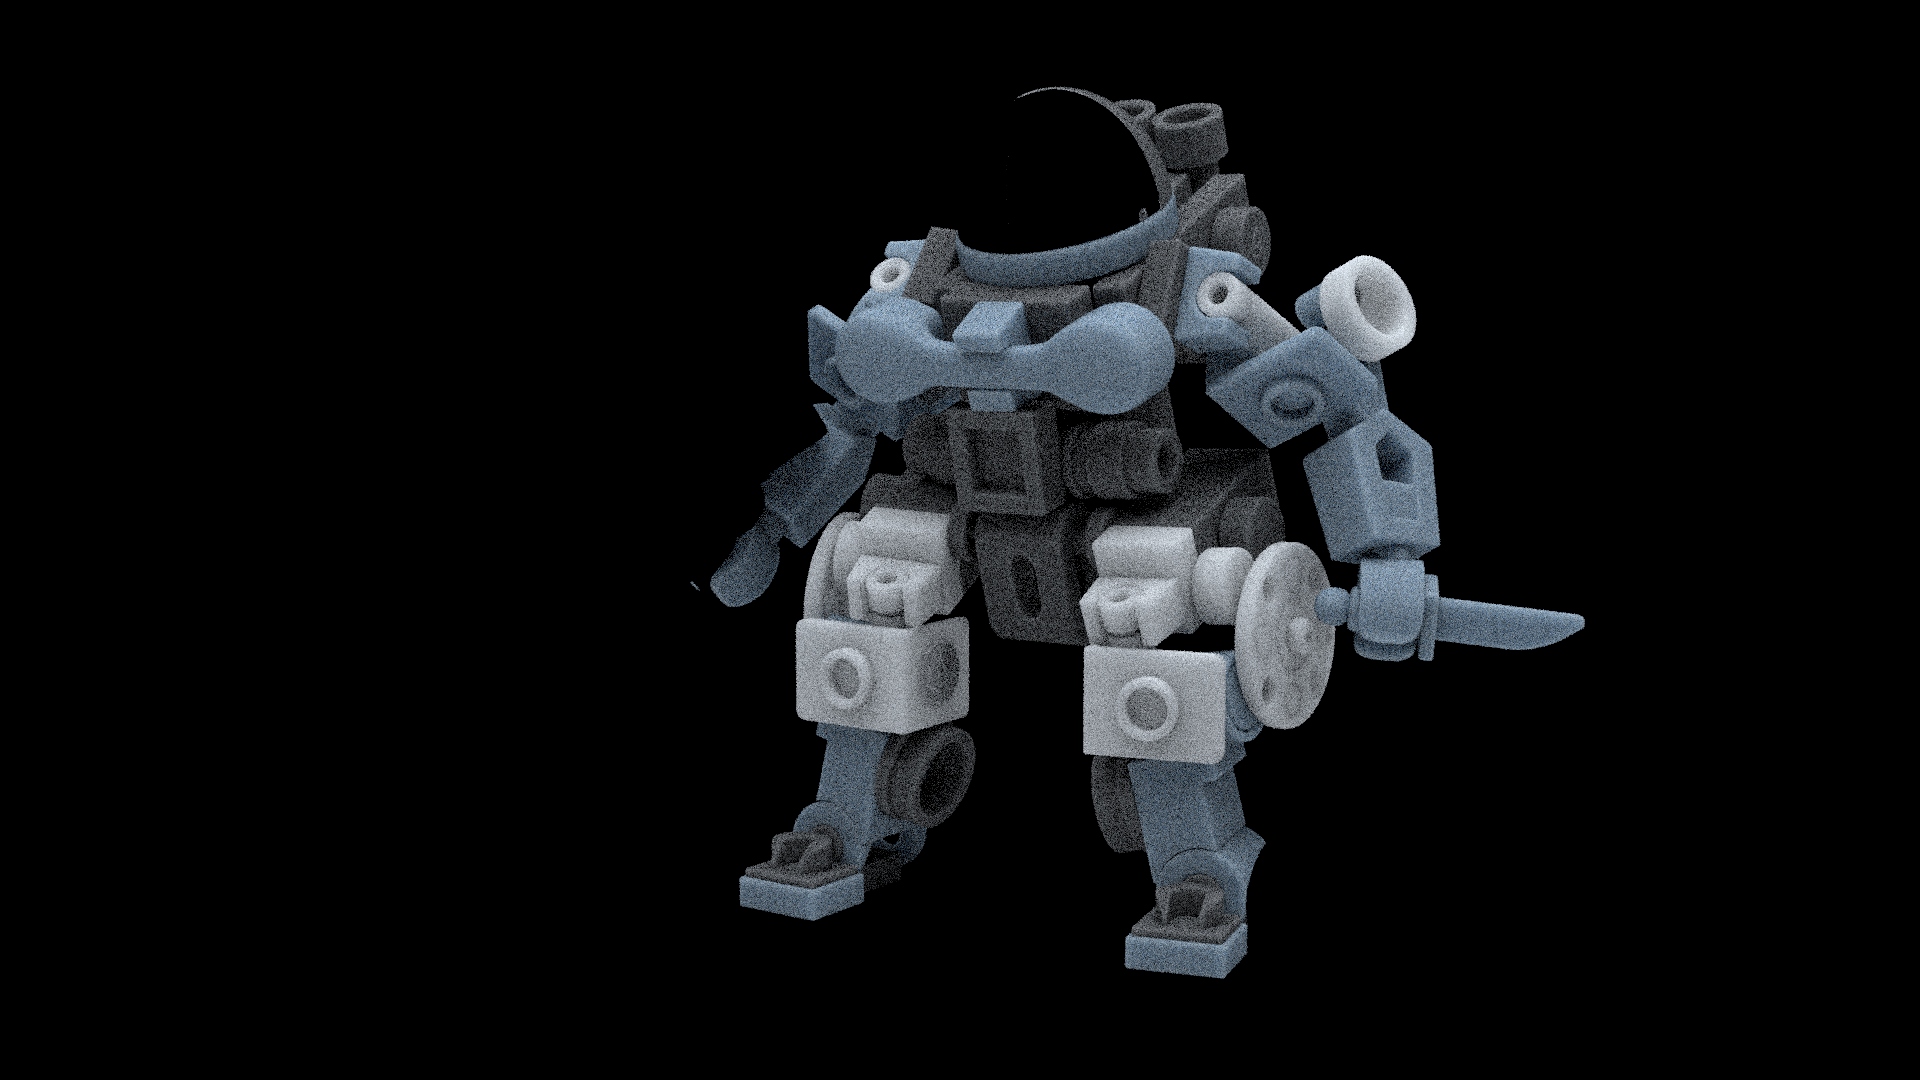
Here we can see that there is a LOT of noise. This makes sense. Additionally, this corresponds to where we were seeing where a lot of the render time was allocated to in the cputime AOV earlier.
To improve SSS noise, we need to increase the number of SSS samples. Here I increased it from 2 to 3:
Volumetric Noise
Next let’s take a look at the volume_direct AOV:
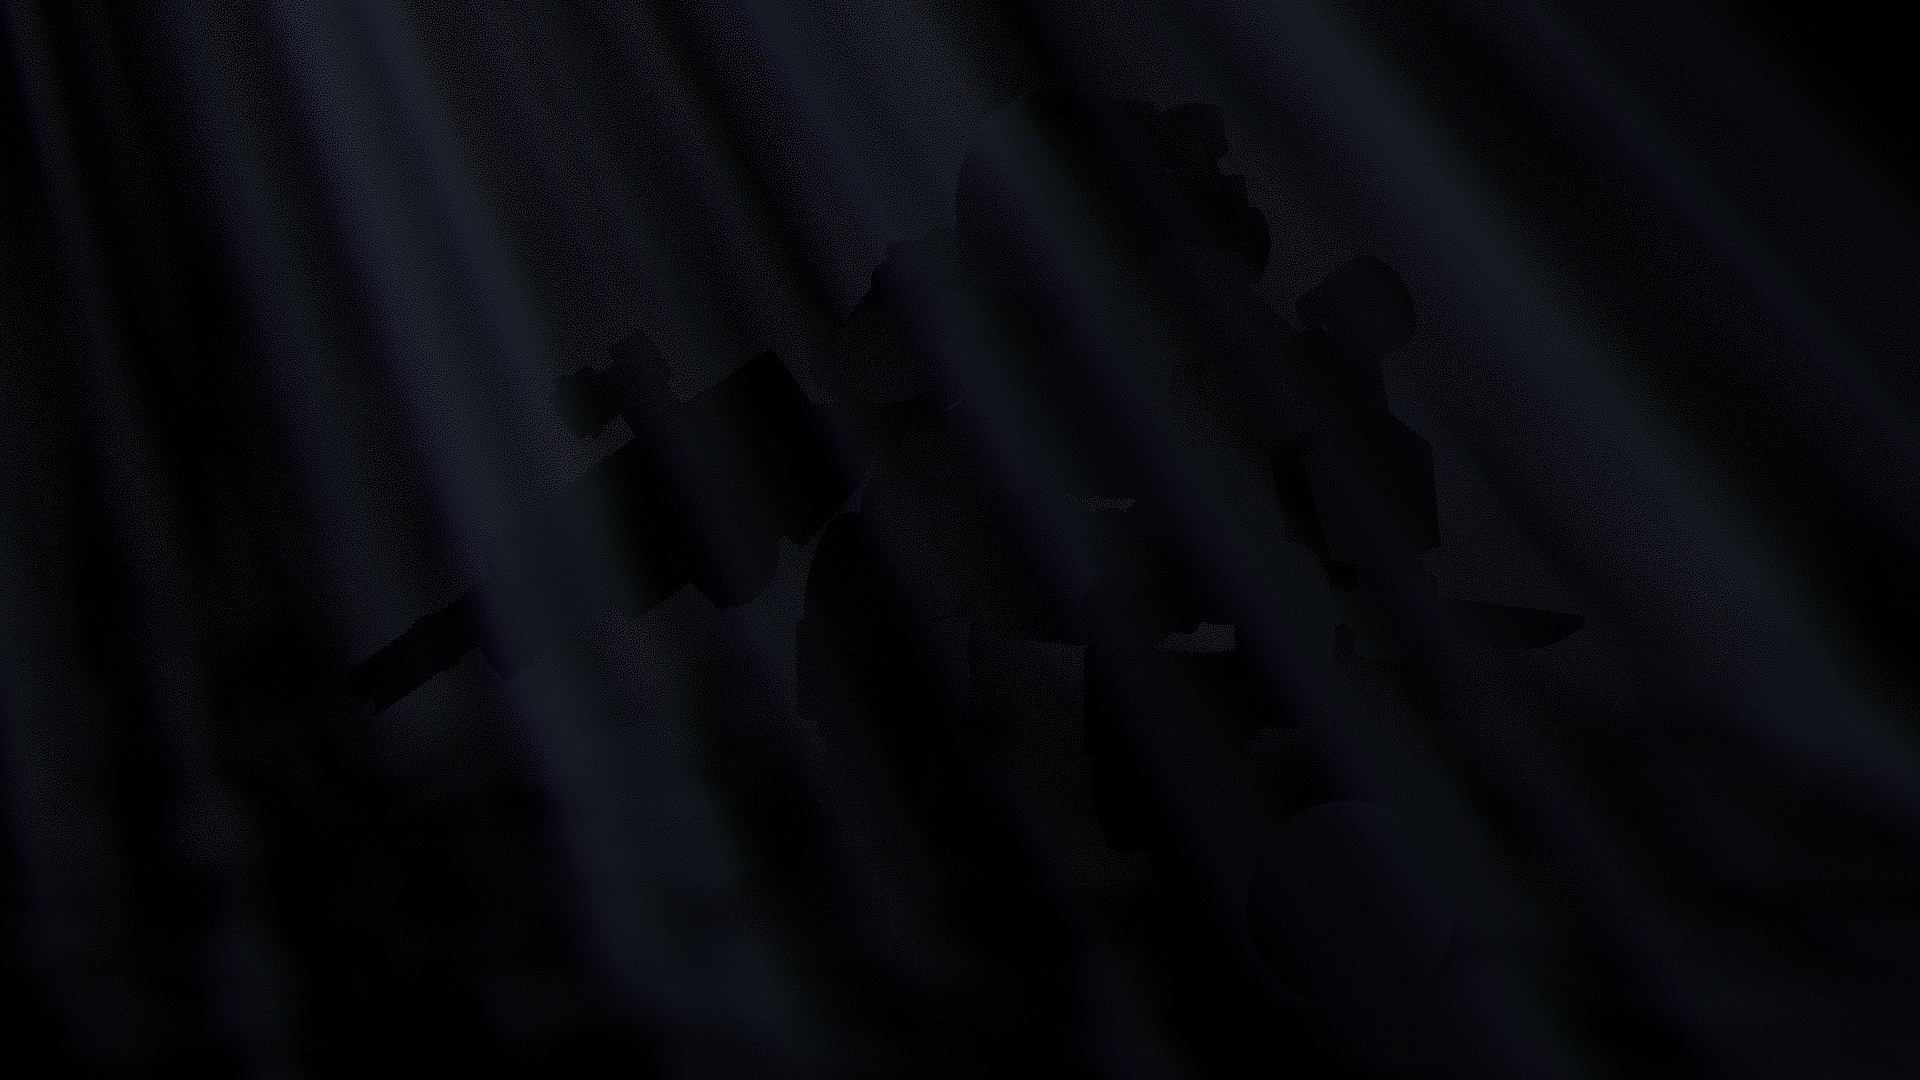
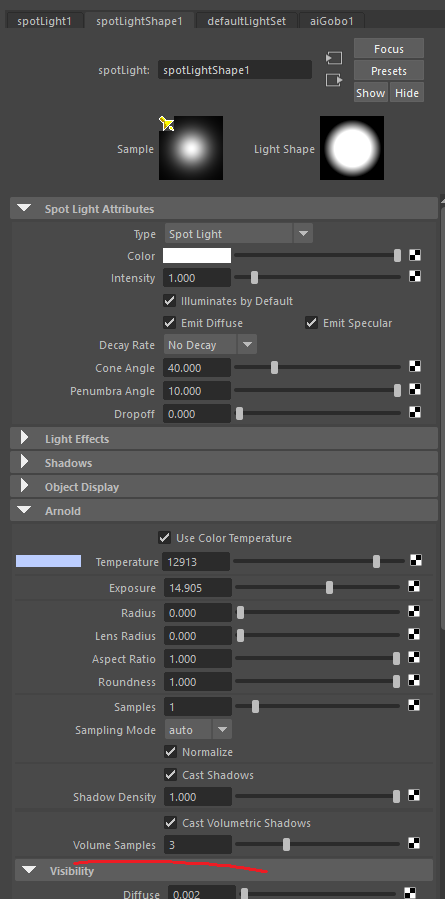
Here we can see quite a bit of noise related to the light that is causing this atmospheric scattering effect in the volume. To fix this, we need to go to the light that is causing this noise. In this case, it is the spotlight in the scene. Then, under the Arnold tab, change the number of Volume Samples to 3.
Comparison
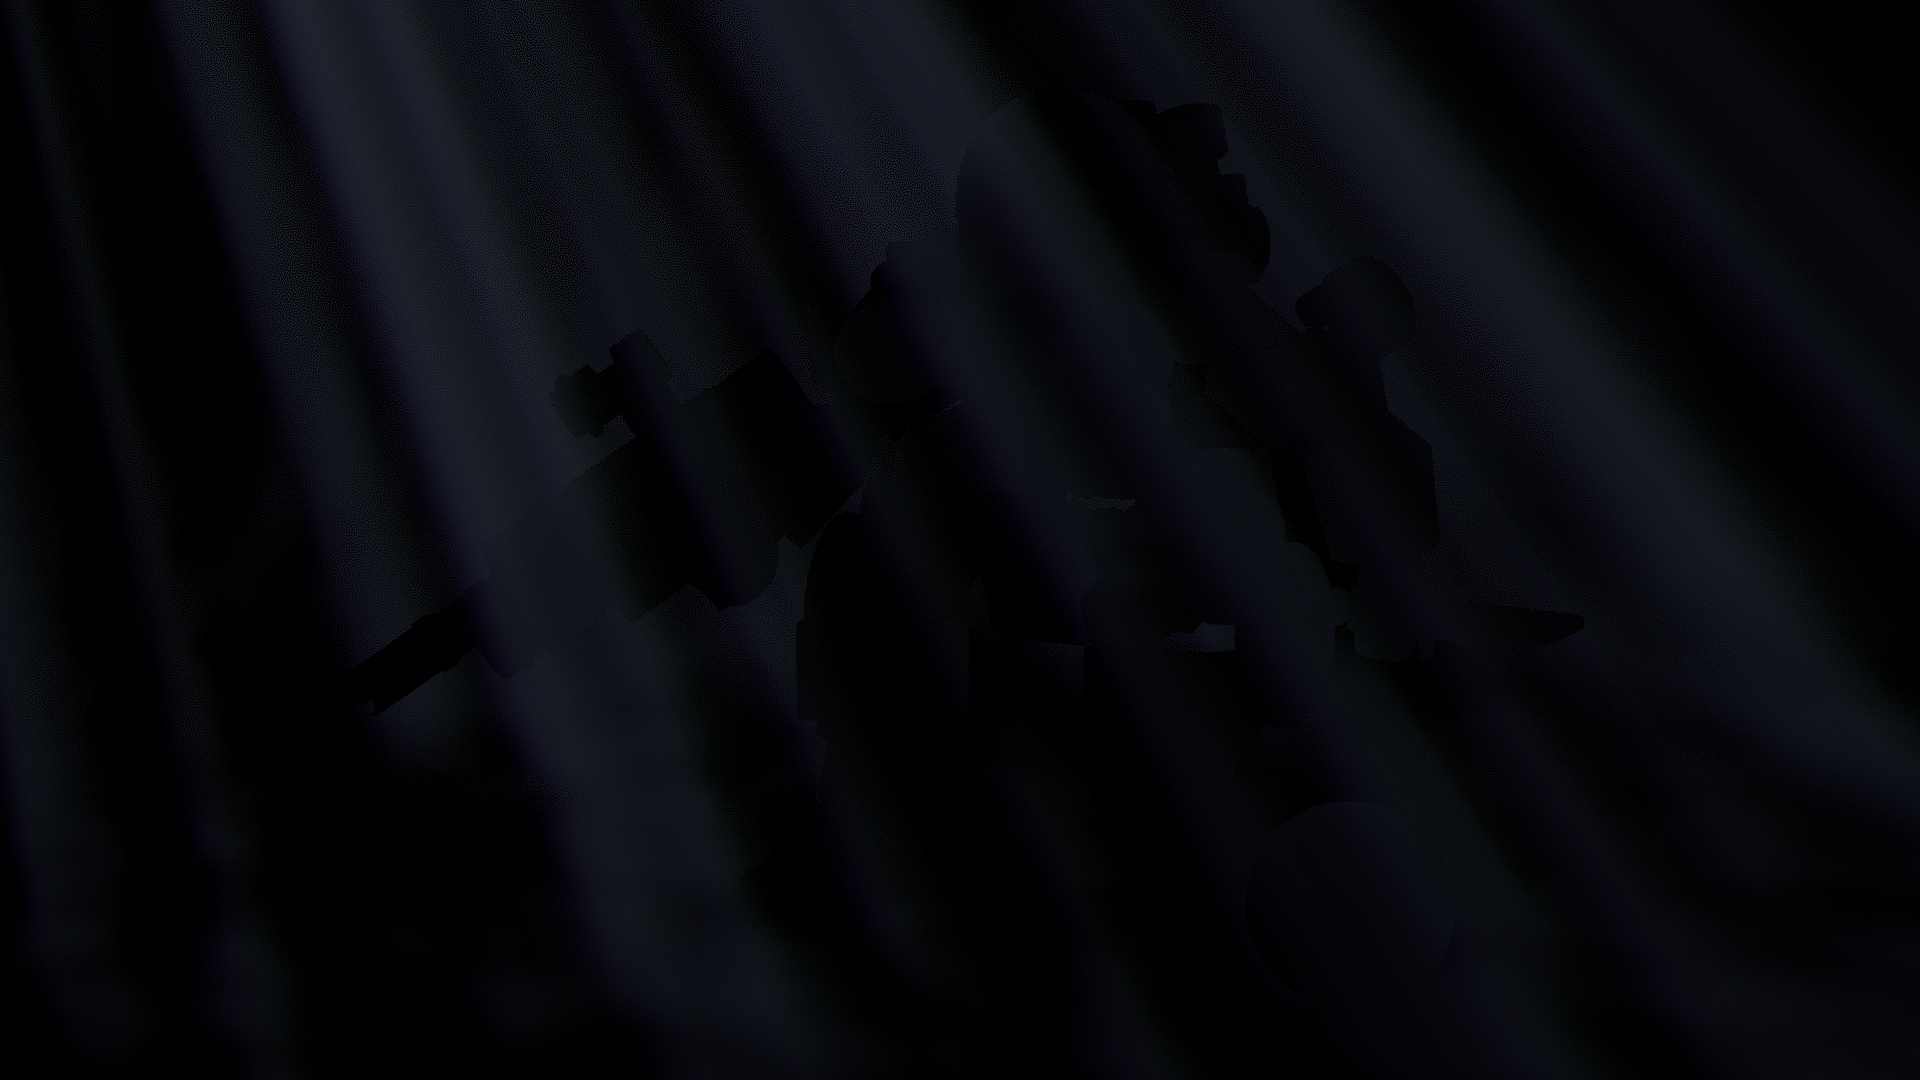
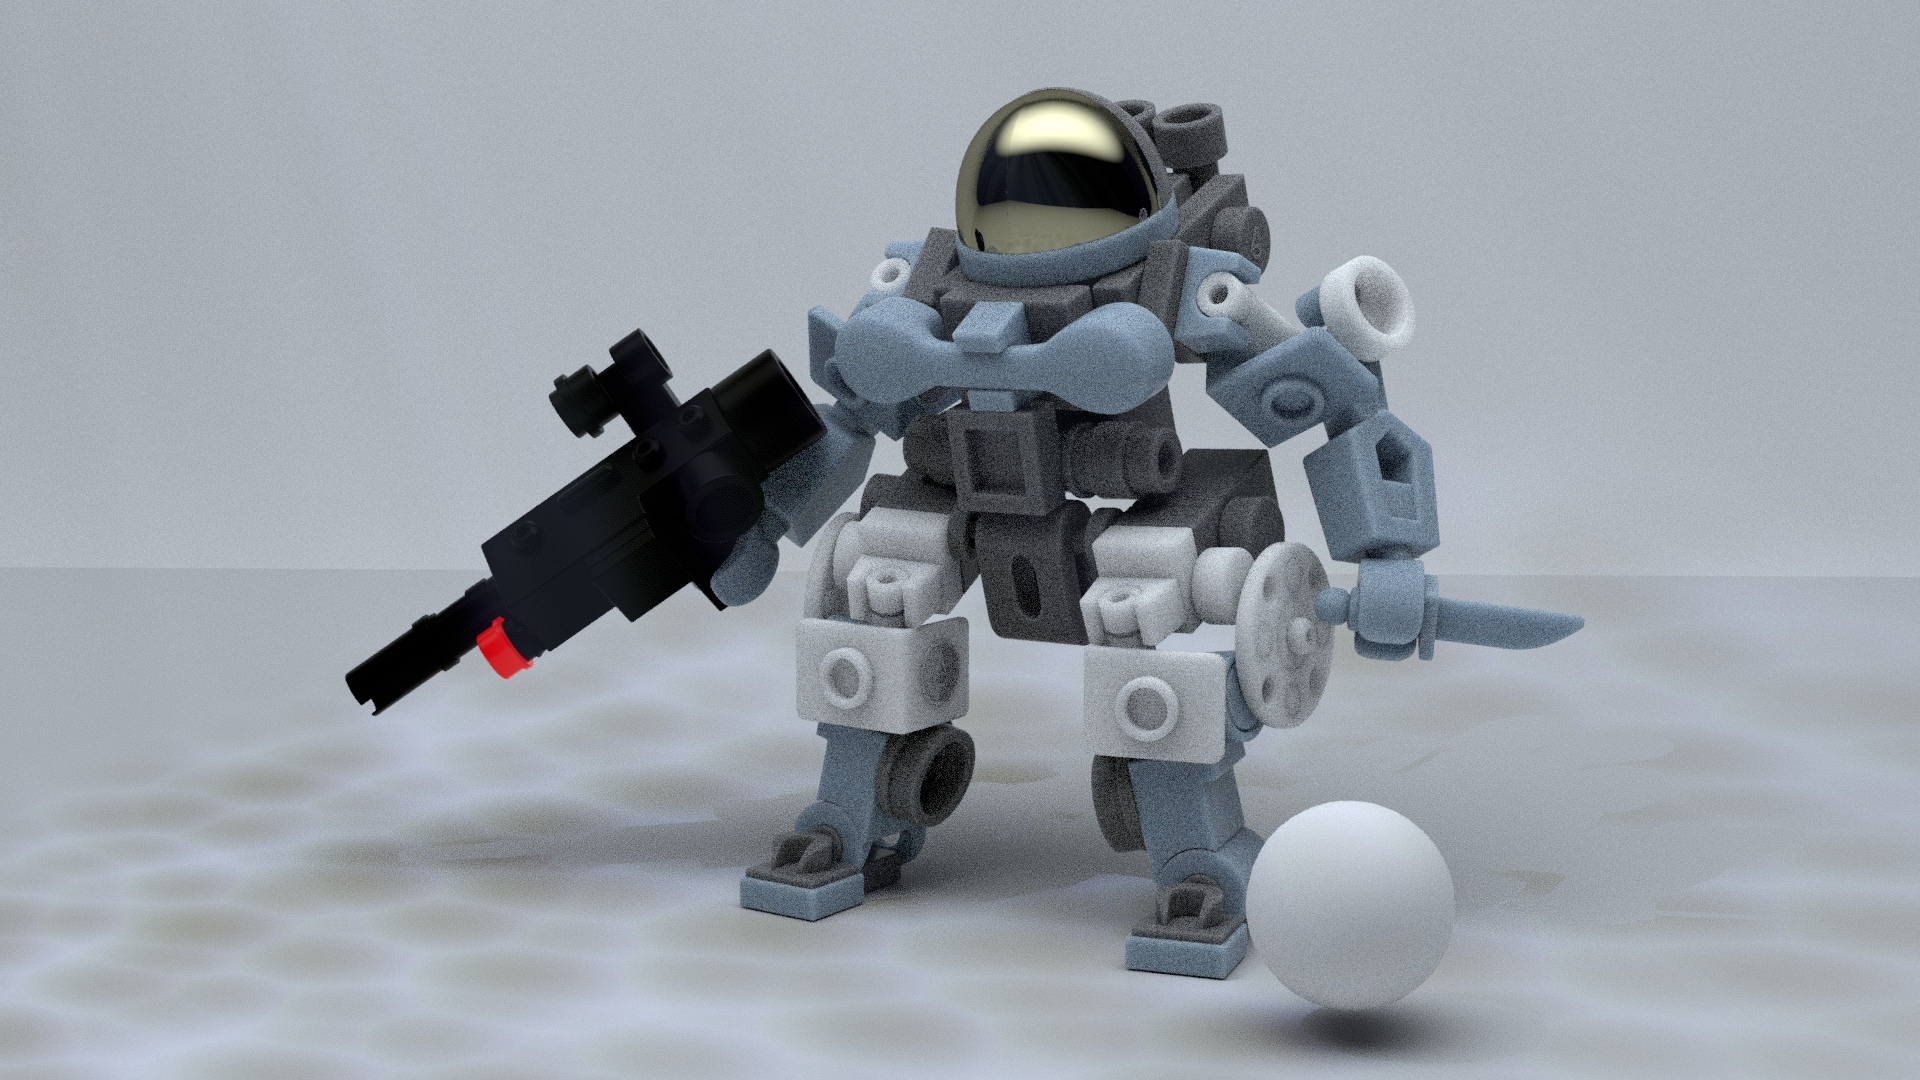
Before
After
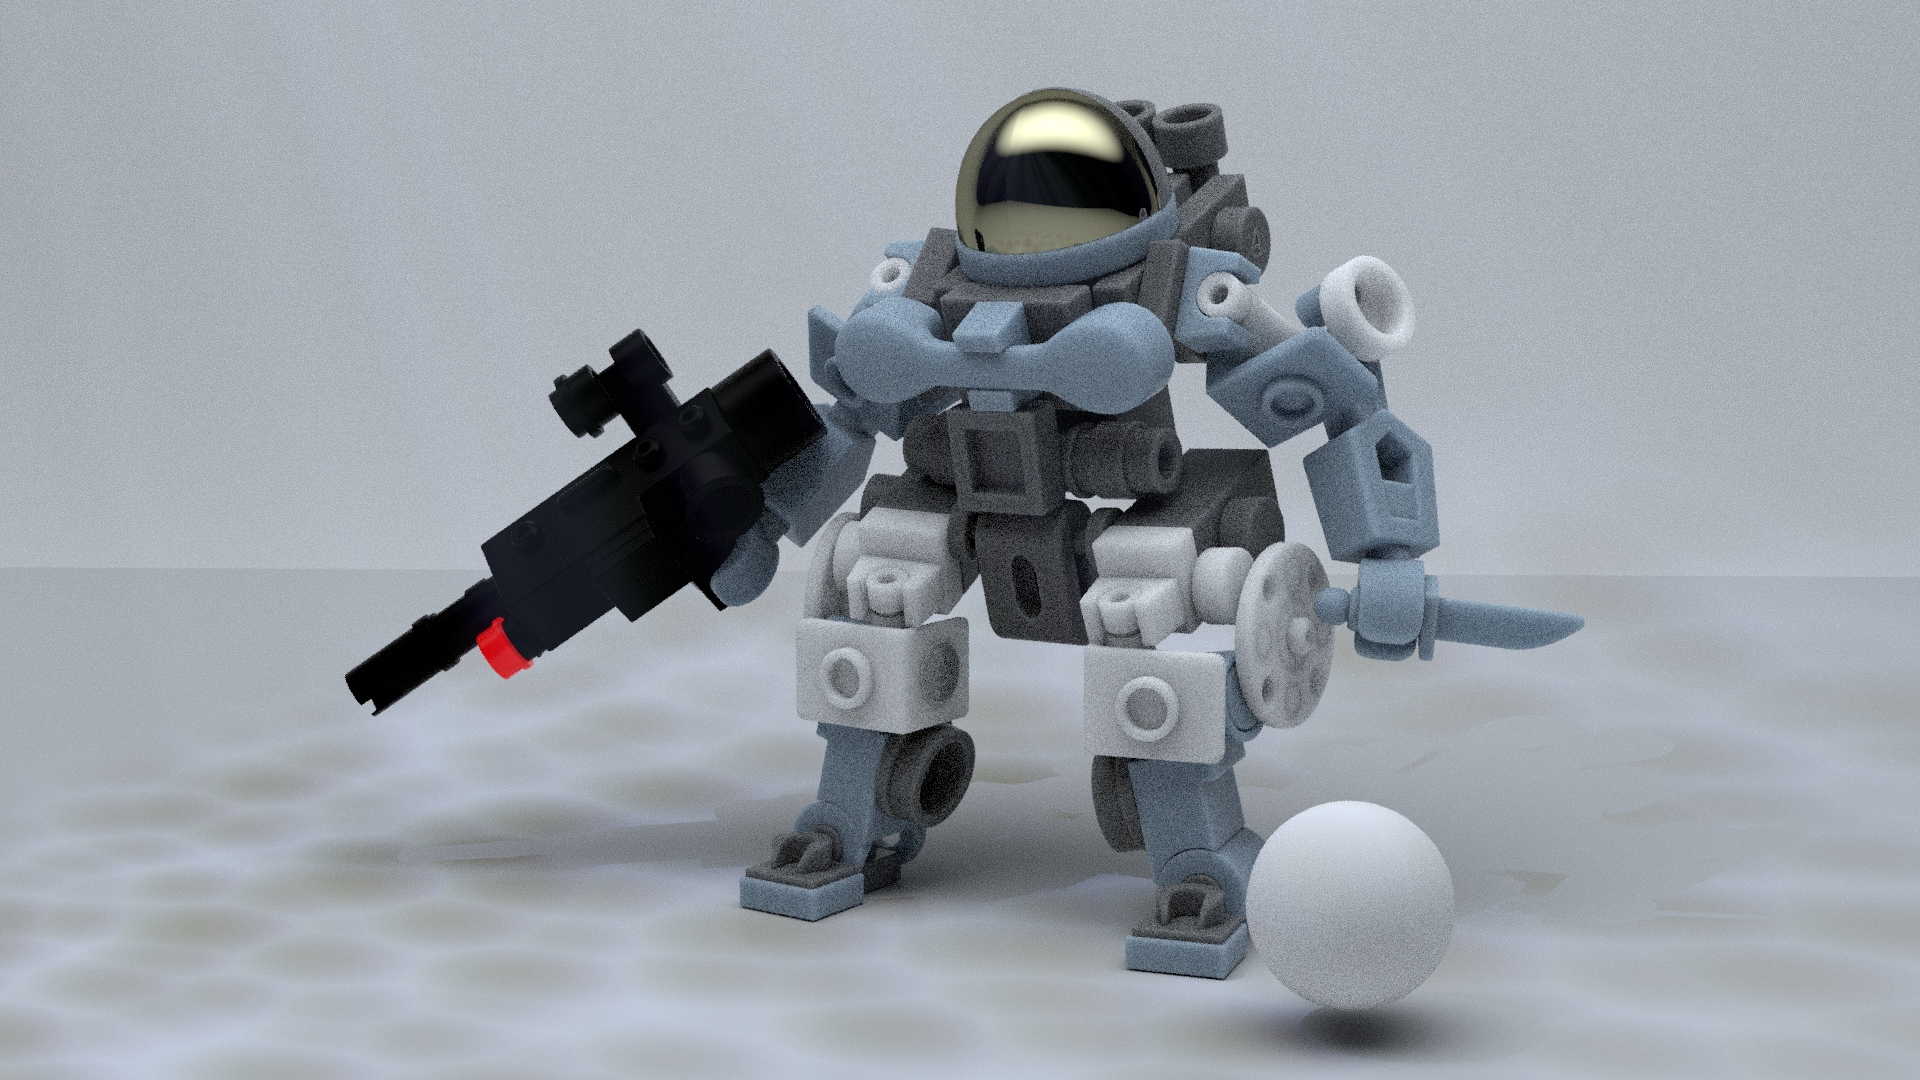
The original took 8 minutes and 18 seconds while after our changes it took 5 minutes and 1 second. There’s still quite a bit of noise though so let’s clean that up using denoising.
DELIVERABLE: Optimized RenderView Screenshot
Submit a screenshot of your render view showcasing the render with the changes we made as well as the amount of time it took to render the frame.
Denoising
Go back to your render settings and add the Oidin denoiser. Note that this imager is NOT temporally stable so you should not be rendering animated sequences with this. However, it is useful to get a preview of what a denoised sequence would look like, as well as for still frame rendering.
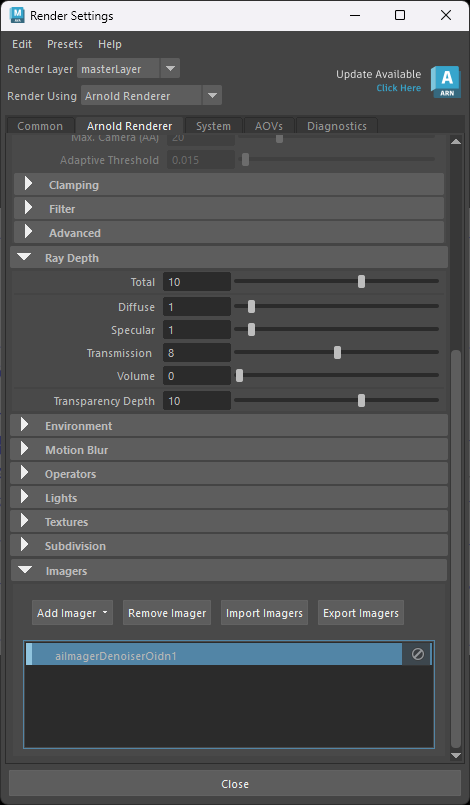
After applying the denoiser, start another render.
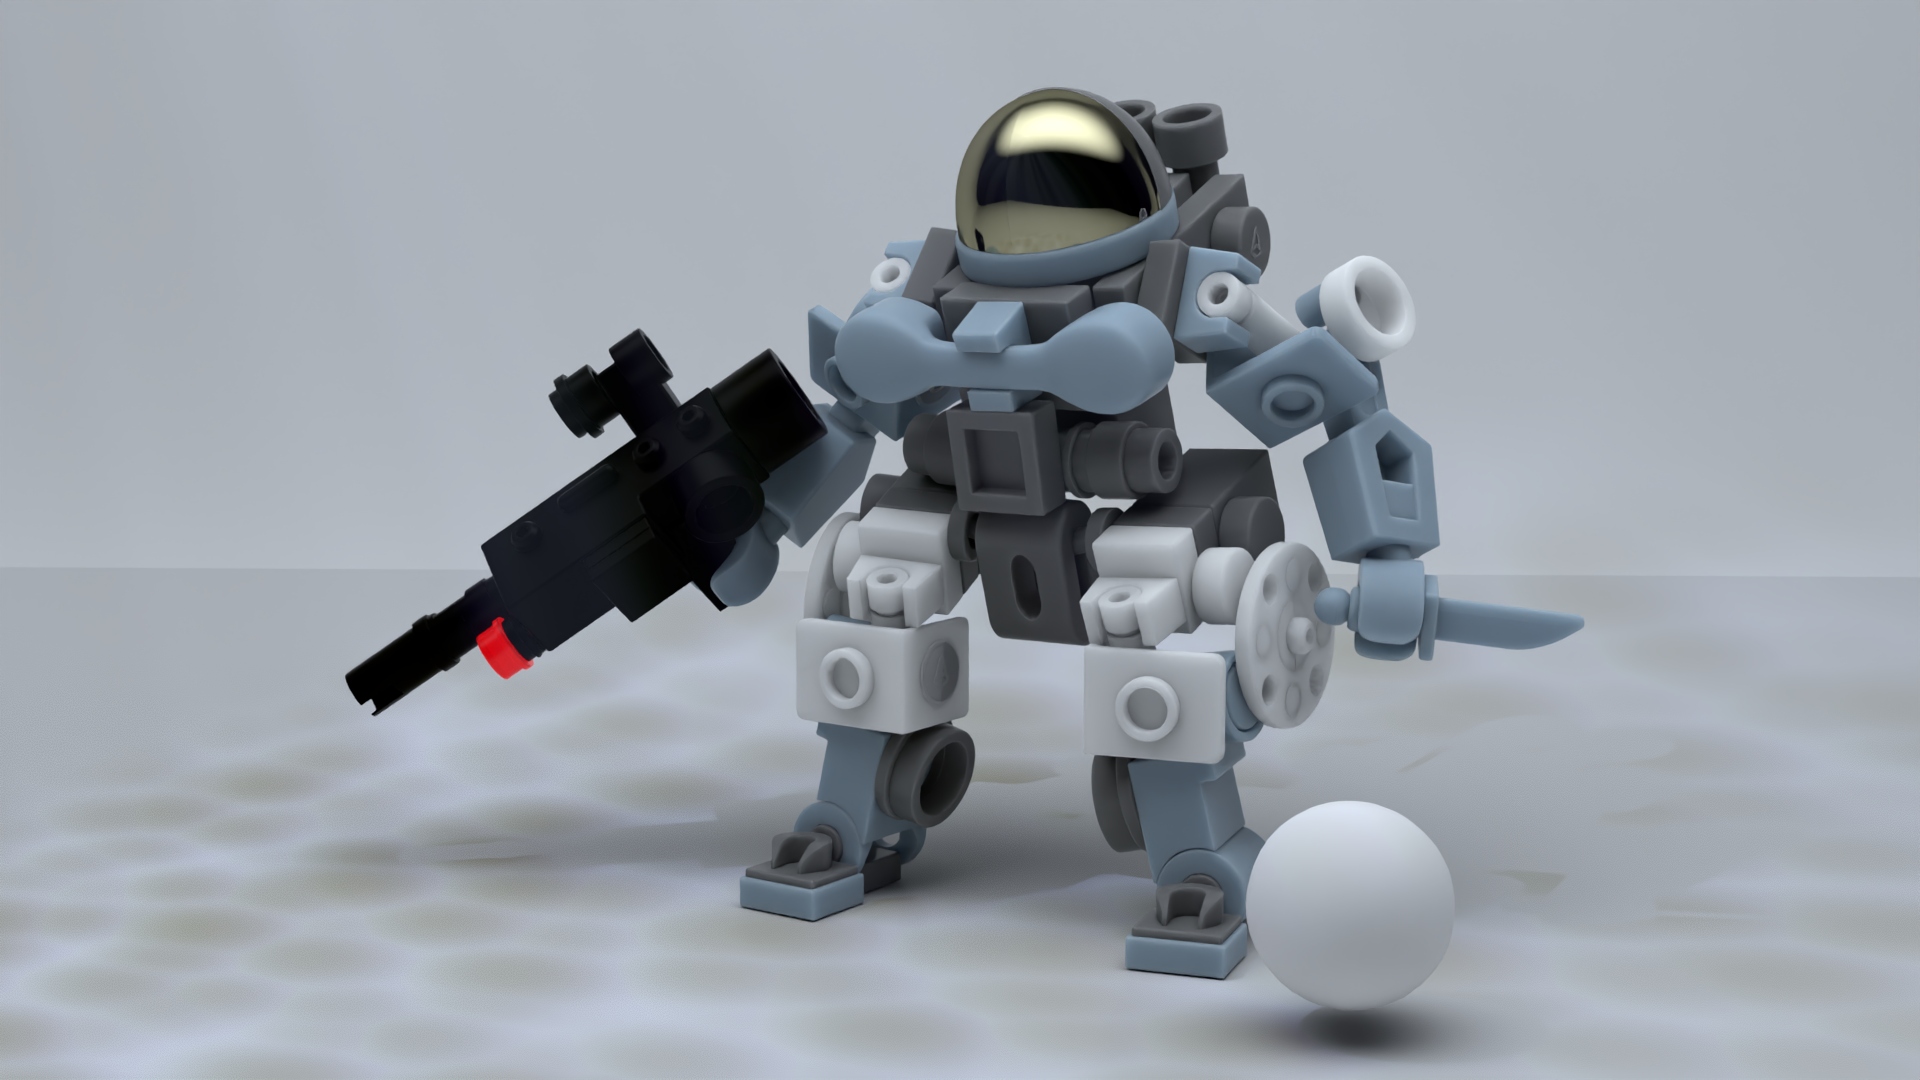
The denoiser does a lot to improve a scene. It is important though that we try to reduce as much of our noise via sampling instead of only relying on a denoiser. A denoiser applied to an incredibly noisy image will have artifacts that look unnatural and out of place.
Once we can see our denoised image, we can probably afford to reduce some of our render settings to compensate. Here I ran another render with my SSS sample count down to 2 instead of 3. Here my final render time is 4 minutes and 43 seconds.
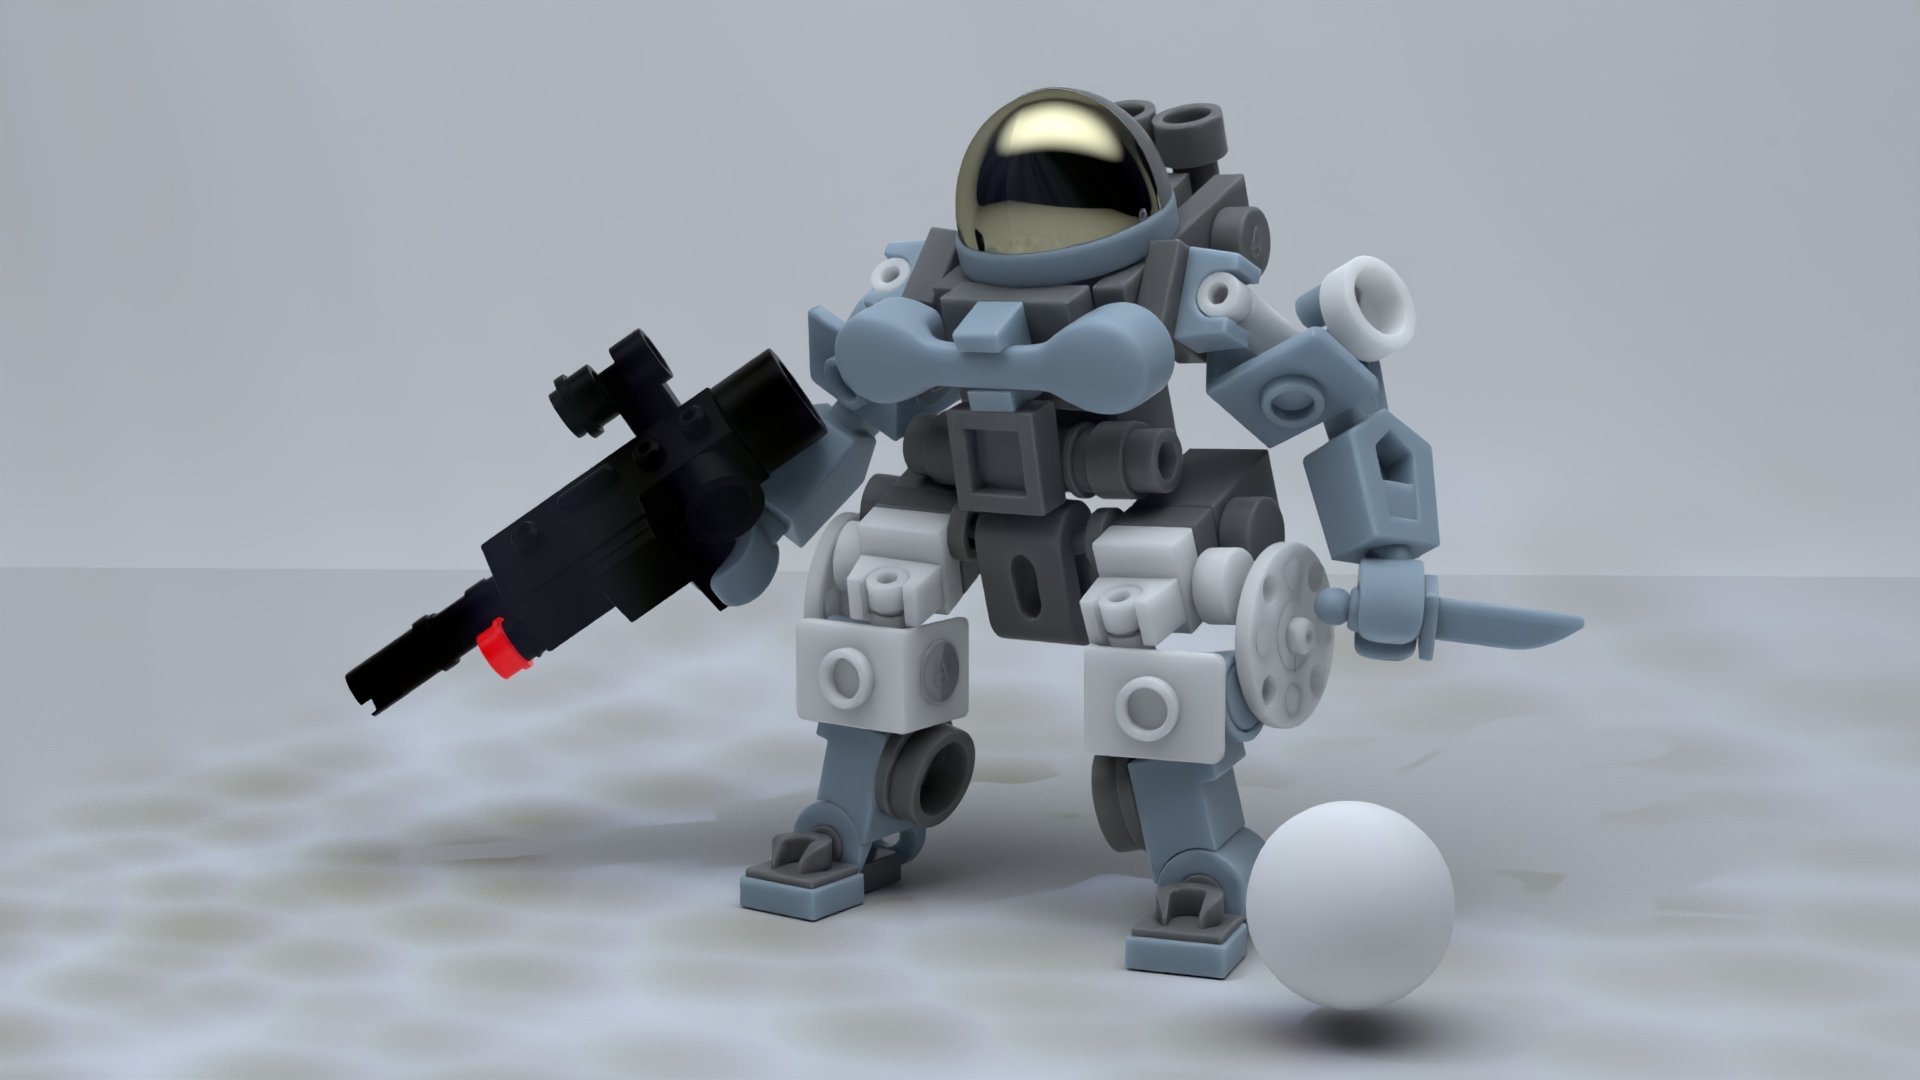
DELIVERABLE: Denoised Image
Save out your denoised image by going to
File → Save Imagein your render view. The file format can be any typical image format (.png/.jpg).
Note that this is not a screenshot.
Preparing for Final Render
After doing our optimization, let’s prepare for our final render.
Danger
Make sure to remove the denoising imager that we just applied. We do not want this imager to be applied to our final sequence since it is temporally unstable. Instead, we will use a temporally stable denoiser after the rendered exrs are created.
Next, go to our AOVs and remove all our AOVs. Only add AOVs that you know you will use in post. The most common AOVs to include for compositing are:
Essentials
diffuse_direct: Adjust direct diffuse lightingdiffuse_indirect: Adjust indirect diffuse lightingspecular_direct: Adjust direct reflectionsspecular_indirect: Adjust indirect reflectionsemission: Adjust glowing objectstransmission: Adjust refraction and glassvolume: Adjust atmospheric scatteringZ: Depth-based fog and compositingN: Surface normals (for relighting objects)albedo: Denoising and lighting separation
Utility
crypto_object: Isolate individual objectscrypto_material: Isolate materialsmotionvector: Motion-vector effects such as motion blurP: World-space position for placing new objects
For this lab specifically, we only require you to output the Z AOV and the motionvector AOV. This way, we can recreate the motion blur and depth of field that we disabled in our feature overrides.
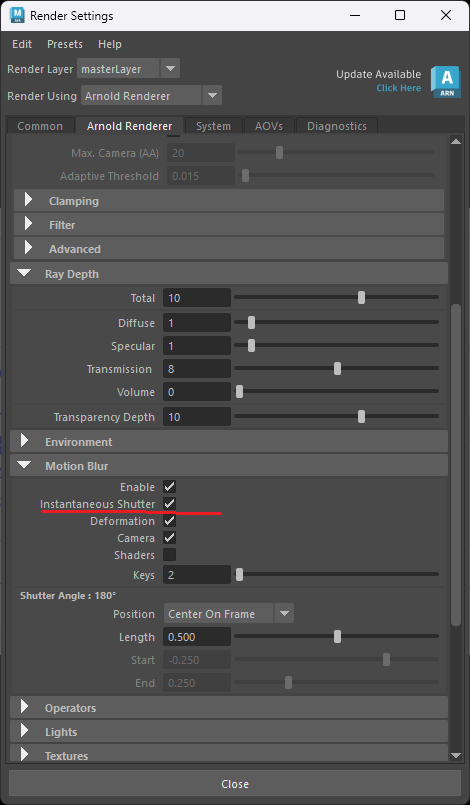
In order to successfully use the motionvector AOV to recreate motion blur, we need to make sure Instantaneous Shutter is checked on in the Motion Blur settings. Additionally, make sure to uncheck Ignore Motion in the Diagnostic Feature Overrides.
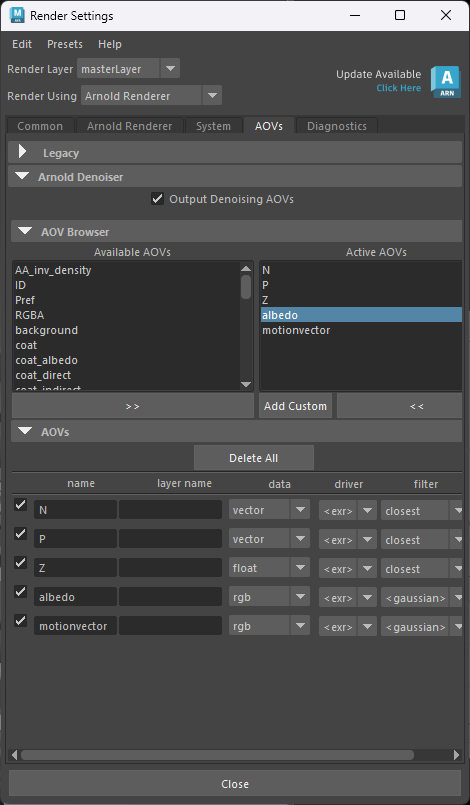
Additionally, in order to use the Noice denoiser, we need to check Output Denoising AOVs on. We also need the N, P, and albedo AOV enable. Also make sure Preserve Layer Name and Merge AOVs is ticked on.
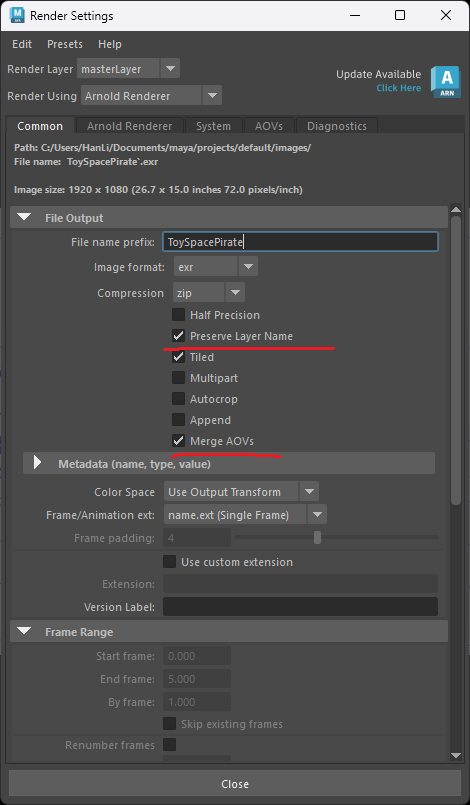
Next, change your Frame/Animation ext to name_#.ext so we can render out a sequence of frames rather than a still image. Set your start and end frames to 0 and 5 respectively and make sure your Renderable Camera is correct.
Additionally, since rendering can take quite a while, feel free to lower your Image Size preset to HD_540. This should make it go faster for the purposes of this lab.
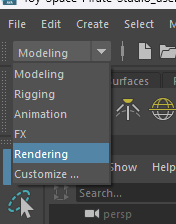
To start a render, go to the Rendering tab here:
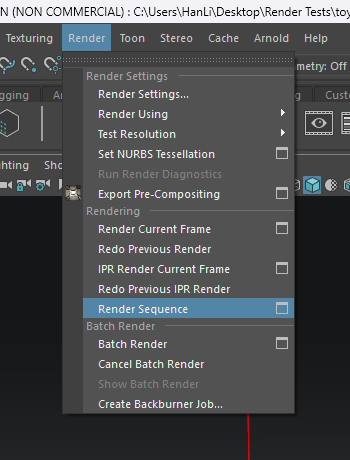
Then go to Render → Render Sequence option box:
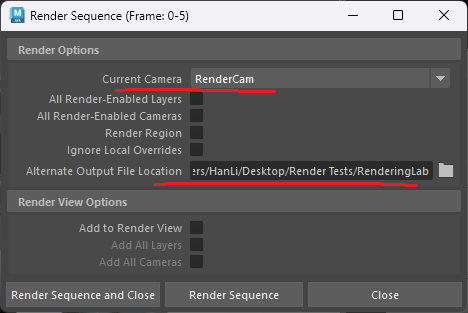
Make sure your camera is correct and your output file is correct. Then click Render Sequence:
Applying the Denoiser
Once you are done rendering, head over to Arnold → Utilities → Arnold Denoiser (noice):
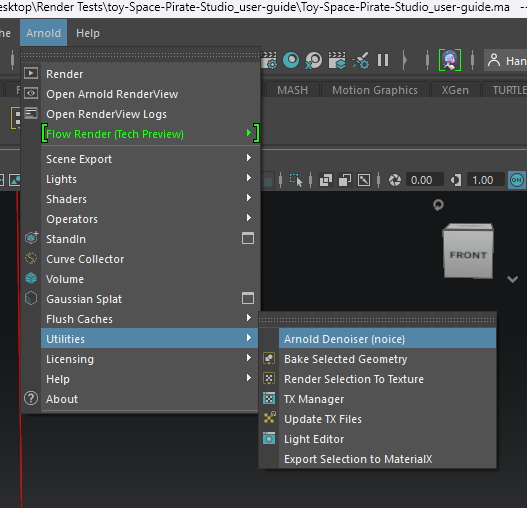
Here you can adjust the denoiser settings. The first thing to pay attention to is the input and output locations of your file. Select the first exr frame of your sequence
- Temporal Stability frames determine who stable your denoising is over time. A higher value will make the denoider look at more frames in order to temporally denoise.
- Pixel search radius is how many pixels the denoiser looks at to determine the color of any individual pixel.
Play around with these two settings with a small frame range until you’re satisfied before doing it on the complete sequence. Then, click Denoise:
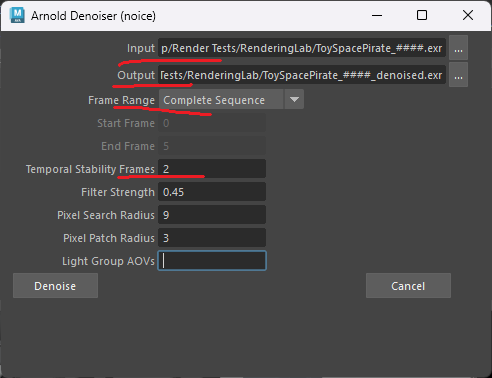
You can view your denoised images by opening them up in the render view!
DELIVERABLE:
Zip up all your denoised
.exrfiles into a folder for submission.