Introduction
For UCBUGG, you will be working both individually on Lab Homework and as a team on your 1-2 minute animated short. You’ll want to keep your homework project files separate from your group project files since you’ll be building assets for the labs that don’t belong in your short.
We’re going to walk through making those two separate file locations; one for your homework files and another for your group project files for your short.
Caution
This lab was recently rewritten and only includes video tutorial for Windows computers at the moment. If you are using MAC, follow along as best you can and ask questions in the Discord if you are stuck.
Read Before Continuing
A note before we continue: production management is challenging! You have a lot to keep track of and it’s all very abstract; so, if you find yourself confused or frustrated, remember that the course staff are more than happy to help you with setting up in Discord.
Homework Directory Setup
This section must be completed by EVERYONE.
This section guides you with setting up your homework project folder. This is where you will store all files related to any labs you complete individually.
Windows - Homework Directory
To start, go to your Desktop. Right-click and make a new Folder (a.k.a. directory) on your Desktop.
Name the new folder
UCBUGG_fall_2026(insert your semester and year in this format). Make sure not to leave any spaces in your file path! Maya will get mad at you if there are any spaces in your file path, and we need to keep Maya happy, kind of like an aging parent.Open up Autodesk Maya and create a new file. You are going to use this file to create your project directory, so this can just be an empty file.
In your new Maya file, navigate to File → Project Window.
This will open up your Project Window. This generates your project directory, which is how Maya keeps track of all the data (including textures, simulations, referenced files, and more) needed for work in Maya.
Setting up your Project Window.
Click the New button
In the
Current Projectfield, change the name tohomeworkIn the
Locationfield, change the directory location to theUCBUGG_fall_2026folder we created on the Desktop.Don’t change anything else in this window and click on Accept at the bottom.
Check the
UCBUGG_fall_2026and confirm it contains ahomeworkfolder containing various project folders such asassets,scenes, etc.
You have now created your personal homework folder where you will save all files related to labs. Later on, we’ll show you how to make sure files save to the correct folder by Setting Your Project.
Next, we’ll be showing you how to setup your group project folder to work on your short.
Group Project Directory + Version Control Setup
What is Version Control?
For those from outside of a Computer Science or technical background (like the author of this lab), Version Control may be a new concept, but it’s pretty straightforward and understandable! For UCBUGG shorts, we recommend hosting your group directory on Google Drive Desktop because they have a user-friendly version control system.
Version Control is a system that helps track and manage changes to a set of files. You can think about Version Control as an advanced file version history, just like how you can see previous versions of Google Docs by clicking on the
last edit was made x units of time agotext in the control bar of any Google Doc. This makes it easy to recover mistakenly deleted or otherwise lost work.
There are many systems and programs that perform Version Control. The most popular version control system is called Git, but unless you have experience with Git or GitHub (a popular web-based platform that uses Git to manage and store code), we recommend using Google Drive Desktop for your UCBUGG short’s Version Control. Git and GitHub are valuable professional skills, and the staff of UCBUGG are more than happy to help you learn those skills if you haven’t used GitHub before but know that it’s totally optional and you’ll be able to complete your UCBUGG short without it if you prefer.
In this section, we will be setting up the group project folder where you will store all files related to your UCBUGG short. The group project folder allows you to share the same files with the rest of your teammates without needing to send it to them.
If you have not downloaded Google Drive for Desktop as instructed in the previous homework, please follow the instructions below:
Downloading Google Drive for Desktop
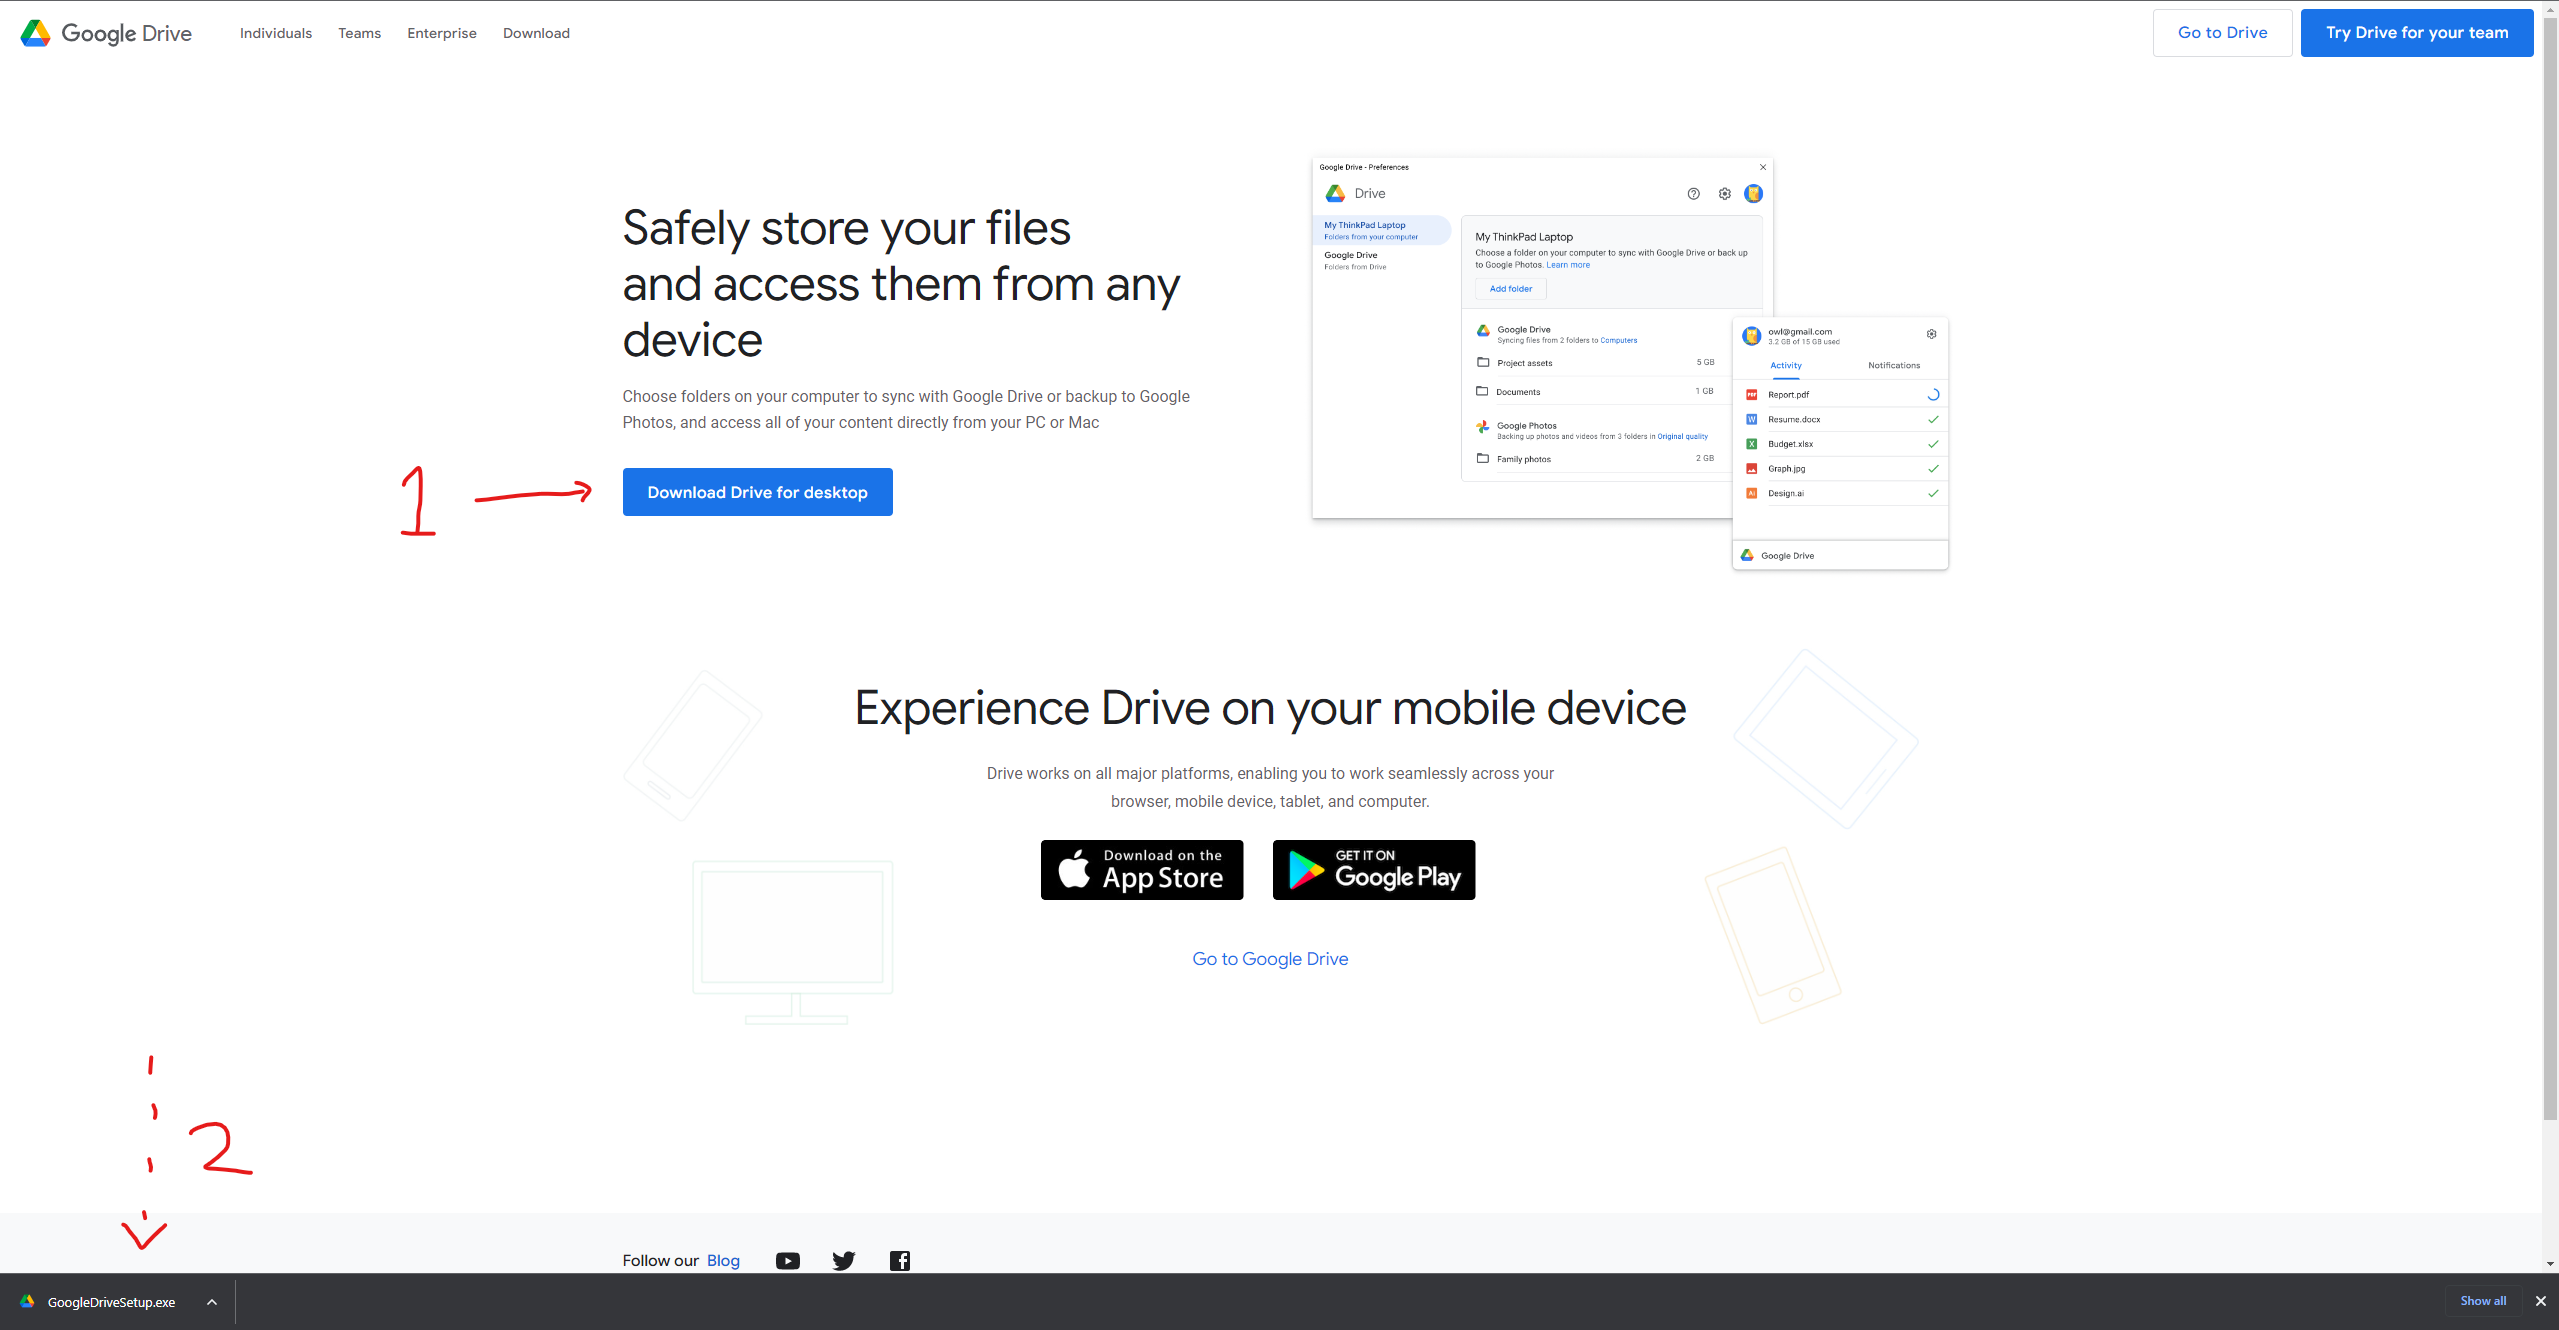
- First, you’ll head to this link or just search for “google drive for desktop” and follow the first link.
- Run GoogleDriveSetup.exe. Setup is essentially a single click.
- Next, there will be another popup window for you to log into your Google account. That will take you to a web browser-based sign-in portal, which you’ll complete the steps for.
- Once you have, you’ll see the
Success!screen. Close the setup app.
Confirm that you have downloaded Google Drive for Desktop by checking on your computer’s file explorer:
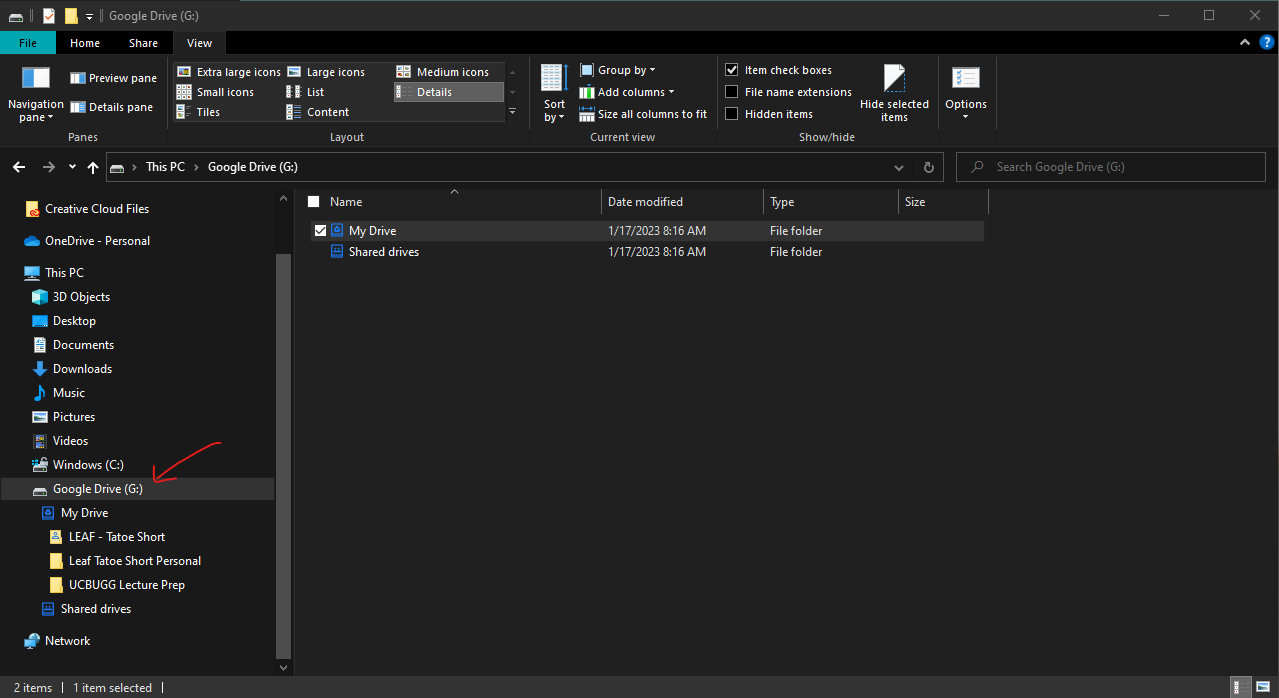
Windows - Local Google Drive
Open a new File Explorer Window and look at the Navigation Pane on the left-hand side. Toward the bottom, you should see a file repository called Google Drive (G:).
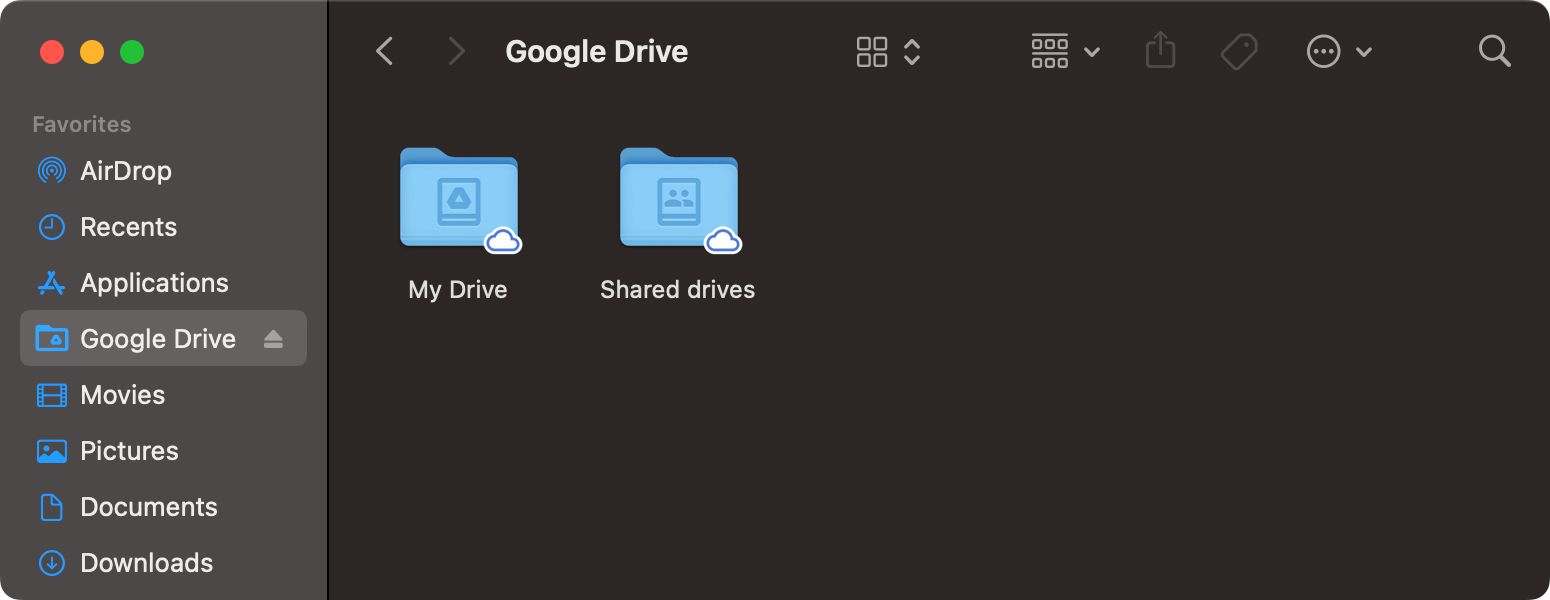
MAC - Local Google Drive
Open Finder. You should see a Google Drive folder inside your favorites.
If you see folders in there, you’ve done it! Download Complete!
Remember where your Google Drive folder is from the above part. It will be important to this section.
Now that we have downloaded Google Drive for Desktop, we can begin setting up the group project folder.
Attention
There are two parts to creating the group project folder.
Your team’s Project Manager will need to complete Part 1 on their own before the rest of your team can complete Part 2.
Part 1: Creating the Project Folder + Tools
This section must only be completed by your group’s Project Manager.
As the Project Manager, you will be creating the group project folder on Google Drive and sharing it with the rest of your group. In Part 2, all group members (including you) will then create a shortcut to the folder inside of the UCBUGG_fall_2026 folder alongside the homework folder.
Windows - Creating Group Directory
- Open up Autodesk Maya and create a new file. You are going to use this file to create your project directory, so this can just be an empty file.
- In your new Maya file, navigate to File → Project Window. We will be creating a project directory similar to what we did for the homework folder.
- Setting up your Project Window.
- Click the New button
- In the
Current Projectfield, change the name to whatever your group’s name is. Remember not to use any special characters or spaces.- In the
Locationfield, change the directory location to your local Google Drive (My Drive). On Windows, this is typically atG:/My Drive. DO NOT SET IT TOG:/.- Don’t change anything else in this window and click on Accept at the bottom.
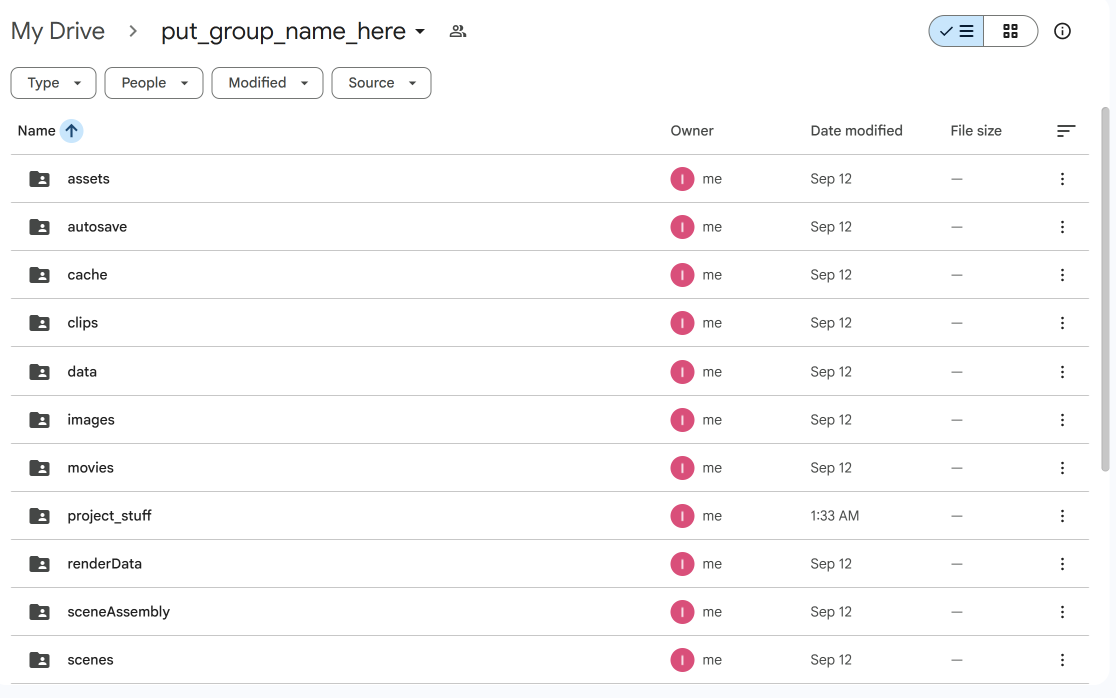
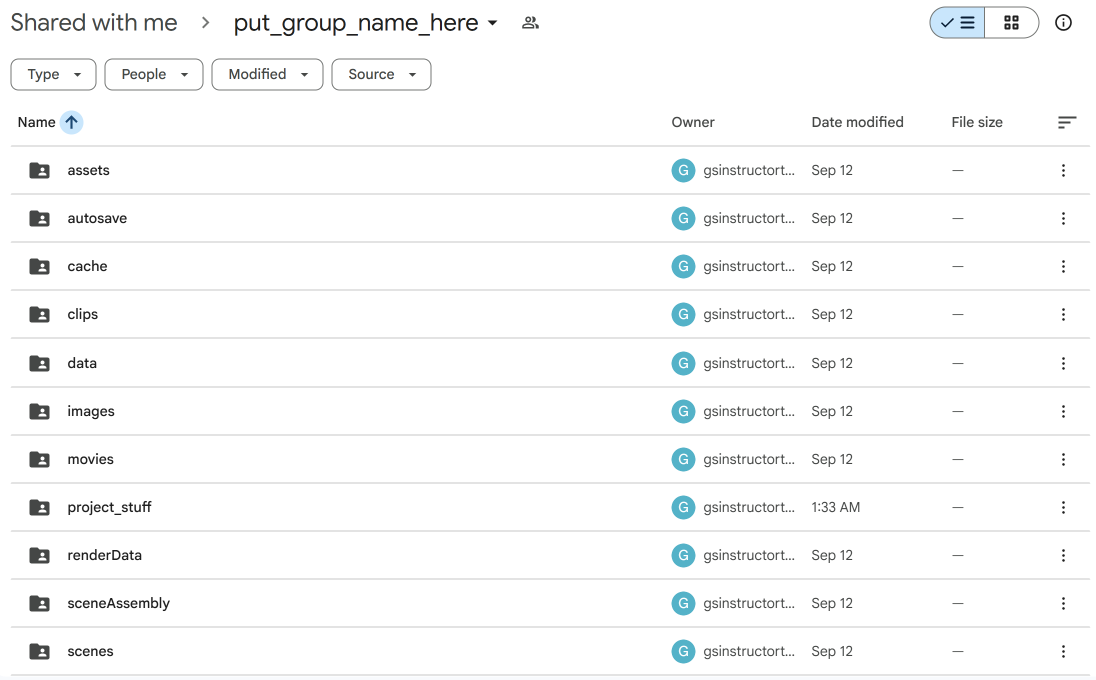
- Check your Google Drive website and confirm it contains your group’s folder containing various project folders such as
assets,scenes, etc.- Click on the three dots next to the folder and share it with the rest of your group.
Now that you’ve created the group project folder, we can also make a copy of the tools you will be using and store it in the folder.
Project Management Tools
- Open up the templates for Team Weekly Progress Slides and Project Management Spreadsheet.
- For both templates, go to File → Make a copy → Entire presentation.
- Rename the copies to whatever you like and locate your group folder.
- Inside your group folder, create a new Folder and name it (I chose project_stuff). This new folder is where you will store the project management tools.
- Select the new folder and click Make a copy.
- Check the folder to confirm you’ve made copies of both templates.
Congratulations! You’ve done most of the hard work setting up your group’s folders. Your group should also have access to the group project folder in their own Google Drive. The next part will focus on making a shortcut so that you can access the group folder from inside the UCBUGG_fall_2026 folder on your Desktop.
Part 2: Making a Shortcut to the Group Folder
This section must be completed by all group members, including the Project Manager.
If you’ve made it to this point, we assume that you now have access to the group project folder created by your Project Manager. To check this, make sure that the folder is inside of your Shared with me on Google Drive as shown below:
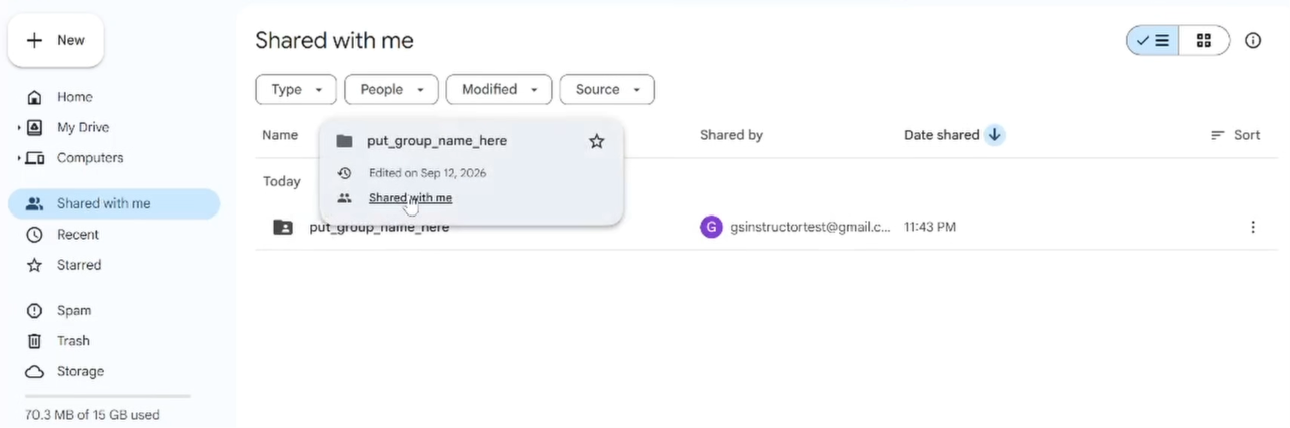
This section will focus on making a shortcut to this folder from your UCBUGG_fall_2026 folder. If you don’t understand what that means, it is perfectly fine. Try to follow along to the tutorial as best you can and ask for help in Discord if you get stuck.
Windows - Making a Shortcut to Group Folder
First, we need to move the group folder out of Shared with me and into My Drive. If you are the Project Manager, this has already been done.
Everyone (except Project Manager)
- Open Shared with me and locate the group folder.
- Right-click or click the three dots on the folder and go to Organize → Add shortcut.
- Select My Drive and click Add.
- Confirm that the group folder is now inside of My Drive.
- Open File Explorer and check your local Google Drive (
:G/My Driveon Windows) also contains the group folder.Now that the group folder is inside of your Google Drive and can be accessed on your computer using Google Drive for Desktop, we will make a shortcut to said folder from inside the
UCBUGG_fall_2026folder.If you are the Project Manager, please follow the specific instructions provided for you below. Everyone else in the group can follow the other set of instructions.
Everyone (except Project Manager)
- Open My Drive on File Explorer so that you can see the group folder.
- Open the
UCBUGG_fall_2026folder.- Drag the group folder into the
UCBUGG_fall_2026folder to make a copy of the shortcut.- Now your
UCBUGG_fall_2026folder should have one folder dedicated tohomeworkand one folder dedicated to your group’s short.Project Manager Only
We need to perform an extra step in order to create the shortcut.
Explanation
For the technical explanation, the group folder in your Drive is NOT a shortcut (you can see the Type is listed as
File folderinstead ofShortcut) compared to the rest of your group, which made a shortcut from Shared with me. As a result, we can’t copy it directly to theUCBUGG_fall_2026folder. Instead, we will make a shortcut temporarily and copy it over.
- Open My Drive on File Explorer so that you can see the group folder.
- Right-click on the group folder and click on Show more options → Create shortcut (on MAC you can click on Create alias instead). This should create a new shortcut to the group folder.
- Open the
UCBUGG_fall_2026folder.- Drag the new shortcut into the
UCBUGG_fall_2026folder to make a copy of the shortcut.- Delete the shortcut inside of My Drive and remove the
- Shortcutat the end of the copied shortcut’s name.- Now your
UCBUGG_fall_2026folder should have one folder dedicated tohomeworkand one folder dedicated to your group’s short.
Setting Your Project
If you’ve made it to this point, congratulations! You should now have a UCBUGG_fall_2026 folder on your Desktop containing two folders, one for homework and one for your group short. The last section showcases how to set your project in Maya so you can switch between the homework folder and your group’s folder while working.
Setting Your Project
Setting your project is important because it tells Maya where to search for and save any files you work on! The video above showcases the simplest way to set the project on the Home Screen.
- Because you created the
homeworkfolder, you should already have thehomeworkproject in the dropdown, listed as a path to thehomeworkfolder. Check this is the case.- To set the project for the group folder, click on the Folder icon to the right of Current Project.
- Locate the
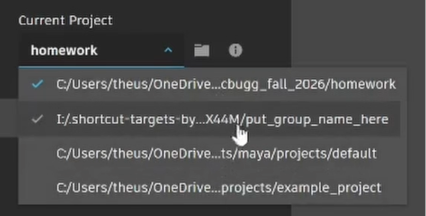
UCBUGG_fall_2026folder on your Desktop and open it. Click on the group folder and then click Set to set the project.- Now in the dropdown when choosing the project, check that you can choose between
homeworkand your group’s folder.Anytime you work on homework, make sure to set the project to
homework.
When you work on something for the group short, switch the project to your group’s folder.
Homework Submission
Once you’ve followed the instructions on this lab, you should be able to easily access your group’s Google Drive folder.
Take the following screenshots for your homework submission:
- Your
UCBUGG_fall_2026folder, containing yourhomeworkand group’s project folders.
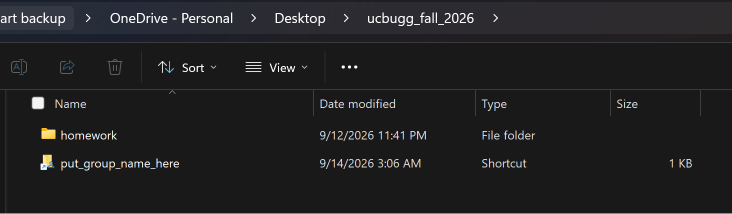
- Your group’s Google Drive folder open on your web browser (Google Chrome, Safari, Firefox, etc.)
- Your Current Project dropdown in Autodesk Maya, where you set the project. It should show both the
homeworkand group’s directories in it.
You did it! Now, you’ll be ready to keep track of all your files this semester! Go eat some ice cream, boba (do you eat boba?), or something else to celebrate.