INTRODUCTION
The objective of this lab is to clarify some of the tools at your disposal when it comes to shading your scenes. The materials you make in this lab are meant to get you in the habit of using fractal noise or custom image maps to control properties of your material. These customizations are made possible through hypershade, Maya’s node-based shading tool. Check this guide for an introduction to the essentials of the hypershade editor.
In this lab, we will go through the process of creating a procedural iridescent metal material with rust. We’re going to start by replicating the iridescent metallic part of our material.
Create a sphere to act as your test object and right click the PxrSurface icon in the shelf to apply a new PxrLayerSurface material. Create or use the preset browser to import an environment sphere to provide lighting.
Next, open Hypershade (Window->Rendering Editors->Hypershade). Select your PxrLayerSurface in the browser and press the expand button to isolate that node network.
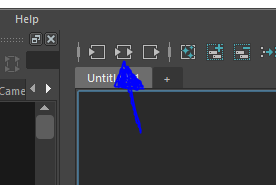
This will show incoming and outgoing connections.You can see that your layers are feeding into a mixer, which is feeding into a layerSurface.
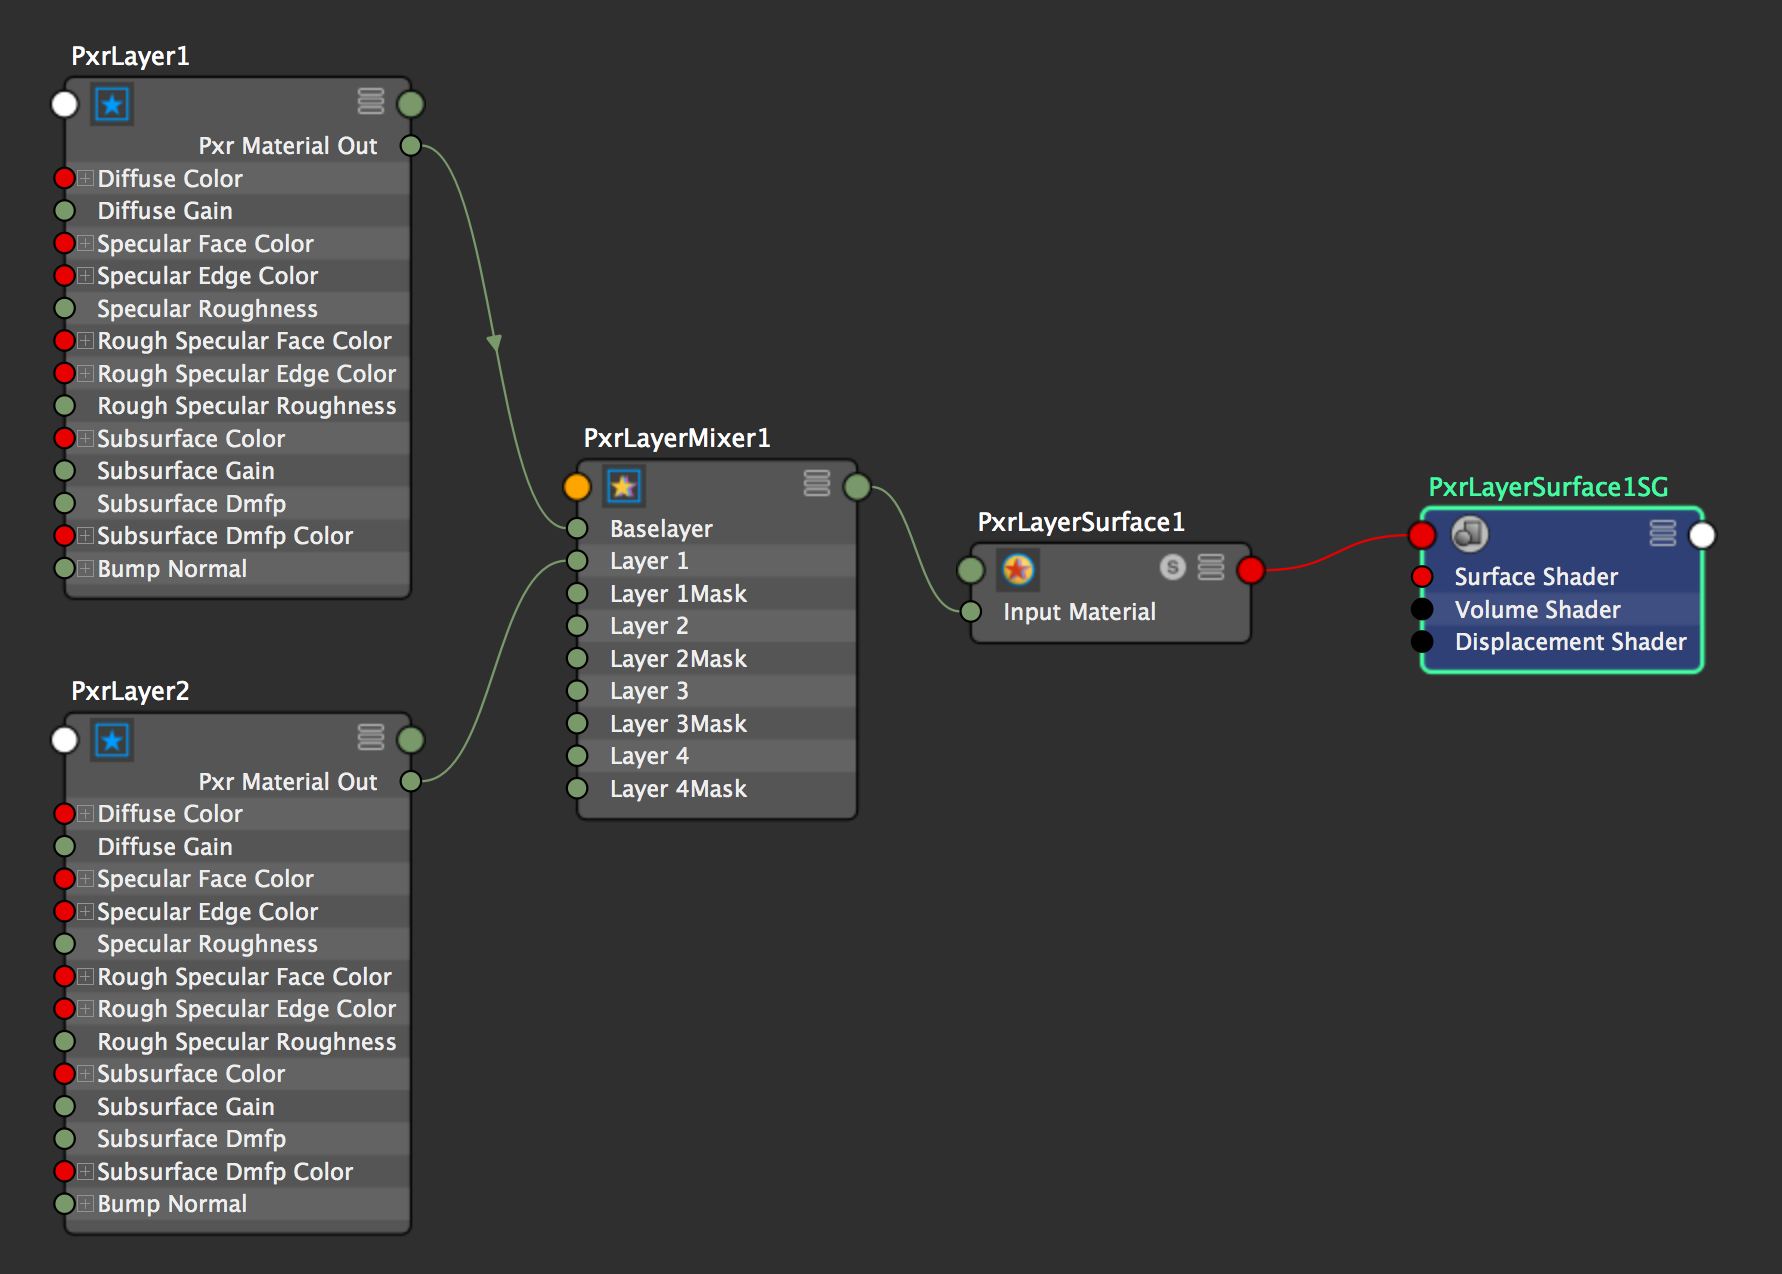
Each PxrLayer node is a big one. It has the potential to have the complexity of an entire material. We’re going to use the first layer to create our metal.
Click on the PxrLayer1 node, and start adjusting the Primary Specular and Rough Specular values in the attribute editor to create something like this:
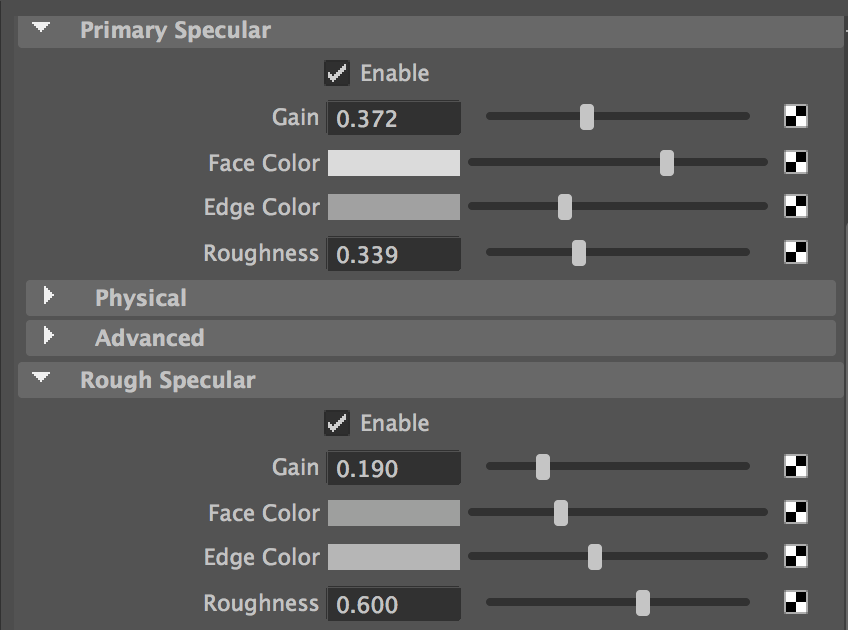
By bumping up the specularity/roughness of our shader, we’re gonna make it look more metallic.
If you test render your sphere right now, you’ll notice that your materials don’t actually appear on your object the way that you would expect. This is because we haven’t actually applied our layer to our shader properly yet.
Click on the “PxrLayerMixer” node in the center of your setup.
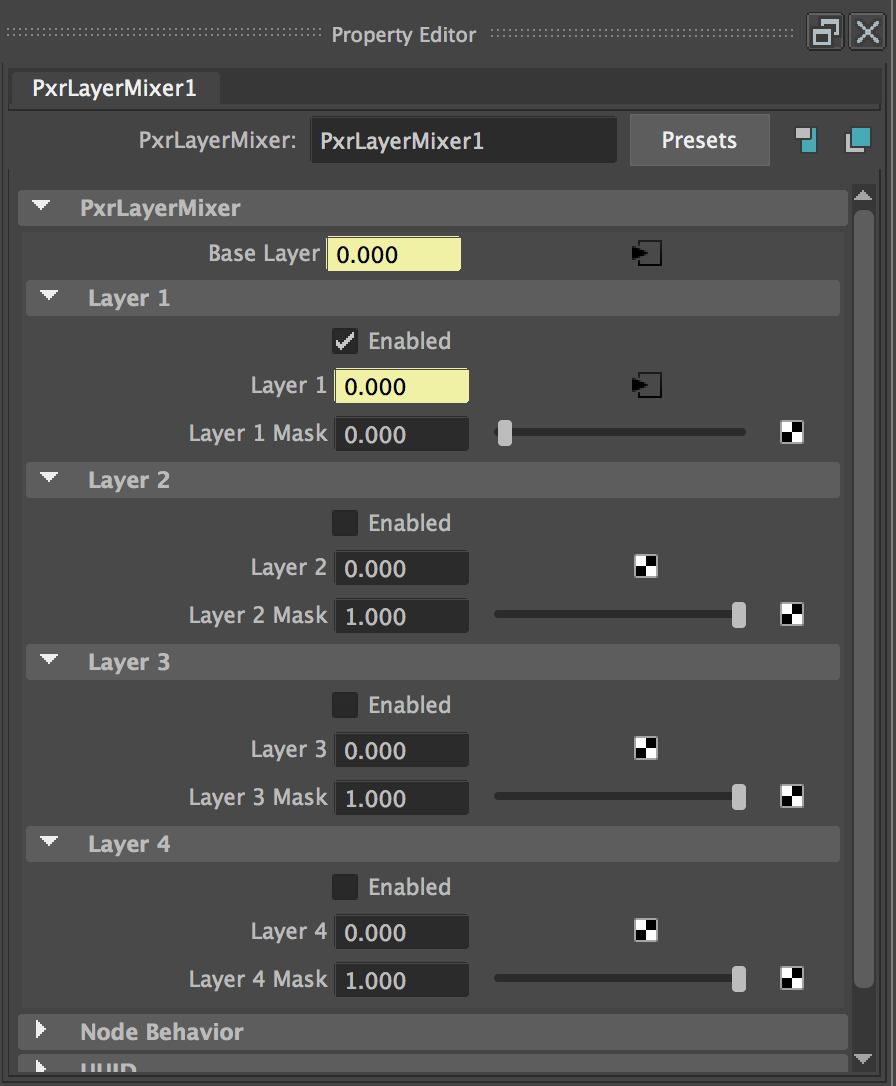
You’ll notice that we have attributes for Base Layer, Layer 1, 2, 3, 4 and 5. This node basically takes input shaders and uses masks (the sliders beneath each layer) to control if the layer is visible or not. If you plug in a black and white image, the dark parts of the image will make the layer invisible and the light parts of the image will make the layer visible.
Adjust the PxrLayerMixer attributes to look like the following:
Now let’s go back to our PixarLayer1’s attributes. Scroll down to find the clear coat attributes. Clear coat applies a translucent layer which can tint the light that travels through it. Feel free to fiddle with these values (using the render-in-viewport option or IPR works well here) and get a grasp on how they correspond to your rendered result. Remember to keep the roughness of the clear coat low to allow light to pass through it.
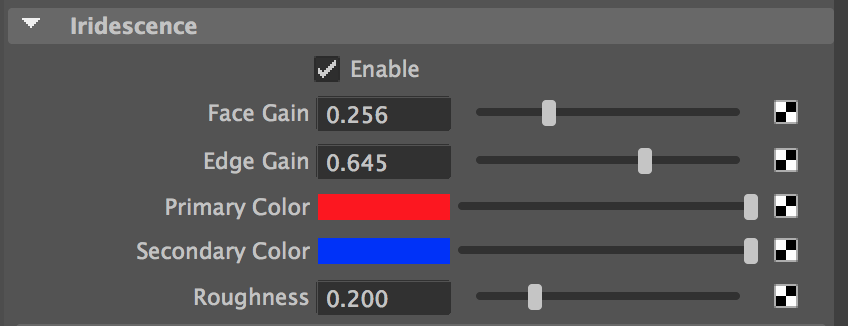
Now, let’s work on making our metal iridescent. Scroll down in your PixarLayer1’s attributes until you find Iridescence. Adjust your values to look like what I have here:
Next let’s work on adding some nice flakes to our metal.
Something that Pixar developed while working on Cars was a method to add sparkles to their metallic paint. PxrFlakes is a pattern node which applies white spots in random configurations. PxrFlakes has two outputs, Result A and Result N. Result A gives an array of values ranging from 0-1. This can be useful for bump maps, or even color (If wired into red, blue, and green channels). We’re going to use result N. As its name implies, this provides a normal map based on the flakes. The “flake randomness” causes flakes/spots to change the direction they face, or their “normals.” When we wire in the Result N to our metal’s Bump Normals we should get sparkles. The idea is that the random flakes will either bounce light into or away from the camera causing a range of brightness which varies randomly across the surface. Right click and hold on your node graph area to get a wheel of options - the top should be “Create Node.” Click Create Node, and go to Renderman > Cattern > PxrFlakes to create a PxrFlakes node.
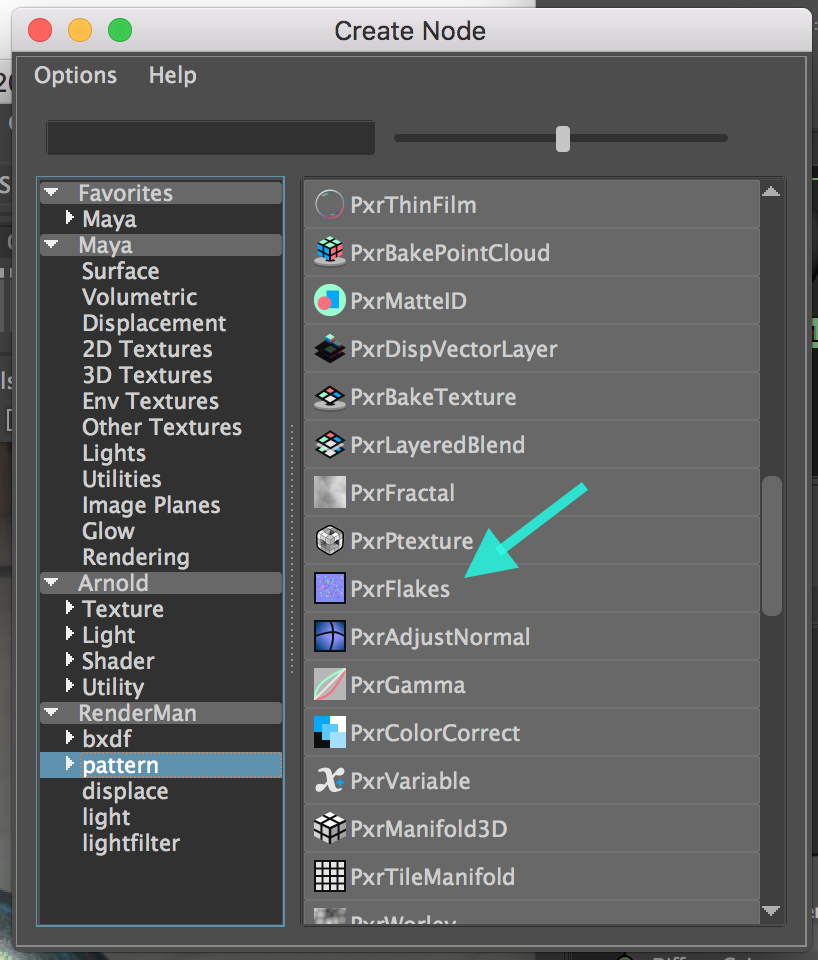
Once your node appears in the graph, position it behind your first layer node. Next, click the white circle at the top right of your PxrFlakes node to choose an output. Choose “result N” and then “result N” again. Wire this Result N to the bump normal attribute of your PxrLayer1 node. Your setup should now look like this:
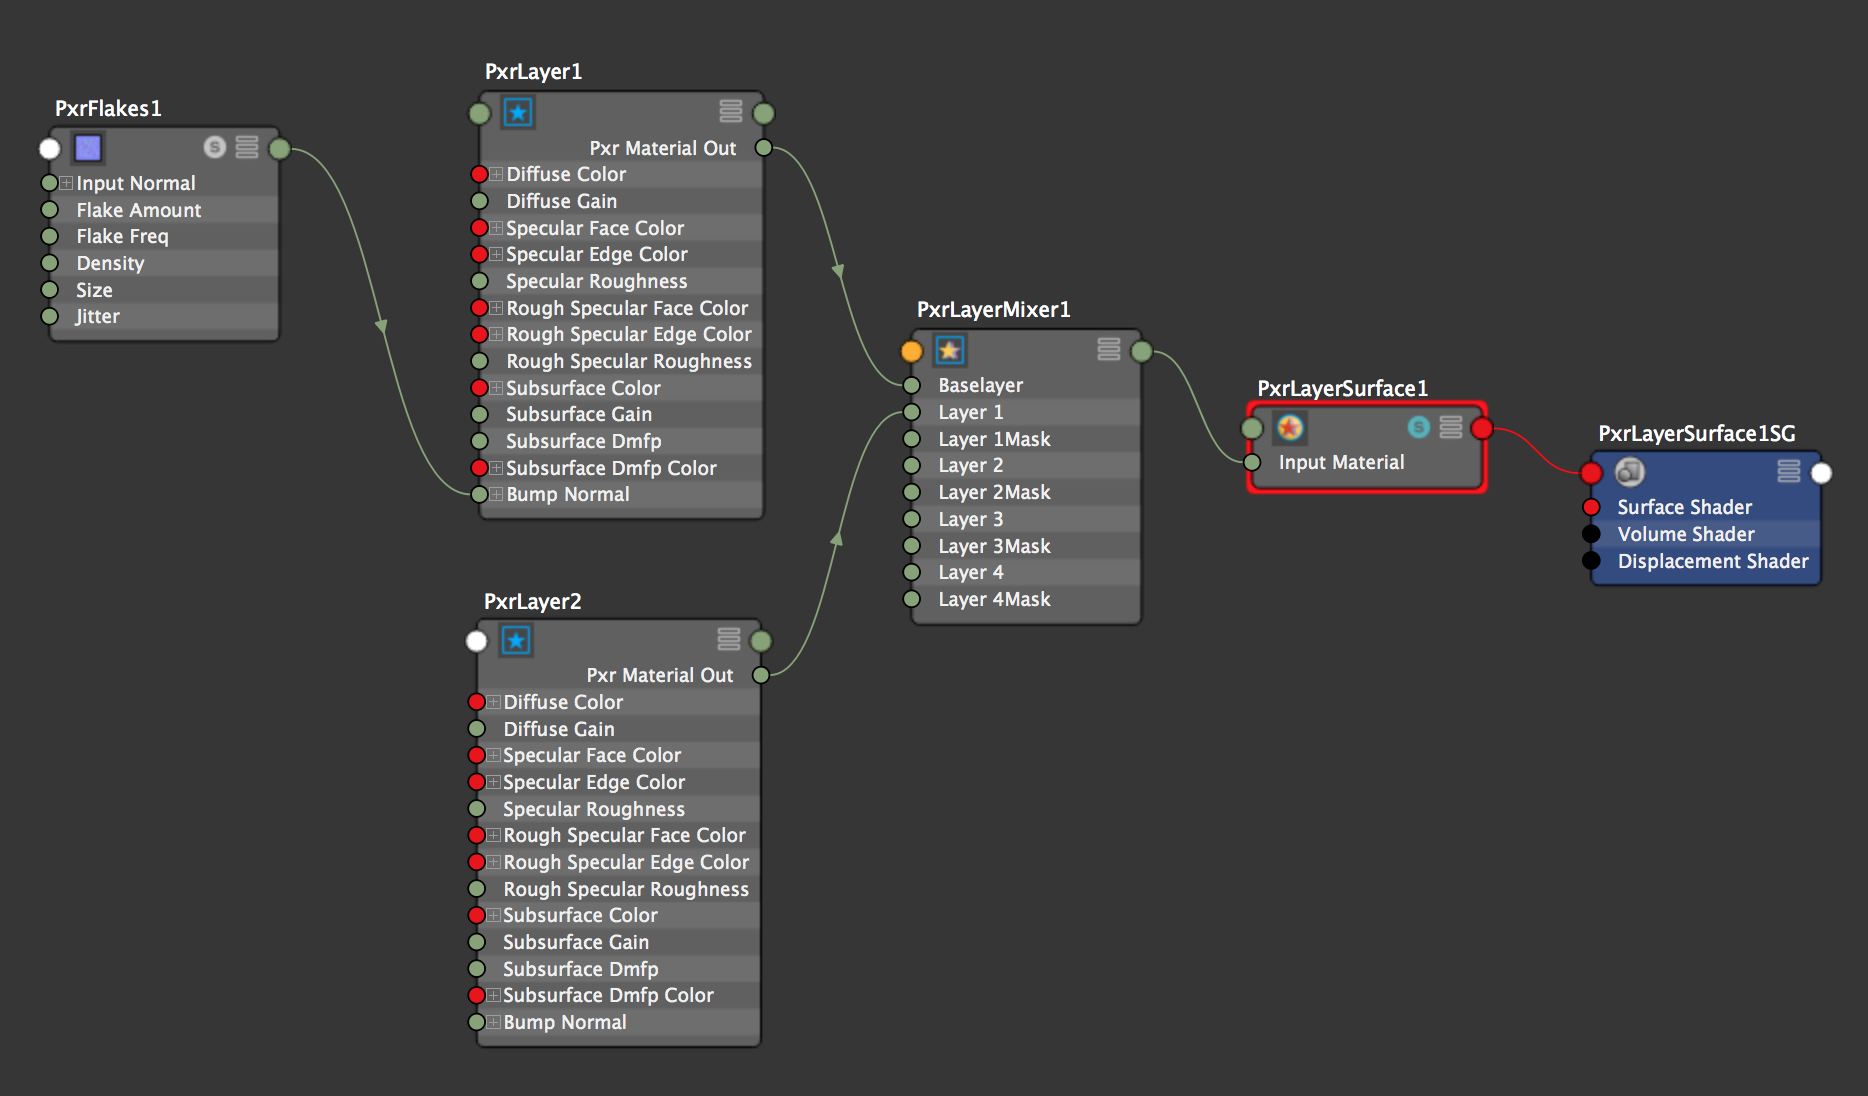
Now, you’ve successfully wired a hypershade node into another hypershade node. Your PxrFlakes now affect the normal map of your first PxrLayer.
Feel free to play with the frequency and flake size of your PxrFlakes node. Mine ended up looking like this:
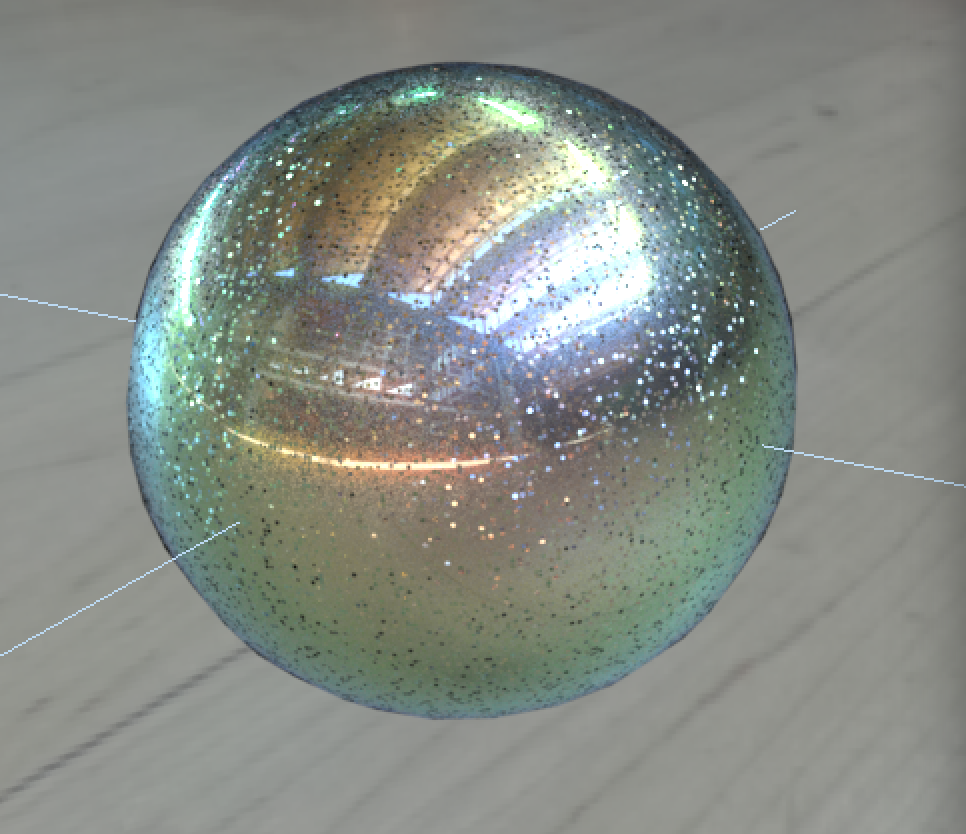
Once you’re happy with your metallic material, let’s move on to the step where we ruin it.
ADDING RUST
Thanks to our PxrLayerSurface, we can apply additional layers to form more complex configurations. The next layer we add will entirely overwrite material properties but only in the places we want it to.
Click on the PxrLayerMixer node. Since we’re now going to work on our second layer, we can check the “Enabled” box for Layer 1, and turn up the “Layer 1 Mask” value all the way.
Next, click on your second PxrLayer node. Check the “Enable” boxes for diffuse, rough specular, and clear coat. Since our rust won’t be shiny, turn up the diffuse and specular roughness and eliminate the thickness of the clear coat.
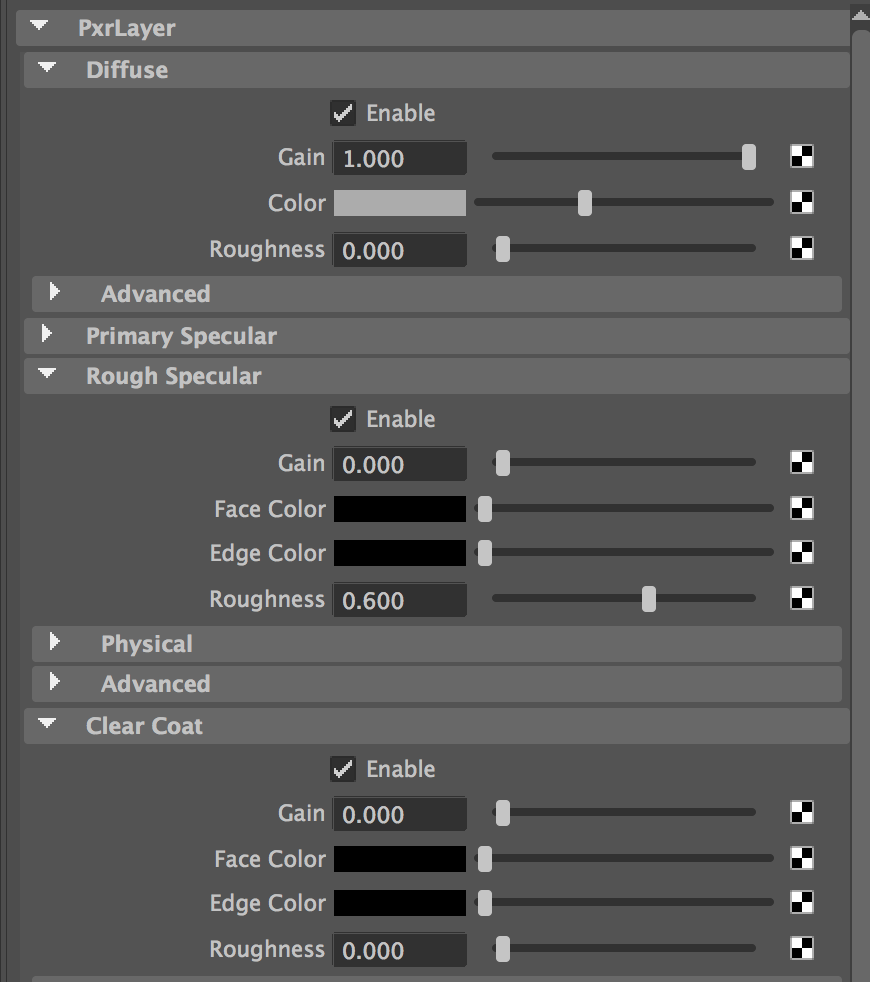
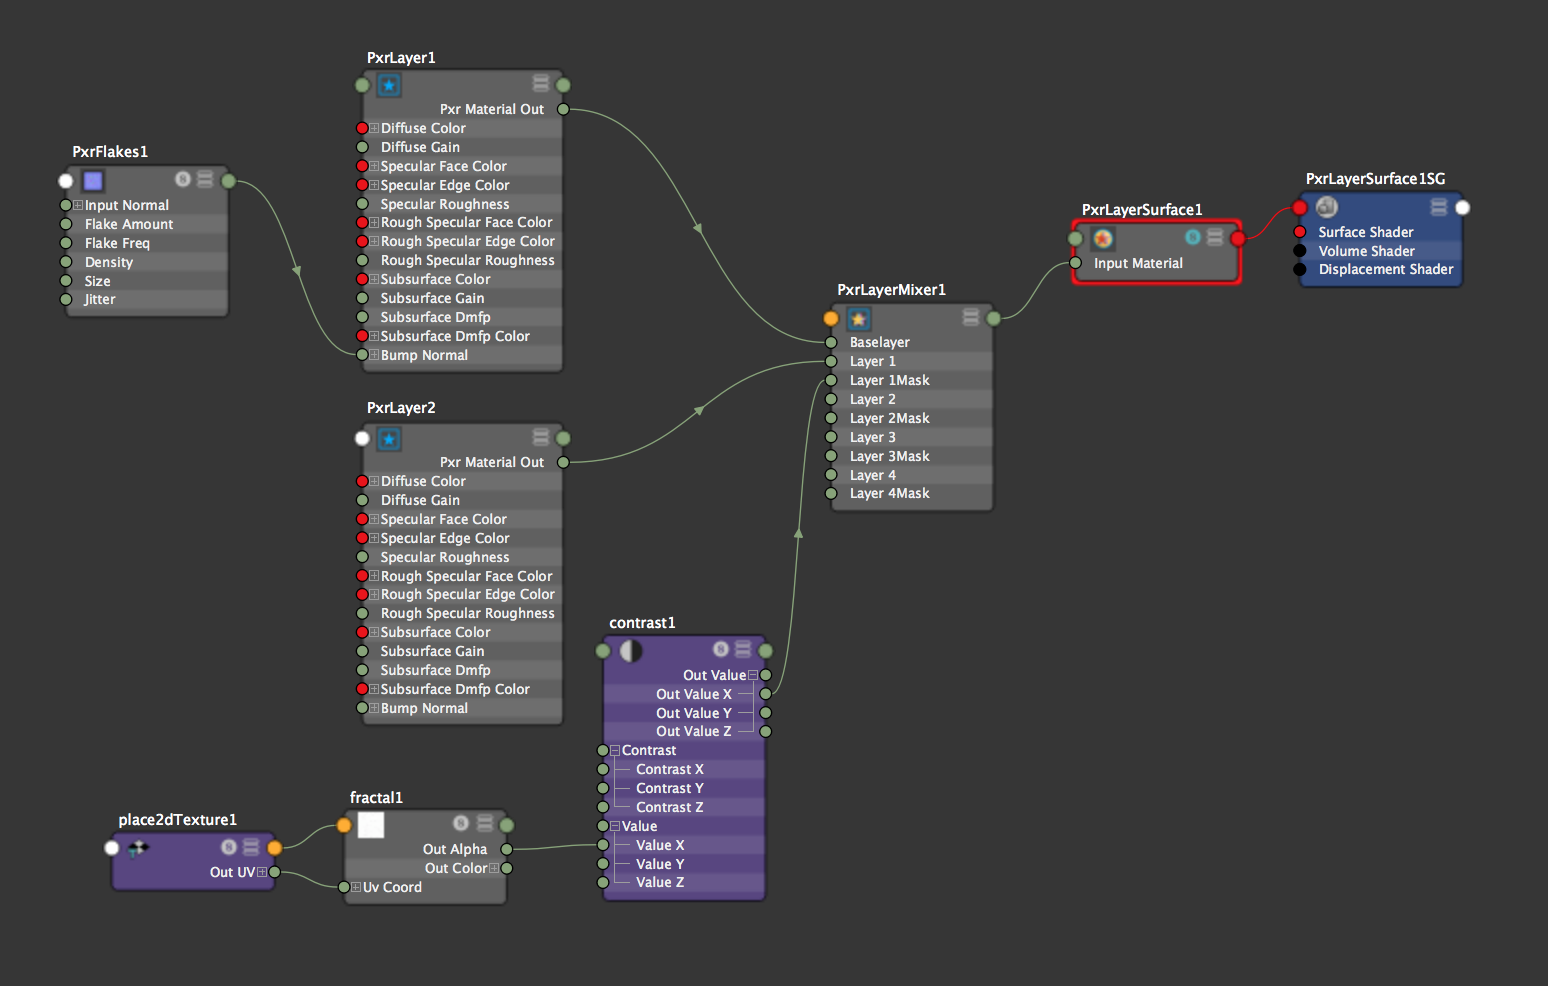
If you adjust the Layer 1 Mask value of your layer mixer, you’ll notice that the two blend together gradually, which isn’t what we’re going for. We’d rather have the rust cover certain pieces of the mesh and leave the metal intact elsewhere. Using this attribute, you could create a custom UV map and hand-paint exactly where you want your rust to appear. For this example, we’re going to apply the rust randomly. To do so, we’re going to need a fractal. Click the checker box next to the Layer 1 mask slider, and create a PxrFractal node.
If you re-render, it will still look messy. The problem is, the fractal produces a range of values between 0 and 1. Any intermediate value between 0 and 1 will mix our materials. By increasing the contrast of our fractal, we can force it to have areas of just 1 or 0 effectively turning on and off our rust based on which parts of the fractal were darker.
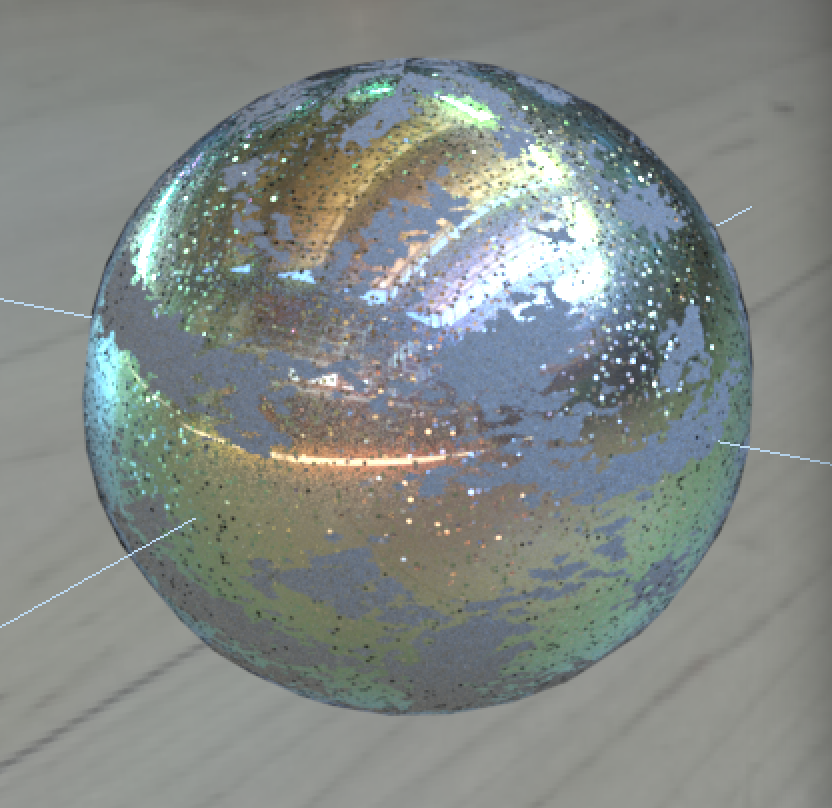
Create a contrast node and wire the result of the fractal to one of the input values. In the attribute editor for the contrast node, you can increase the contrast (from a default 2). 4 should max things out sufficiently. Rendering now, you should have sectors where the paint is untouched and sectors where your rust layer is in charge.
Unfortunately, our rust isn’t quite the right color. Rust also isn’t a constant color so just changing the attribute won’t do the trick. Instead we’re going to use more fractals. If we wired in a new fractal to the color attribute, the color would just range from black to white. Instead, we’re going to use a PxrMix node. PxrMix takes in two colors (or whole maps if you want to get fancy) and will combine them according to the “mix” attribute. A value of 0 for mix will return the first input. A value of 1 will return the 2nd. Values in between will combine them in different ratios. By wiring our fractal to the mix, we’ll get a healthy jumble between both colors. For my rust, I went with a red-orange and grey. See if you can make a better mix.
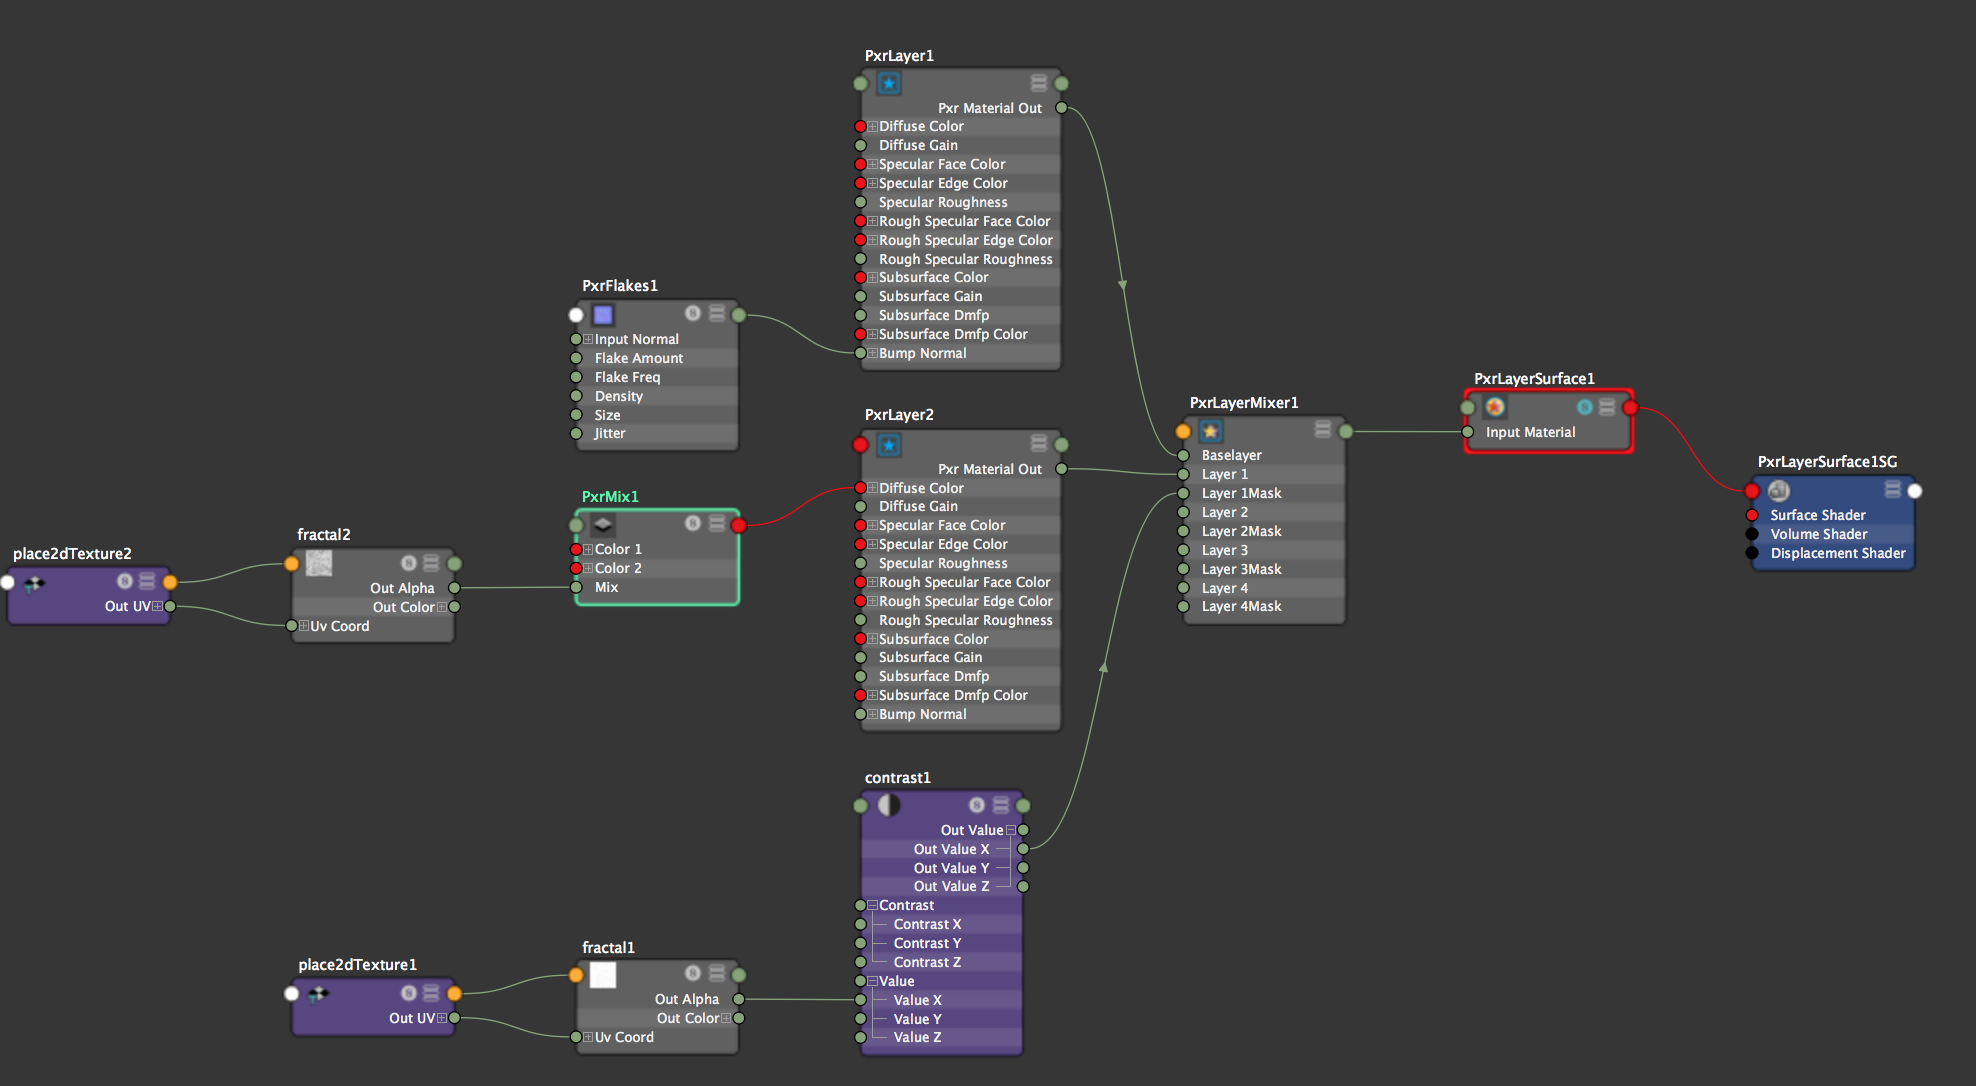
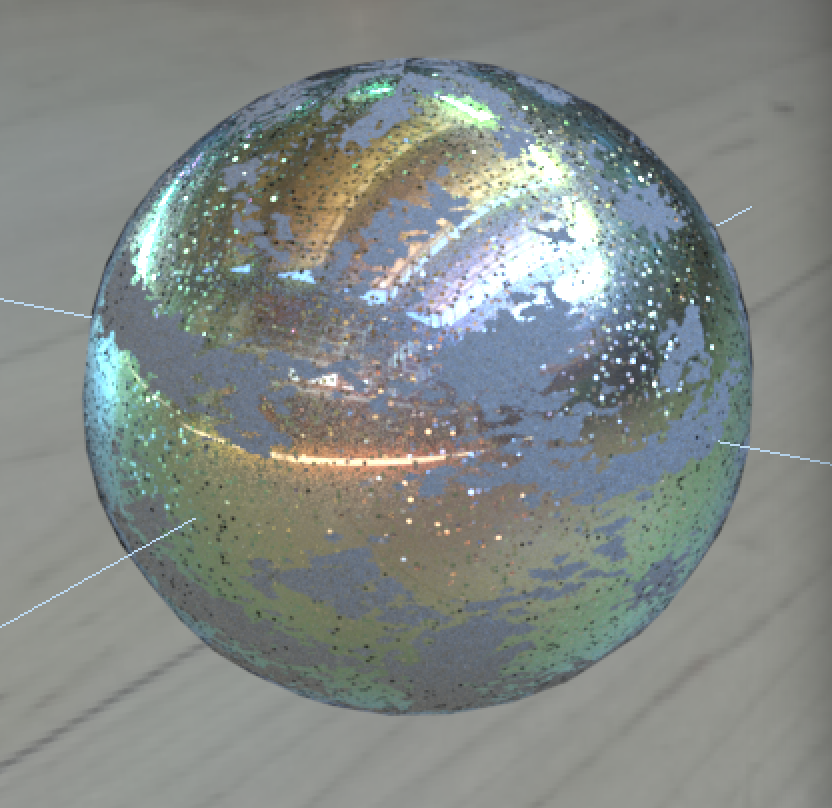
This is a rough render of my result.
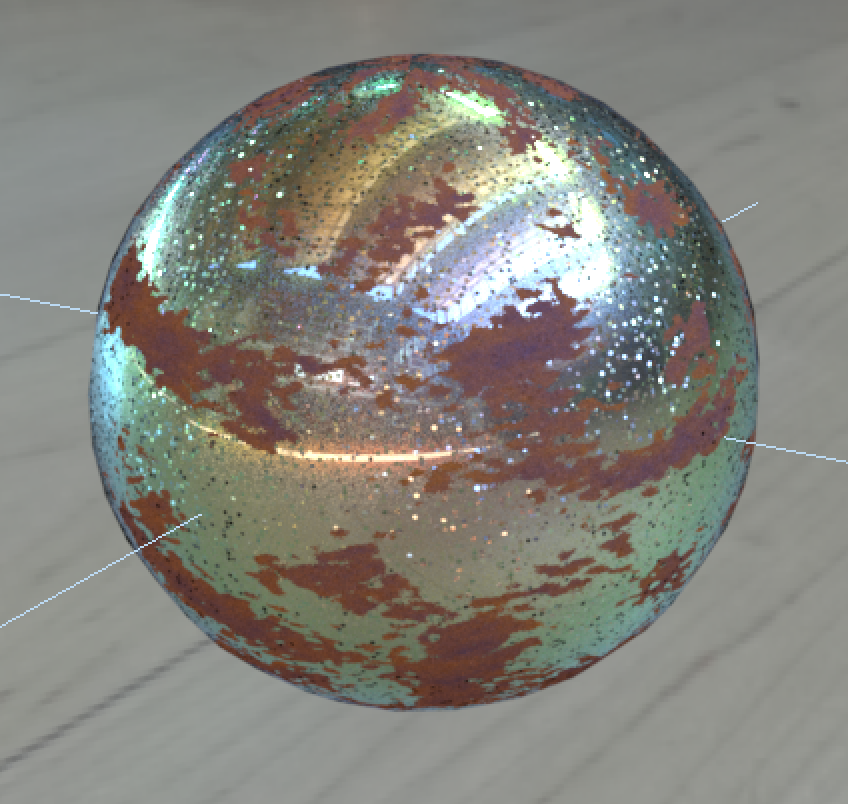
I hope this example helped you understand what Pixar shaders can be used for and prompts you to explore what other Renderman nodes might help in your animation. Next time you create a node, just type “pxr” and scroll through the options. Try out things that sound interesting and see if you can figure out how they work. If you have questions on how to make other materials, ask a facilitator for help. Now that you understand how to navigate the node editor, it will be easier for you to learn more advanced techniques.
Please remember to turn in this lab on bCourses!